Page 1 of 1
Fitting radius arm kit
Posted: Sat Sep 06, 2025 9:19 am
by Mr Spigot
I am trying to fit the radius arm kit purchased from ESM and struggling to see how to to fit the inner side plate over the shackle plate. The instructions say to remove the short 1/4" bolts that secure the shackle plate, a job which is impossible with the spring in situ. If the spring is out and the shackle plate bolted up with the new side plate, the hole in the new plate is too small to put the shackle pin back and thus put the spring back in - Catch22!
Does anyone have any suggestions, other than enlarging the hole to allow the shackle pin to be replaced?
Re: Fitting radius arm kit
Posted: Sat Sep 06, 2025 1:24 pm
by philthehill
https://www.morrisminorspares.com/rear- ... up-p831360
The shackle insert plate as shown in your photo is not required to be removed from the spring hanger or modified, it stays in place. Also neither of the radius arm plates need to be modified when fitting the kit.
You remove the two 1/4" UNF bolts holding the shackle insert plate in place, do not remove the original shackle insert plate. Bolt the ESM inner radius arm plate over and to the out side of the shackle insert plate using the two 1/4" UNF bolts (note I have replaced the 1/4" bolts with 5/16" UNF bolts as I consider the 1/4" bolts to be 'not up to the job'). The outer radius arm plate is bolted to the outer side of the spring hanger using the shackle pin eye bolt. You then have to drill two holes in the side of the spring hanger and fit two suitable bolts.
Fitting the plates is much easier if the front of the spring is detached from the spring hanger. But the bolts can be fitted from the inside of the spring hanger with the spring in place if care is taken.
I have added additional 5/16" UNF bolts as in my opinion just having the two 1/4" UNF bolts either side to be inadequate.
The plates either side of the spring hanger should fit tight up against the under side of the spring hanger. If they do not additional loading is placed on the 1/4" UNF bolts.
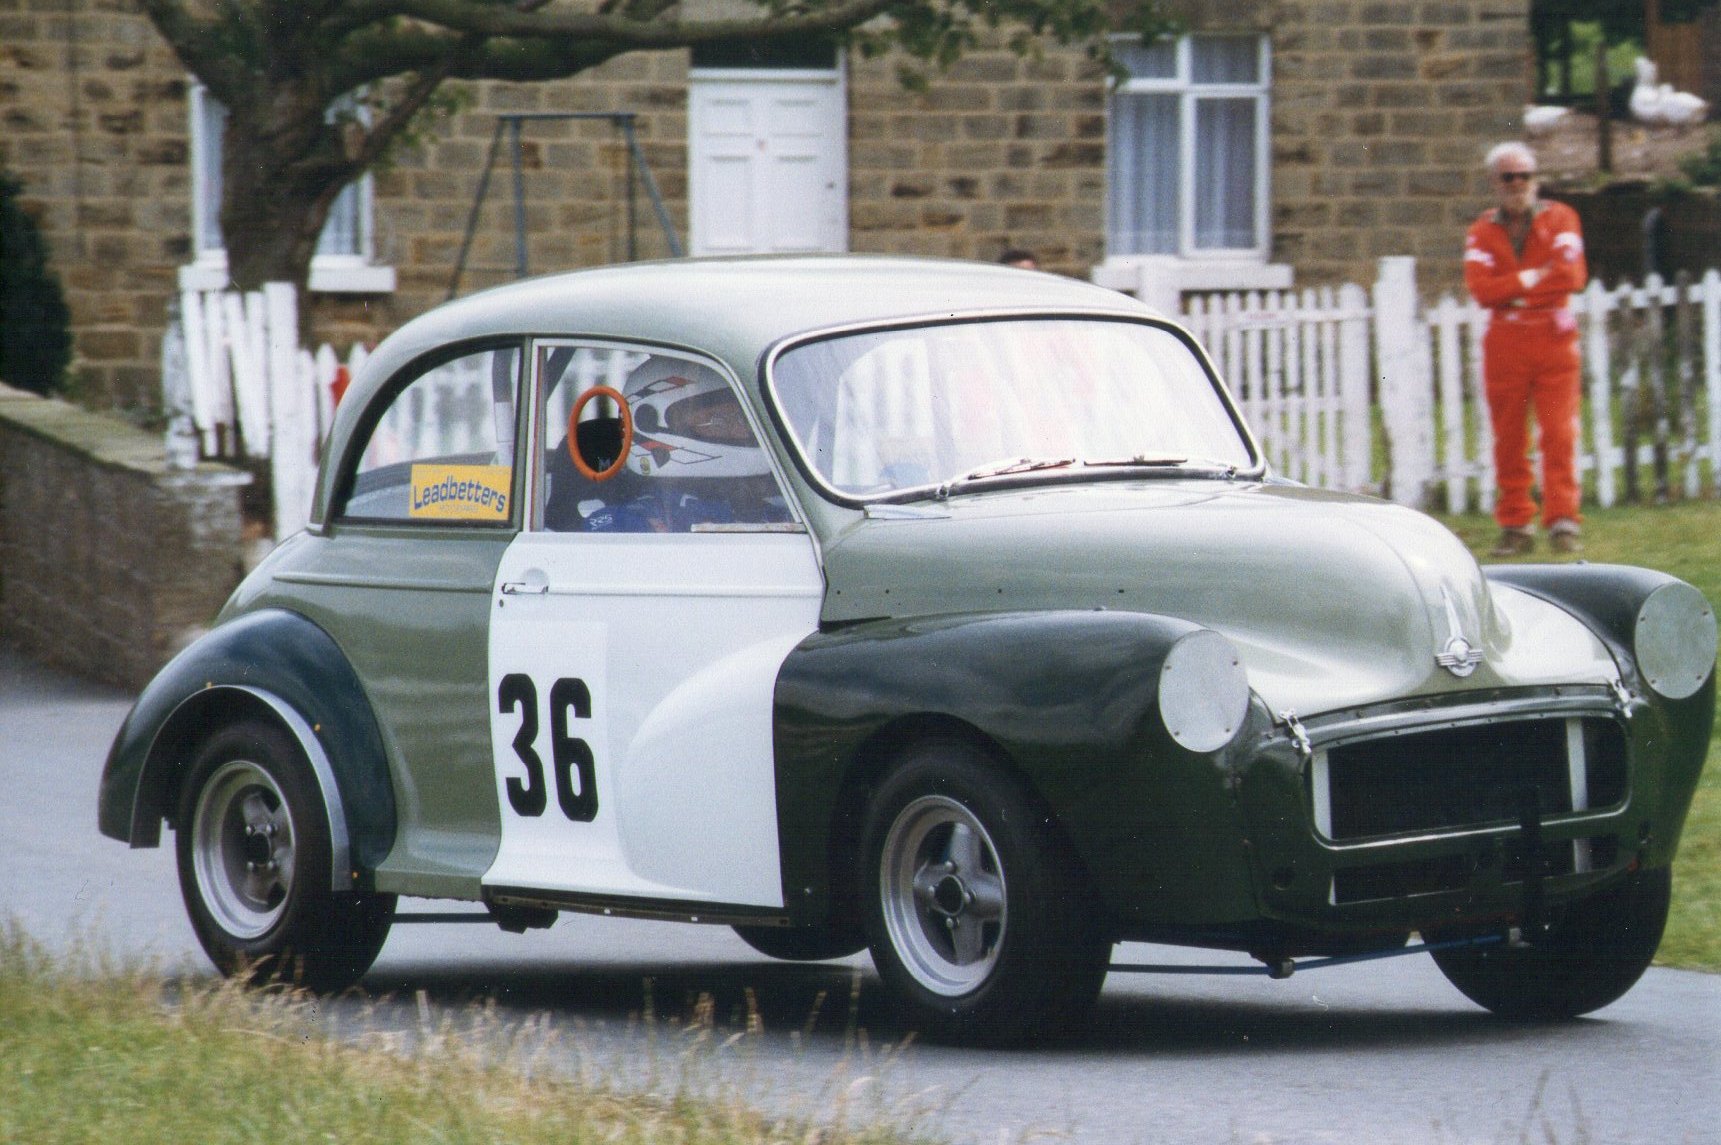
I have a similar design of radius arm kit which was designed and made by myself way before the ESM kit was available. I have rose jointed ends to the bars and my kit works very well.
My anti tramp bars in action:-
- Harewood.jpg (374.77 KiB) Viewed 2356 times
Re: Fitting radius arm kit
Posted: Sat Sep 06, 2025 1:41 pm
by philthehill
Deleted duplicate post
Re: Fitting radius arm kit
Posted: Sat Sep 06, 2025 1:42 pm
by philthehill
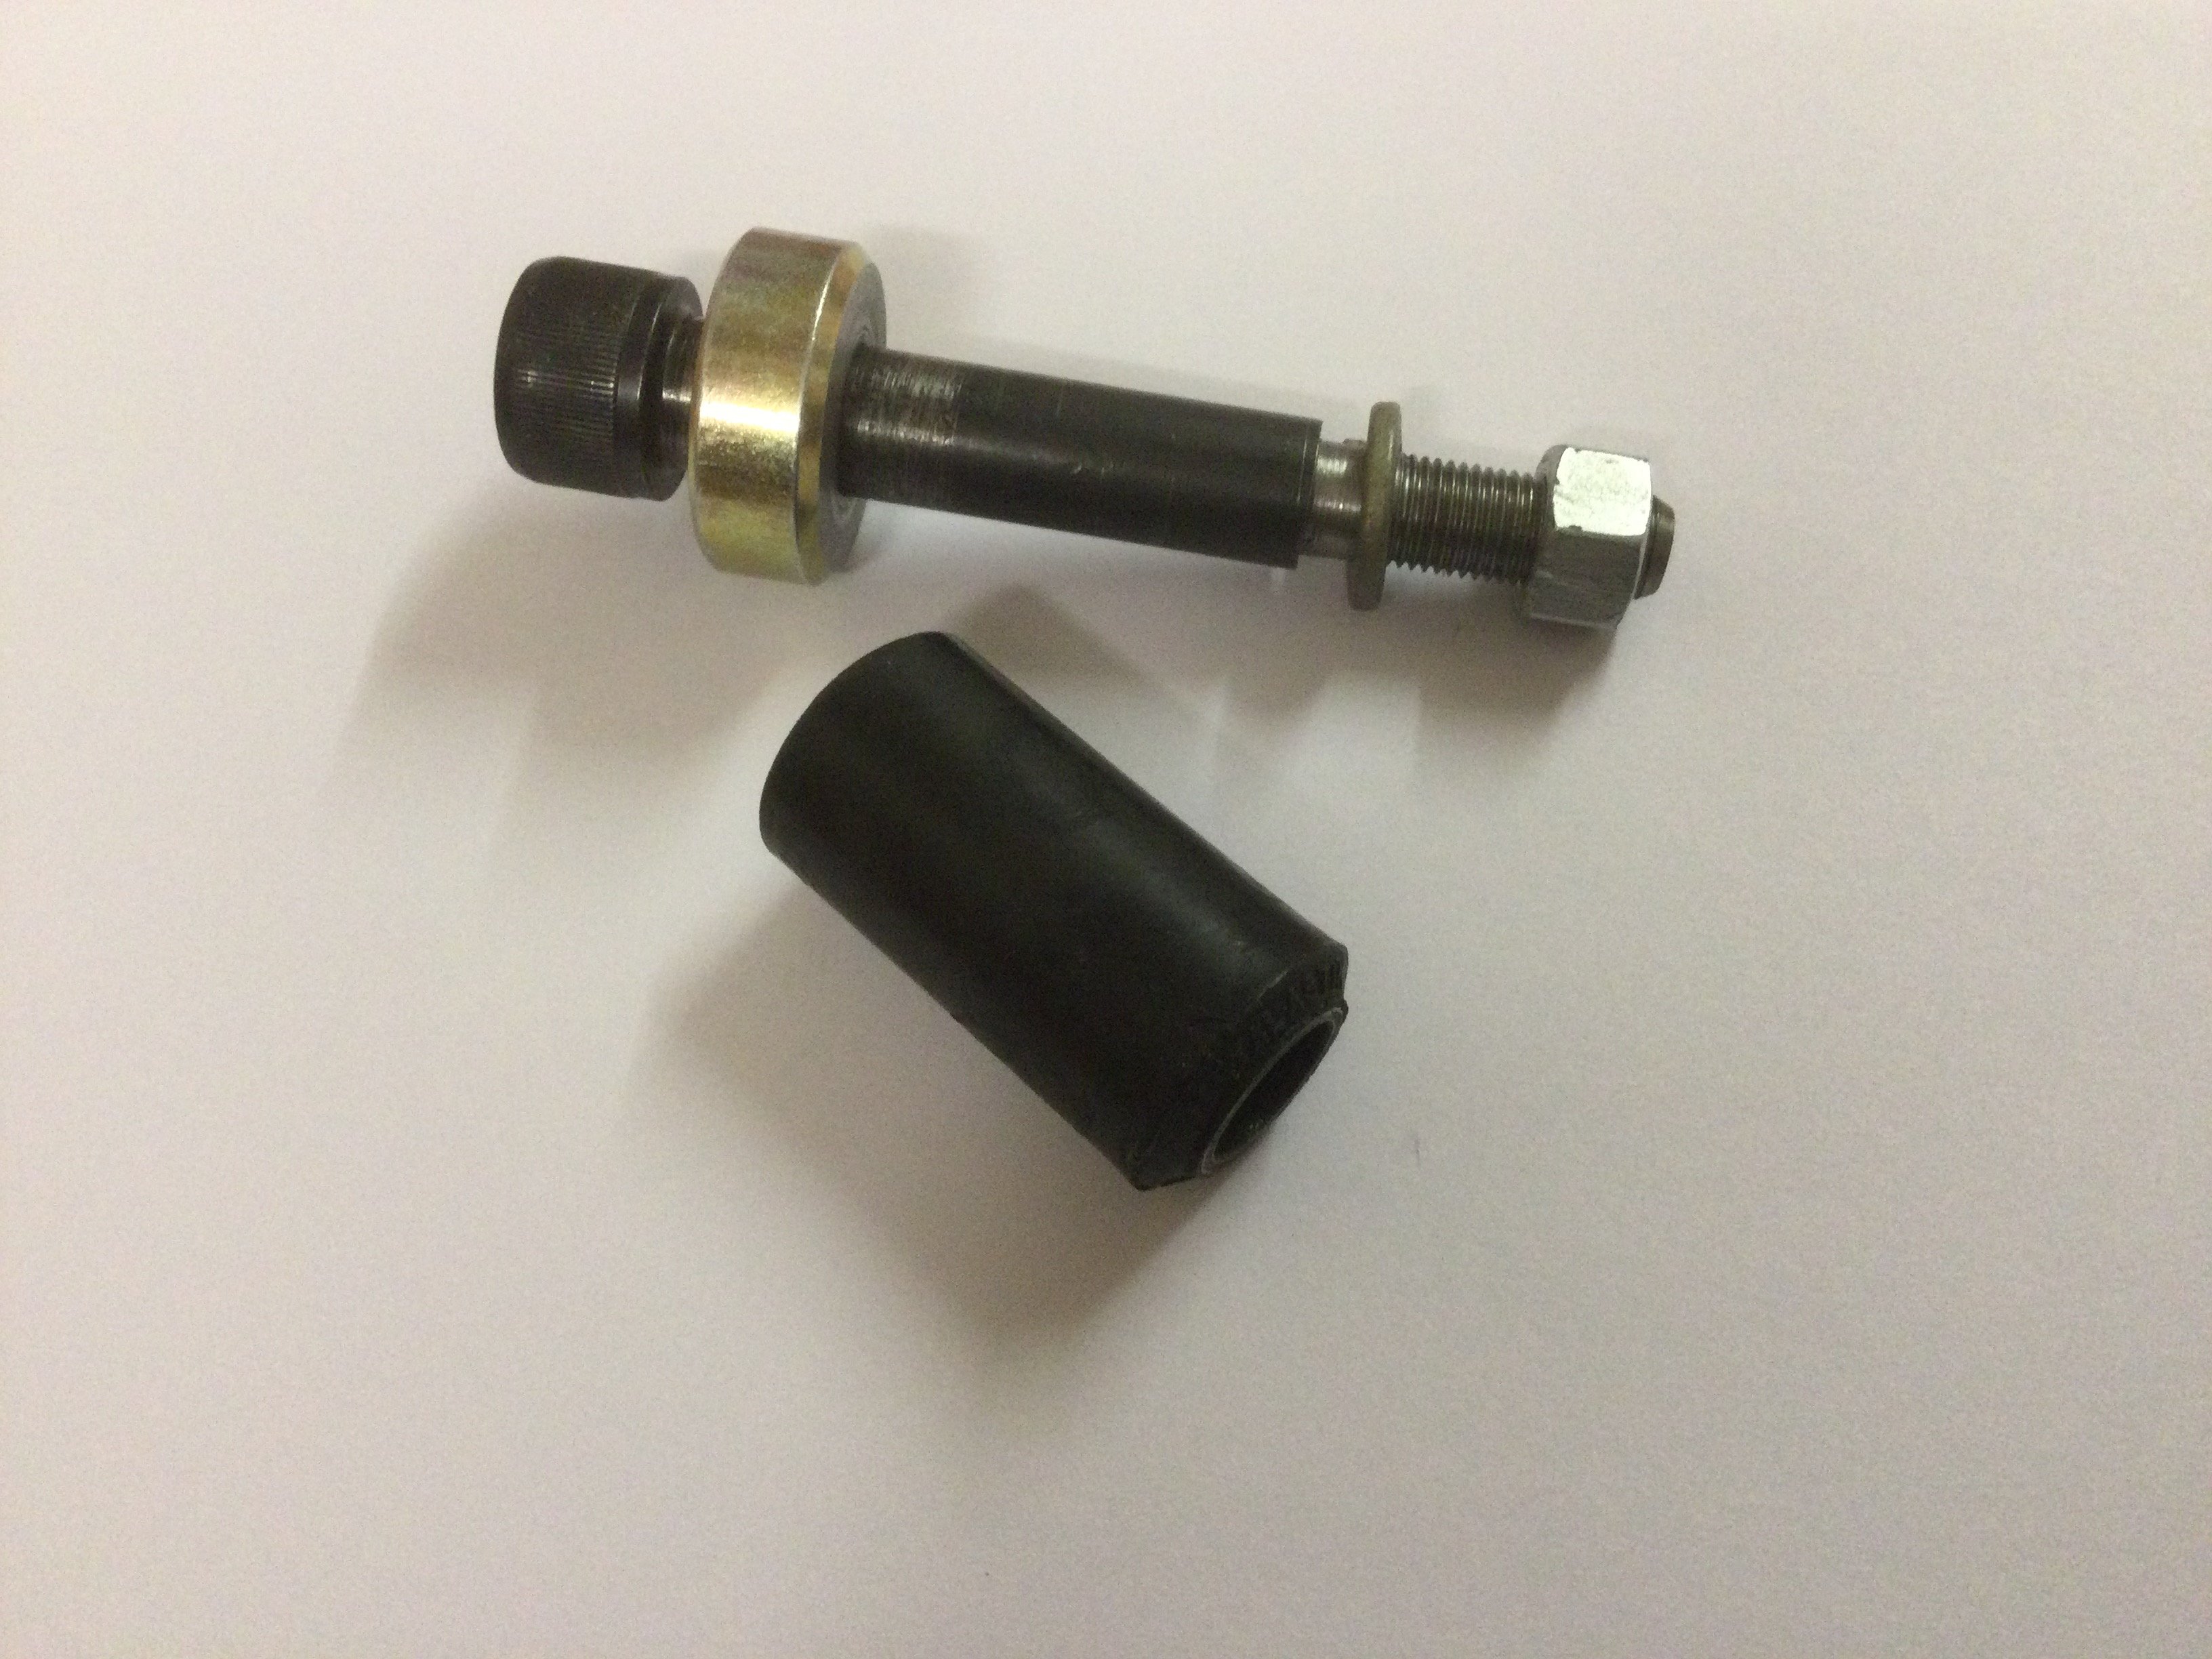
Keeping the subject separate but relative to the above posts I have modified the rear spring front pin and fitted Metalastic bushes.
The photos should be self explanatory:-
- Rear spring front bush.JPG (978.98 KiB) Viewed 2362 times
Alternative arrangement as regards pin:-
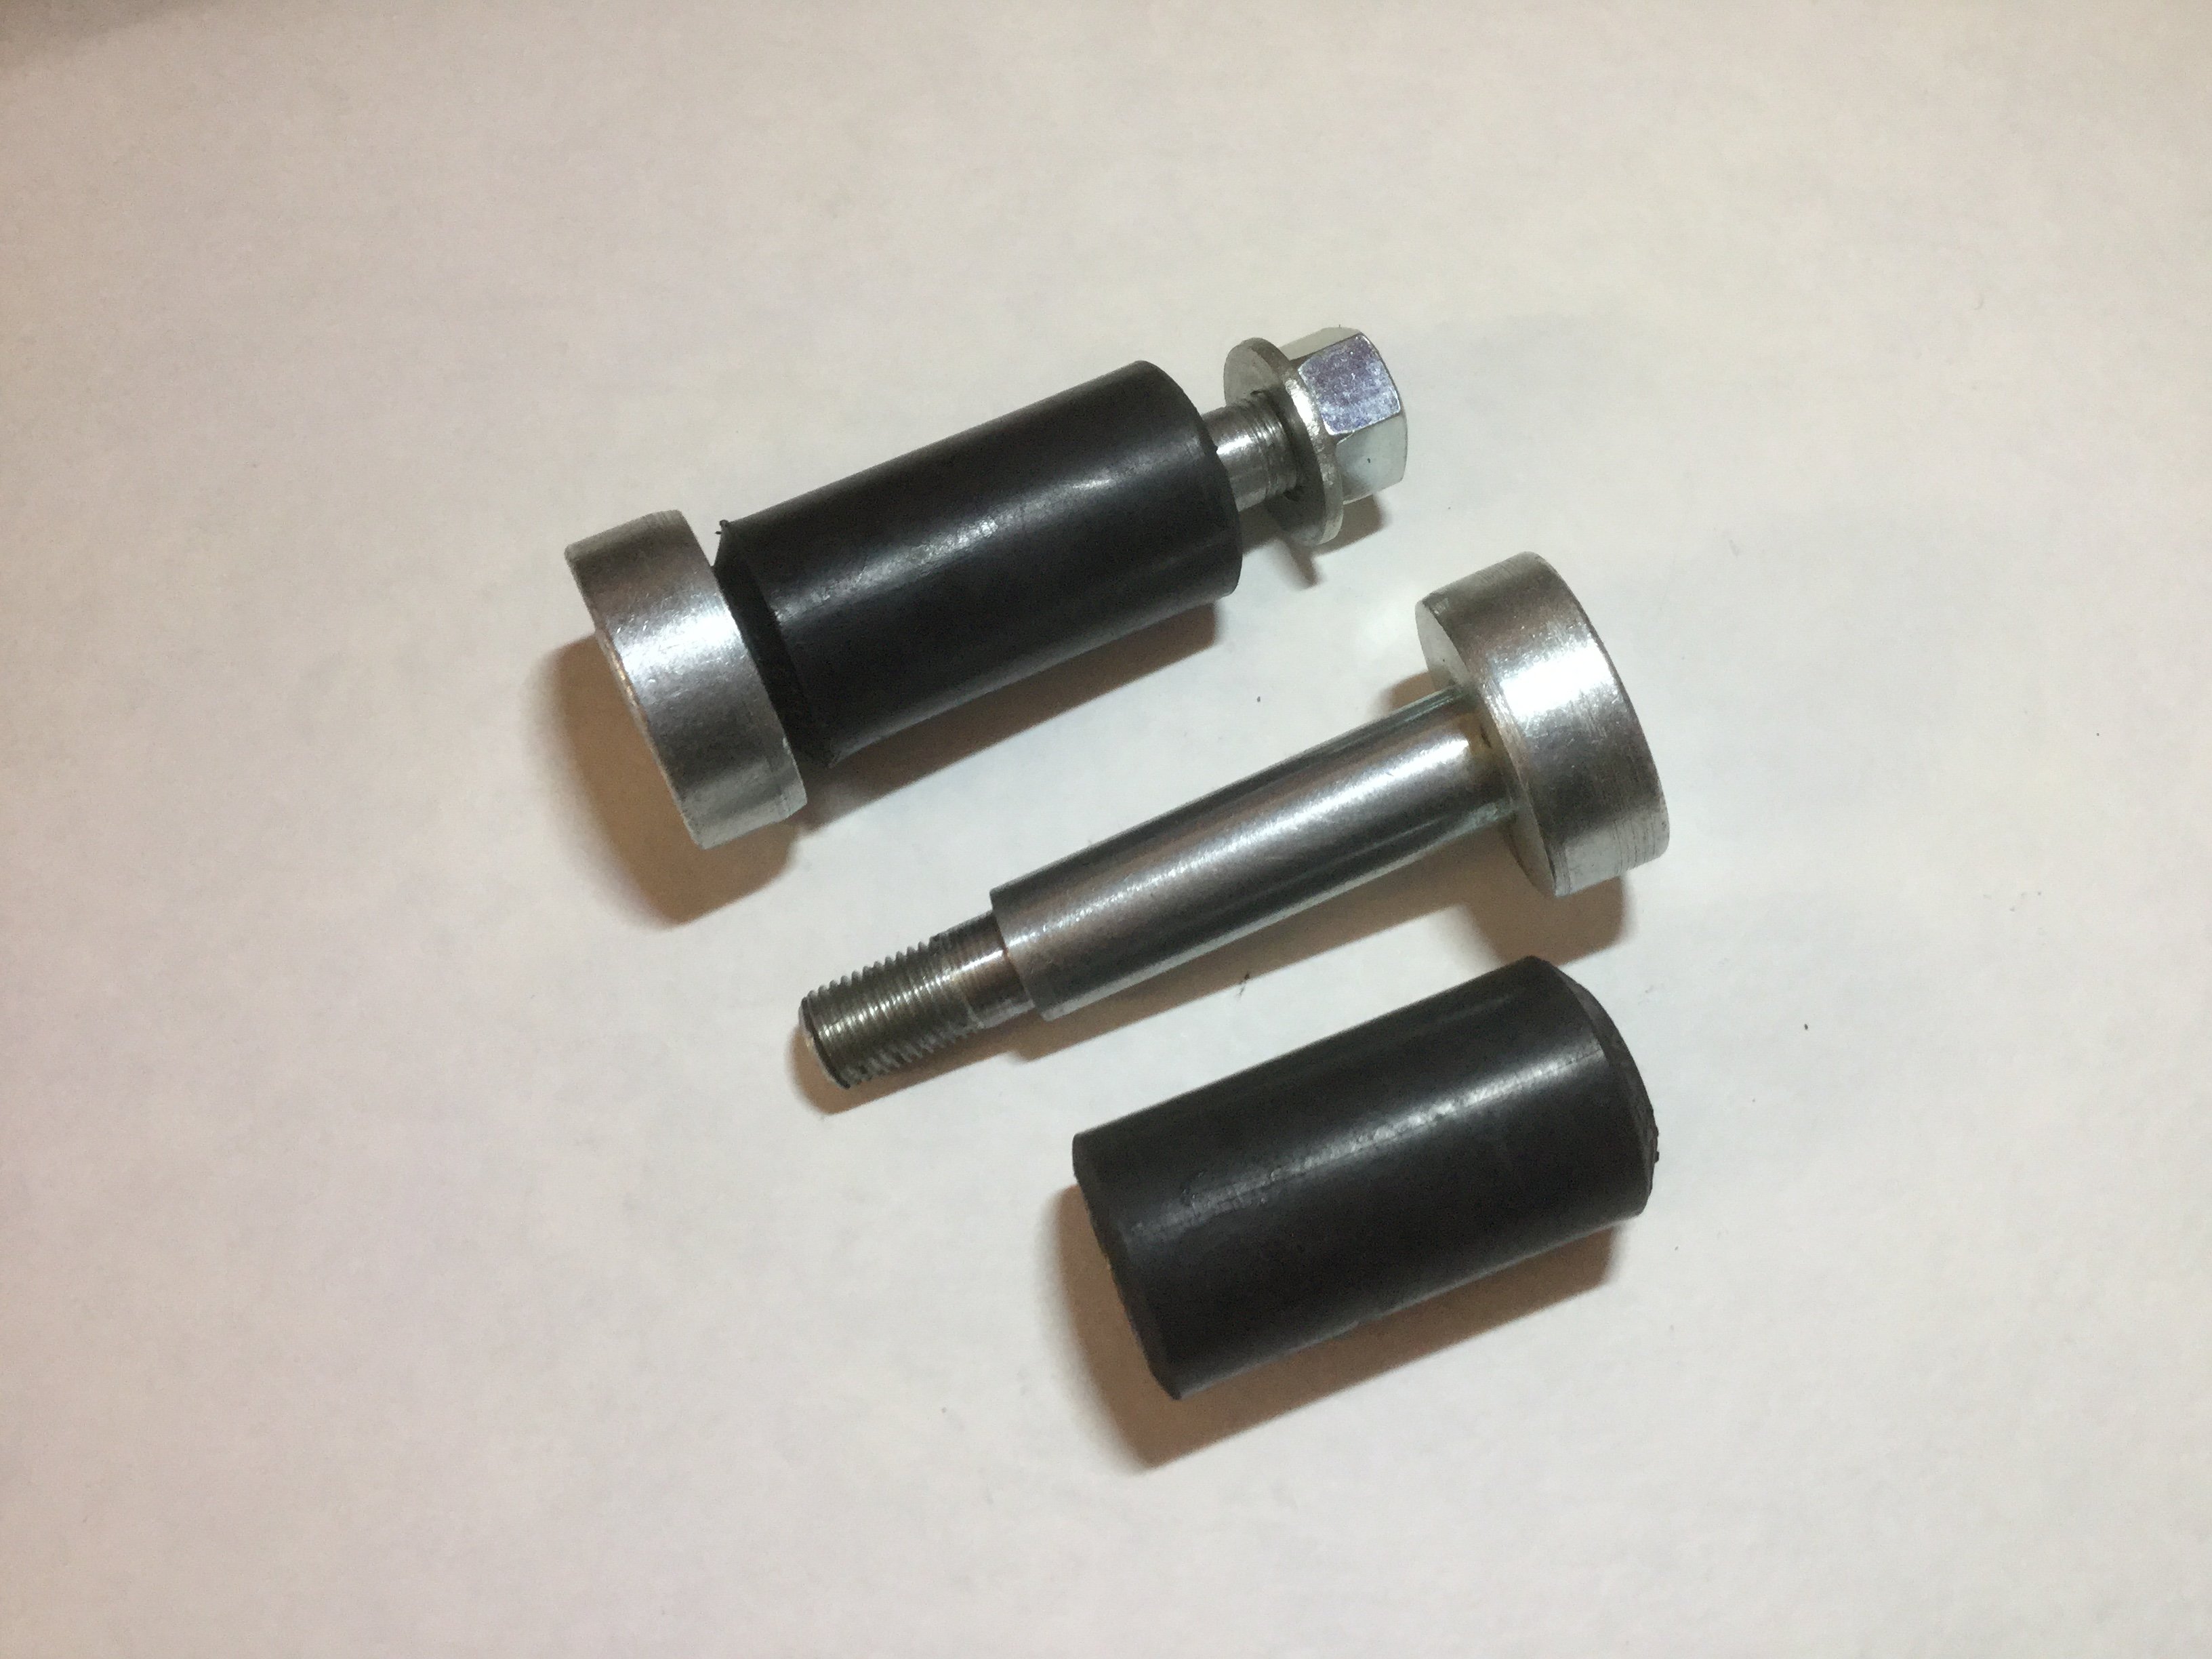
- Rear spring front eye bushing..JPG (712.13 KiB) Viewed 2362 times
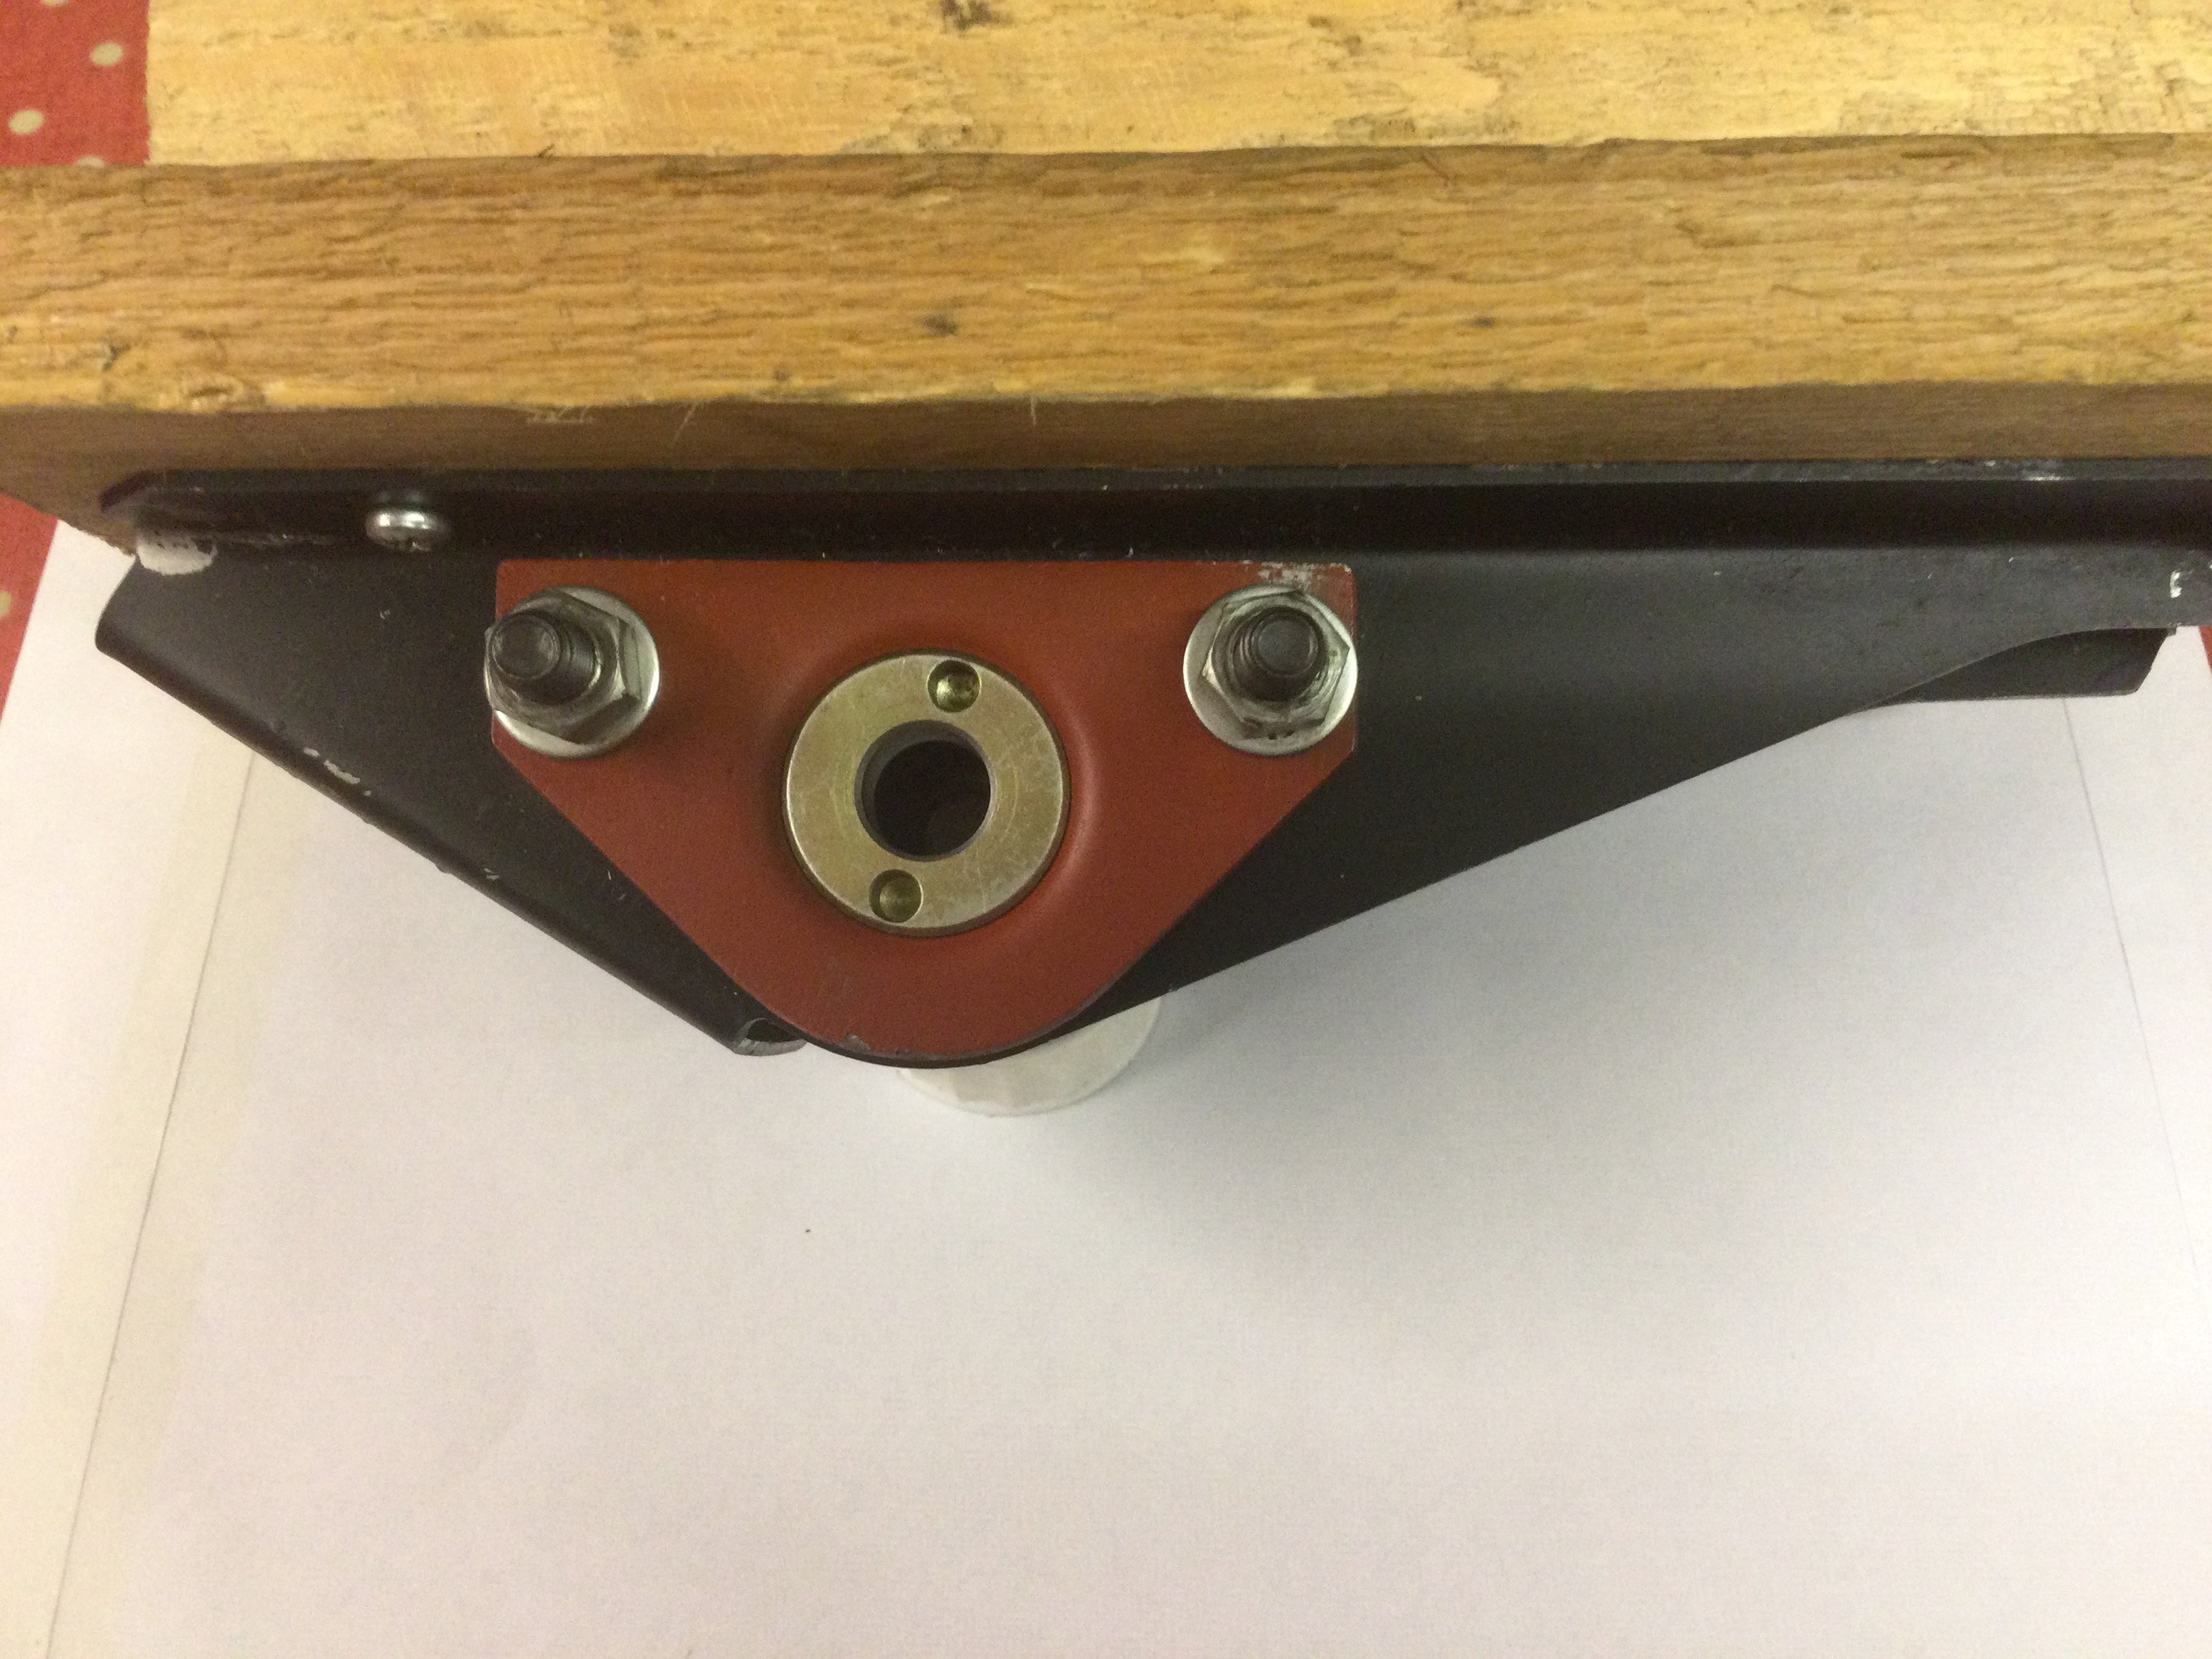
- rear spring plate..JPG (1.01 MiB) Viewed 2362 times
The inner radius arm plate has a sufficiently large hole at its centre so that the modified front spring eye cap headed bolt can be removed without disturbing the radius arm plate.
Re: Fitting radius arm kit
Posted: Sat Sep 06, 2025 2:47 pm
by Mr Spigot
Thanks Phil, all noted. The shackle insert plate shown is to replace the original one as some previous owner had decided in their wisdom to tack-weld it to the hanger. Having undone the bolts (one with an angle grinder) with the spring out, I had to spend some time upside down with an angle grinder to remove it (see photo)- hence the new plate shown against the radius arm plate.
"the bolts can be fitted from the inside of the spring hanger with the spring in place if care is taken" I will have to persevere obviously! A thin spanner needed to go in and hold the front bolt head on the inner plate.
I note your modification and it would seem easier if one of the plates in the ESM kit had a larger hole to accommodate the shackle pin head so that spring removal would not necessitate taking everything apart - I had wondered about making a larger hole in the inside plate to do this.
I have just fitted poly bushes generously lubricated with silicone grease which will hopefully work well with the new springs.
Re: Fitting radius arm kit
Posted: Fri Sep 19, 2025 3:38 pm
by Mr Spigot
Well perseverance paid off on one side as I managed to squeeze my smallest spanner inside to hold the bolt while it was tightened. The other side was a non-starter as a previous owner had welded a plate over the open front end of the spring hanger, so there was no way a spanner would go in to hold the front bolt. I overcame this by using a 3" long 1/4 UNF bolt to go right through the spring hanger, in front of the spring, with a nut on the outside. If ever taking the springs off on another car, I would use a 3" bolt to replace the small front one, to make life easier.