Page 1 of 1
Lucas 9H Horn Repairs and adjustments
Posted: Fri Jan 24, 2025 12:41 pm
by svenedin
Ever since my Morris's horn stopped working some years ago I have wanted him to get his proper voice back. There are cheap modern replacements and expensive reproductions available but they do not have the exact sound of a Lucas 9H and this matters to me.
I picked up Lucas 9H horns at auto jumbles. Some worked a bit, others did not work at all.
If the horn works feebly, sounds bad or draws excessive current, it may be out of adjustment. This Lucas workshop manual details how to make the necessary adjustments.
https://www.rjh-heritage.ch/index_htm_f ... s%209H.pdf
If the adjustment does not help matters or the horn does not work at all, it is necessary to disassemble the horn.
NOTE: if the horn is not working do not leave it connected to a battery for more than a few seconds or you risk melting the horn's internal parts; this is irretrievable.
This horn was not designed to be disassembled. It is held together with rivets and these must be drilled out. This is tedious! I found it best to drill most of the rivet out and then finish off by drifting it out with a suitable drift and a hammer. If you don't do this you risk the rivet suddenly letting go as you are drilling and this can break the drill bit (which is what happened to me). Drill slowly. I used a 1/8" HSS drill bit.
When all the rivets are free the top section can be separated from the body. The top section is steel, the bottom section is aluminium alloy. The top section contains all of the components that make the horn work electrically. The bottom section is just a "trumpet".
Inside the top you can see the electrical contact breakers (points). You can also see that the smaller screw on the outside of the horn (or sometimes this is the smaller nut) is the adjustment for the points gap. There is a rubber type gasket on the alloy section inner face, a metal diaphragm and then another gasket/diaphragm made of the type of black paper seen in speakers. Unfortunately, I found this paper diaphragm to be so well stuck on to the edges that I had to destroy it to remove it. I will see if I can find suitable paper to replace it.
The next stage is to clean the points thoroughly. Then with the adjusting screw closing the points to complete the circuit a multimeter can be used to measure the coil resistance. The multimeter probes are attached across the Lucar connectors on the top of the horn and with the points closed the resistance is measured. If the resistance is infinite (open circuit) AND the points are closed and clean (making a good electrical connection) then the conclusion is that the electromagnet coil is faulty. There is not much point proceeding if the coil is fried as spare parts are not available. If this test is good then it is worth cleaning everything up further as the horn is very likely to work again.
That's all so far.........
Pictures to follow
Stephen
Re: Lucas 9H Horn Repairs and adjustments
Posted: Fri Jan 24, 2025 1:00 pm
by svenedin
Re: Lucas 9H Horn Repairs and adjustments
Posted: Fri Jan 24, 2025 1:11 pm
by svenedin
Re: Lucas 9H Horn Repairs and adjustments
Posted: Fri Jan 24, 2025 1:21 pm
by svenedin
There is a small air hole in the metal diaphragm that needs to be clear of obstruction.
- IMG_1301.jpeg (2.06 MiB) Viewed 28706 times
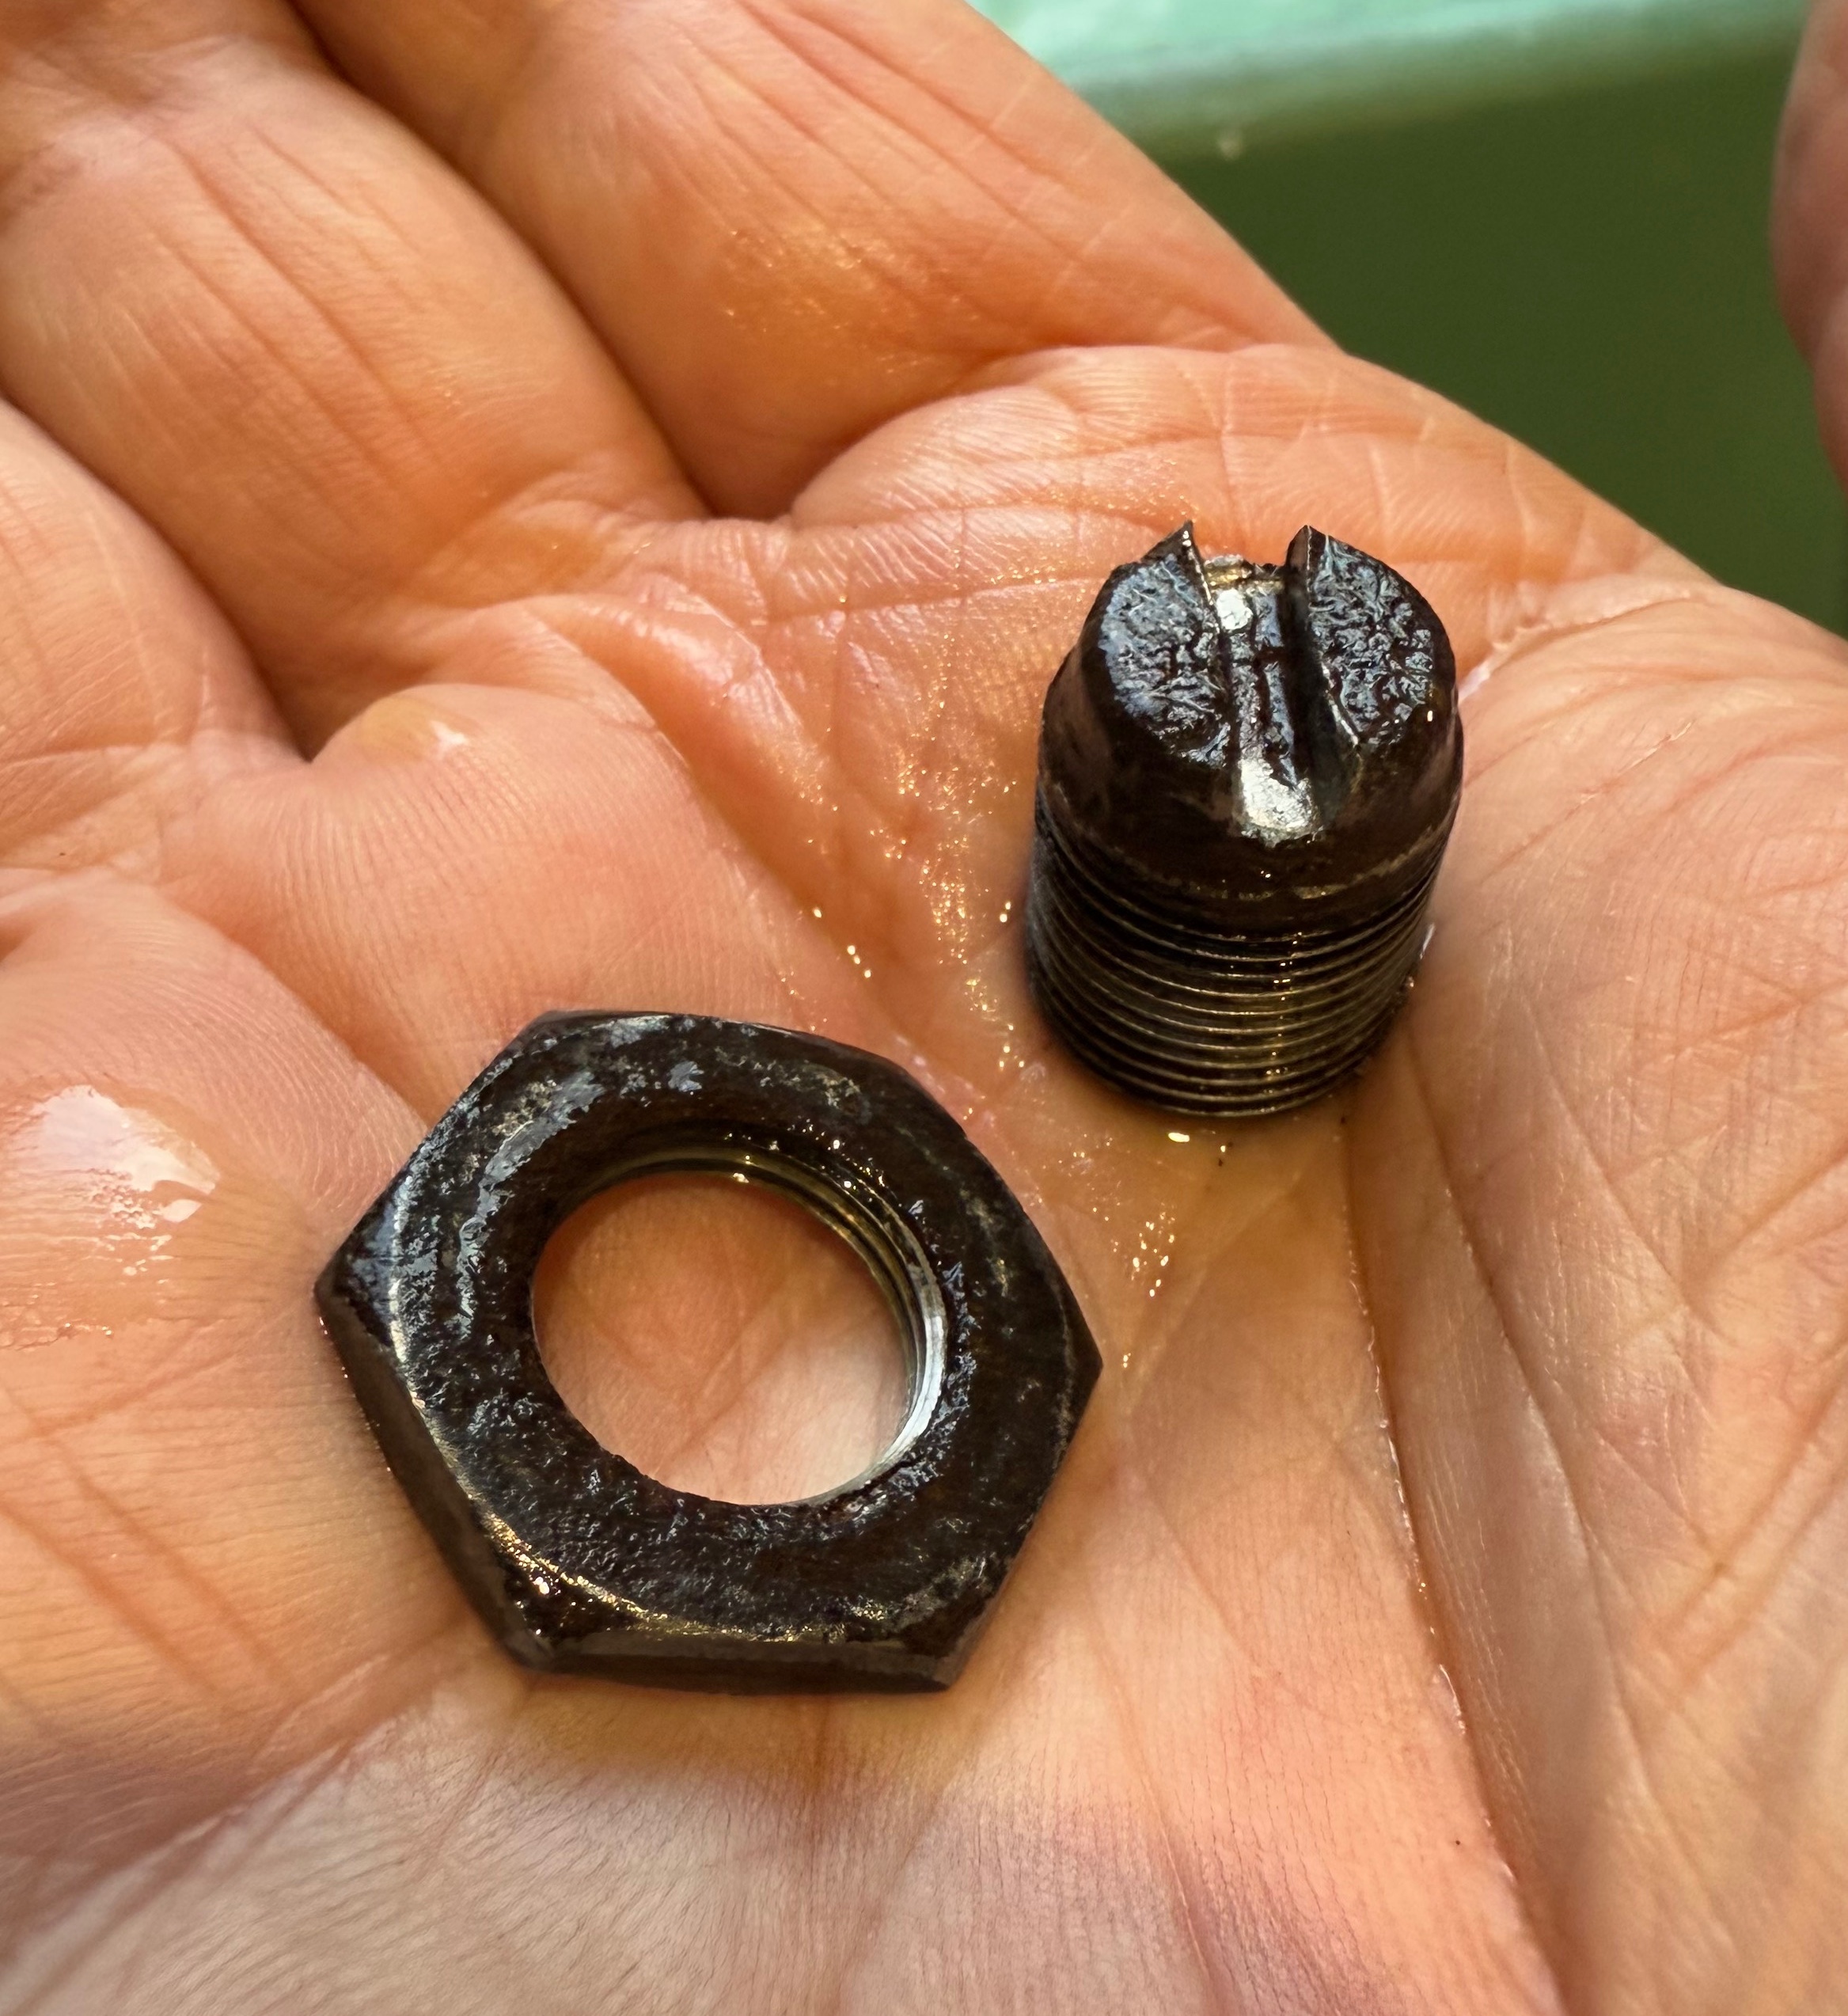
The tone adjusting screw on the top of the outer case has a locknut. This may prove very difficult to remove due to corrosion. Lot of PlusGas or similar and persistence. If the screw and nut are corroded together as they probably are, you could use an impact driver of the type you hit with a hammer. This is what I did. The screw and the nut came out together. Then I separated the screw from the nut by holding the nut in the jaws of a large adjustable spanner and using a big screwdriver.
- IMG_1300.jpeg (1.22 MiB) Viewed 28761 times
Once the internals are cleaned up and the outside de-rusted, the horn can be re-assembled for testing. Small nuts and bolts could be used to replace the rivets or pop rivets. If looking for absolute authenticity then the same rivets as the original could be used. Small nuts and bolts have the advantage that the horn could be disassembled in future with minimal effort but I think rivets look tidier and aluminium rivets won't be as difficult to drill out as the original steel ones were. Gaskets can be re-made using gasket paper or you could use sealant. I do not know how important the black paper diaphragm/gasket actually is but I will make a new one of the same dimensions.
Then just paint as you see fit and that's it. Be careful not to jam up the points adjusting screw or tone adjusting screw with paint.
Hope that's of use.
Stephen
Re: Lucas 9H Horn Repairs and adjustments
Posted: Fri Jan 24, 2025 4:32 pm
by myoldjalopy
Very good. Often the problem is that the contacts have corroded together slightly and just need freeing up.
Aren't the earlier horns with the bulbous "snail shell" easier to disassemble?
Re: Lucas 9H Horn Repairs and adjustments
Posted: Fri Jan 24, 2025 4:48 pm
by svenedin
I know the type you mean but I am not sure what the Lucas part number is of the earlier more trumpet-like horns. Is it the WT618? If so, these are also riveted and just as difficult to take apart. I believe some of the earlier Lucas horns had screws instead of rivets and are definitely easier to take apart but I don't know the specific models.
It was a very pleasant surprise to see the internals in such good condition when the outside looked so unpromising.
Stephen
Re: Lucas 9H Horn Repairs and adjustments
Posted: Fri Jan 24, 2025 7:20 pm
by philipkearney
I think the earlier models with the larger trumpet style shell was a WT614 and the later version was the WT618.
Great article Stephen, thanks.
Re: Lucas 9H Horn Repairs and adjustments
Posted: Mon Jan 27, 2025 3:43 pm
by myoldjalopy
Well I looked at the 'snail shell' horn in my car and the spare that I have and I confirm both were riveted........

Re: Lucas 9H Horn Repairs and adjustments
Posted: Mon Jan 27, 2025 4:07 pm
by svenedin
myoldjalopy wrote: ↑Mon Jan 27, 2025 3:43 pm
Well I looked at the 'snail shell' horn in my car and the spare that I have and I confirm both were riveted........
Annoying. It is possible to drill out the rivets with a hand held power drill as I did but it would be far easier, and more accurate, to do it on a pillar drill.
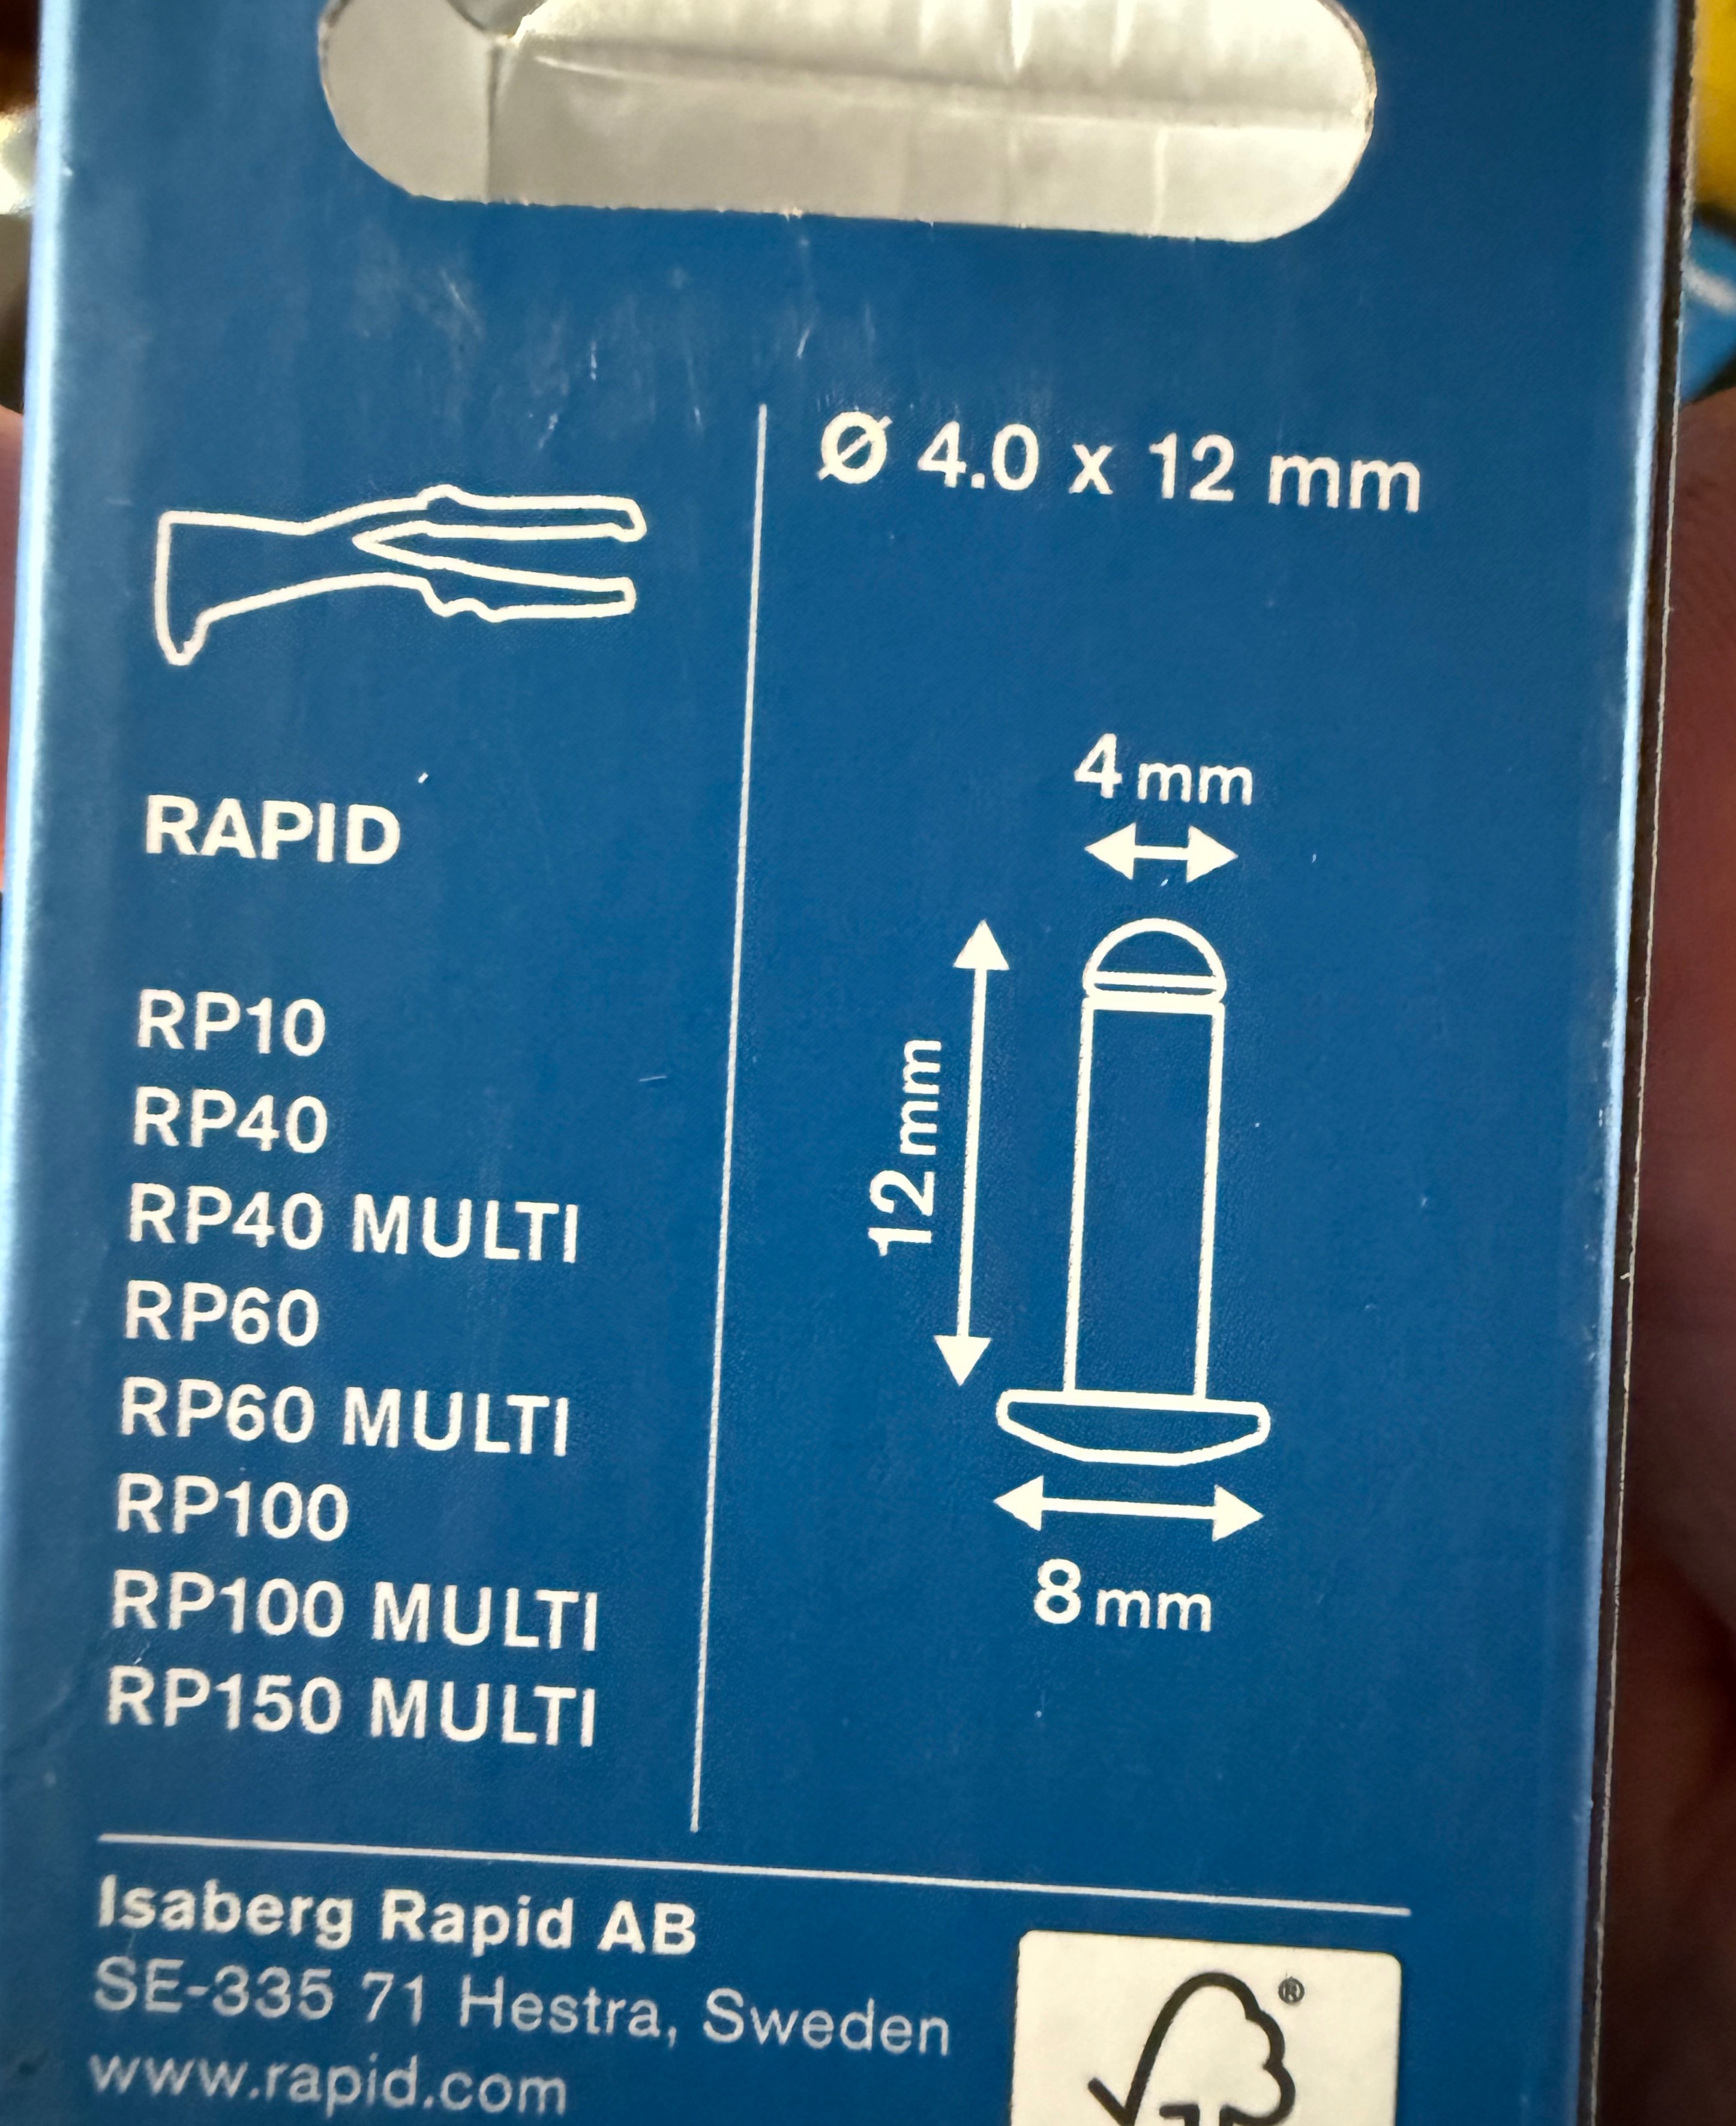
4mm diameter aluminium blind rivets x 12mm are ideal replacements so the drill size should be 4.1mm.
A floor-standing pillar drill is on my list of tools that I would like to have!
Stephen
Re: Lucas 9H Horn Repairs and adjustments
Posted: Mon Jan 27, 2025 4:24 pm
by myoldjalopy
On the other hand, the domed part of the horn is held on by a screw. It looks possible to unscrew this and remove the dome - I must take a look sometime to see what is revealed by doing this......
Re: Lucas 9H Horn Repairs and adjustments
Posted: Tue Jan 28, 2025 11:32 am
by Mervin
Re: Lucas 9H Horn Repairs and adjustments
Posted: Tue Jan 28, 2025 11:58 am
by svenedin
Mervin wrote: ↑Tue Jan 28, 2025 11:32 am
myoldjalopy wrote: ↑Mon Jan 27, 2025 4:24 pm
On the other hand, the domed part of the horn is held on by a screw. It looks possible to unscrew this and remove the dome - I must take a look sometime to see what is revealed by doing this......
Yes, that screw secures the dome only to reveal the "workings" of a WT618 (as fitted to my own Minor). Unfortunately also riveted.
horn 1.jpghorn 2.jpghorn 3.jpghorn 4.jpghorn 5.jpg
Ah but you can clean the points easily! Looks like it is only the diaphragm that is riveted and unless the horn has got wet you should not need to access the diaphragm.
Stephen
Re: Lucas 9H Horn Repairs and adjustments
Posted: Tue Jan 28, 2025 12:24 pm
by myoldjalopy
Yes, indeed! And it is usually the points stuck/corroded together which is the problem with a non-functioning horn. And thanks to Mervin I don't even need to remove the domed 'shell' on mine to take a geek!

Re: Lucas 9H Horn Repairs and adjustments
Posted: Thu Feb 13, 2025 1:03 pm
by svenedin
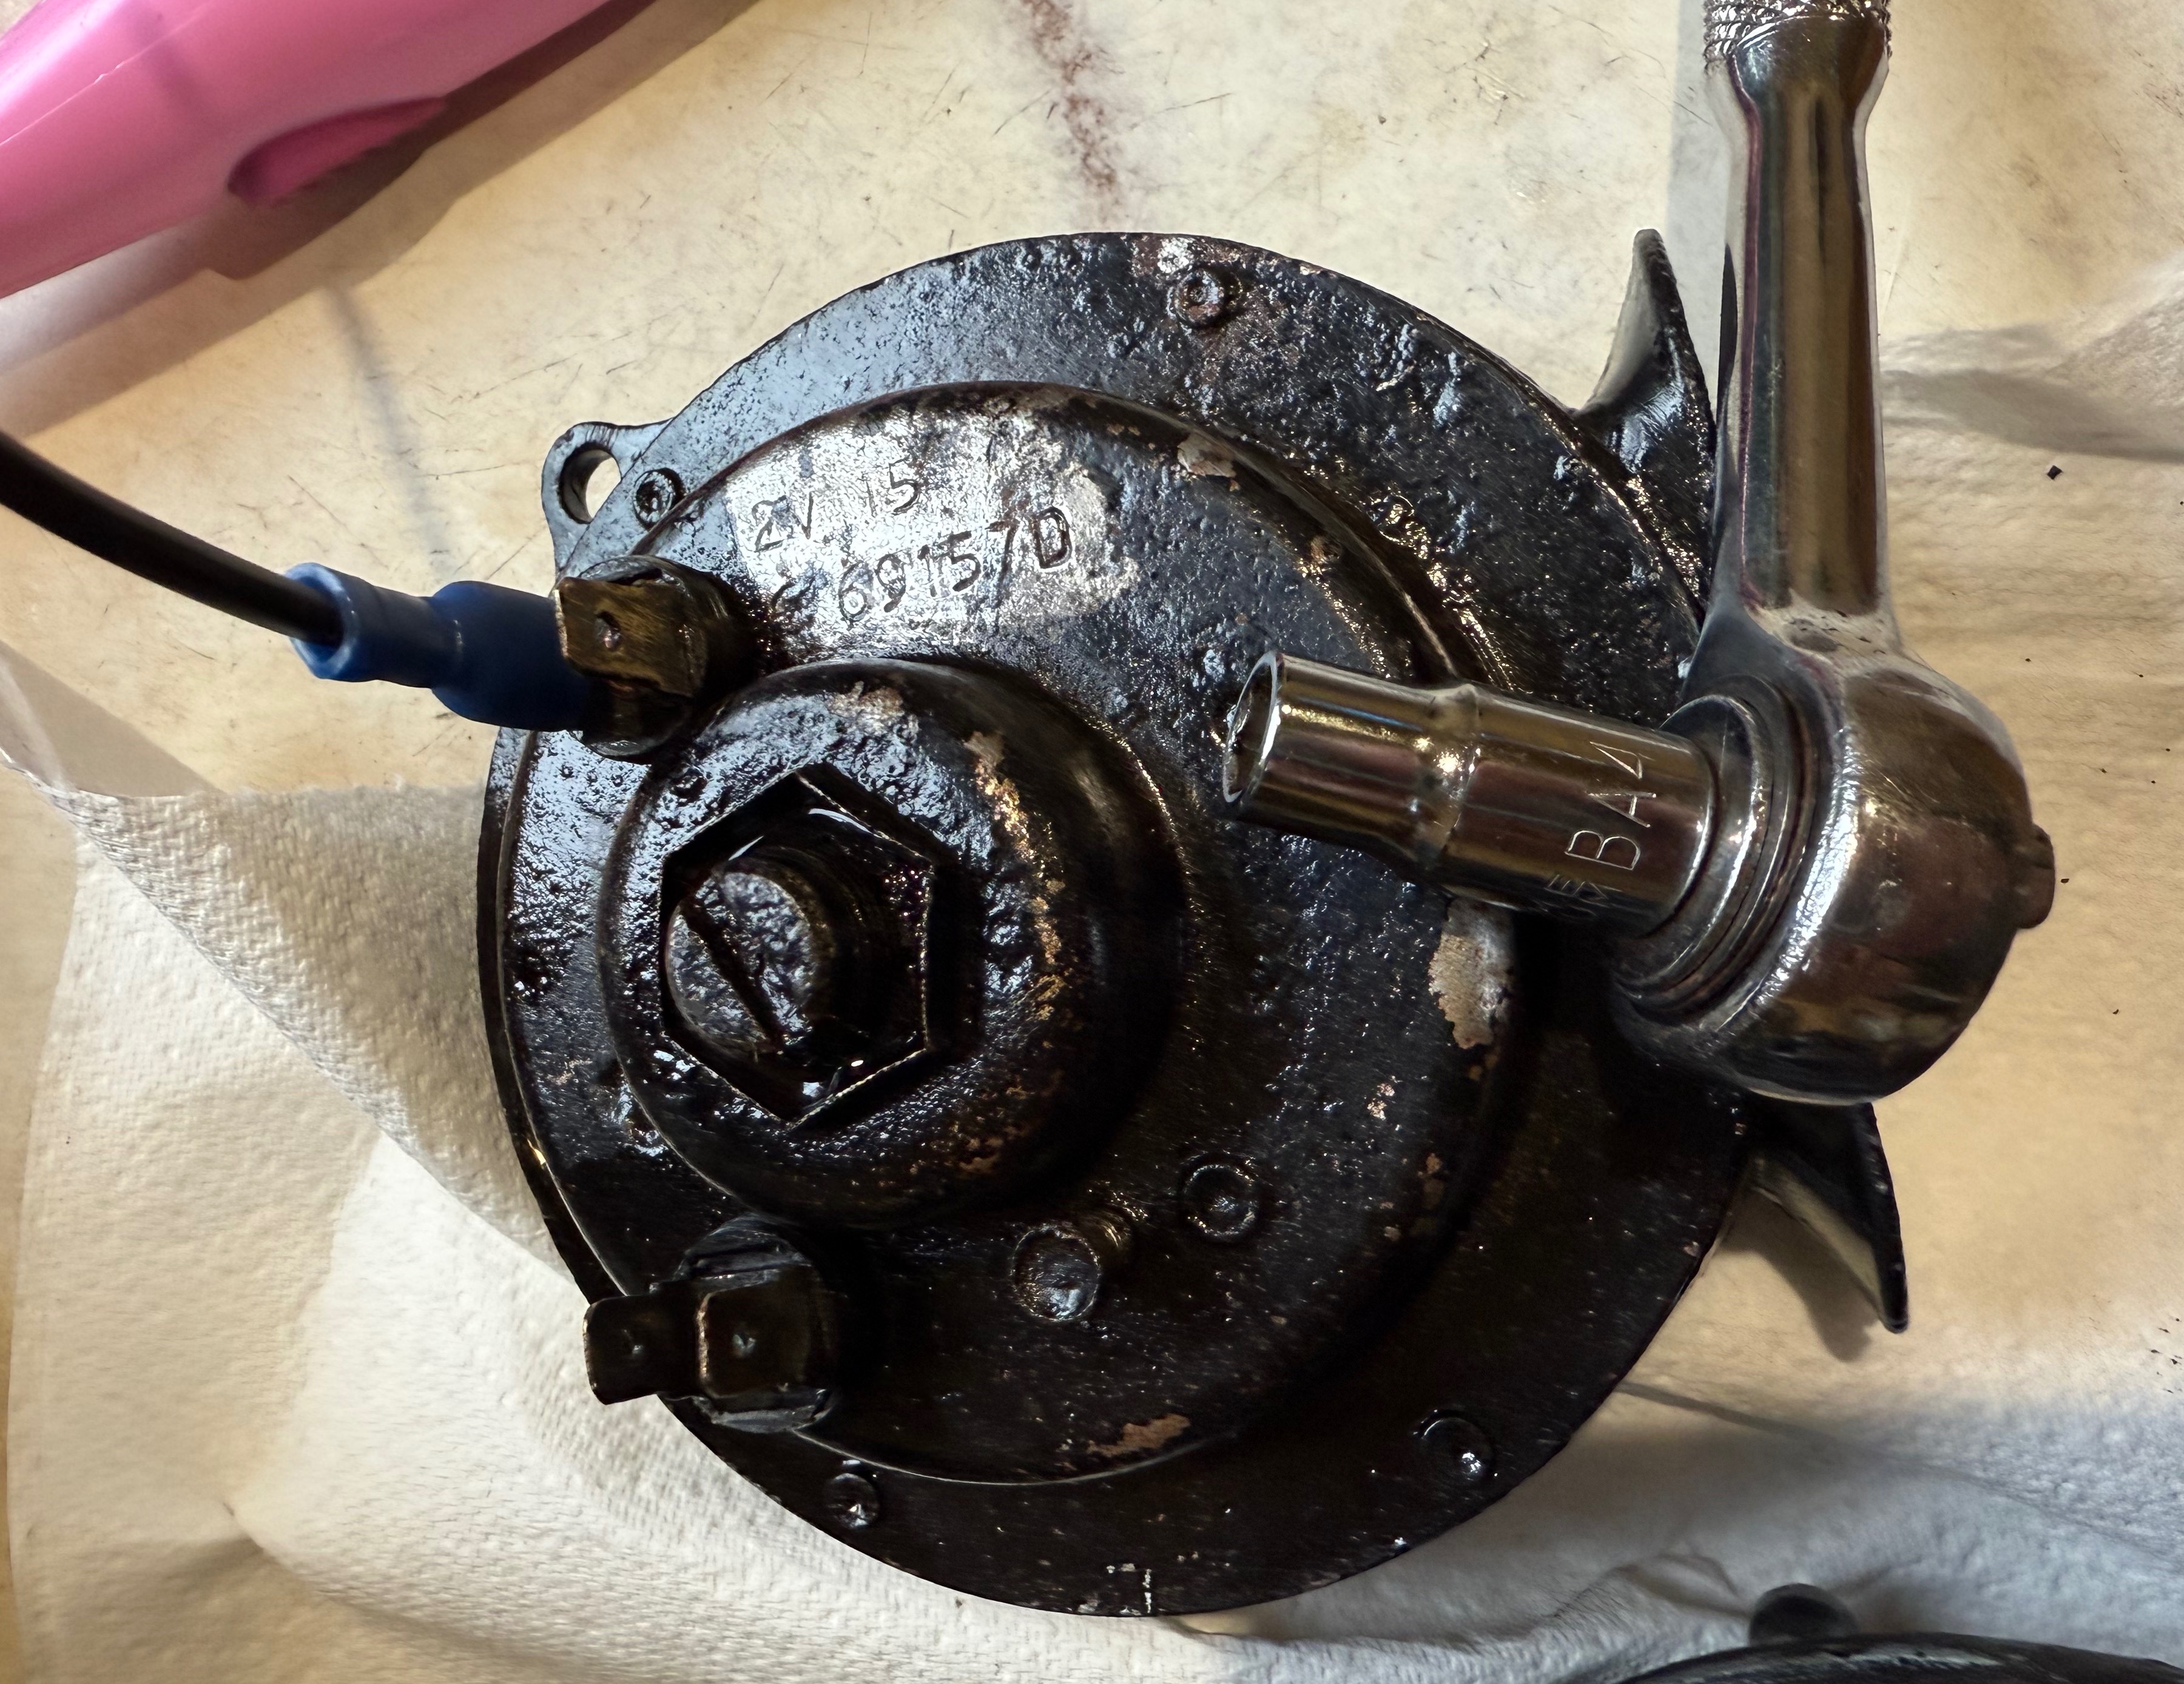
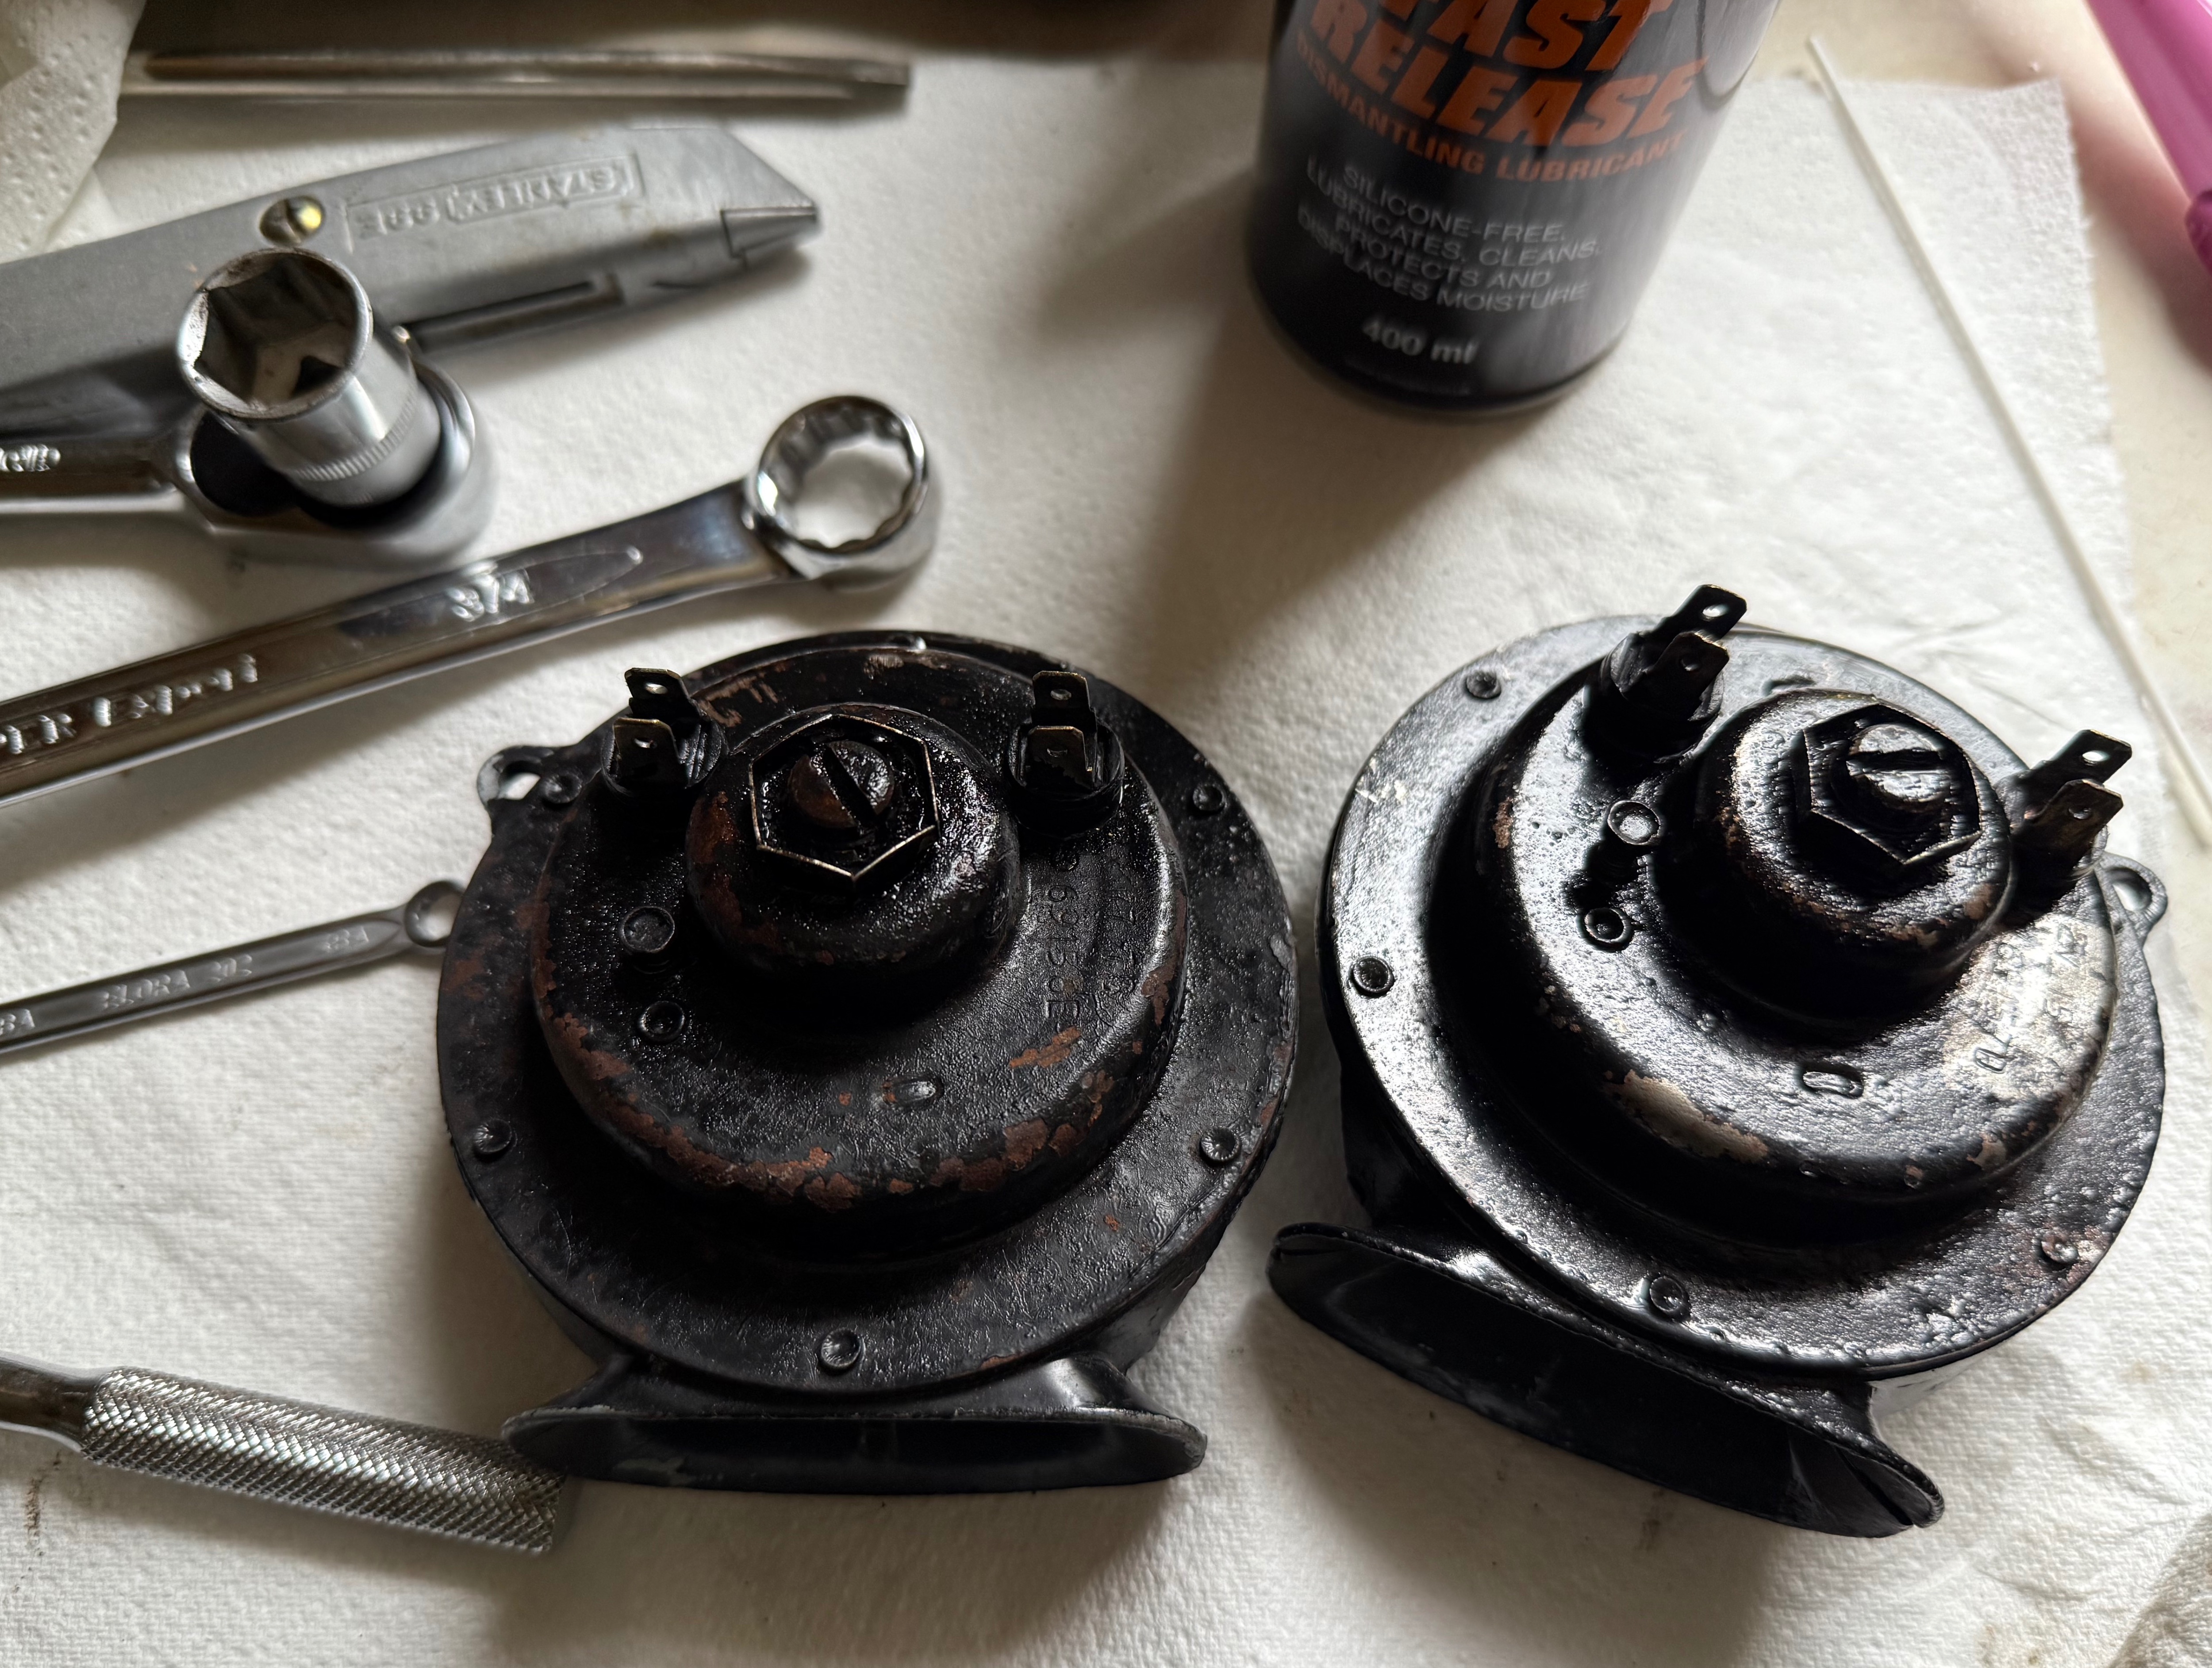
For anybody struggling to adjust these horns. Here is a pair of slightly later Lucas 9H that are working but need adjusting. They don't need complete disassembly but the adjusters are corroded and totally seized. These later ones have a different central lock washer.
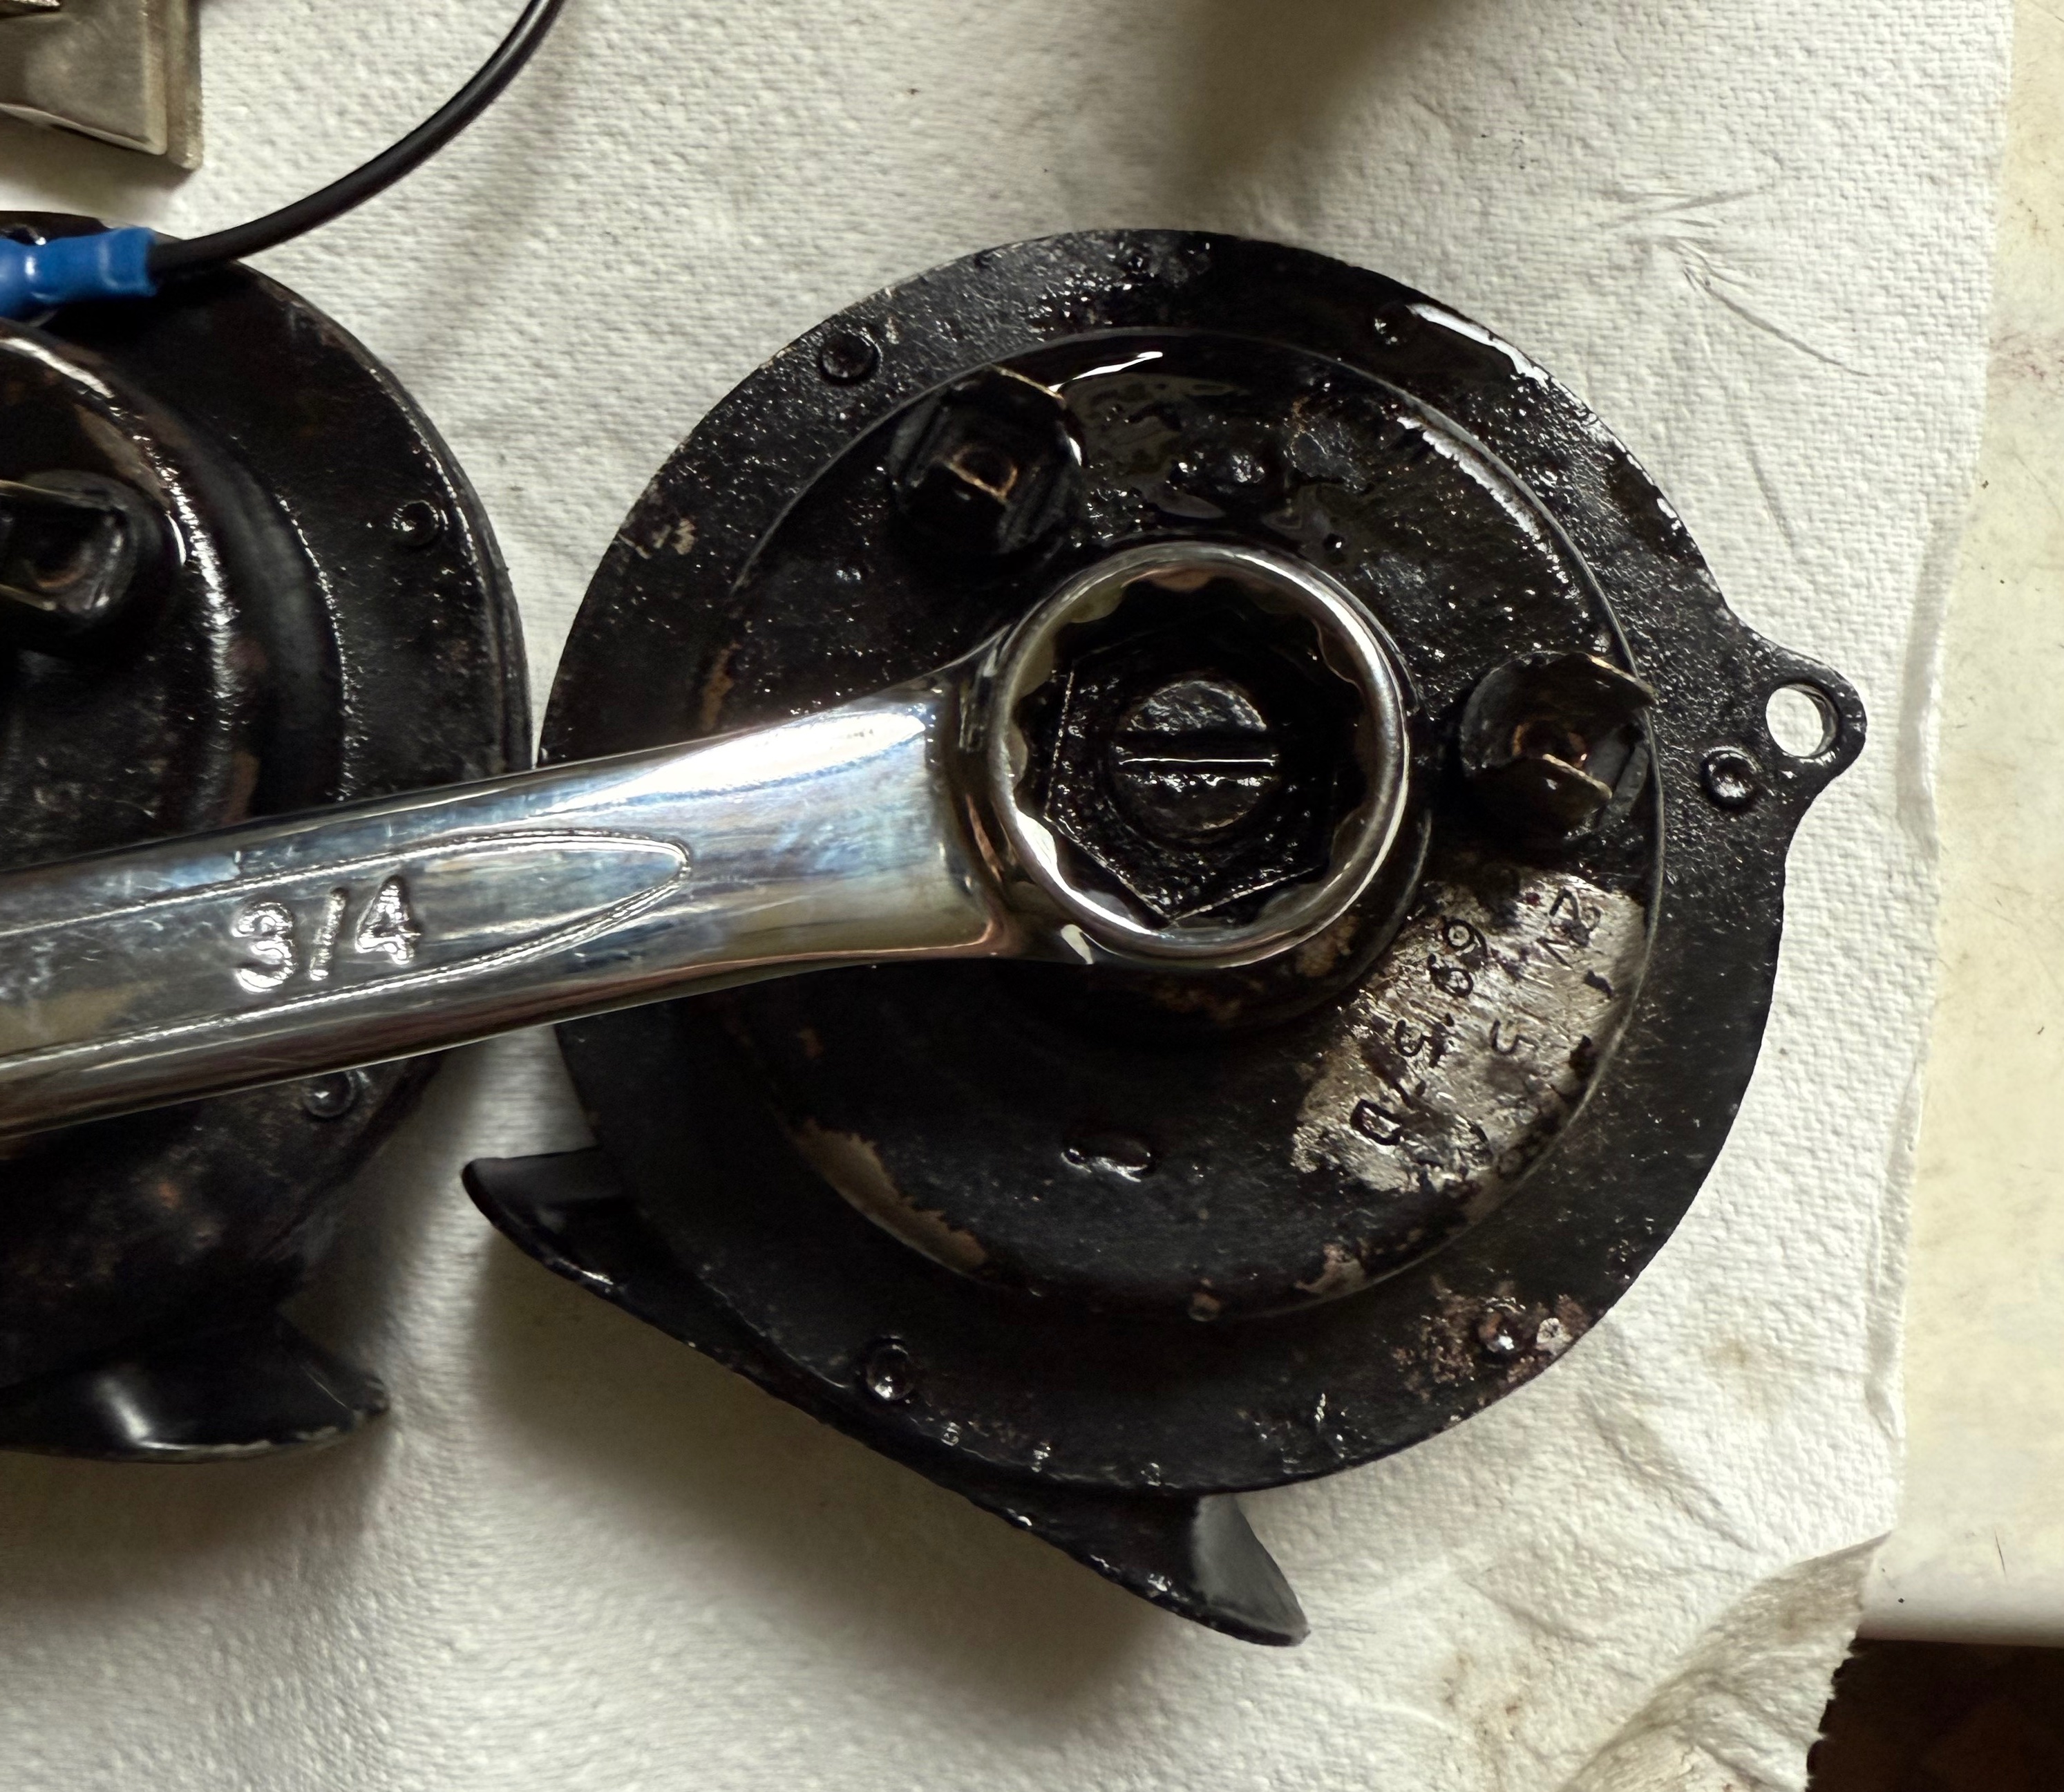
A 3/4" AF spanner fits the central lock washer. A 19mm socket is a good fit too.
The smaller points adjuster is 4BA. A 4BA socket works very well. A spanner is likely to be inadequate and either chew the head or slip off.
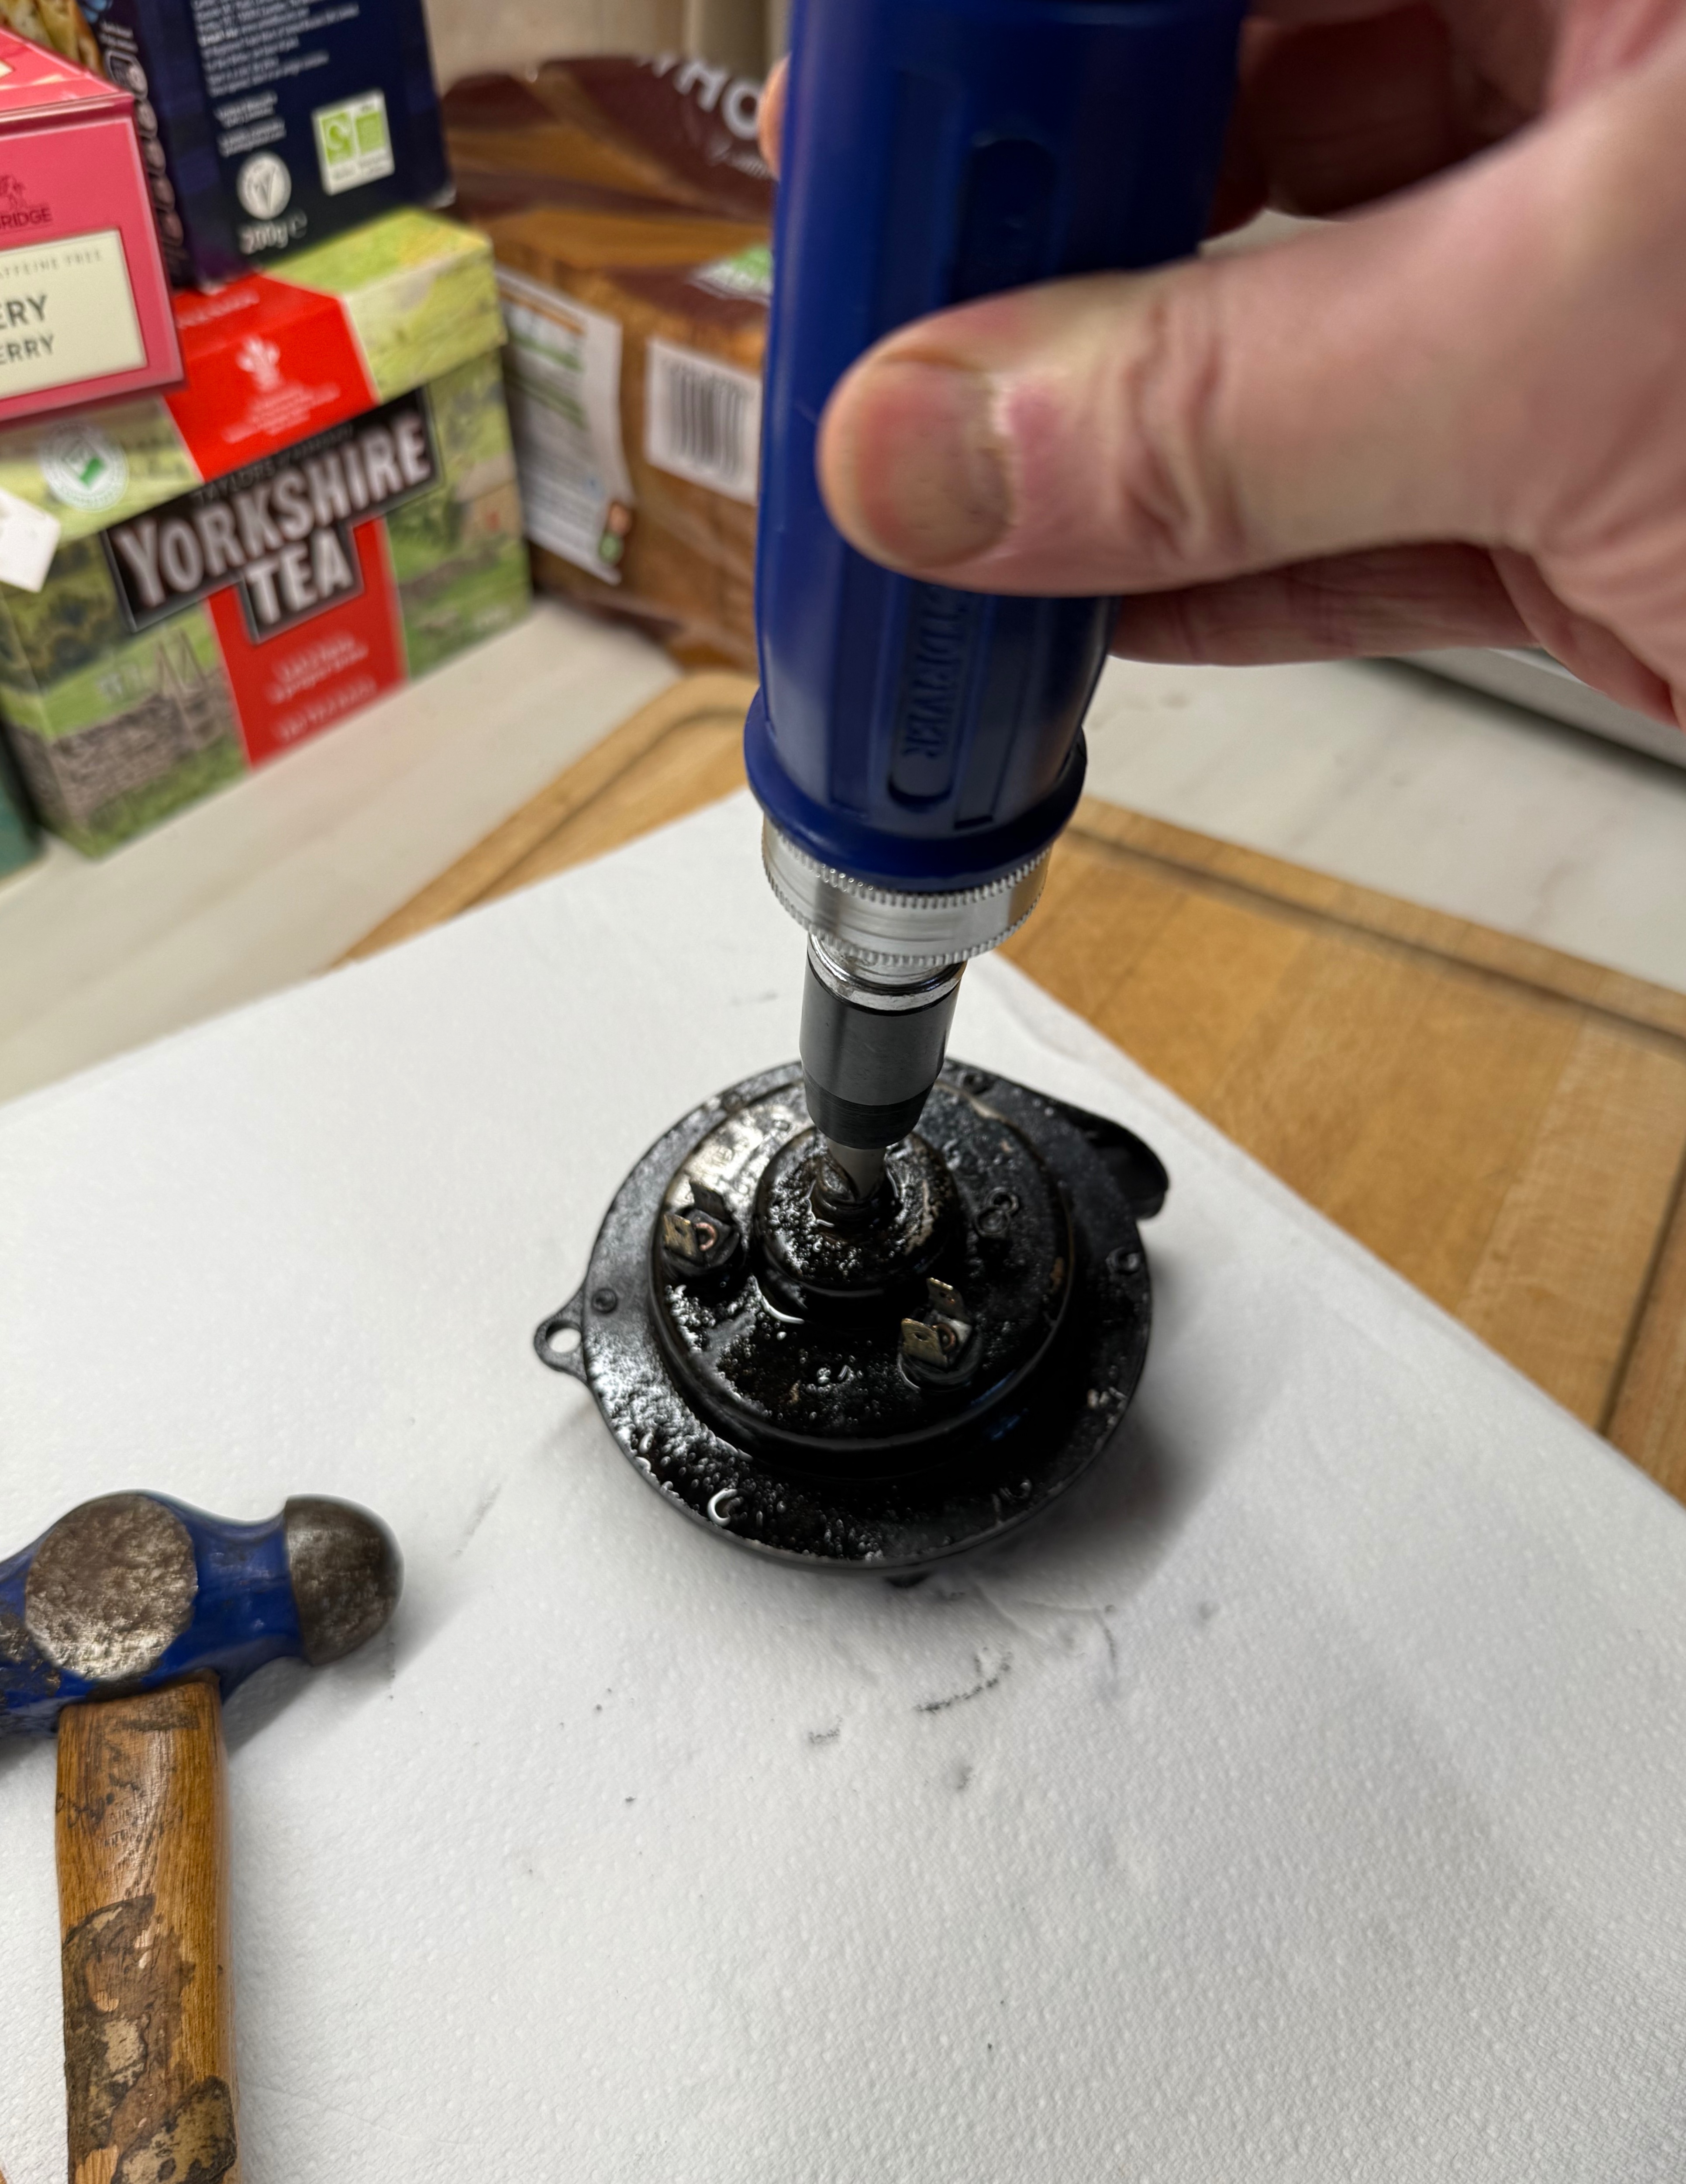
When you have the central lock washer off, the big central screw will probably still be seized. An impact screwdriver works very well (the type you hit with a hammer). The threads inside are not badly corroded.
Try a good load of PlusGas and patience.
Grease these parts before reassembly to avoid this annoyance of seized fixings next time!
Stephen
- IMG_1407.jpeg (2.44 MiB) Viewed 22805 times
- IMG_1408.jpeg (1.87 MiB) Viewed 22805 times
- IMG_1410.jpeg (3.77 MiB) Viewed 22805 times
- IMG_1412.jpeg (2.8 MiB) Viewed 22800 times
- IMG_1413.jpeg (1.7 MiB) Viewed 22800 times
Re: Lucas 9H Horn Repairs and adjustments
Posted: Sun Feb 16, 2025 11:49 am
by svenedin
A few more observations. In order to keep the drilling out of the old rivets as accurate as possible, it really helps to centre punch the rivet where you intend to drill. A 4mm drill bit means you can then go on to use 4mm rivets to put it back together again. 4mm x 12mm blind pop rivets are ideal. You could use nuts and bolts instead. Either way, future maintenance will be much easier as aluminium pop rivets are a doddle to drill out compared to solid rivets.
This one is done except for a bit of new paint and then the new rivets will be mostly hidden. The horn has gone from not working at all to very loud indeed!
Stephen
- IMG_1428.jpeg (1.67 MiB) Viewed 22637 times

- IMG_1429.jpeg (1.51 MiB) Viewed 22637 times
- IMG_1430.jpeg (1.46 MiB) Viewed 22637 times
Re: Lucas 9H Horn Repairs and adjustments
Posted: Wed Feb 19, 2025 7:57 pm
by svenedin
Tinkering with another defunct 9H horn from my collection of special rubbish today.
This one did not work and still refused to work even after I had drilled out the rivets to open the case and cleaned the points as best I could with them in situ.
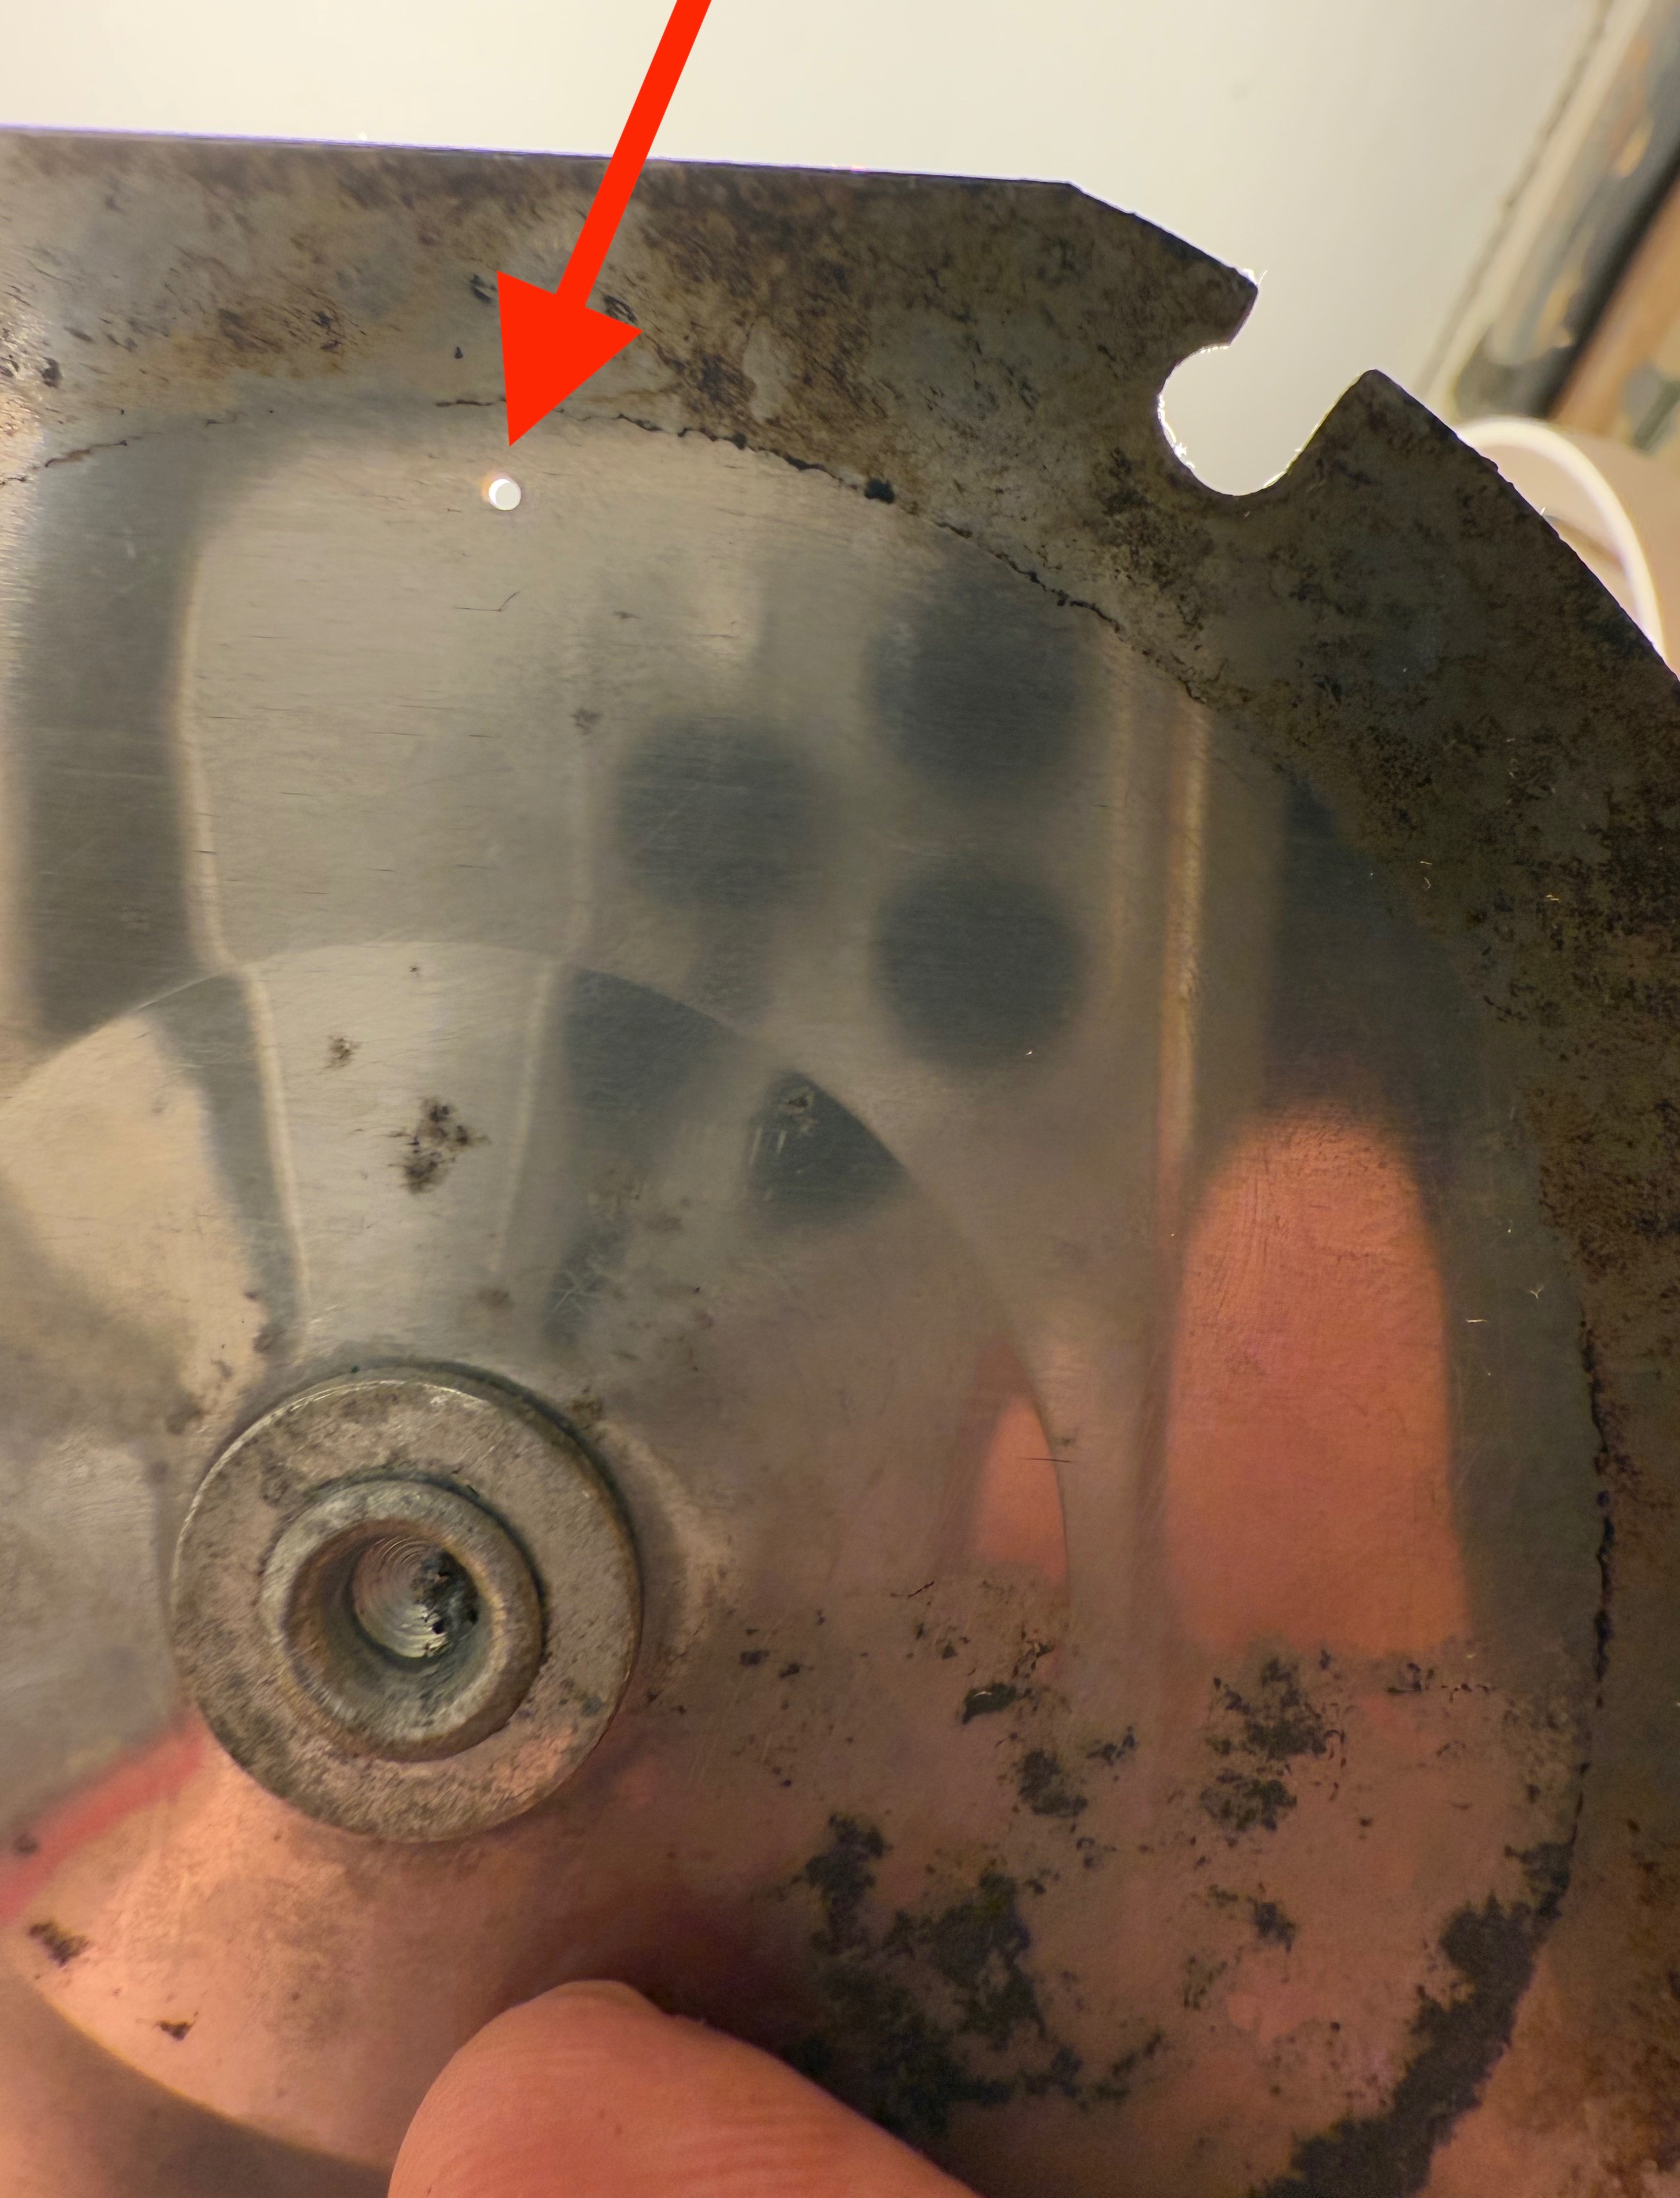
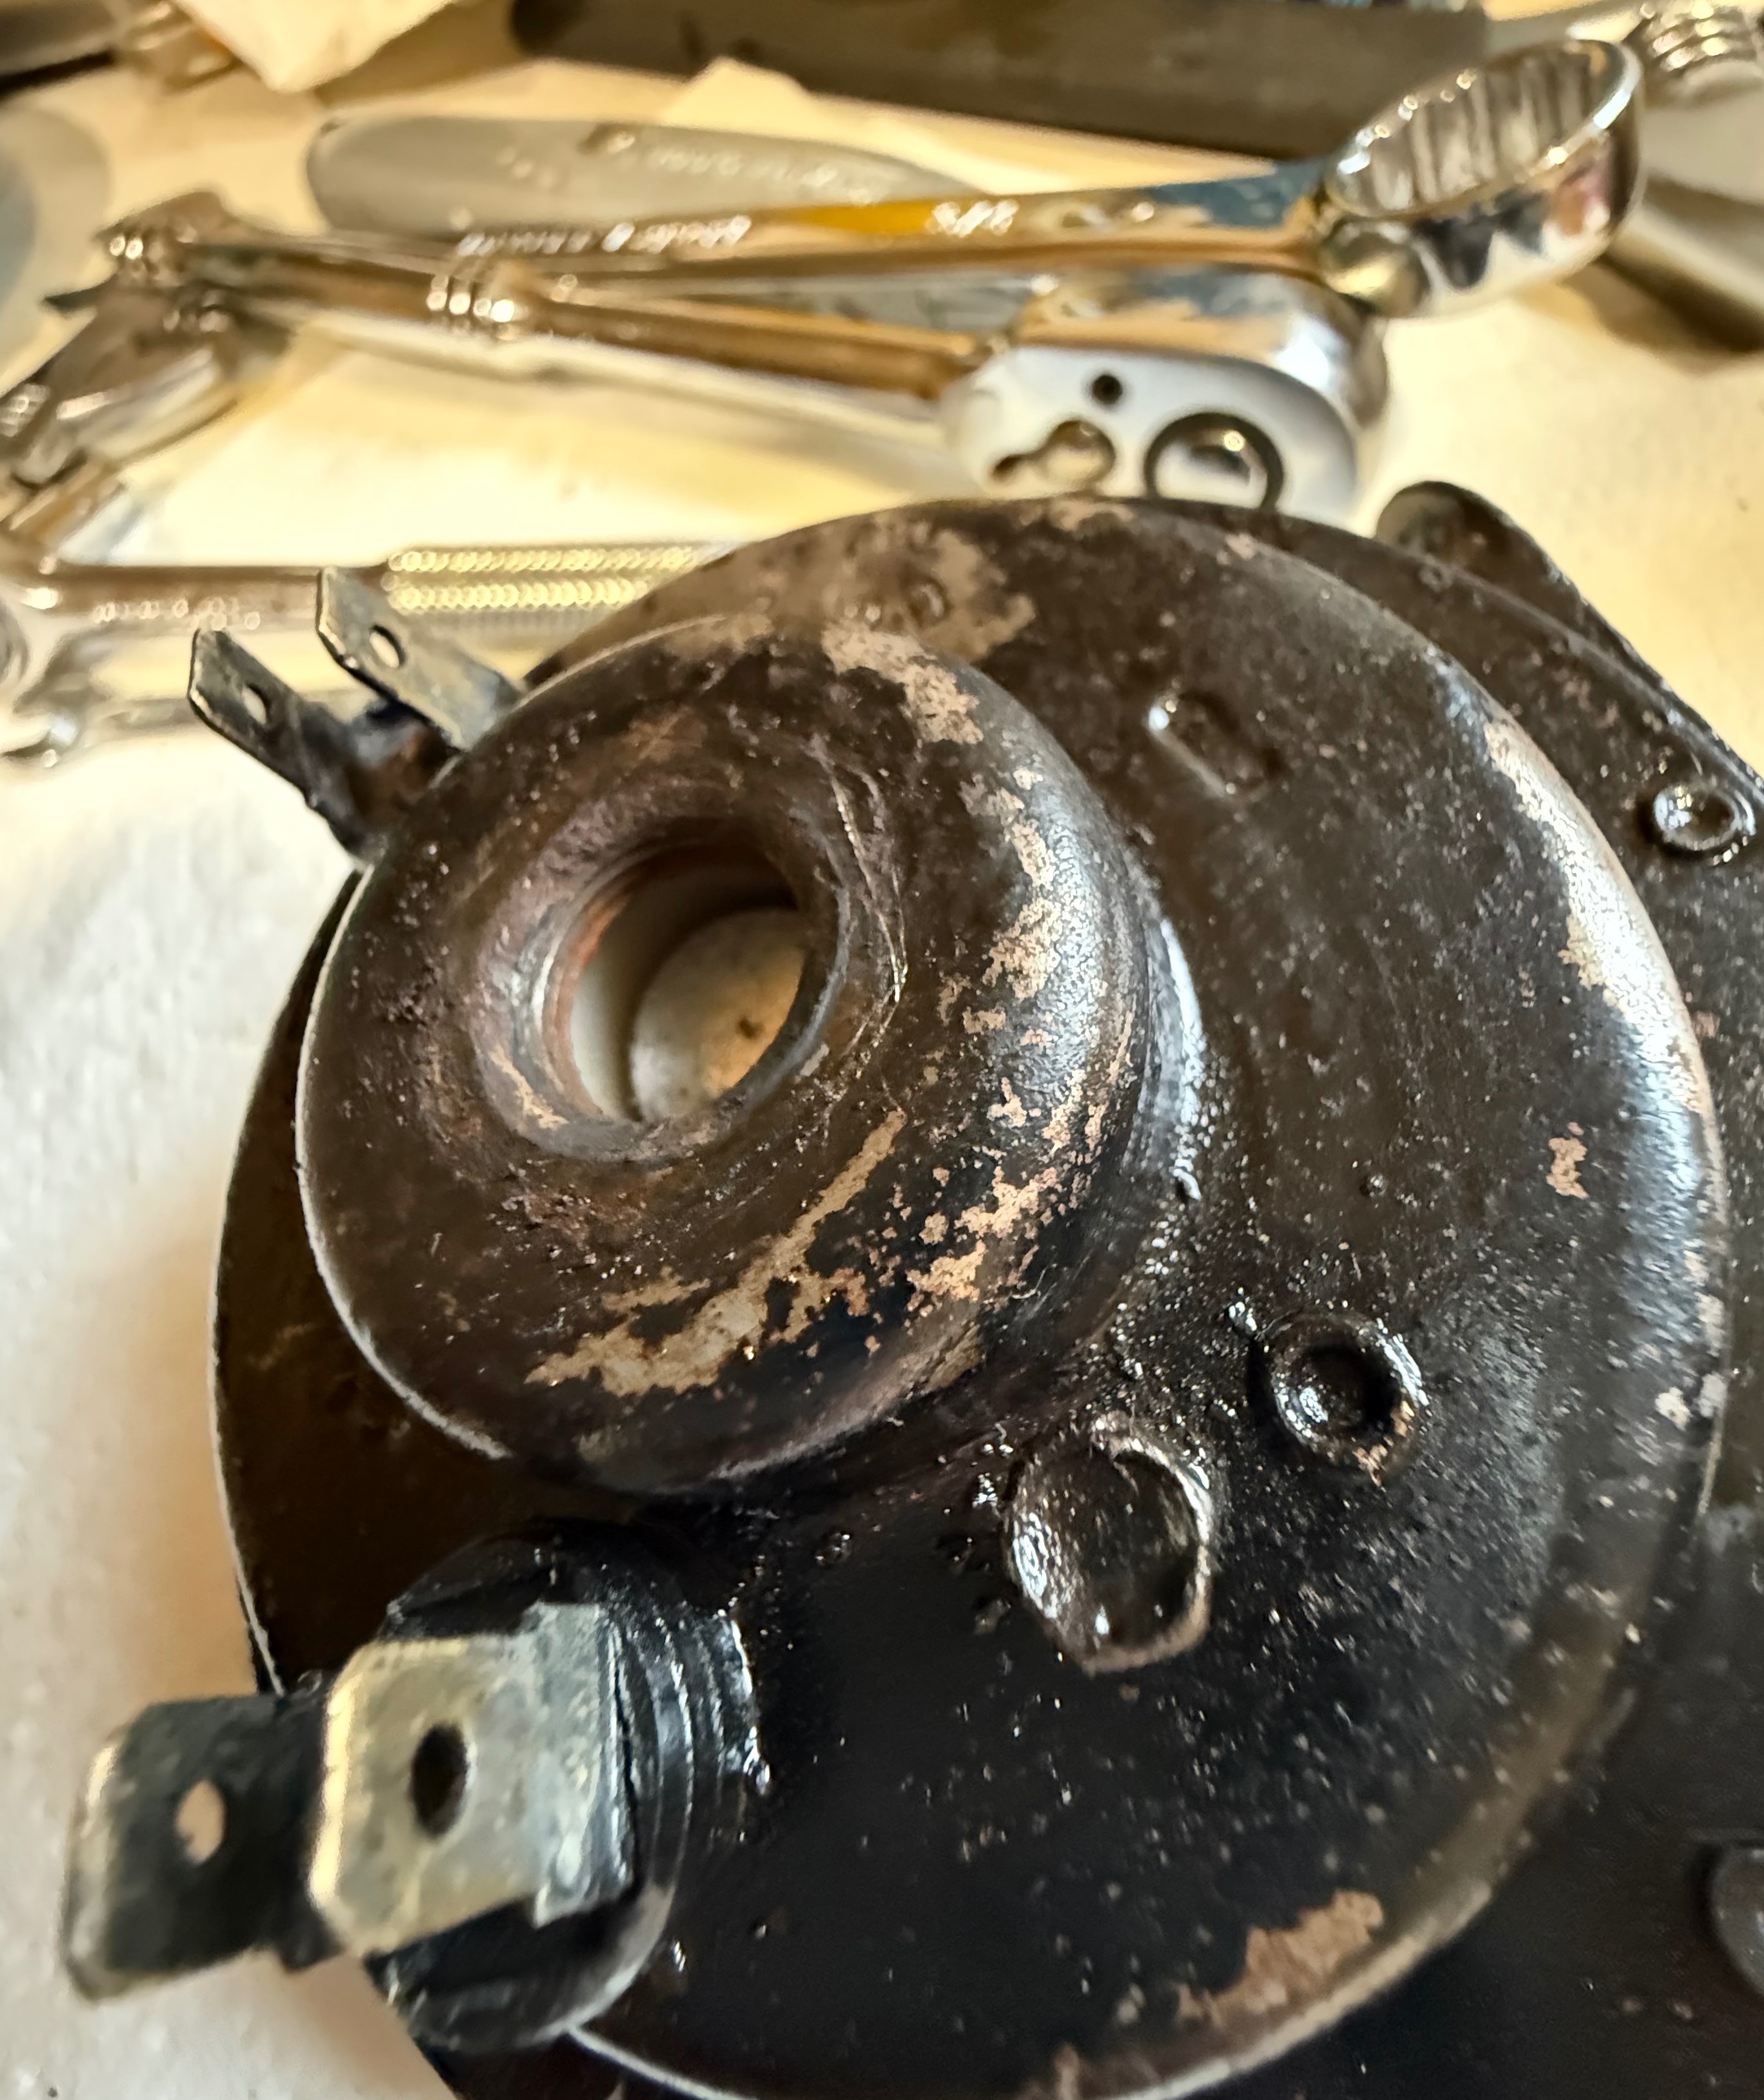
Since the horn still did not work I thought I had nothing to lose so I disassembled a stage further. I took out the points screw (arrowed) and then removed the various parts. This does not come apart easily and clearly is never intended to be taken apart during the life of the horn. Anyway, the points were heavily oxidised and after cleaning them and reassembling the horn now works again.
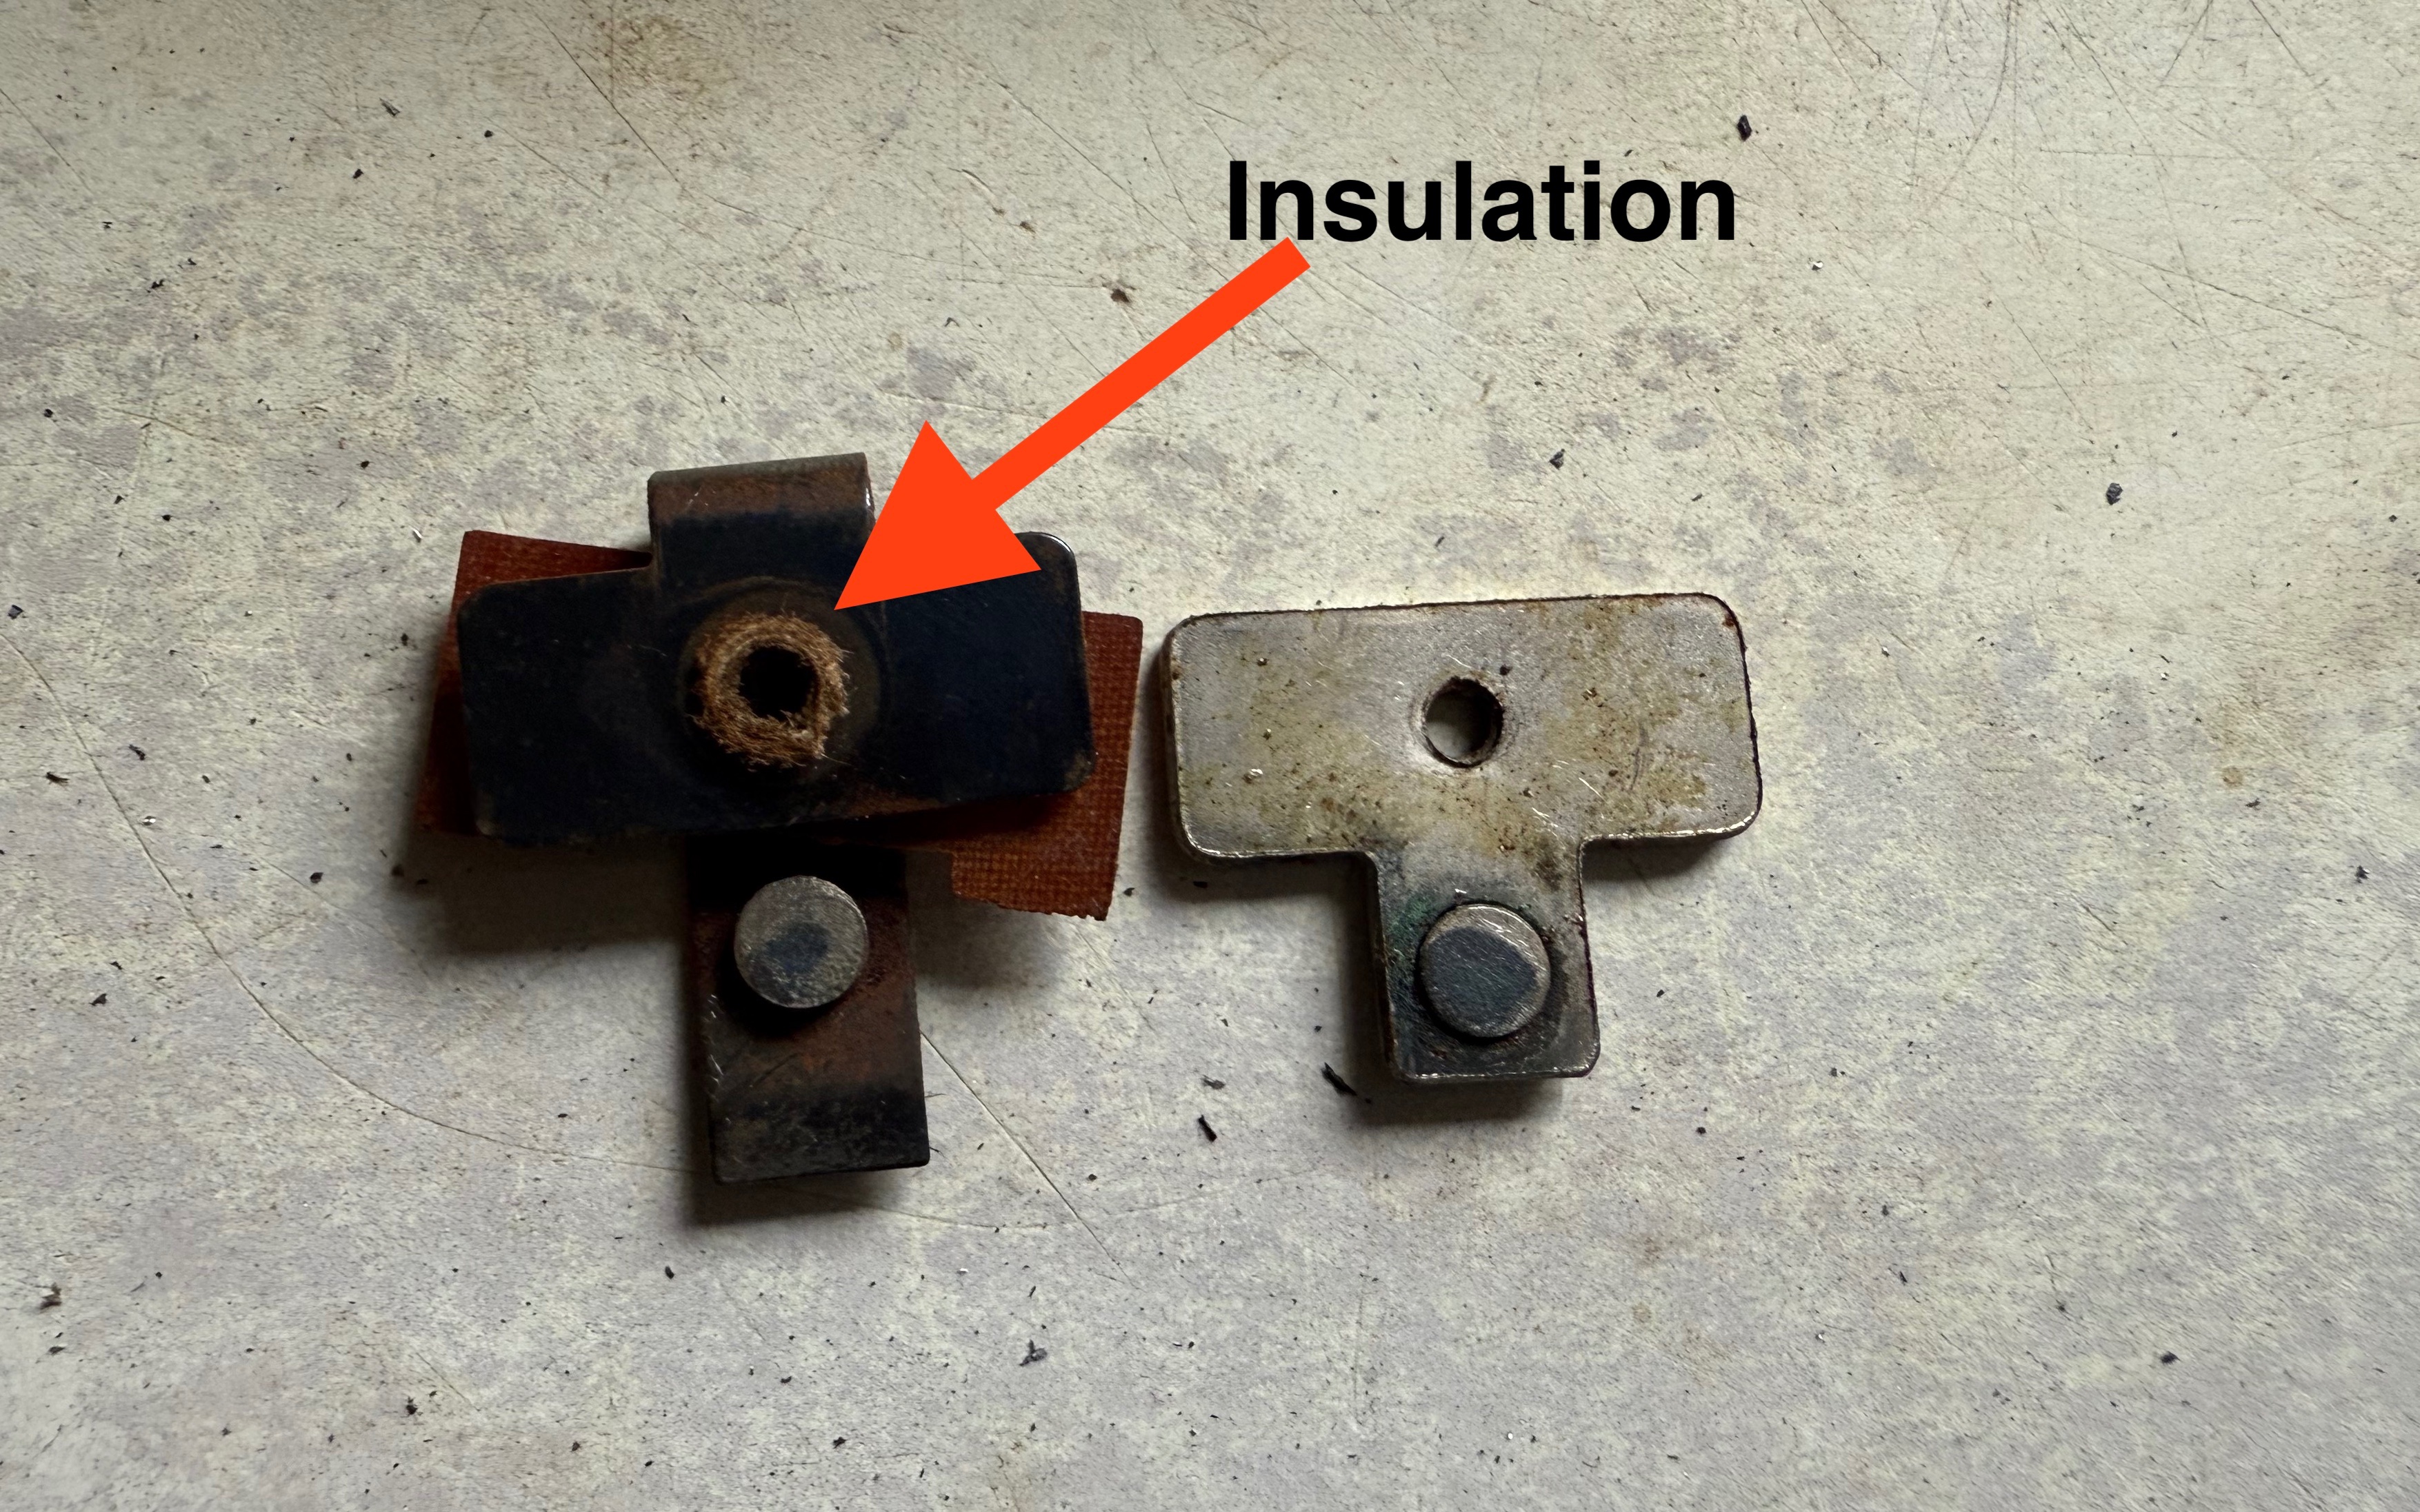
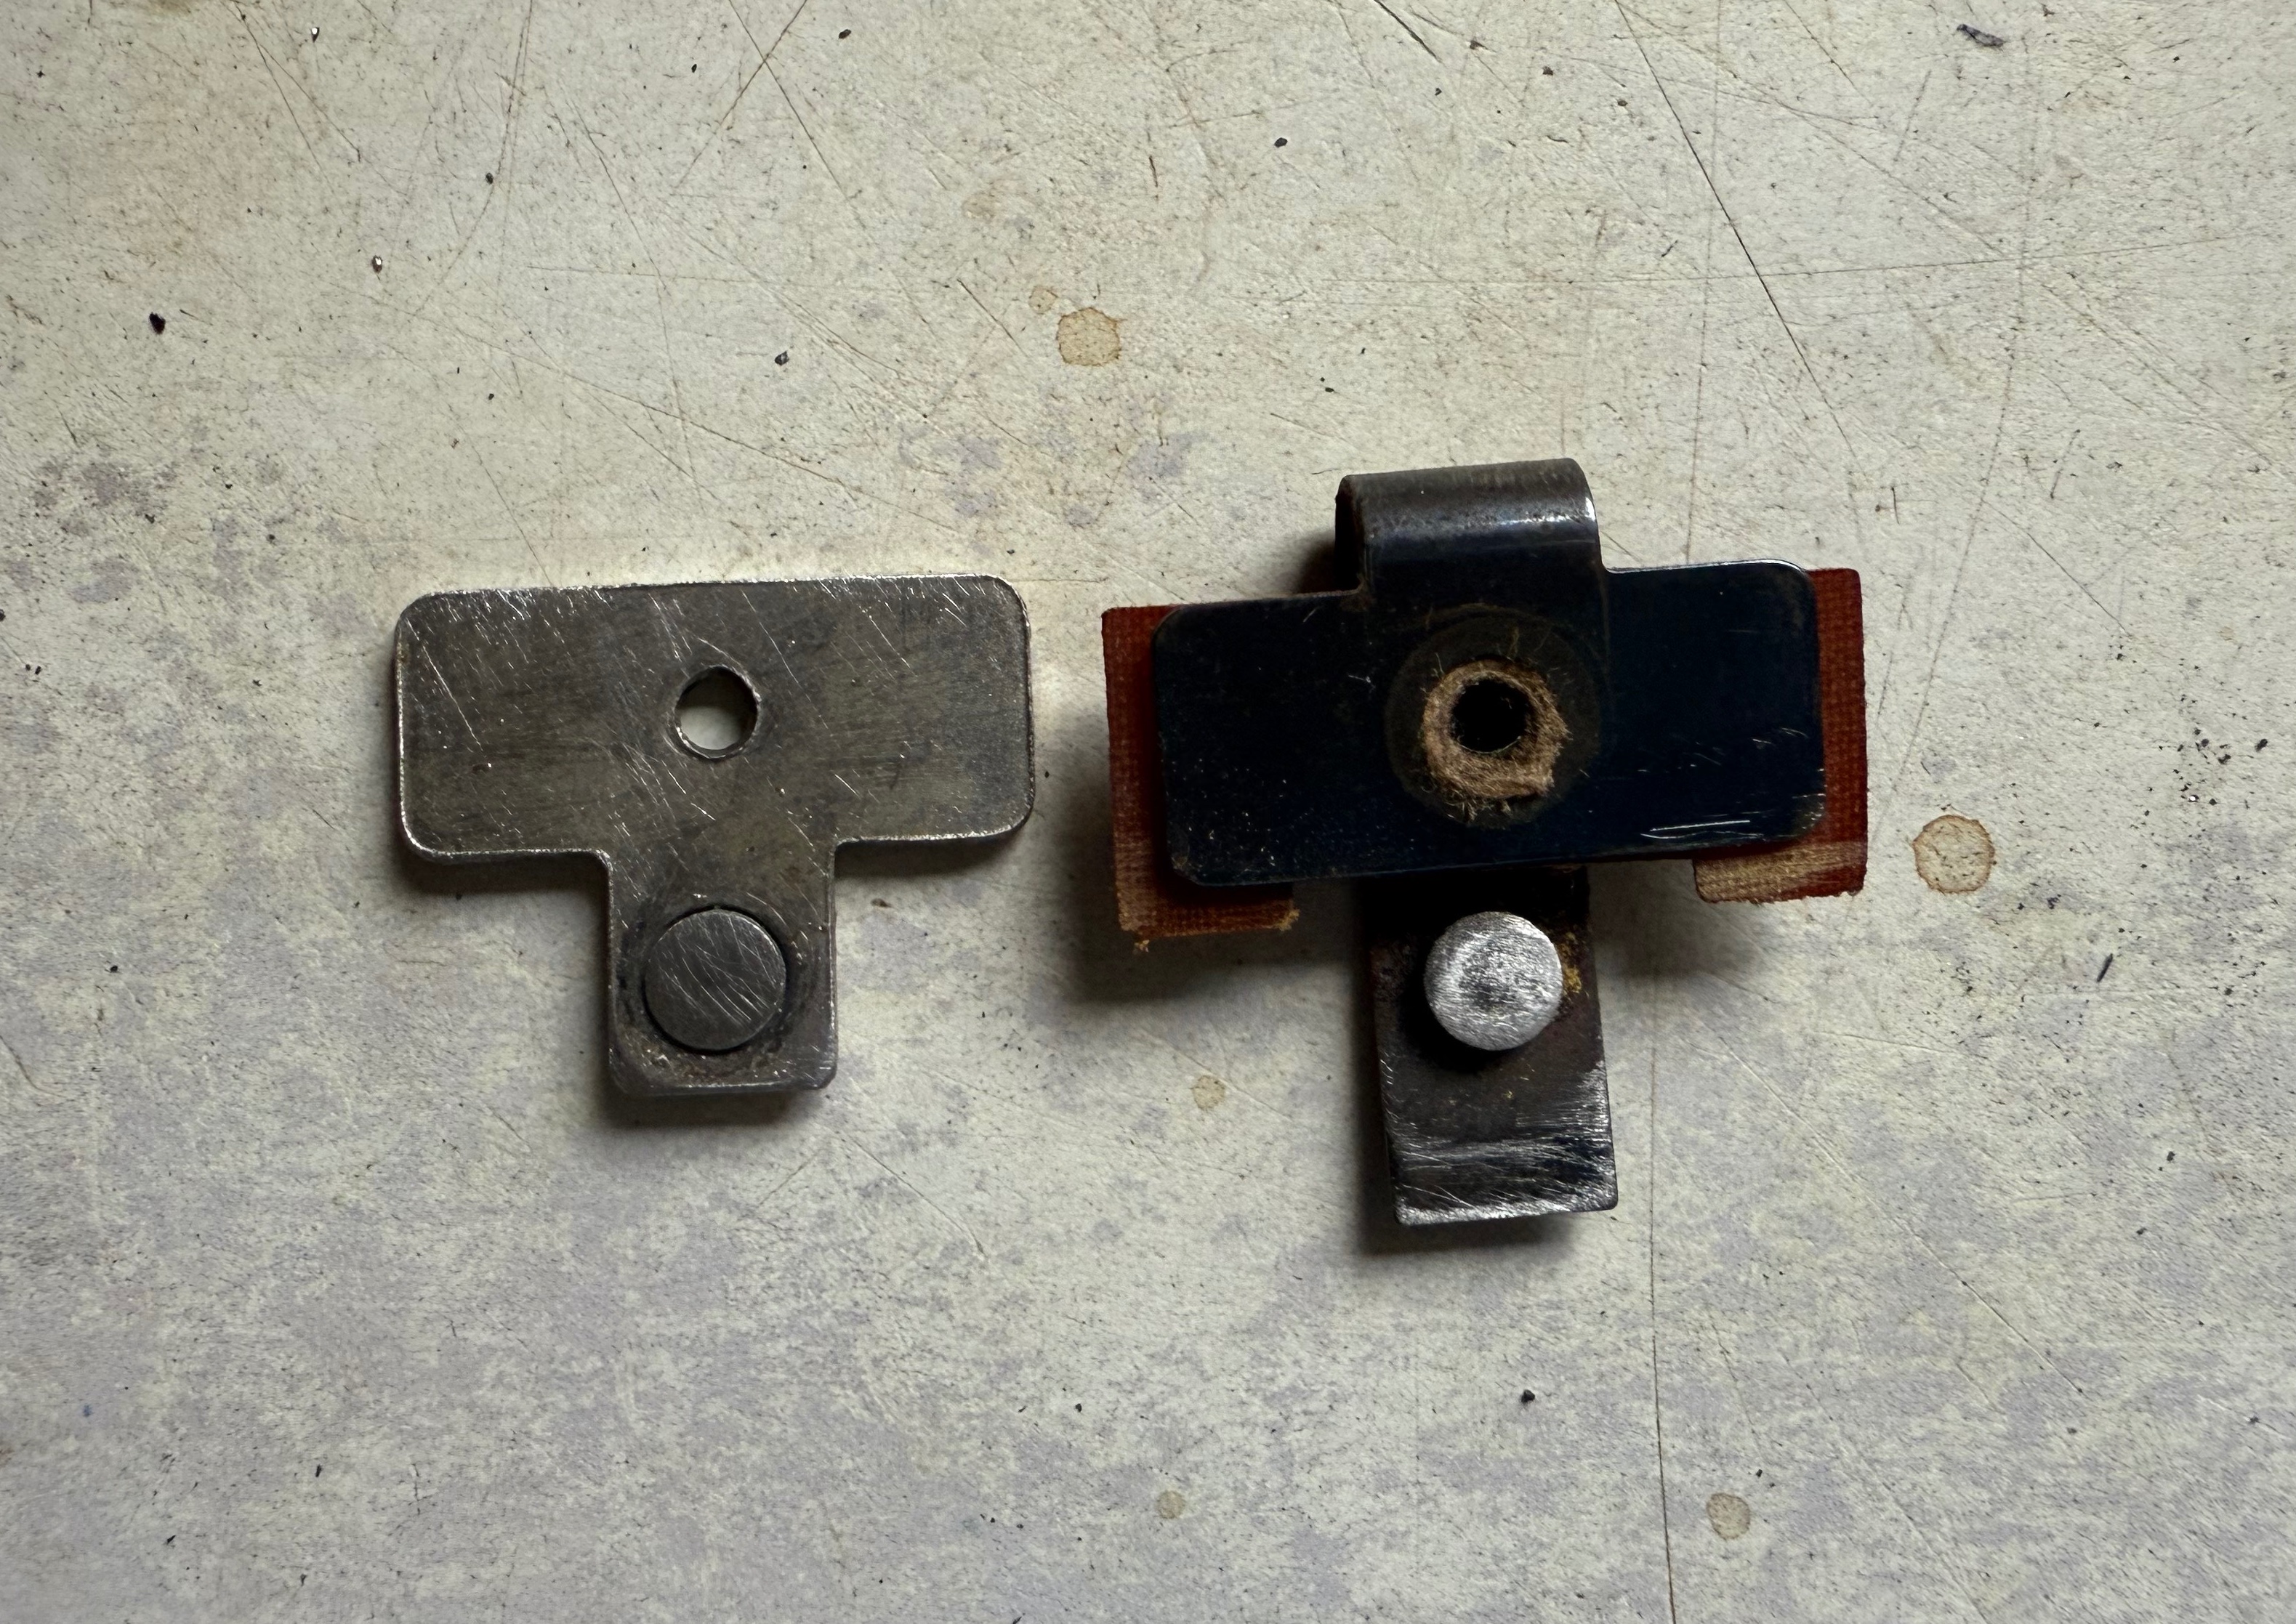
WARNING: It is very difficult to put the points back together because the space is highly restricted and you need to line everything up to get the screw back in. You must remember where the 2 insulator plates go and it is extremely fiddly. Do not take the points out of a functioning horn or you risk ruining it! There is some kind of fibre insulator around the screw and this must be retained or the points will be bridged (shorted). This is a last ditch technique.
Stephen
View showing points securing screw.
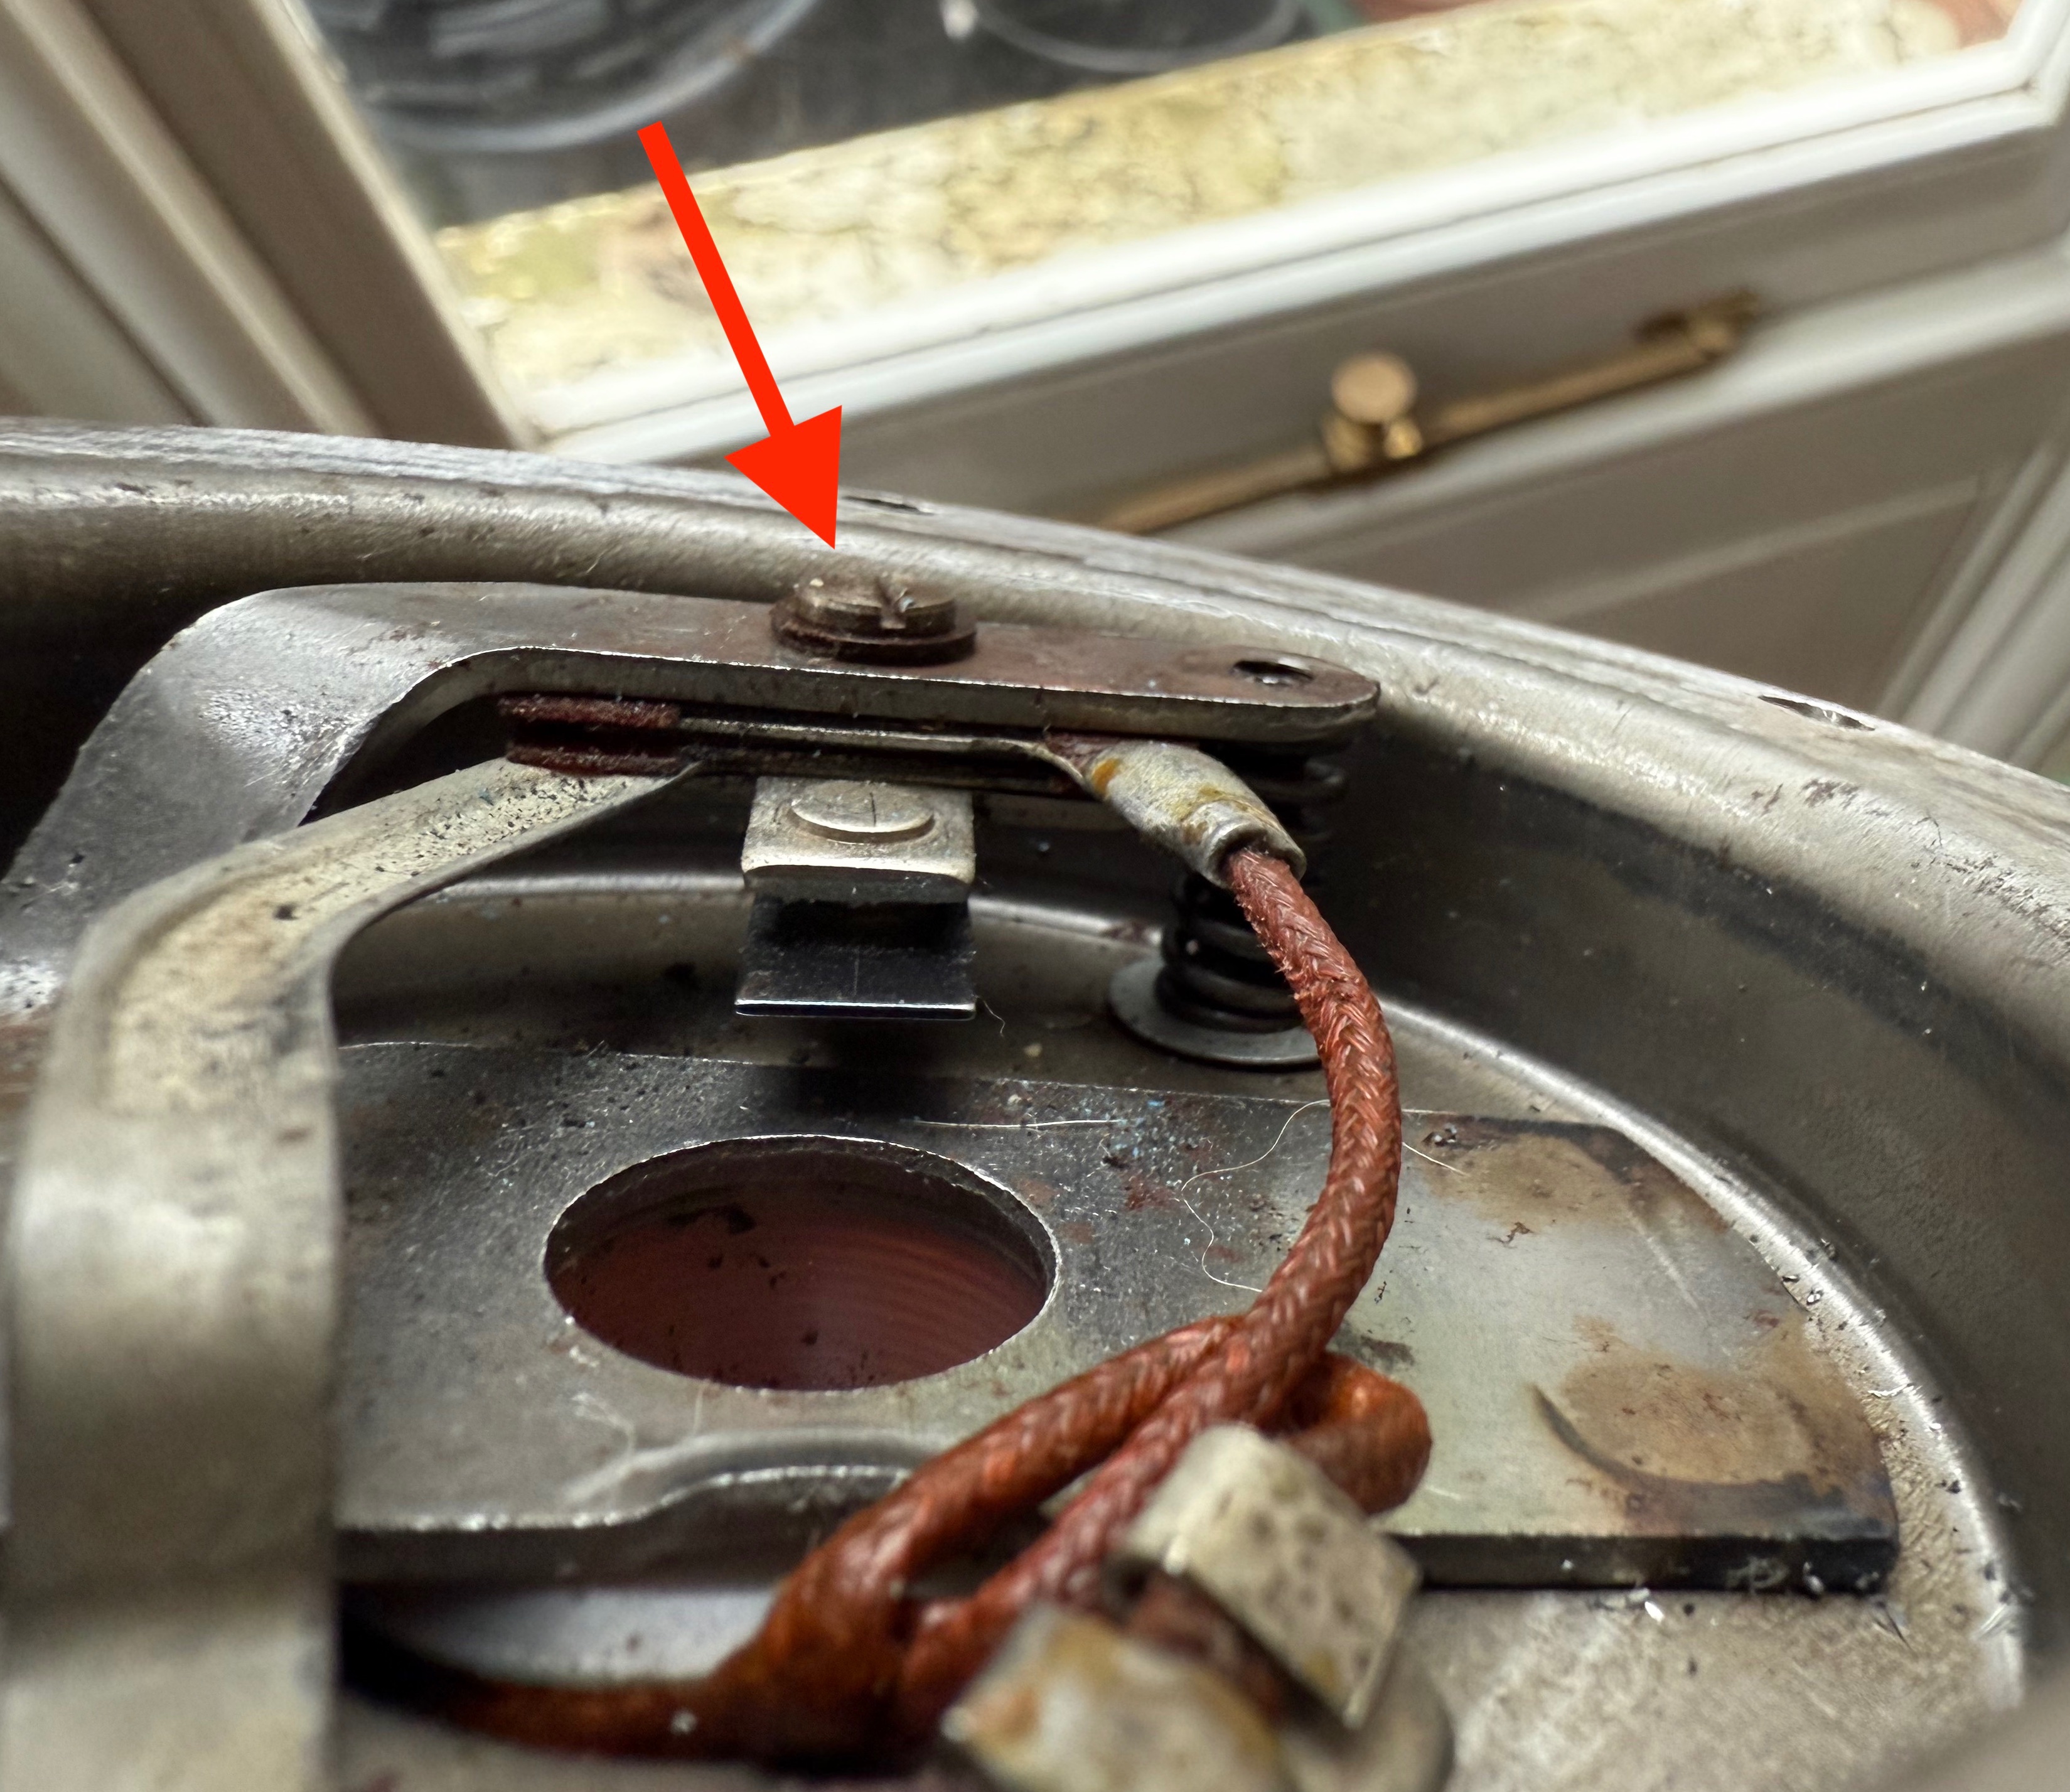
- IMG_1445.jpeg (1.87 MiB) Viewed 16149 times
Very dirty points. Multimeter showed open circuit
- IMG_1442.jpeg (2.48 MiB) Viewed 15979 times
Not perfect but much better. Multimeter reads 0.2 Ohms.
- IMG_1444.jpeg (2.26 MiB) Viewed 16149 times
Re: Lucas 9H Horn Repairs and adjustments
Posted: Thu Feb 20, 2025 11:08 am
by svenedin
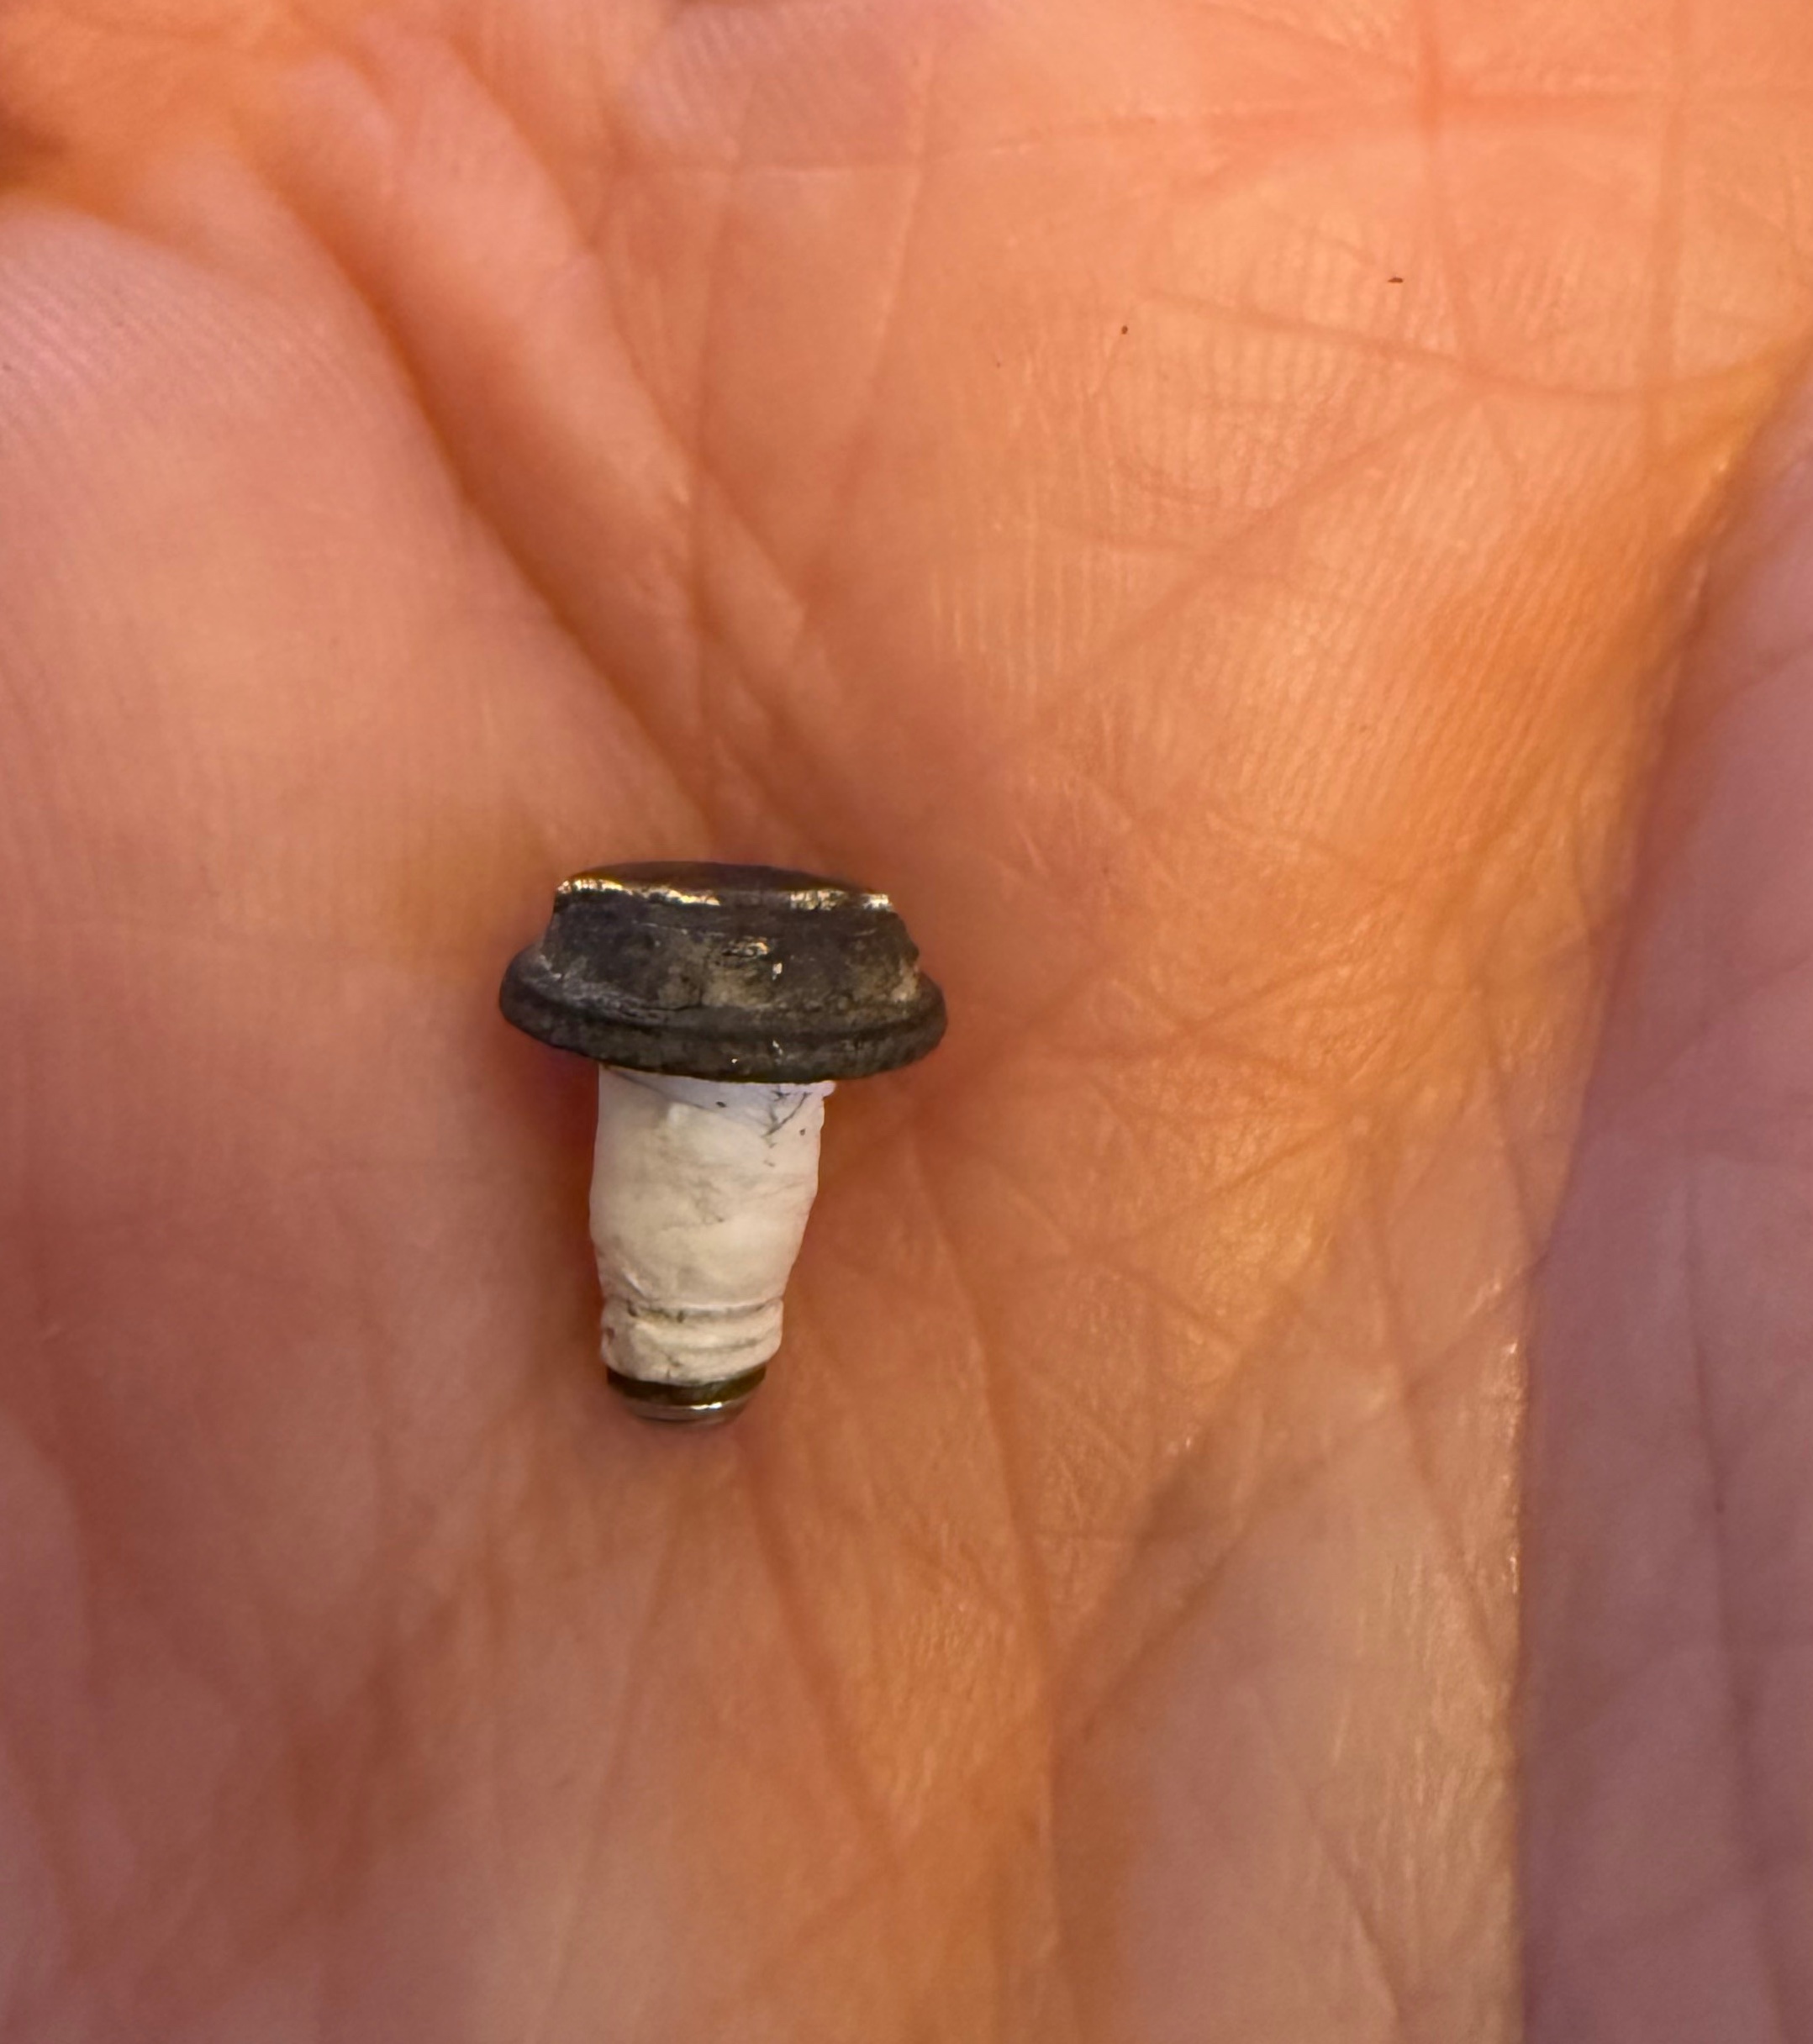
If the insulation around the shaft of the points assembly securing screw disintegrates, you can wrap the screw in PTFE plumber's tape.
My next experiment will be to wire a Transil (TVS or transient voltage suppressor) across the points. I will use the same Transil as is used in the SU fuel pump. If my experiment works, in theory there will be no more burnt points and a greatly extended life of the horn. However, the frequency of oscillation of the horn is much higher than in the fuel pump so I am not sure whether this will work.
Stephen
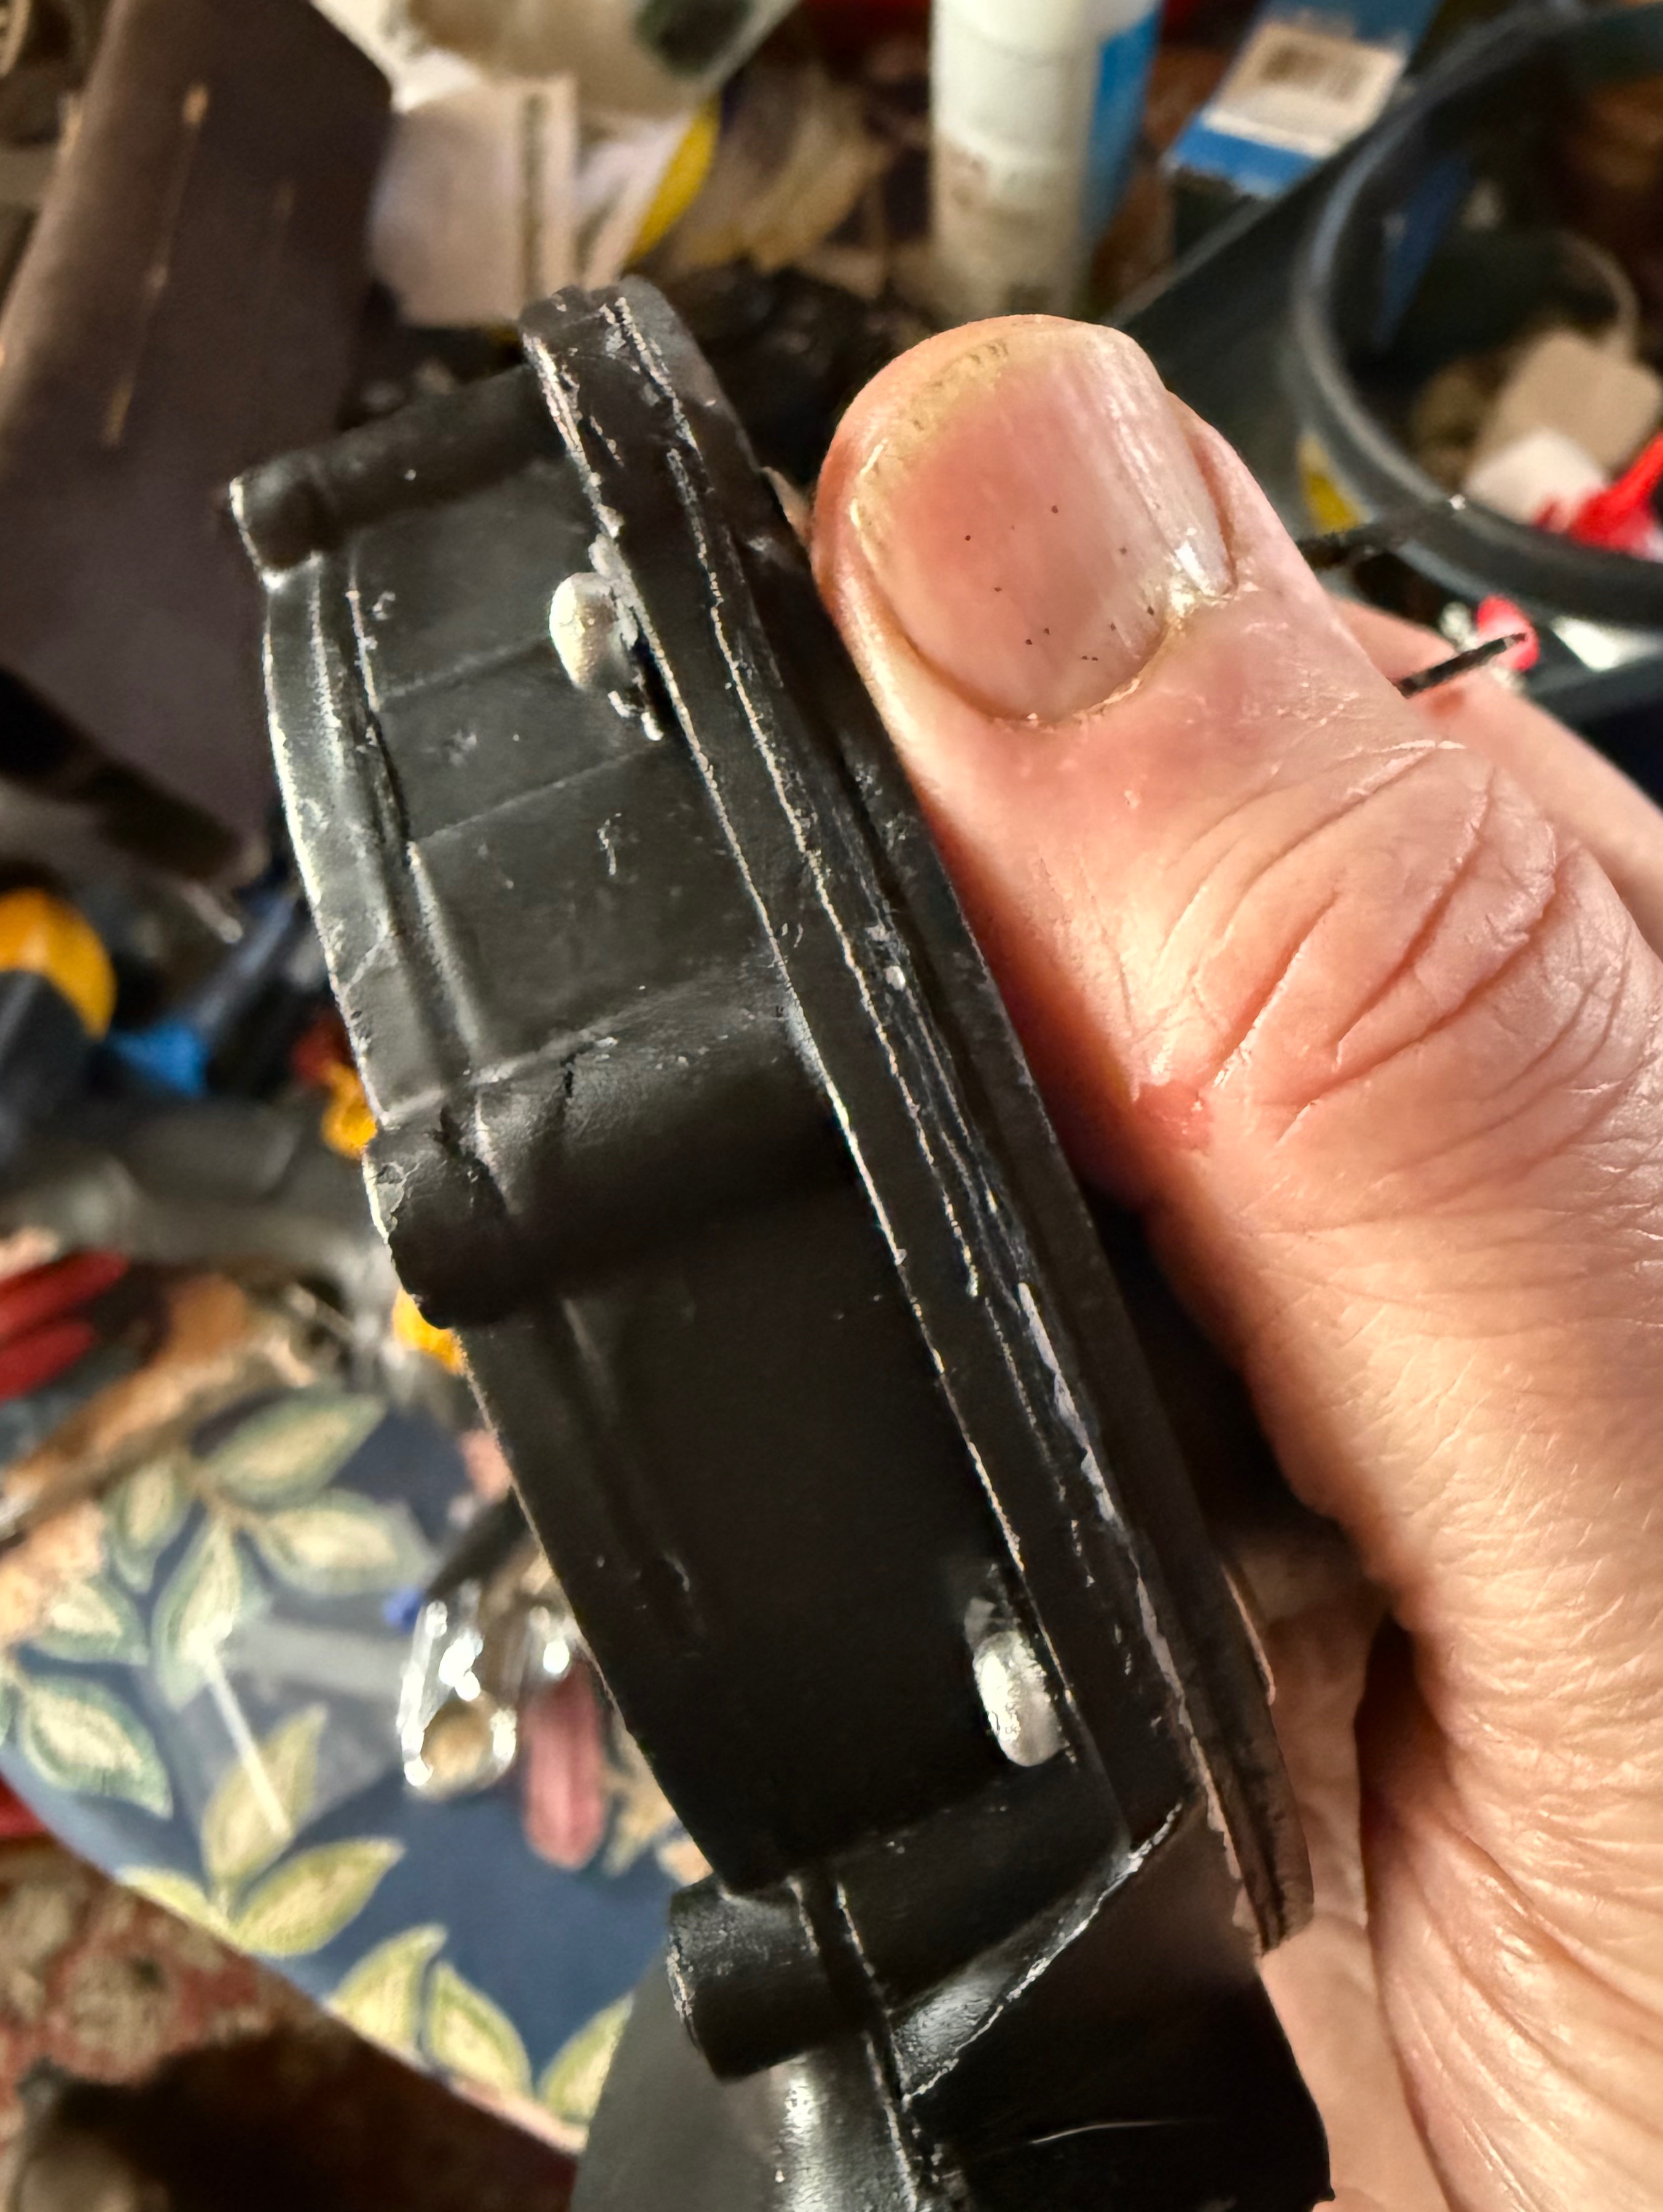
- IMG_1451.jpeg (596.89 KiB) Viewed 14989 times
Re: Lucas 9H Horn Repairs and adjustments
Posted: Thu Feb 20, 2025 5:53 pm
by myoldjalopy
"in theory there will be no more burnt points and a greatly extended life of the horn"
So an almost immortal horn then! My horn is 70 years old and still works fine
I'm pretty confident it has not been tinkered with in all that time.
Re: Lucas 9H Horn Repairs and adjustments
Posted: Thu Feb 20, 2025 5:56 pm
by svenedin
myoldjalopy wrote: ↑Thu Feb 20, 2025 5:53 pm
"in theory there will be no more burnt points and a greatly extended life of the horn"
So an almost immortal horn then! My horn is 70 years old and still works fine
I'm pretty confident it has not been tinkered with in all that time.
In theory yes!

What a lot of fuss for a humble pair of hooters!
Stephen