Page 1 of 2
1098 Gearbox Rebuild
Posted: Thu Dec 10, 2020 9:07 pm
by culp
I'm just starting out rebuilding the gearbox on my 1970 Traveller. I'd driven it for a while before the restoration and it wasn't bad it was not too noisy and it didn't jump out of gear. It did, however, make a terrible growling roaring noise in 1st and reverse. This I understand is worn layshaft and bearings. When I got the box out of the car the inside of the bell housing was an almighty mess with black gunge everywhere and there is quite a bit of wiggle in the input shaft. the output shaft is fairly solid
Is it realistic for a reasonably competent mechanic to tackle replacing the layshaft and gears and the front bearing and oil seal? Can I get the gearbox apart without separating the dreaded 1st/2nd synchroniser hub and the ball bearings and springs disappearing off the face of the earth? Is there anything else I should consider?
Thanks in advance

Alan
Re: 1098 Gearbox Rebuild
Posted: Thu Dec 10, 2020 9:38 pm
by les
Was trying to post a link for a rebuild by the Dorset owners club but although I had it on my homepage, it looks like you now need permission to view it. If true, it’s a shame because it was very helpful. Can anyone else access it ?
Re: 1098 Gearbox Rebuild
Posted: Thu Dec 10, 2020 10:01 pm
by chrischris59
Re: 1098 Gearbox Rebuild
Posted: Thu Dec 10, 2020 10:33 pm
by pgp001
You will more than likely find that the first gear ring is well worn judging by your description of the noise.
That was my experience when I did my own recent rebuild.
Its not too difficult to do if you follow those instructions.
The hardest part was fitting and machining the new tail bushing to size.
Phil
Re: 1098 Gearbox Rebuild
Posted: Thu Dec 10, 2020 11:09 pm
by les
Yes thanks, that will be the one but the link doesn’t load for me. Hopefully it will for culp.
Re: 1098 Gearbox Rebuild
Posted: Fri Dec 11, 2020 10:30 am
by culp
Oh you beauties! Just what the doctor ordered. My membership fee just paid itself back, thanks to one and all for the pointer.
Re: 1098 Gearbox Rebuild
Posted: Fri Dec 11, 2020 10:57 am
by don58van
Hi culp
Please let us know how you go. Pictures would be good.
BTW, there are tips on here on how to avoid the springs and balls firing across the room on this site. I bought a little gadget off the online marketplace to make loading the springs and balls foolproof. It is a cup shaped device with recesses to accommodate the balls and springs. A twist of the cup forces them into place so that the ring can be slid into place.
Wishing you well with your rebuild
Don
Re: 1098 Gearbox Rebuild
Posted: Fri Dec 11, 2020 11:04 am
by culp
Hello Don,
Do you have details of the tool? Whilst I am planning to avoid separating the two parts I may well wind up doing it inadvertantly.

Re: 1098 Gearbox Rebuild
Posted: Fri Dec 11, 2020 2:58 pm
by philthehill
Re: 1098 Gearbox Rebuild
Posted: Sat Dec 12, 2020 5:29 pm
by newagetraveller
The lay shaft and needle bearings will invariably need replacing. I have never needed to replace the bearing that the third motion shaft runs in and the only problem I had with a first motion shaft was when the bearing cage disintegrated.
I have reassembled that synchro ring with the springs and little balls using two big jubilee clips and three electrician's screwdrivers.
The thing that you have to be careful about is the three selector forks with their rods and springs and plungers. A mistake here and you will find yourself stuck in one gear or jumping out of gear.
Re: 1098 Gearbox Rebuild
Posted: Sat Dec 12, 2020 6:34 pm
by culp
I have the gearbox apart, so far so good.
the front cover is leaky and the first motion shaft has lots of runout. New bearing
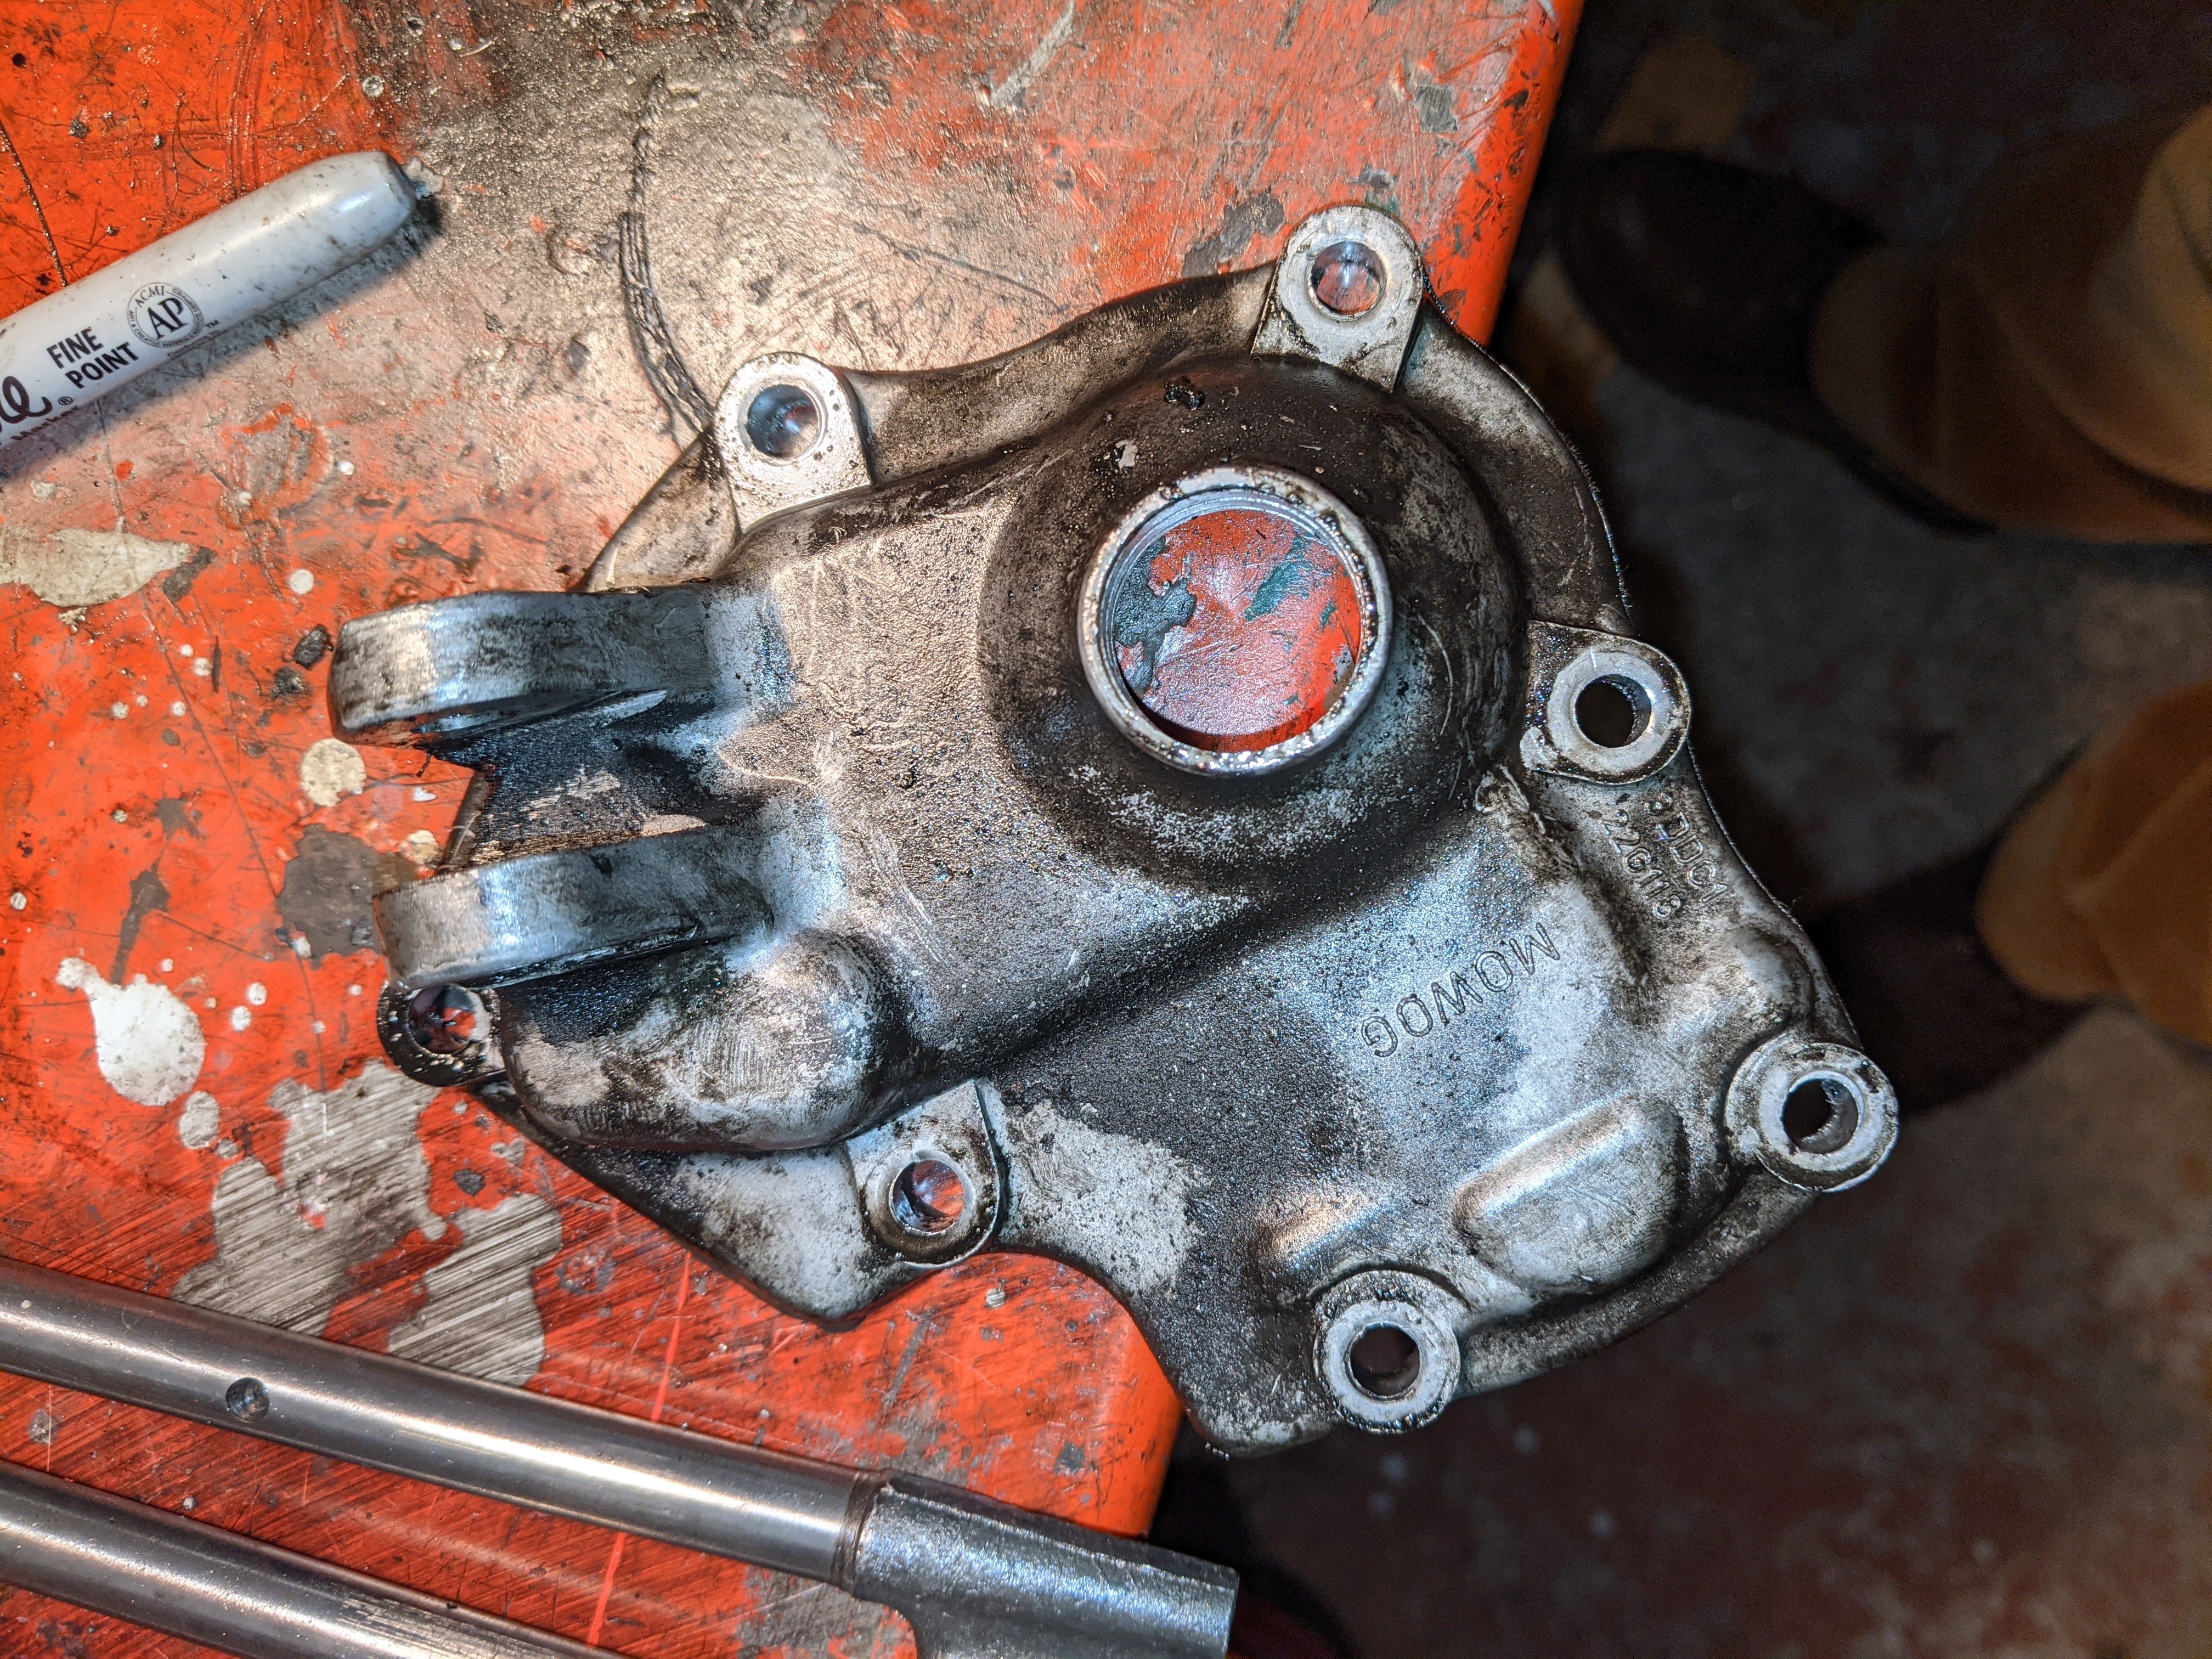
- gearbox front cover
- PXL_20201212_180616984.jpg (3.36 MiB) Viewed 4561 times
the selector fork rod detent grooves seem fine to me
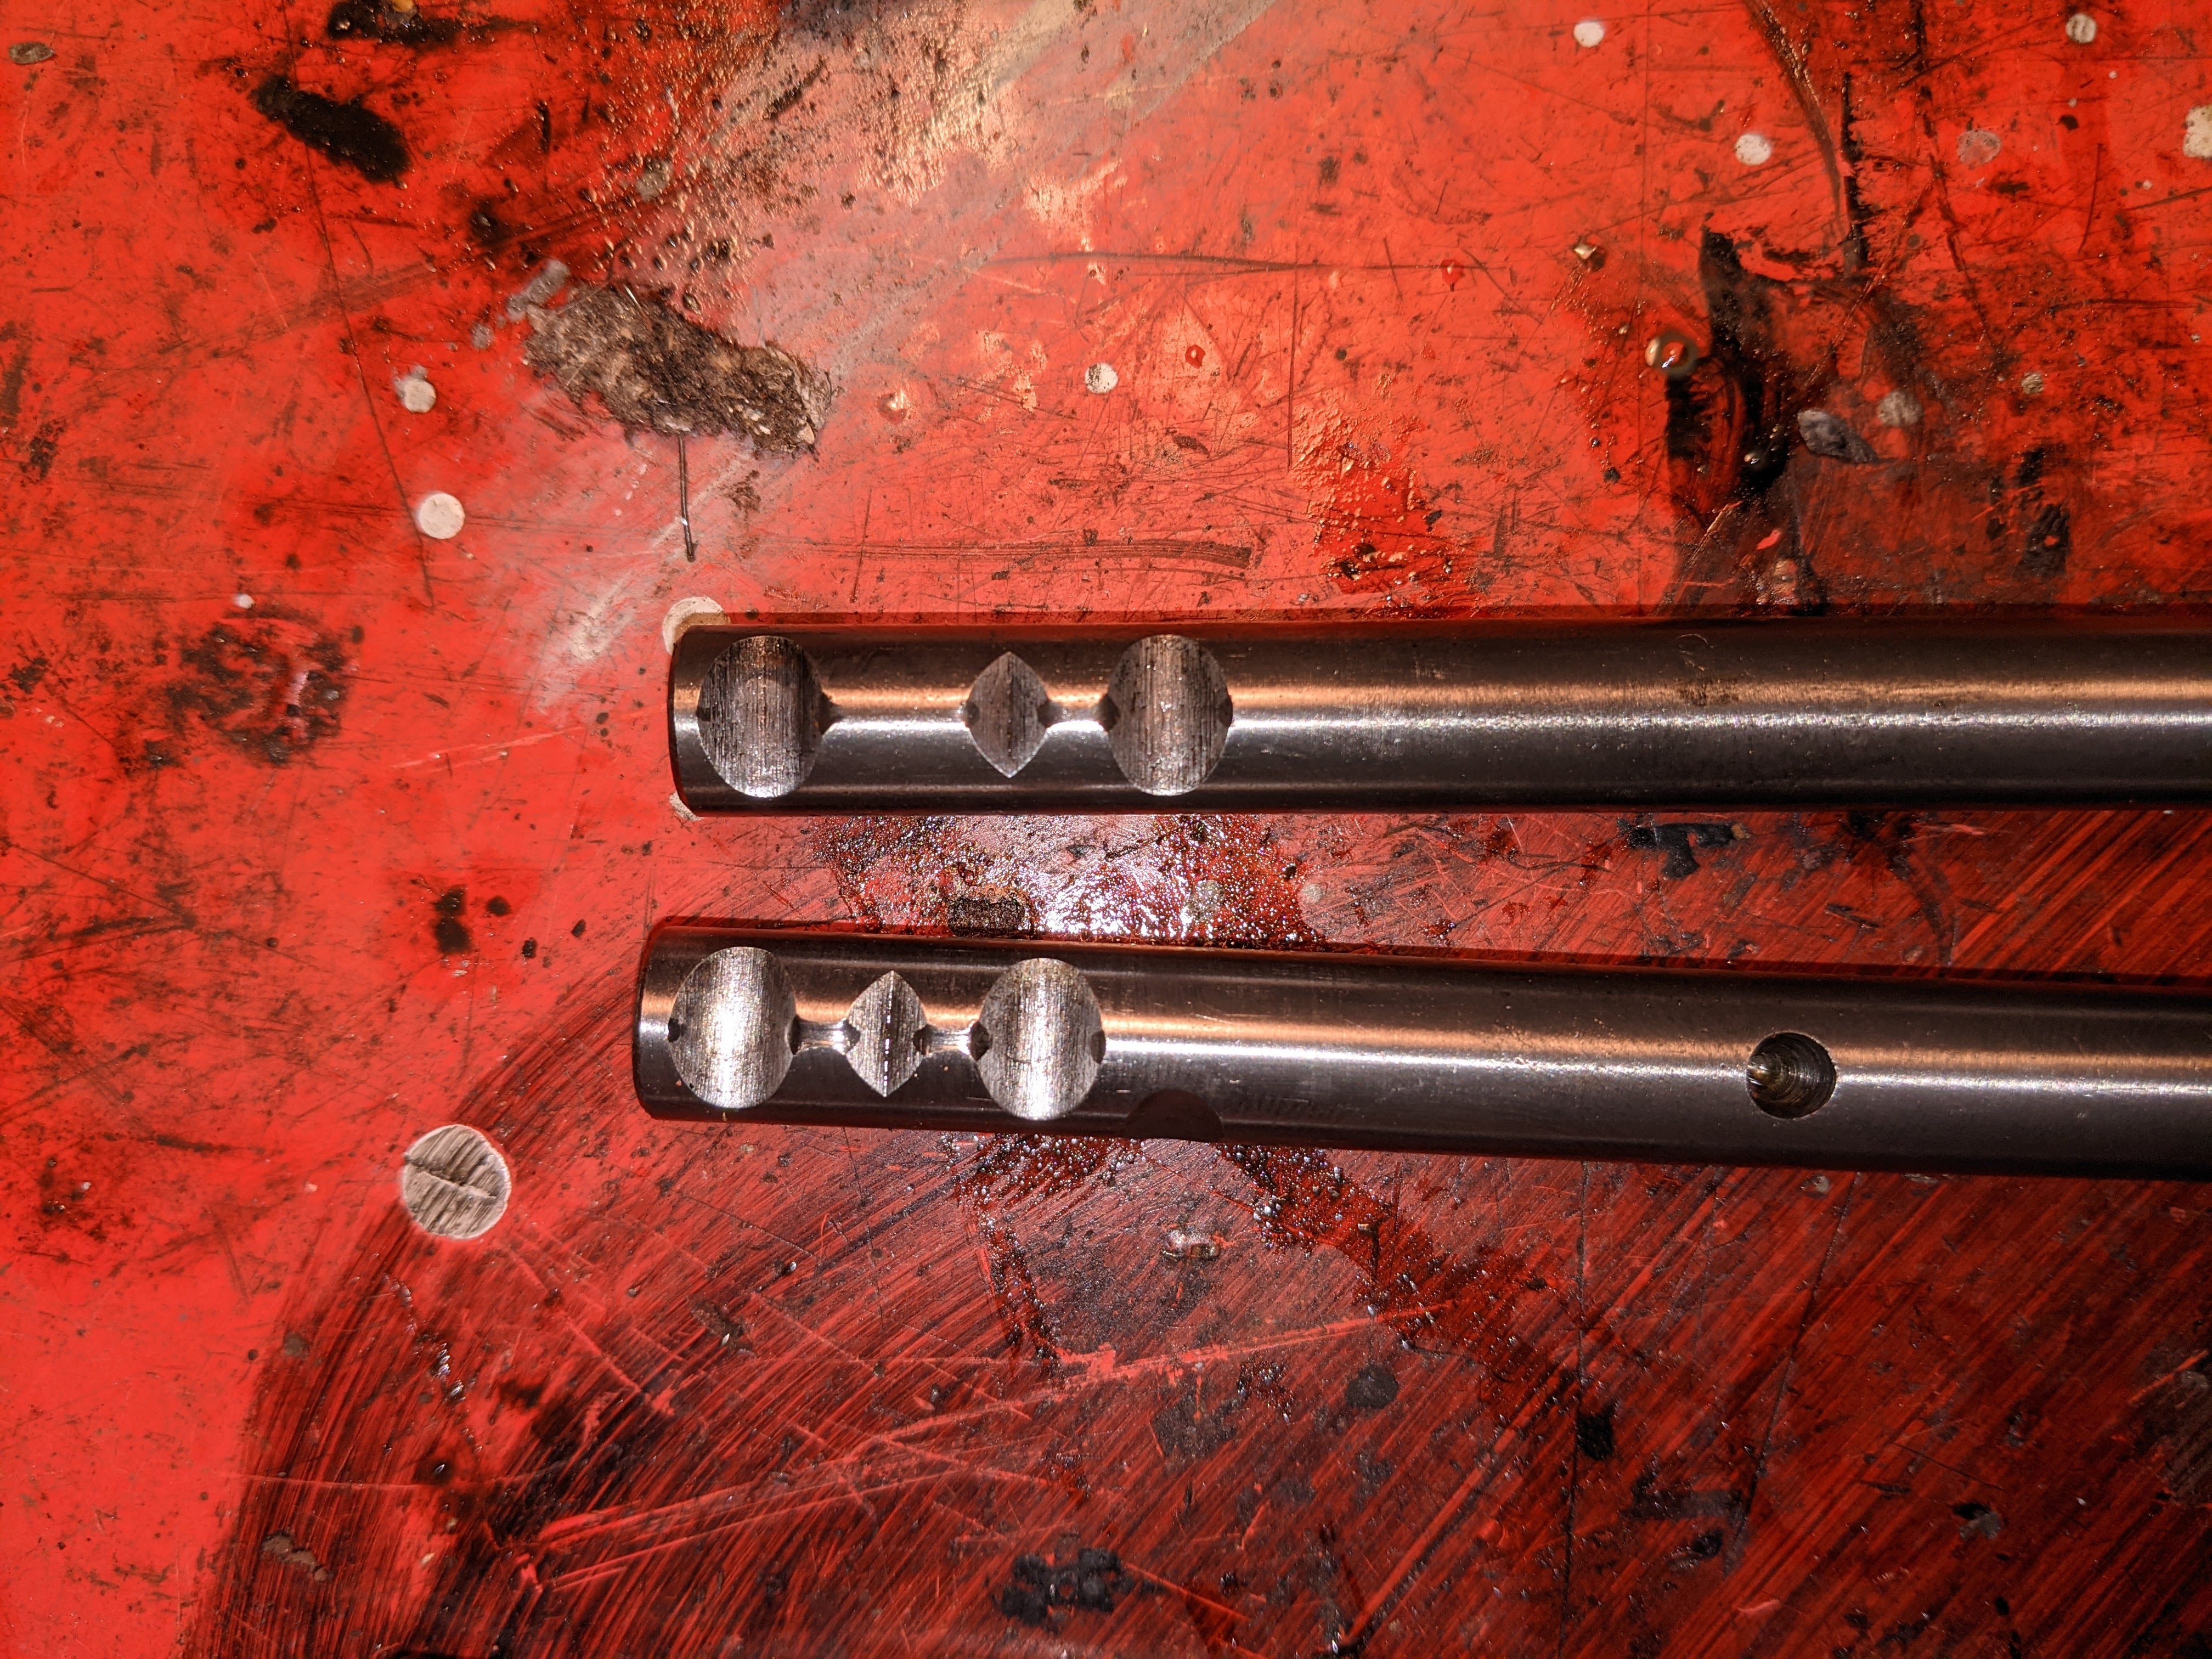
- selector fork detent grooves
- PXL_20201212_180557539.jpg (2.65 MiB) Viewed 4561 times
There's 8 thou endfloat in the laygear thrust washers, I need to see if that's acceptable
The layshaft seems fine and not too worn
what has surprised me is the reverse idler and shaft which is very....very worn

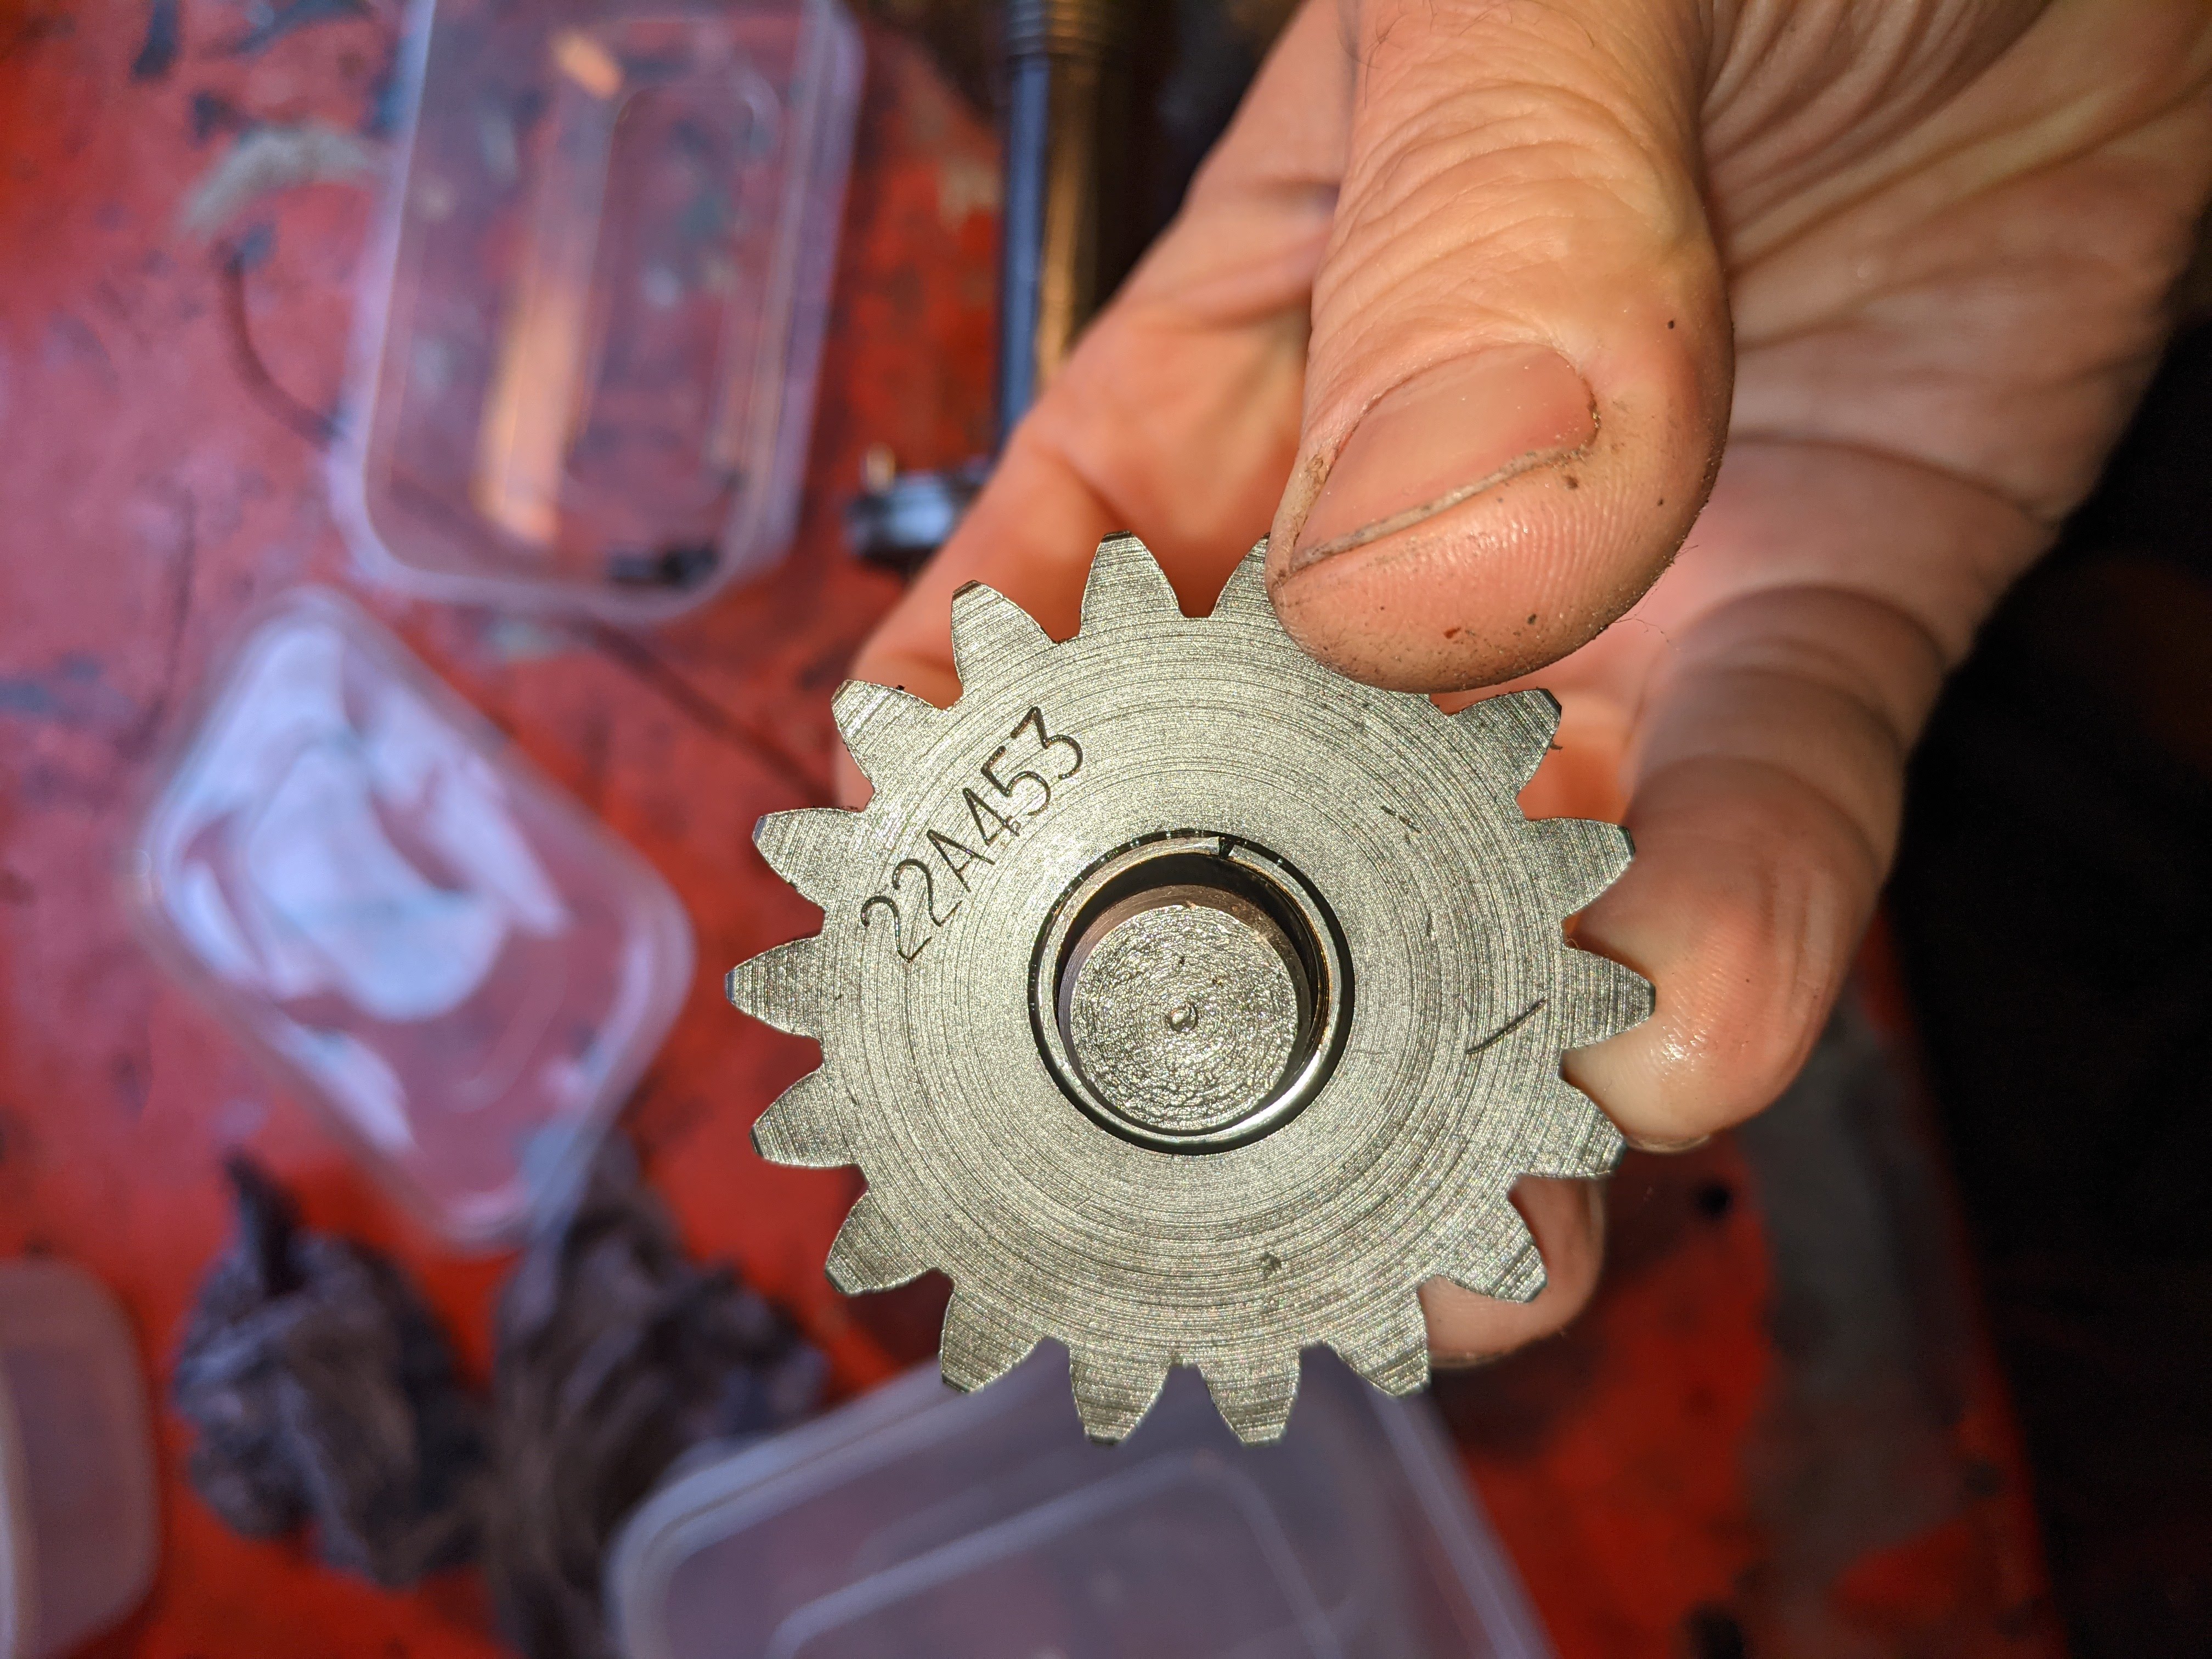
- worn reverse idler bush
- PXL_20201212_130335884.jpg (2.28 MiB) Viewed 4561 times
that has lead to very worn teeth on the idler
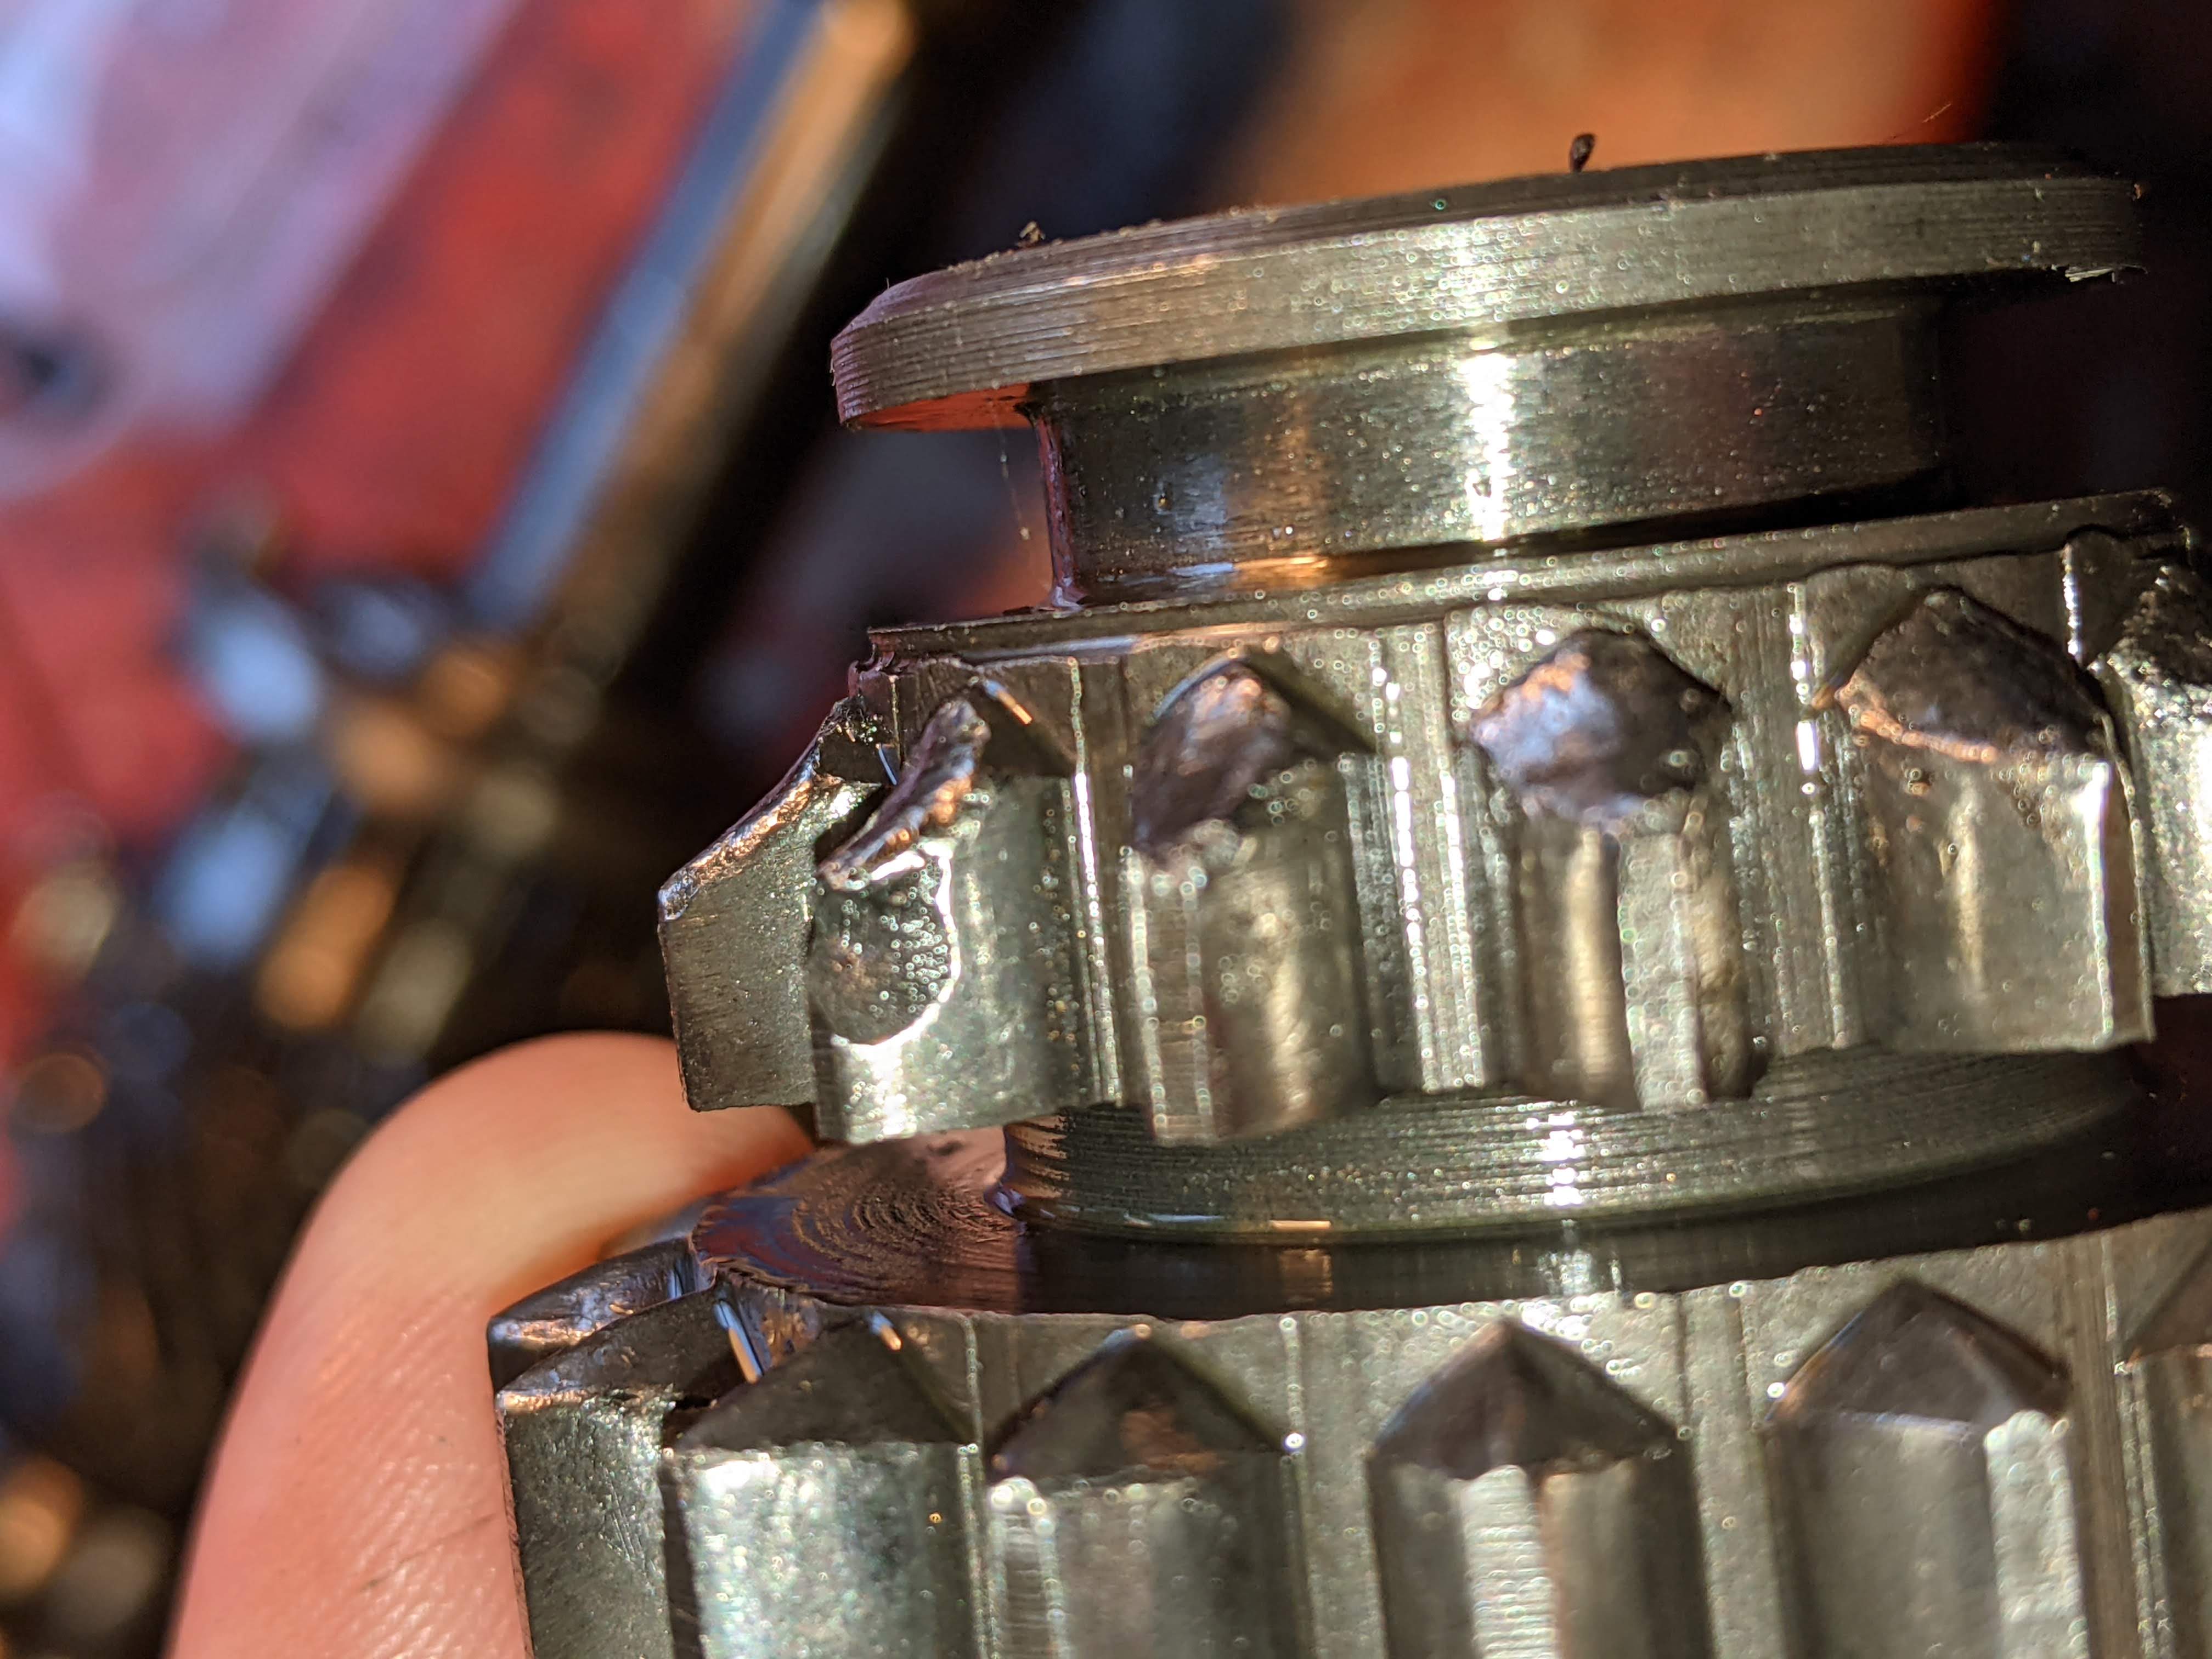
- damaged reverse idler teeth
- PXL_20201212_130507797.jpg (624.67 KiB) Viewed 4561 times
which has in-turn worn the teeth on the laygear
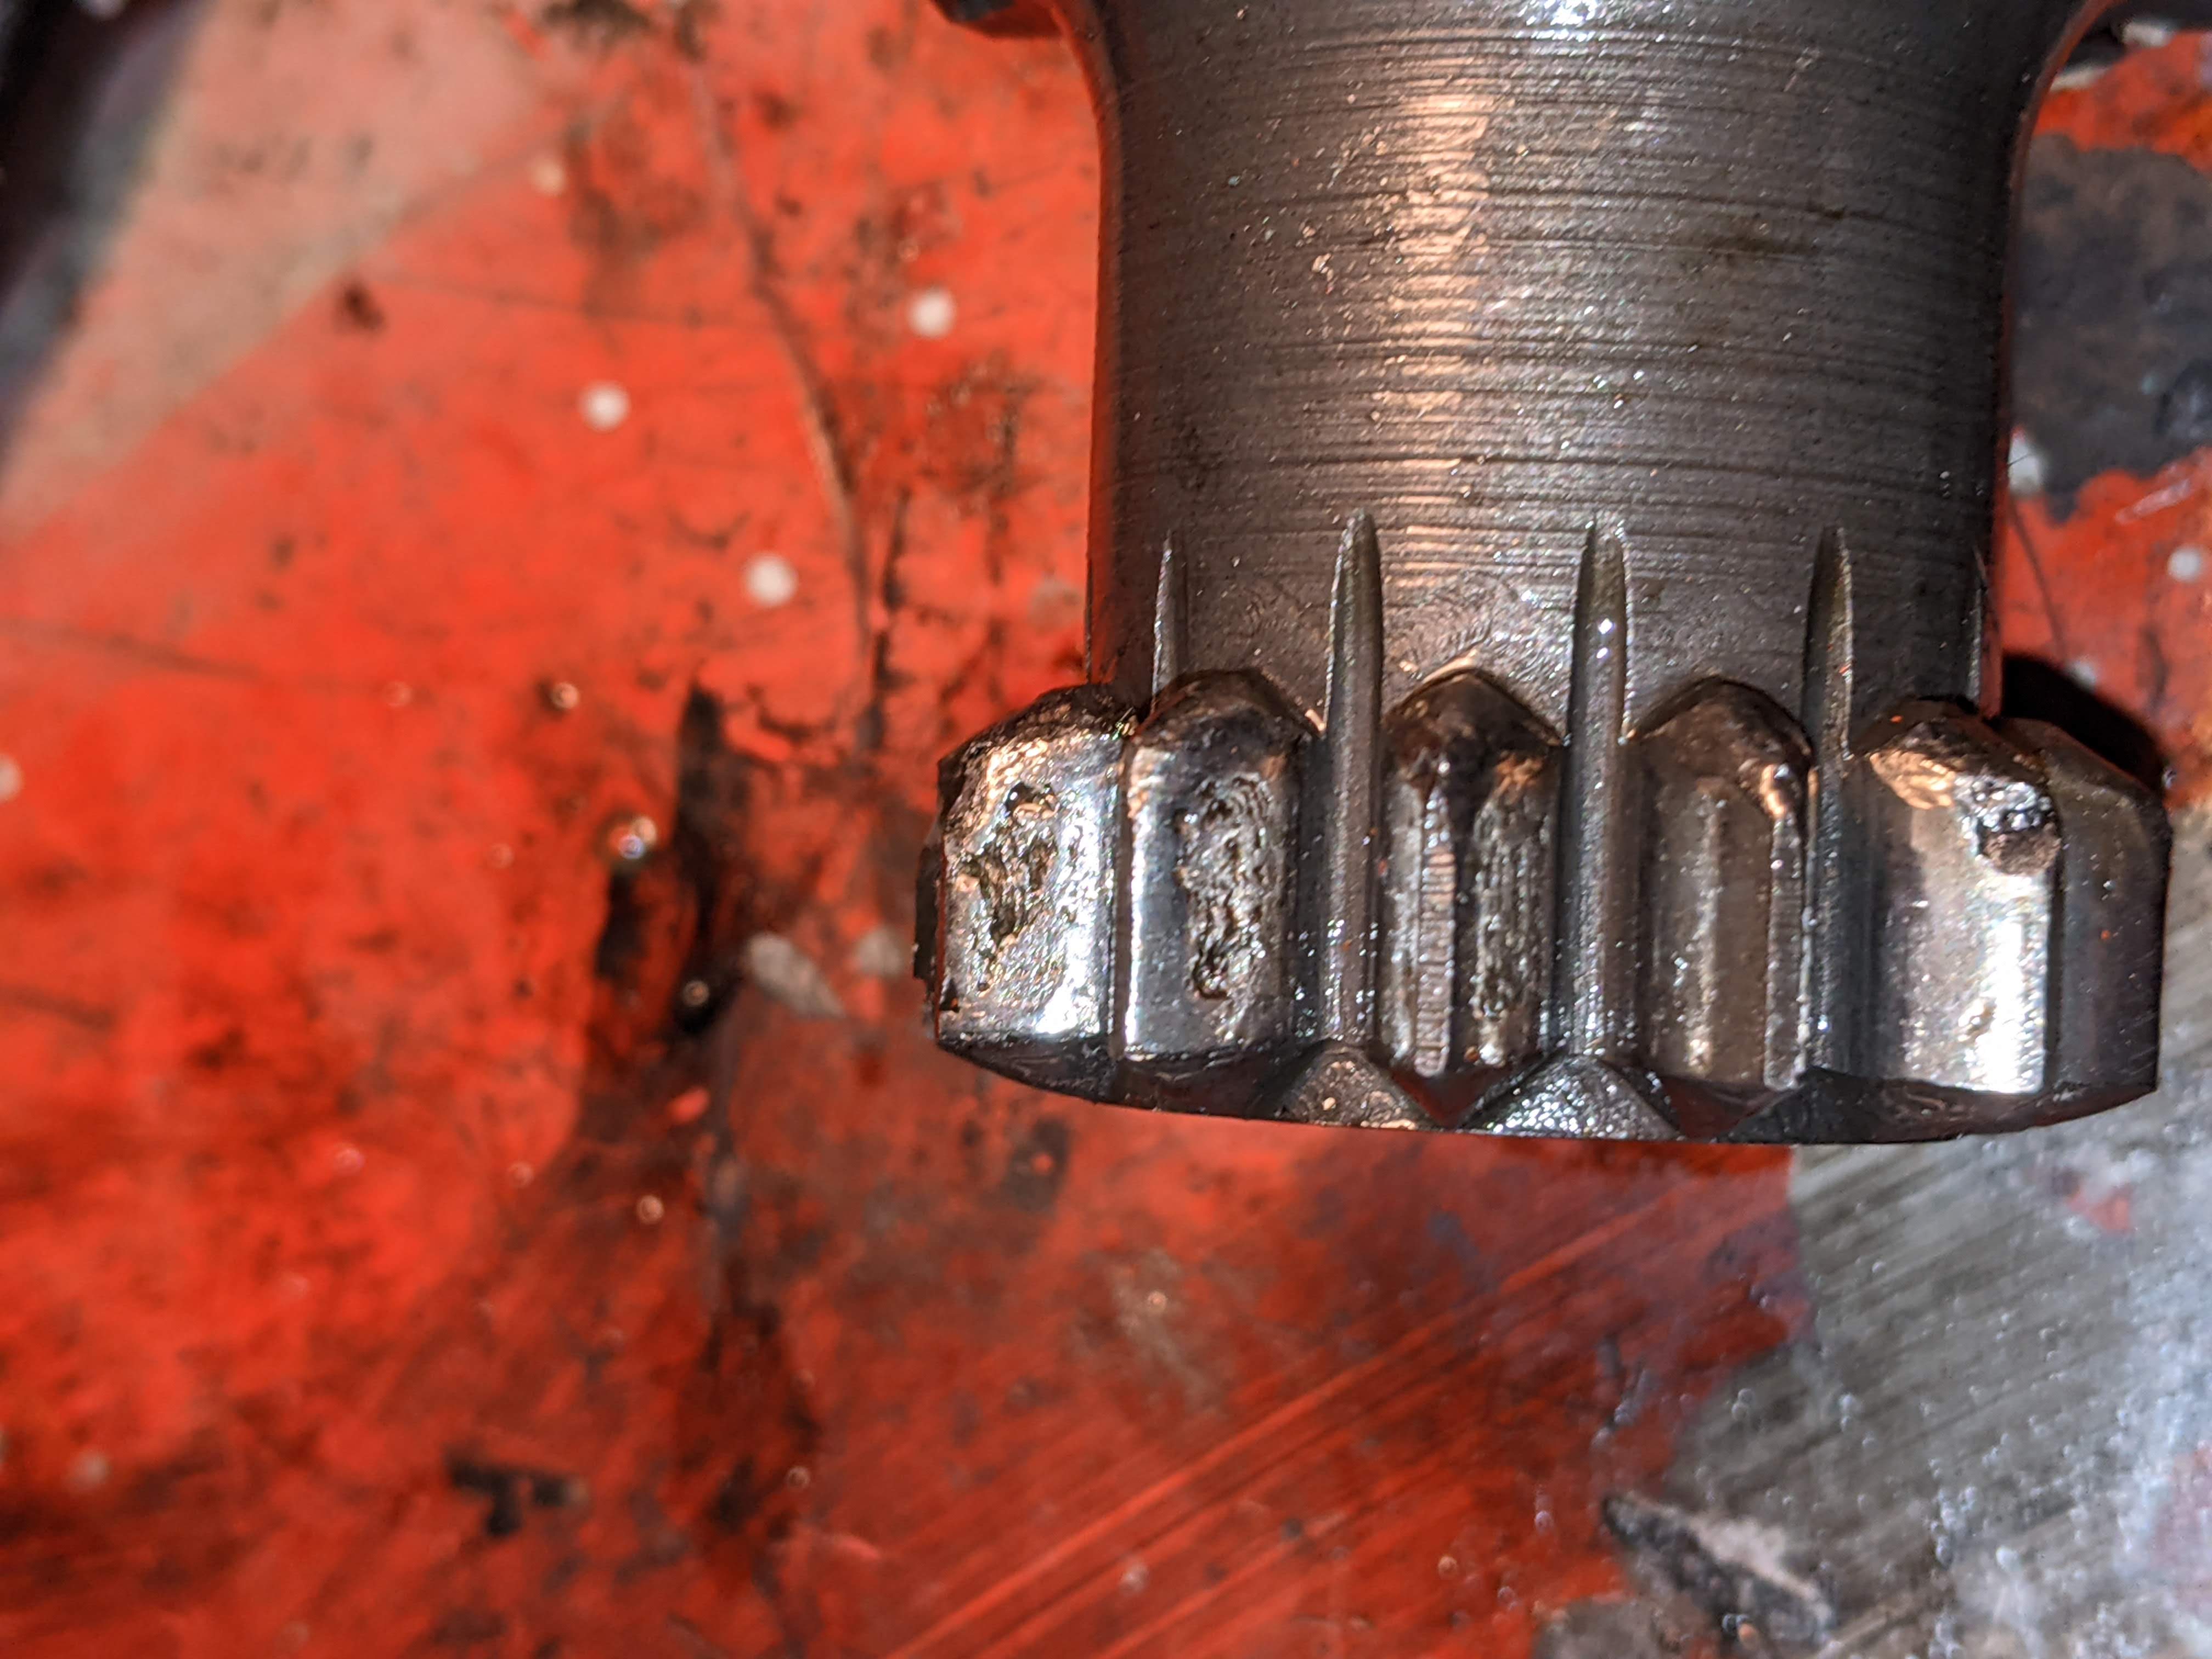
- damaged laygear teeth
- PXL_20201212_180704595.jpg (611.75 KiB) Viewed 4561 times
most of the bits I can get except the reverse idler gear shaft does anyone know of a supplier?
Re: 1098 Gearbox Rebuild
Posted: Sat Dec 12, 2020 6:44 pm
by pgp001
Talk to Andrew at Mirabelle Classic Cars, he should be able to offer you something.
http://www.mirabelleclassiccars.co.uk/gearbox.html
Phil P
Re: 1098 Gearbox Rebuild
Posted: Sat Dec 12, 2020 9:55 pm
by jagnut66
Very interesting, with useful links.
I have a non-functioning spare 1098 box sat at the back of the bench awaiting attention, so I suspect this will prove a very useful point of reference.
Best wishes,
Mike.
Re: 1098 Gearbox Rebuild
Posted: Sat Dec 12, 2020 10:58 pm
by don58van
Great photos.
I can't imagine why the gearbox was noisy


BTW There is a demonstration of the jubilee clip / zip tie method on youtube somewhere--much cheaper than the cup-type tool I referred to earlier. There is also the clear plastic bag method, which can be combined with other methods to stop balls and springs flying into oblivion.
Thanks for sharing.
Don
Re: 1098 Gearbox Rebuild
Posted: Mon Dec 14, 2020 8:52 am
by Murrayminor
don58van wrote: ↑Sat Dec 12, 2020 10:58 pm
Great photos.
I can't imagine why the gearbox was noisy
BTW There is a demonstration of the jubilee clip / zip tie method on youtube somewhere--much cheaper than the cup-type tool I referred to earlier. There is also the clear plastic bag method, which can be combined with other methods to stop balls and springs flying into oblivion.
Thanks for sharing.
Don
Get the correct tool, I tried and failed attempting to use a zip tie, the tool makes the job a 20 second affair rather than my wife and I standing in the garage her holding a clear plastic bag and me attempting to press my thumbs into the teeth of the gear, along with numerous unprintable words, only for the springs to do their work and shoot the balls out, even managing to squeeze between my arm, her hand and the plastic bag, never to be seen again.
Whereas with the tool it was a 20 second job, in fact it was that easy I took it apart again just to check it was correct.
Credit to Phil the Hill for pointing me in the right direction of the correct tool for the job.
Re: 1098 Gearbox Rebuild
Posted: Tue Dec 15, 2020 10:11 pm
by culp
The reverse idler shaft...the very worn reverse idler, is very tight in the hole in the casing.
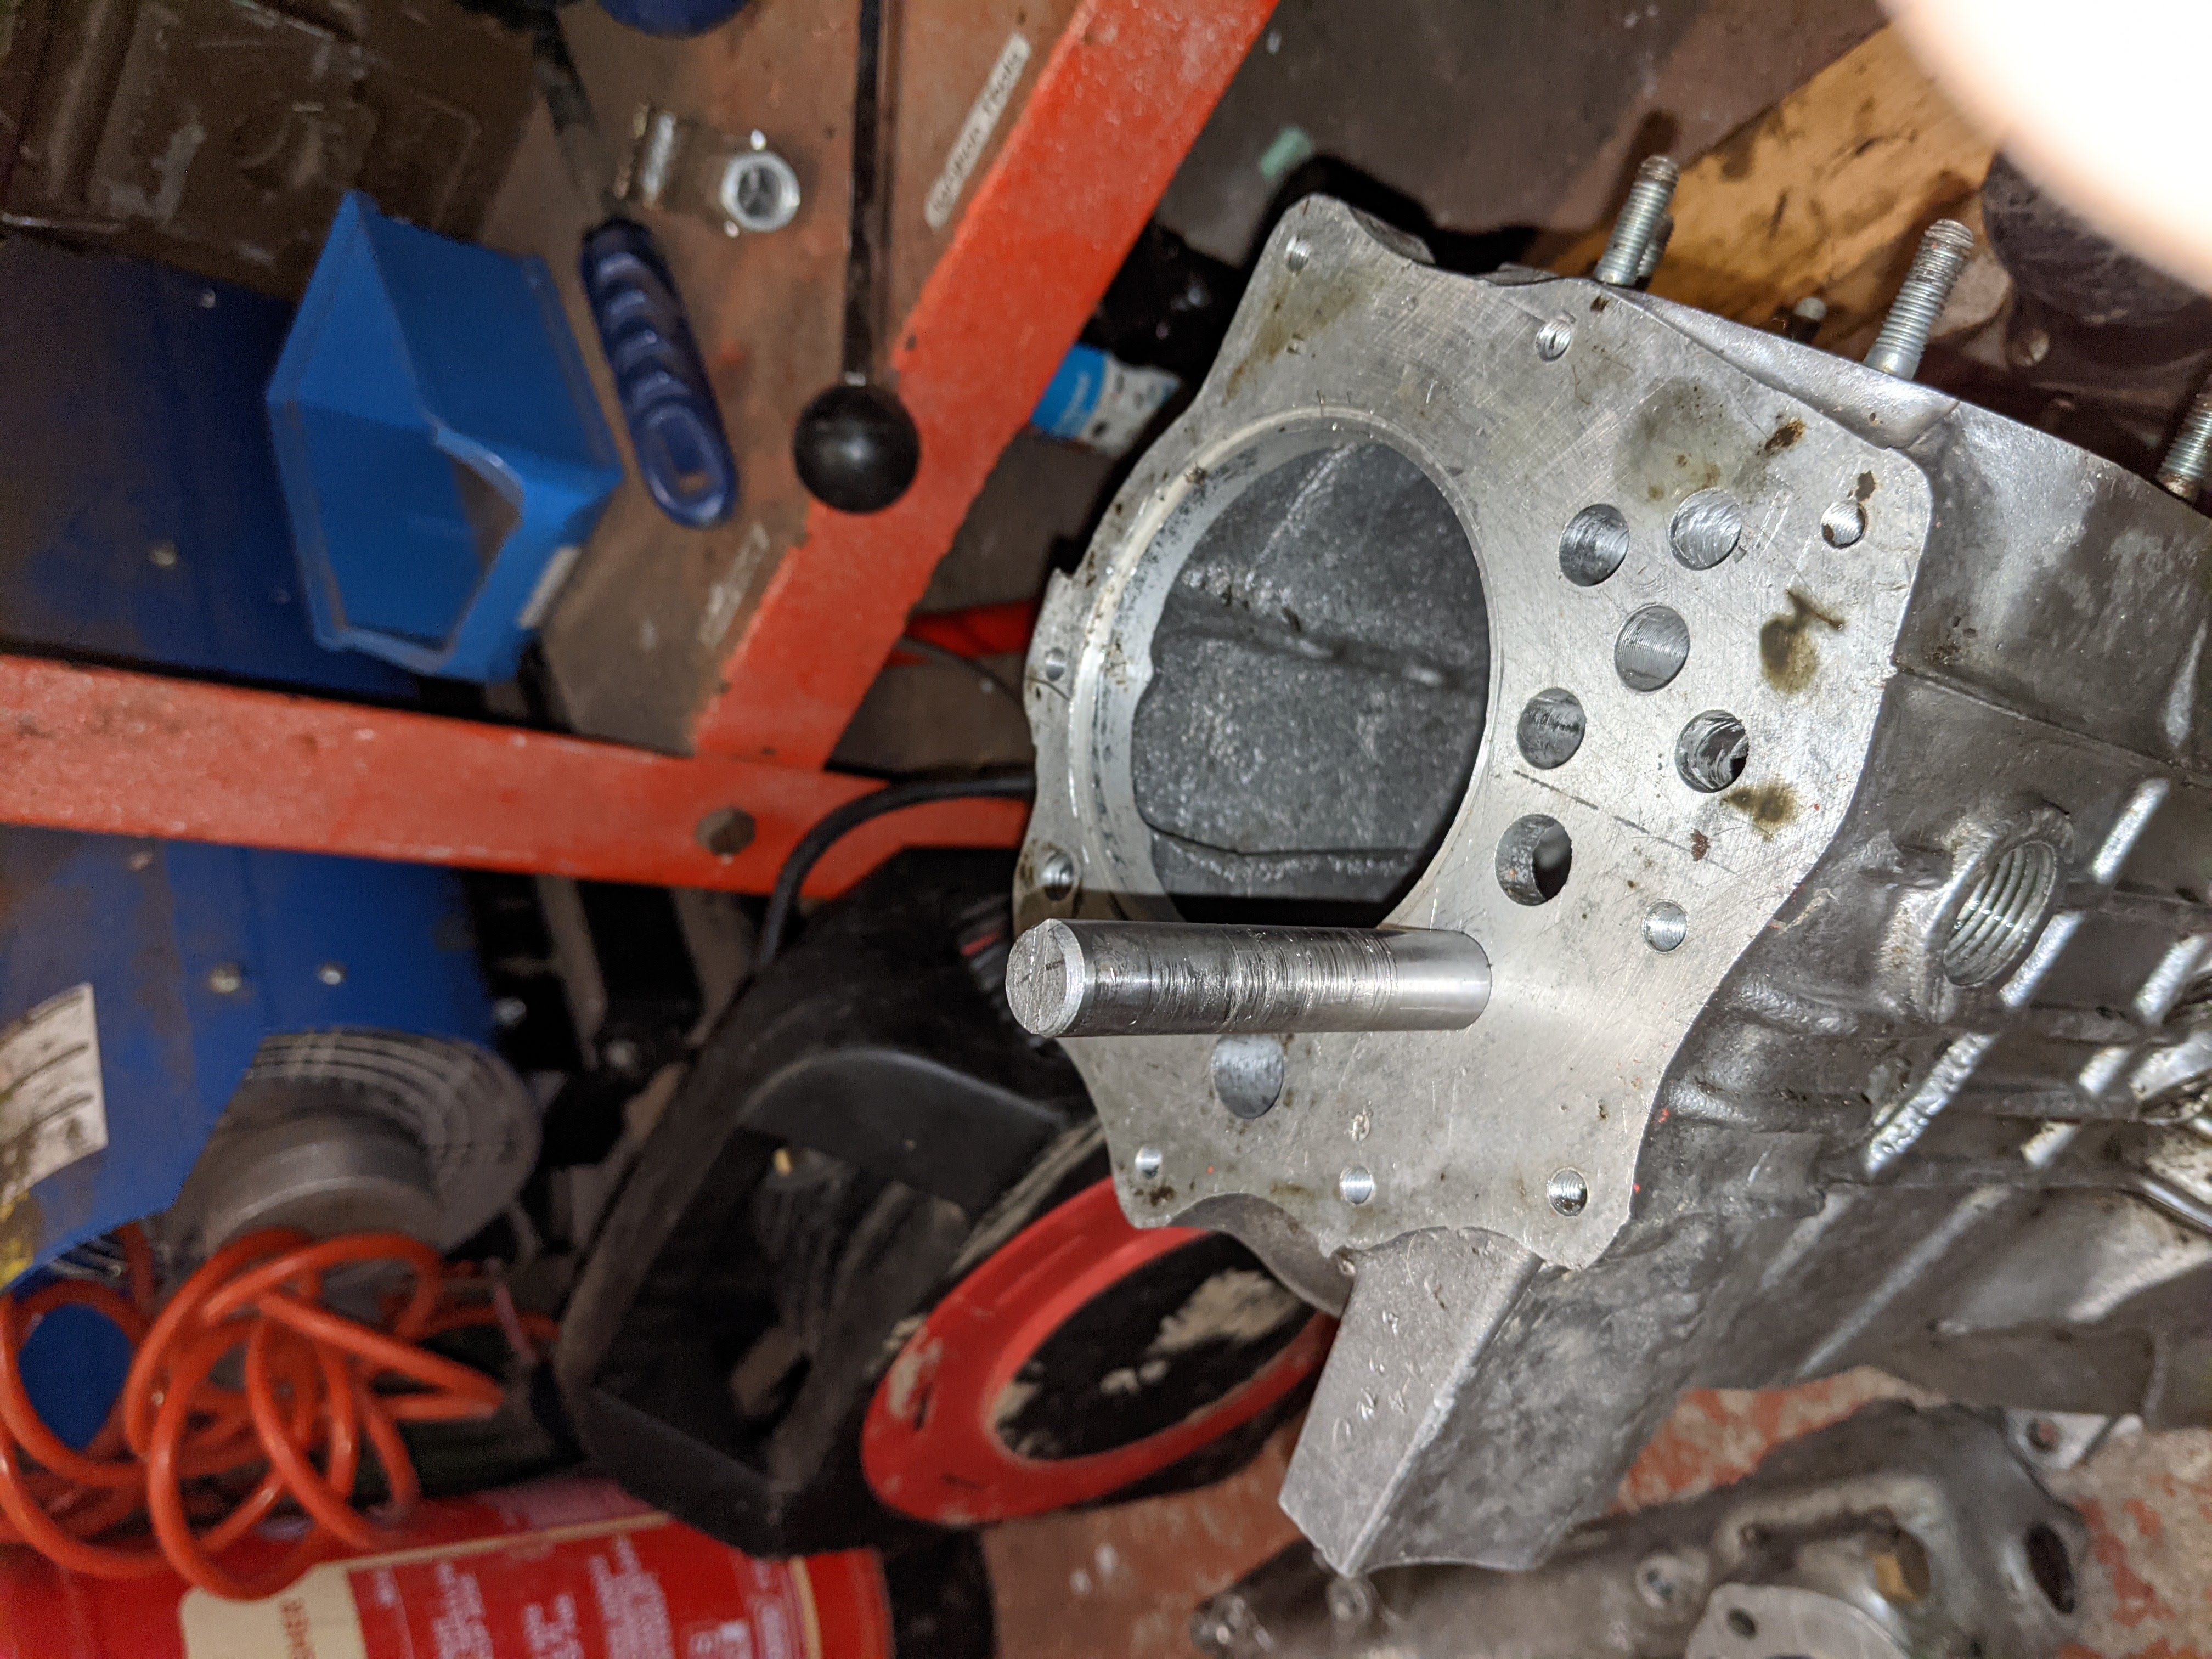
- reverse shaft very tight in gearbox
- PXL_20201215_214045865.jpg (2.05 MiB) Viewed 4414 times
My measurements (taken with cheap eBay vernier callipers) for the shaft are
0.559" - 0.5615" which is 9/16" if my maths is right
the hole in the casing reads 0.539" - 0.543"
so that's the hole undersize by 20 thou or there abouts
I got the shaft out by belting it with a hammer and heating the casing
I'm thinking I buy a 9/16" reamer an ream out the holes to the correct dimensions
Please, somebody, stop me if this is the wrong course of action
Re: 1098 Gearbox Rebuild
Posted: Tue Dec 15, 2020 10:26 pm
by les
Well I can’t see why the hole should need opening, it wouldn’t close up in service! I’d get a new shaft before doing anything, and see how that fit. I presume there are no burrs or pickups on the shaft.
Re: 1098 Gearbox Rebuild
Posted: Wed Dec 16, 2020 7:22 am
by oliver90owner
You simply do not take accurate measurement of hole sizes with a vernier caliper . Even better digital versions are inappropriate for more the measurements to a few thousandths. Simply the wrong tool for the job.
Even when shrink fitting, the shaft will only be a couple of thous (per inch diameter) larger than the hole (in similar metals).
So the hole will be best measured by measuring the shaft that fits in it.
9/16” is 0.5625” by my calculation. In my experience hole tend to become larger, not smaller (unless the casting was belted with a hammer!)
I would suggest the items are galled, so need cleaning up, and fitting should be by pressing, if it is a tight fit
Re: 1098 Gearbox Rebuild
Posted: Wed Dec 16, 2020 7:58 am
by Murrayminor
The reverse idler shaft I fitted to my 1275 gearbox was a nice snug fit, I was able to slide it in with finger pressure once oiled, it came out the same way.
I take it the marks on the shaft in the picture are caused by the removal process?
On a side note I didn't have to use a hammer on any of the shafts both on strip down and rebuild.
I did have to tap the bearing cover on but that was it.
Re: 1098 Gearbox Rebuild
Posted: Wed Dec 16, 2020 8:42 am
by philthehill
The reverse idler shaft is a hand press fit into the casing. There should be absolutely no need to hammer anything.
If the shaft is worn and marked it could be difficult to remove and the removal process adjusted accordingly.
As above - do not do anything until you have the replacement shaft.