Page 1 of 1
Battery Tray Trim
Posted: Wed Nov 25, 2009 12:25 am
by taupe
Hi
Can anyone tell me what trim would originally have gone here to blank off the holes in the bulkhead behind the battery. and what went under the battery?

Posted: Wed Nov 25, 2009 7:29 am
by Leo
My 69 Traveller still had the original sheet of vinyl type material which was held in place with by two rubber buffers that fit into the holes in the bulkhead.
Under the battery was a sheet of black painted hardboard material, not sure if this was original
I have replaced the vinyl with rubber sheeting stuck to the bulkhead and refitted the two rubber buffers. Cut out a sheet of hardboard for the base and painted it black
Posted: Wed Nov 25, 2009 8:26 am
by RogerRust
Early cars has a big rubber grommet in the hole where the surface to air missile was fitted.
Posted: Wed Nov 25, 2009 10:28 am
by mike.perry
A big rubber bung in the hole and battery boxes are listed in the Moss catalogue
Posted: Thu Nov 26, 2009 12:15 am
by andy-harris
Why was the big hole there in the first place? It kind of makes a mockery of the whole 'bulkhead' thing. Something to do with the factory process perhaps.
Posted: Thu Nov 26, 2009 7:19 am
by LouiseM
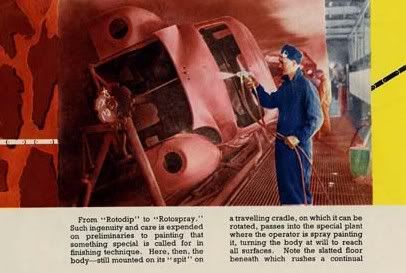
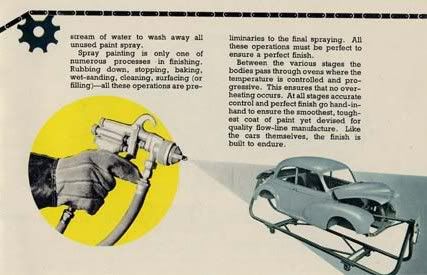
Yes. During part of the production process the bare shells were 'hung up' by a pole passing through the bulkhead and the rear seat space.
Posted: Thu Nov 26, 2009 10:36 am
by mike.perry
A pole was inserted through the car body and was used to rotate the body shell in the spray booth. There is a photo of it in one of the books somewhere on my bookshelf.
Posted: Thu Nov 26, 2009 10:55 am
by Judge
I think that you will find that the 'Rota-dip' process submersed the body shell in a tank containing a form of liquid rust inhibitor.
Posted: Thu Nov 26, 2009 11:04 am
by PSL184
Judge wrote: liquid rust inhibitor.
????????????


Posted: Thu Nov 26, 2009 11:21 am
by billlobban
Judge wrote: form of liquid rust inhibitor.
Think mine was made on Friday afternoon as they must have missed it
Posted: Thu Nov 26, 2009 12:25 pm
by PSL184
Maybe it was a saline solution they used......
Posted: Thu Nov 26, 2009 1:37 pm
by Leo
Posted: Thu Nov 26, 2009 1:39 pm
by Leo
Posted: Thu Nov 26, 2009 1:58 pm
by Judge
That was the updated version of the Rotadip
Posted: Thu Nov 26, 2009 2:52 pm
by Blaketon
They were dipped. If you look down the front chassis rails of my Traveller, it is teal blue all the way down (With Wazoyl/Dinitrol on top of it). I don't think it got in there via a spray gun.
I have put a steel plate over the hole - safer in the event of an engine bay fire.
Posted: Thu Nov 26, 2009 2:54 pm
by MColes
This video shows how it was done on the original mini to give you some idea. Look from 4 minutes onwards - although the whole video is interesting
http://www.youtube.com/watch?v=CkTDCOQB-rg
Posted: Thu Nov 26, 2009 3:27 pm
by Judge
I believe that the original rotodip process, i.e. to submerse the shell in a tankfull of rust inhibitor, was intended to ensure that the insides of chassis legs etc also received a protective coat.
Re: Battery Tray Trim
Posted: Sun Mar 14, 2010 5:28 pm
by Declan_Burns
A rainy day here so I decided to do up the battery tray. I know it's not original but it has turned out quite well. The rubber, (~3mm), has an adhesive strip on the back as it is used as a non-slip covering for stairs and steps. I saw it in a local DIY and thought it would be good for the battery tray. I hadn't quite enough rubber to do the sides and still need to remove some rust patches but this is what it looks like so far.[frame]

[/frame]
Close-up-it neatly goes over the edge of the battery tray[frame]

[/frame]
I ran out of rubber so the battery has been refitted. These photo also show the "Grumpy" engine steady which I slightly modified to hide the threaded rod by putting a stainless steel tube over it. It looks better and doesen't allow it to act as a rasp.[frame]

[/frame]
Regards