Page 1 of 1
Newbie with a traveller
Posted: Mon Nov 16, 2009 1:33 pm
by PeteC
Hello all,
I in the first throes of a traveller restoration in conjunction with my younger brother. The car is actually owned by my father, but with us being relatively spritely youths to his verifable pensioner status it's obviously a lot easier for use to be crawling all over it. Anyhows, after poping in here several times to have a read-up of some subjects I thought I would ask a few questions of my own.
The car is a late sixties two-tone black and rust example - no prizes for guessing where the black ends and the rust starts - and like most other restorations we're steadily uncovering previous repairs, bodges and a host of rather alarming problems.
We made a start at the rear where the floor had been treated to some lovely bits of sheet metal and angle iron over the years to stop the doors draggin on the floor. A new repair panel has gone in along with the nearside corner and wheelarch top section. That bit is far from done however as the spring rebound plate is a mess and the box section is terminal from there running forwards to the sills. But it looks like the inner arch repair panel and some patient cutting out of the channel with repairs should sort out that little problem. Along with a few pints of cold galvanise.

So a gentle start, but the rear arch on the offside is rather worse. A cursory inspection so far reveals the rear channel is pretty much shot along the entire length of the arch, with glass fibre resin stuffed around the rear spring hanger and towing eye and rebound plate. Nice. The front section of the arch is badly patched and will have to be removed, and the front spring hangers on both sides waved goodbye to this cruel world a long time ago.
Moving forwards the picture really doesn't get any better. The car is just slightly bowed in the middle judging from the door gaps, and the crossmember and floor have reached the giddy heights of Stephen King-ness horror. In fact the floor is builging upwards and has split in several places, revealing the wonderfully delaminated crossmember underneath. Sills? Don't be silly.
So, the tinworm has had a street party on this car and with the next job being to tackle the offside rear arch area I'm wondering how best to support it. I'd sooner not drop the axle if I can help it as it's going to be very useful in double-checking the rear sping hanger location, but the chassis channel will need some cutting up to where it folds over to become the floor. So suggestions are really welcome on this.
The other thing I was thinking of was to take a deep breath, jack it up until the slight bow is removed and the door gaps are corrrect and then just brace the car up with plenty of heavy duty anglework welded between the pillars both front to back and side to side. I suppose if at least the pillars don't move then I'm in with a fighting chance of keeping it all in shape while I get busy with the cutting discs. Are there any pitfalls around this idea I should know about first though? I imagine the crossmember is going to make this a bit more complex of course.
I'll put some pics up a bit later when I have got the old box brownie out. I'm sure many people have restored far worse examples than this, but it's still a very sad sight at the moment.
Posted: Mon Nov 16, 2009 4:43 pm
by bmcecosse
Welcome to the forum - you certainly present a 'pretty'picture of this poor Traveller. I would agree with your 'bracing ' plan and then I suggest you should remove engine and box - and tip the car on it's side to work on the underside. It will be much easier.
Post up in your profile where-abouts you are - there may be folks nearby willing to help with the tipping!
Posted: Mon Nov 16, 2009 9:25 pm
by PeteC
Thanks for the tip, I'll certainly sort that out.
I did promise some pics so here goes:
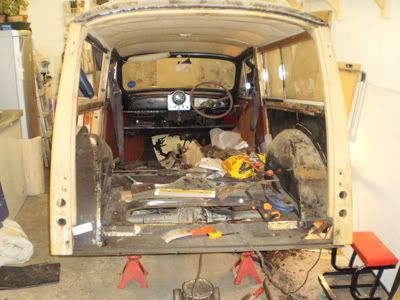
The rear, which doesn't look too bad. The wood on first acquaintance appears sound, although it's not quite as good as it may seem - but certainly saveable.
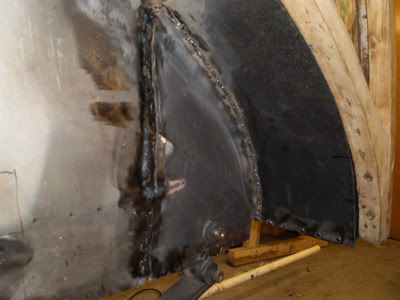
Nearside rear wheelarch - you can see I've been having some fun with the MIG! It's not pretty but it hasn't been linished completely yet. However it's stood up to several good whacks with a lump hammer so it's certainly solid now.
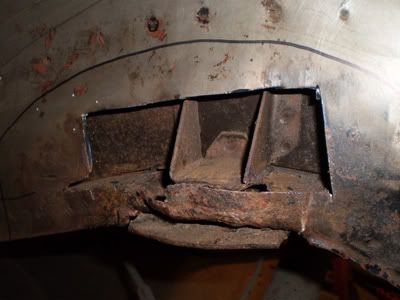
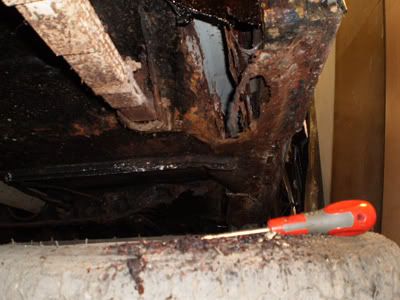
Moving forwards however you can see the bumpstop is not nice, and neither is the channel behind it. A cursory scrape shows it to be largely surface rust though - but it seems to get steadily worse as it goes towards the sills.
I guess I'll be finding out what lies behind this pretty soon!
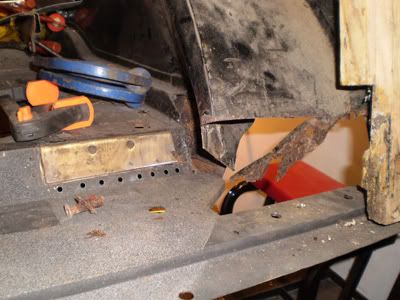
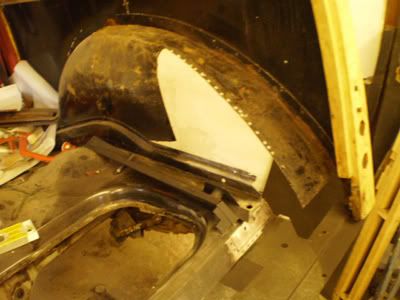
Moving to the offside rear arch, here's the new boot panel waiting to be joined up to what new metal I decide to insert. My first thinking was to just go for a repair piece, but.....
---this is suggesting there might be a lot more rot when the bodges are steadily removed.
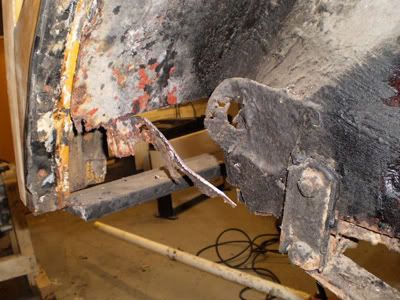
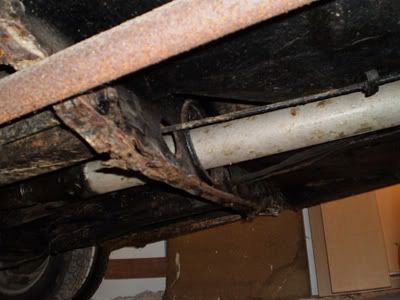
Rebound plate is again in a nasty state, along with the channel behind it. The drip marks is from my use of SOP (stale old petrol) to soften up the underseal ahead of scraping off
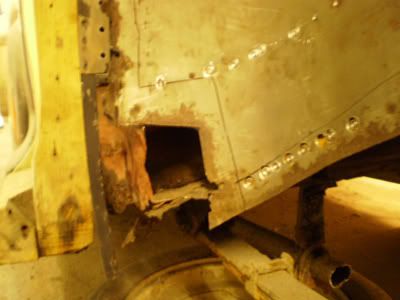
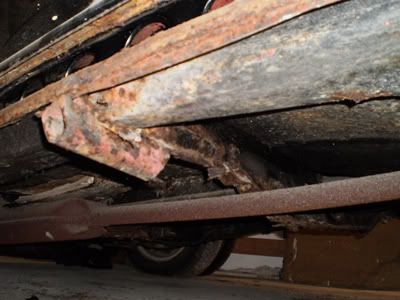
And the front edge has a patch, which when viewed from the underneath...
..was largely pointless!

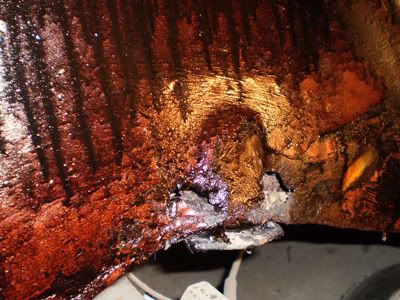
Overall this wheelarch is a case of awful, rising to solid then reverting back to mucky. Once the layers of paint, underseal, oxide primer and more underseal are off then I'll have a better idea though
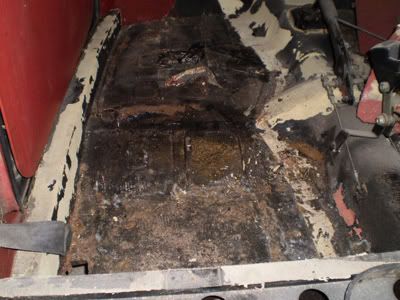
The bulging floorpan signals all is not well underneath
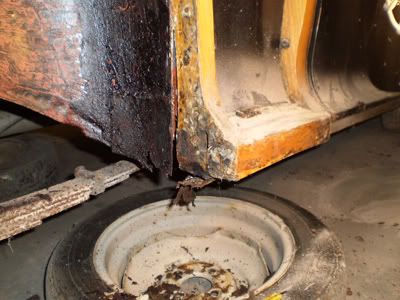
And the jacking point and crossmember are well past it.
So there you go, a few pics to nicely show I've got some entertaining evenings ahead of me ;)
Posted: Mon Nov 16, 2009 10:38 pm
by bmcecosse
Quite a project!
Posted: Thu Dec 24, 2009 6:50 pm
by PeteC
Bit of a festive update. I'm taking it nice and steady and concentrating on specific areas, which started with the bootfloor, nearside wheelarch and now for the offside one. Which is in pretty poor shape.
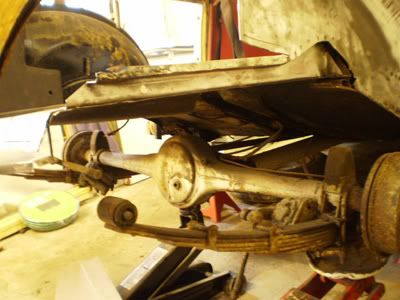
I wasn't going to cut so much out, but when I saw the rot in so many places it didn't make sense to me to be spending days cutting out little holes and welding metal back in. So I did a nice big hole instead.
The rear channel has rotted out through the lower section, and the extent prompted me to go get a repair section rather than fab up a new piece. After taking some measurements for later use I got busy with the cutting disc.
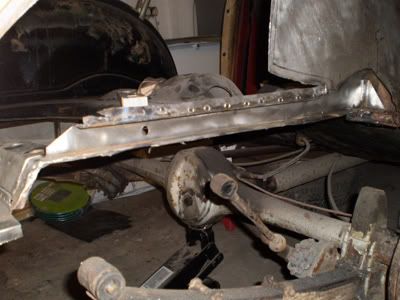
Not too bad a job to cut the channel out, although it did mean a bit of butchery round the bumpstop plate. That's all going anyway so it wasn't an issue.
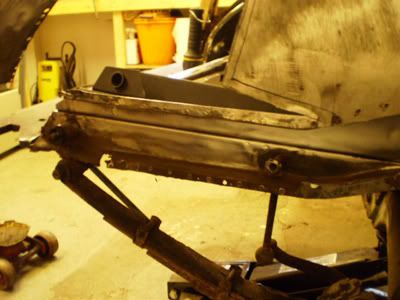
The area now ground back and almost ready for the repair panel. With the back of the wing removed the potential for getting this welded in wrong doubles as I now have to watch the positioning across two axis, but trial fitting the repair panel is spot-on so far. Just need to check it with the wheelarch panel and repair section I'm fabbing up.

The spring hanger repair section, which cost a fair bit of money considering it was only half made. The first trial fit snapped the laughable blob of weld holding the damper locator, so I welded it up on both sides and for good measure seam welded up the reinforcing plate too. So that's all ready to go on.
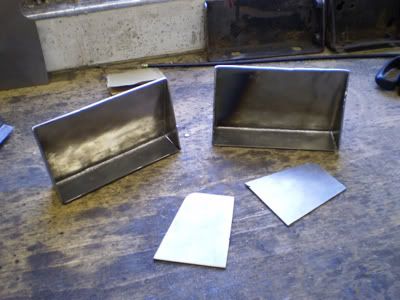
I got a bit distracted with the brace that sits in the boot. This and the various brackets located in the corners had suffered years of damp and were in various stages of rot. So I thought I'd try a spot of fabrication and so far I've done the brackets that are welded to the brace along with new repair plates for the brace itself, which had terminal tinworm in the lower half. So, here's the brace brackets and the ears to affix the floor brackets to the wheelarch:
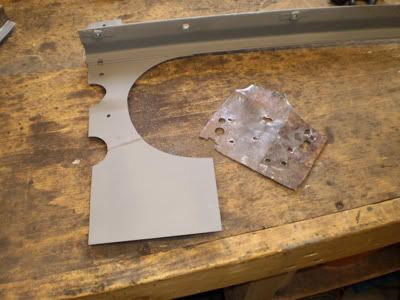
And here's the brace with the rubbish cut off and a repair section welded in place, followed by a dusting of zinc coating. I thought I would show the old piece that was cut off. Believe me, that's a flattering snap of it too.
While I have a couple of days off next week I'll finish off the spring hanger, put the arch repair section in and complete the back end. Might even hang the doors back on to make sure everything is still aligned properly wrong if I feel brave!
The next job after all that is to start reparing the rest of the rear channels. The bumpstops on both sides are scrap and the channel itself looks poor running forwards all the way round the arch to the sills. From what I can see there are no readily available repair sections for this job so I'll be busy with the shears and hammer again.
Merry Christmas everyone!

Posted: Thu Dec 24, 2009 9:43 pm
by DAVIDMCCULLOUGH
Keep up the good work!!
Merry Christmas

Re: Newbie with a traveller
Posted: Wed Sep 08, 2010 12:04 am
by PeteC
Lordy does time fly or what?
Like a lot of other people a boatload of things have conspired to delay getting back to work on the Traveller, but a few jobs have been finished off such as the inner rear wings largely completed and the rear floor almost ready to be visited by the Mig for the last time. Also, the engine and box have come out and the front end had a cursory inspection ahead of doing a combination of repair and replace of the panels. However, it's here that things have hit a bit of a crossroads.
While doing some check around the rear of the car the doors were trial fitted and found to be so far out of alignment it was laughable. Out came the measuring tape and the aperture for the rear doors was found to be a mile out of square, and even when jacking up a corner it did't really get much better. Worse, putting a spirit level on the front crossmember and then on the rear section of the floorpan showed the car to be twisted quite markedly, which we think is down to a combination of a load of repairs done by the previous owner and the resulting deterioration of the body, along with the original corrosion that much of the repairs did not properly address.
So before doing anything we're going to try and get a set of accurate dimensions of the car in the time-honoured fashion of a plumline and chalk with the body on a flat stage being made up from some sturdy timber and ply (the garage floor isn't too bad but fundamentally it's not level). Oh, and younger brother has made a nifty frame for rotating the body when we have got the twist fingured out. Maybe I should've said if instead of when as we're going to have some fun spotting where the issue might be.
In the meantime I'm asking for any info fellow member may have on the bodywork dimensions. I have the workshop manual which gives a good set of basic measurements in plan view but I'm struggling to find anything showing the relative heights of specific points along the chassis. If anyone hs got some details and can share them with me then I'd really appreciate it. In some ways the ideal cure would be to take all the dimensions, build a good sturdy jig and then slap the thing on it!
Re: Newbie with a traveller
Posted: Wed Sep 08, 2010 12:25 am
by bmcecosse
Good luck with the project - and thanks for coming back with the update. I'm sure you can take out any 'twist' simply by jacking under the appropriate corner - and then applying load to the other corner......
Re: Newbie with a traveller
Posted: Wed Sep 08, 2010 12:34 am
by PeteC
I'm hoping that will be the case squire, although I also think there will be a lot of hours spent with a plumbline and measuring tape to get a set of spot measurements to be able to decide which corners to attack, and I have a feeling the state of the floor and sills is the primary cause of all this anyway. Which means there might be an awful lot of bracing, cutting and frighteningly huge holes in various places before things begin to improve!
Oh, both front legs are shot by the way. To bits. And the A pillars look worryingly lumpy from the base up past the screen and almost along the entire length of the rain channel. Happy days.........
Re: Newbie with a traveller
Posted: Wed Sep 08, 2010 12:51 am
by taupe
Page R16 in the manual has the main relative heights for the chassis points.
Re: Newbie with a traveller
Posted: Wed Sep 08, 2010 5:17 am
by charlie_morris_minor
have you repaired the doors?
the only reason i ask is that i had some repaired doors.. and because of the way they had been repaired they had twisted them selves

Re: Newbie with a traveller
Posted: Sat Sep 11, 2010 3:20 pm
by PeteC
I have yet to even look at the doors charlie, the rest of the car has depressed me enough!
I'm glad you asked the question though as I know the doors shut with a fair degree of difficulty and the shutlines indicate the car is sinking between the axles as the sills and floor are in a bad way and the crossmembers is similarly on the way out.
Re: Newbie with a traveller
Posted: Sat Sep 11, 2010 3:41 pm
by PeteC
I'm hoping I don't upset anyone in the club or involved in moderating the forum with this post, so I will try to do this very carefully!
It's inevitable I will be buying quite a number of repair panels shortly - I don't have taupe's skills in fabbing up panels (wish I did!), and so I have to make a decision on which supplier to get them from. The difficulty I have is in deciding what to get from where, becuase as I see it there are two main sources and there seems to be some difference of opinion on their products. I have purchased a couple of repair panels from one place and to be honest they were not particularly good, but the price difference between items such as floor sections can be quite wide and I don't exactly have Mr. Abramovic's bank account details, so I need to make some careful choices here.
What I would really appreciate then is anyone can give me their advice by PM of which panel manufacturer to purchase items from, based on them using them for themselves. I see no reason on spending ignificant sums of money on items when they are available for less money and are just as good, but in the same vein I really don't want to get caught trying to fit the likes of a cheaper chassis leg that is patently wrong.
Any advice sent by PM will not be published either elsewhere by the way, it is purely for me to make a personal decision. From reading one or two other threads I am conscious that the club is trying to steer a very difficult path around the subject of suppliers, and I hope that my request for info is seen to be for my own use only to help get my father's Traveller back on the road in the best condition possible we can achieve.
Thanks to everyone who can help, it's very much appreciated.
Re: Newbie with a traveller
Posted: Sat Sep 11, 2010 7:17 pm
by taupe
Hi
Firstly I dont see the need for a PM to give advise on this as its a personal opinion and not a criticism of any supplier.
Generally I have found the Hadrian panels to be reasonable quality and a reasonable fit. These can usually be spotted by their green paper labels. Some are better than others and most of them will require some adjustment to fit correctly. They are not that much more expensive.
If you can get NOS panels from e bay etc these will usually be a 'perfect' fit although it will depend how much your car is out of true!!
You will also sometimes find Henric panels - again these are usually quite a good fit but sadly they are no longer trading.
The SriLankan panels are generally reather crudely made as they are mostly beaten out and seam welded by hand. With some of them the fit is reasonably good but generally they will require adjustment to make them fit properly. Some people have questioned the quality of the steel used for these, but I dont know if this is really an issue.
Some panels or part panels are really quite simple to fabricate yourself so why not give it a go!!
So there you go -the choice is yours