Replacing rear springs
Forum rules
By using this site, you agree to our rules. Please see: Terms of Use
By using this site, you agree to our rules. Please see: Terms of Use
-
Bazzalucas
- Minor Fan
- Posts: 313
- Joined: Thu Dec 13, 2007 3:06 am
- Location: Michigan, USA
- MMOC Member: No
Replacing rear springs
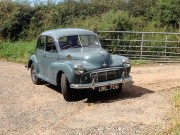
What is the purpose of the fancy-schmancy pivot pin on the rear springs? It is possible to replace it with a suitable bolt, or is that strictly a no-no?
[img]http://i298.photobucket.com/albums/mm274/bazzalucas/Morris.jpg[/img]
-
Bazzalucas
- Minor Fan
- Posts: 313
- Joined: Thu Dec 13, 2007 3:06 am
- Location: Michigan, USA
- MMOC Member: No
-
Dean
- Minor Legend
- Posts: 2180
- Joined: Fri May 30, 2008 9:41 pm
- Location: Sutton Coldfield
- MMOC Member: No
You can buy replacement pivot pins, hopefully (like mine) rust can work to your advantage when taking the old one off... just undo the nut and the rust should have seized the pivot pin solid so it doesn't spin on you.
Then bang the thing out with what ever implements ou feel necessary.. then buy..
http://www.morrisminorspares.net/shop_item.php?ID=3142
and if you want to make it look new replace:-
http://www.morrisminorspares.net/shop_item.php?ID=3143
Buying the nuts to suit the pin and nuts and bolts to secure the plate, might also be beneficial.
My Minor:
A Clarendon Grey 1953 4 Door Series II.
MMOC - 66535

A Clarendon Grey 1953 4 Door Series II.
MMOC - 66535
-
mike.perry
- Series MM Registrar
- Posts: 10183
- Joined: Sun Jul 24, 2005 11:39 pm
- Location: Reading
- MMOC Member: No
-
mike.perry
- Series MM Registrar
- Posts: 10183
- Joined: Sun Jul 24, 2005 11:39 pm
- Location: Reading
- MMOC Member: No
-
Onne
- Moderator

- Posts: 3441
- Joined: Wed Jan 26, 2005 4:50 pm
- Location: Mapperley Nottingham
- MMOC Member: No
I changed both rear springs in about an hour... they were the originals.
I do much prefer the nyloc nuts the suppliers provide these days.
I do much prefer the nyloc nuts the suppliers provide these days.
Onne van der S. MMOCno 60520 Moderator
2dr 1971 White DAF 55 (with hopefully a 1600cc engine soon)
2dr 1973 Bergina (DAF 44)
2dr Estate 1975 DAF 46 in red
2dr saloon 1972 DAF 44 in Mimosa
2dr 1971 White DAF 55 (with hopefully a 1600cc engine soon)
2dr 1973 Bergina (DAF 44)
2dr Estate 1975 DAF 46 in red
2dr saloon 1972 DAF 44 in Mimosa
-
jaekl
- Minor Addict
- Posts: 652
- Joined: Thu Jun 19, 2008 7:40 pm
- Location: Pennsylvania, USA
- MMOC Member: No
The reason for the special bolt is to allow insertion of the rubber bushing. The rubber bushings need to be compressed to work properly. Therfore, the pair would be too long to be able to be preassembled and fit inside the hanger. Undoing the 1/4 inch bolts and removing the plate with the pin is the way to do it.


