Page 1 of 2
Sanding Traveller wood.
Posted: Thu Oct 18, 2007 10:01 am
by iandromiskin
I've decided I can do no more with my Travellers wood in terms of bleaching, so I've decided to move onto the next step and start sanding it down for preparation, but is there a right way or a wrong way to do this or is it fairly normal and straight forward ?
I was going to use two grades of sandpaper, one semi rough and the other fine. Is this ok or does anyone have any advice / suggestions ?
Also I was going to paint on two or more coats of wood preserver before oiling.
Posted: Mon Oct 22, 2007 11:17 am
by chickenjohn
I just re-did the wood on my Traveller- to try and get it a bit lighter and do a more thorough job than I did when I got the car back on the road.
I started by sanding the wood with 80 grit pad on a detail sander to remove the old finish. Then applied the wood bleach. I like to apply the bleach, leave it for a while, then add another coat and scape off with the Skarsten scraper. (Keep sharpening the blade on the bench grinder), this takes off a very fine layer of darkened surface wood and whats underneath is much lightened. Then repeat, and when the wood is as bleached as I could get it, let it dry for a few days, sanded with 80 grit (some detail sander, some by hand). then went up 120/150grit, finishing with 240 grit.
I used 1 coat Sikkens HLS and 2 coats Cetol 7 one day to dry between each coat, this time using the pine finish (code 077). The sikkens seems to preserve the wood pretty well and lasts about a year before needing a sand and re-coat with the filter 7.
Posted: Mon Oct 22, 2007 11:22 am
by chickenjohn
Scrape in the direction of the grain and sand in the direction of the grain also.
Posted: Mon Oct 22, 2007 12:06 pm
by Kevin
Dont forget that once you have achieved your sanded finish give it all a couple of coats of clear Cuprinol 5* this will keep the wood better preserved.
Posted: Mon Oct 22, 2007 12:32 pm
by iandromiskin
Great. I must head to a shop and renew my sandpaper. I have a Cuprinl preserver all right, though I must check which one, that I was going to paint on too. Its ok to use the Danish oil afterwards too ?
Posted: Mon Oct 22, 2007 12:50 pm
by bmcecosse
Yes - I used the Cuprinol 5 star on mine - block up the drain holes in the side window lower sections while doing this to make the stuff soak right into the timber. Unblock them later of course! When all nice and dry I coated with Teak Oil (best on a warm sunny day) - and annual clean/scrape/refresh with oil is all it needs. Stains and varnishes just trap moisture in the window.
Biggest problem with sanding is keeping the paper off the paintwork - masking tape helps but you still need to be careful.
Posted: Mon Oct 22, 2007 1:00 pm
by chickenjohn
I completely masked up the paintwork around the wood, and yes, i've used Cuprinol 5* too. I tried wood oils in the past and found the wood darkened quickly and became damp. My car has to live outside a lot as I only have one garage and it gets used in the winter too. The microporous woodstain seems to stand up to this use, with appropriate maintainance. Microporous woodstain lets the wood breathe and does not trap moisture like a varnish.
Posted: Mon Oct 22, 2007 1:44 pm
by MoggyTech
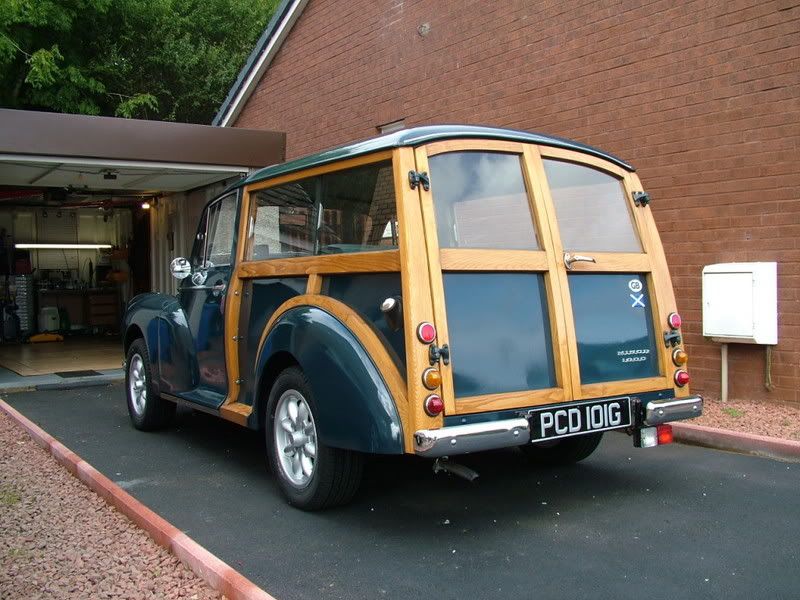
I use my traveller all year round and it's been 4 years since the last wood treatment. I used Burgess Hydrosol and Burgess Topgloss, both are Microporous. No dark patches at all. The great thing about the Burgess stuff, is you apply the Hydrosol wet on wet with a rolled up rag. Topcoat can go on within the hour, so the treatment (excluding prep) only takes a couple of hours.
Posted: Mon Oct 22, 2007 3:18 pm
by chickenjohn
Thats a seriously good looking traveller!!

Posted: Mon Oct 22, 2007 3:24 pm
by MoggyTech
chickenjohn wrote:Thats a seriously good looking traveller!!
Many Thanks

Posted: Mon Oct 22, 2007 6:25 pm
by Welung666
And a seriously large picture!

Posted: Mon Oct 22, 2007 6:42 pm
by MoggyTech
Welung666 wrote:And a seriously large picture!
Aye appologies for those on dial up, photobucket seems to be fixed size using the uber fast broadband upload.
Posted: Mon Oct 22, 2007 7:37 pm
by Mike Shipman
Ive not yet got round to doing Benny's woodwork, but on a previous Traveller I found a cabinet scraper best for removing the old varnish and leaving a good clean surface to apply the finish.
Theres a good article on the cabinet scraper below:
http://www.finefurnituremaker.com/news/?m=200504
Posted: Tue Oct 23, 2007 7:34 am
by chickenjohn
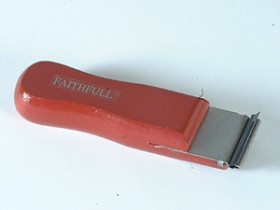
This type of scraper (handle with a blade at right angles- commonly called a "skarsten" ) can be useful for getting into the nooks and crannies on traveller wood.
Posted: Tue Oct 23, 2007 11:01 am
by Stig
I've used the sides of a wallpaper scraper after sharpening them on a flat grindstone to get them nice and square. Using the end risks digging in and damaging the wood whereas dragging a really sharp 90 degree edge works quite well - it needs re-sharpening from time to time though. I've found this better than sanding to remove old varnish and leave a smooth surface to the wood. Sandpaper seems to remove wood more quickly than varnish.

Posted: Tue Oct 23, 2007 1:17 pm
by bigginger
Both sound/look pretty much like cabinet scrapers
a
Posted: Tue Oct 23, 2007 1:29 pm
by chickenjohn
http://www.dm-tools.co.uk/browse.php/se ... 73/level/4
DM tools call them Skarsten scapers, and they should know being tool specialists.

Posted: Tue Oct 23, 2007 2:20 pm
by iandromiskin
Posted: Tue Oct 23, 2007 2:36 pm
by dave1949
looks gud to me,well done
do you just cover her over at night or is she garaged?
have you any pics before bleaching began?
Posted: Tue Oct 23, 2007 4:34 pm
by iandromiskin
No I don't have a garage
but am lucky enough to have just enough space at the side of the house to keep her under cover and lock a gate behind her. I'd love to be able to build a lean too type thing in the future to keep it protected a bit more.
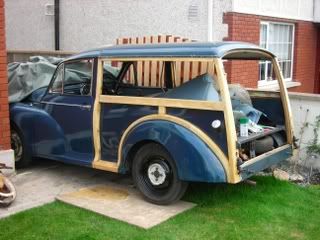
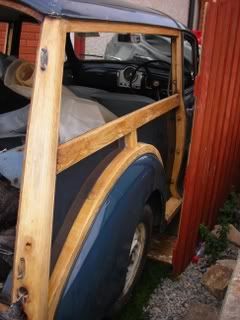
I'am probably lucky enough that when I bought the car about 2 years ago I was given the run down on it at the time. So I was told that the car needed a lot of work underneath, which it does, but that the wood was quite good and only needed stripping and retreating. So over the last few years, whenever I get the time, I took the windows out to change the channels and stripped the wood. The original wood was varnished and had a number of dark spots on them, but once I got the varnish off the Oxalic acid worked brilliantly and lightened the wood a lot, though you probably can't see much difference in the photos. I have two new rear doors too as the old ones where gone. Slow process but she's a really nice good looking car so in time I'll have her going. Plan to work on the wood, fit new channels, windows and rear doors, then start work on the engine as she doesn't go, then get her welded up and repaired.
http://s156.photobucket.com/albums/t28/ ... ler/Milly/
(See if the link above works as there are eight photos and I didn't want to post them here in case they took up too much space.)