Page 1 of 2
Replaceing all the Wood ..
Posted: Mon Jun 12, 2006 8:17 pm
by JustinMinor1000
So as some of you will have seen I've got the lovely Max. Max is very solid but his wood is truely awfull ... I had always assumed that I would have to replace every stick of it .. No I know that traveller wood is the most specialised item on any moggie and i don't want to mess it up.
I can't really find a nice exploded diagram of a traveller so I'm not really sure how it goes together ..
Looking at the ESM catalog .. they supply each side as an assembled item.
If I bought the two sides and the four roof rails and the doors and bolted it all together and then transfered all the metal could I then in theory lift the remains of the old wood off the car and "Slot it in"?
Under what would be the rear doors on a four door saloon there is a bit of metal hanging off Max .. I can't see on any of the exploded diagrams what this is .. on page R44 of the workshop manual there seems to be nothing there at all ..
I'm under no illusions that there will be welding to do .. how much can one do to traveller with the wood off without bending the whole thing out of shape ?
Justin
Posted: Mon Jun 12, 2006 8:58 pm
by Welung666
Try
this for an exploded view of the timbers... Hope it's of some help.
Lee
Posted: Mon Jun 12, 2006 10:10 pm
by michel
Hello Justin,
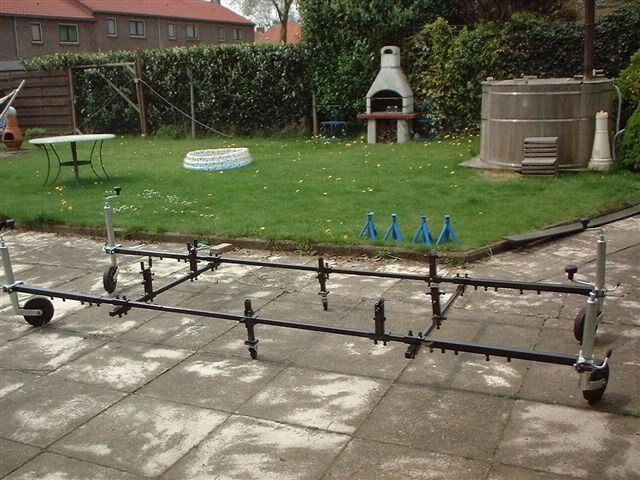
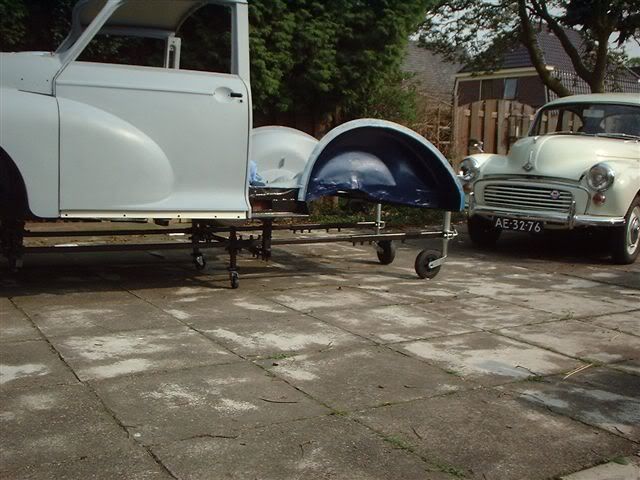
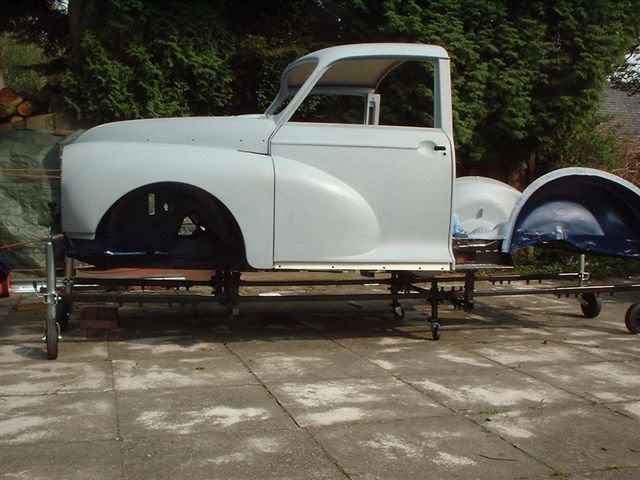
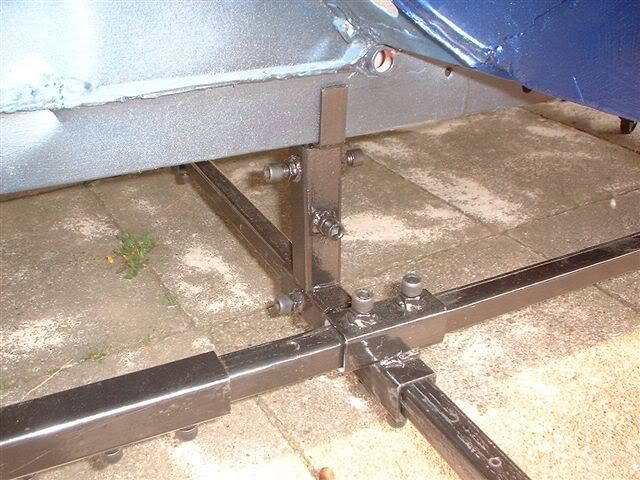
Here are some pictures from a traveller without wood. So you can get a idee of the metalwork underneath
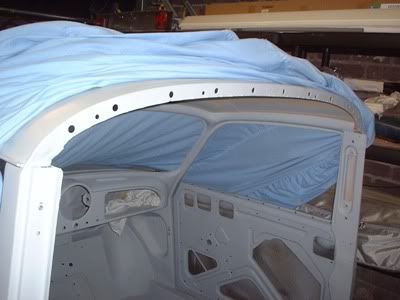
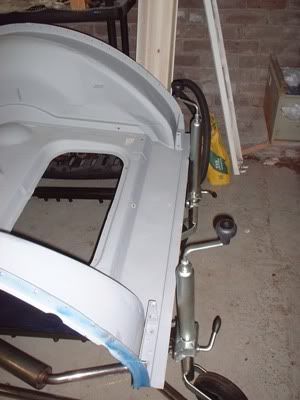
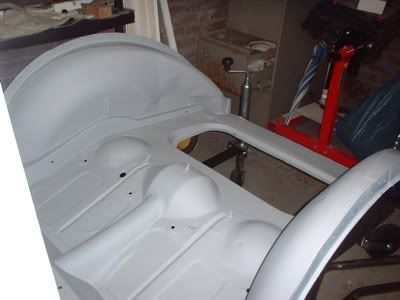

The wood is a part of the structure of the car. Just taking it off without strengtening the car is not a good plan.
Michel
Posted: Wed Jun 14, 2006 12:43 am
by JustinMinor1000
Brilliant

thankyou those pictures make it all clear ..
Posted: Wed Jun 14, 2006 4:09 am
by Kevin
Another useful contact is Steve Foreman.
http://www.morriswoodwork.co.uk/
Posted: Wed Jun 14, 2006 7:03 am
by chickenjohn
If ther car is going to be a run-around not a show car, then you can save yourself a lot of money by getting the wood as "seconds" from Travellers Timbers
http://www.travellertimbers.co.uk/.
Posted: Wed Jun 14, 2006 8:13 pm
by JustinMinor1000
Perfect .. this seems to be the answer to all my problems .. These pictures seem to have travellers with all the wood off. Do they put them on some sort of Jig to hold the chassis shape? or wil they keep the shape anyway ?
I've been thinking about getting an old caravan chassis and turning it into a "Traveling traveller" and Jig ..
Posted: Wed Jun 14, 2006 9:15 pm
by Tris
Welung666 wrote:Try
this for an exploded view of the timbers... Hope it's of some help.
Lee
Thats in the Haynes restoration manual! was helpful for me I found

Posted: Thu Jun 15, 2006 8:01 am
by chickenjohn
The car will hold its shape with the wood off unless rust has seriously weakened the structure. To replace sills, inner wing, etc on a traveller with the wood off, all you have to do is jack the car up, support the body at several points with axle stands to stope the remains of the floor from flexing and losing the shape of the car and several large blocks of wood, and only cut off what is needed to be replaced at the time.
I did this on the RHS rear of my traveller and the car kept its shape, the new panels fitted and so did the wood
Posted: Thu Jun 15, 2006 6:46 pm
by JustinMinor1000
chickenjohn wrote:The car will hold its shape with the wood off unless rust has seriously weakened the structure. To replace sills, inner wing, etc on a traveller with the wood off, all you have to do is jack the car up, support the body at several points with axle stands to stope the remains of the floor from flexing and losing the shape of the car and several large blocks of wood, and only cut off what is needed to be replaced at the time.
I did this on the RHS rear of my traveller and the car kept its shape, the new panels fitted and so did the wood
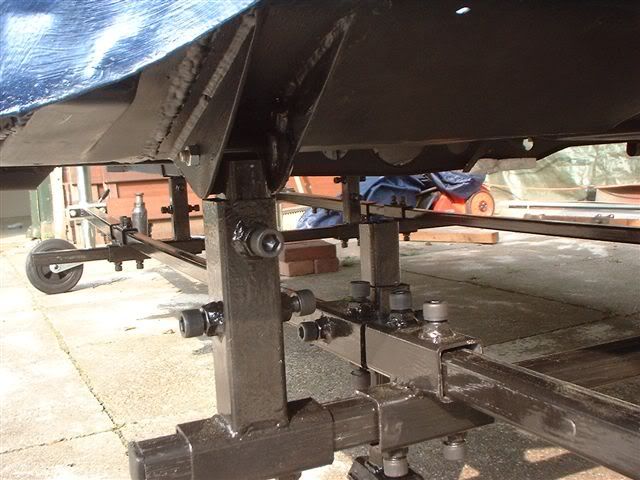
Superb .. Just the information I needed .. The floor is pretty good but has two bits that need some welding Axle stands either end and trolley jacks under the back suspension hangers.
I'll do that first and then cut the wood away piecemeal
Posted: Thu Jun 15, 2006 6:57 pm
by chickenjohn
Justin, I used large "balks" of timber between axle stand and rear floor, then one either side of the spring hanger, and another one. I'll dig out a picture so you can see what I did.
Posted: Thu Jun 15, 2006 7:35 pm
by rayofleamington
One useful tip I've seen (but never had to do... so far) is that when doind serious structural repairs on a traveller to use the new assembled wood as a guide to check the steel is lined up before and after welding.
For this however you want good quality assembled sides to use as a pattern!
There was a series of mag articles by Practical Classics that was turned into a book that demonstrates just how badly it can go wrong - even in the hands of a 'proffessional' Minor specialist!
I have a copy which you're welcome to borrow - they are v expensive on ebay due to the limited print run (lack of availability)
Posted: Thu Jun 15, 2006 8:44 pm
by JustinMinor1000
chickenjohn wrote:Justin, I used large "balks" of timber between axle stand and rear floor, then one either side of the spring hanger, and another one. I'll dig out a picture so you can see what I did.
I have a couple of 5" x3" fence posts at the stables .. they should be fine ..
Neighbour (Mot inspector) says there is nothing that specifically says I can't get an MOT with the wood as it is, except that he would block the car in with a tow truck to stop me driving it , in addition to listing it as dangerous on the certificate. He suggested stripping out the interior and the Aluminium and then Bolting timber accros the back doors and diagonally up the sides. He suggested that then you can cut away the bottom of the wood to do the tidying there and the welding and then replace each side individually ...
Given what I've read here this seems to tie in ..
In the diagram there seem to be four bits of wood supporting the roof (left to right) but I don't see anyone selling these .. Does anyone know why ?
justin
Posted: Fri Jun 16, 2006 12:20 am
by Kevin
Well Steve Foreman Kits are supposed to contain everything you need including associated nuts bolts pin window channels the lot email him and ask.
Posted: Fri Jun 16, 2006 7:54 am
by chickenjohn
The four bits of wood may be just to support the roof, but you may want to remove the rear roof section to replace the cab/roof rubber anyway. I guess they supported the roof to stop it buckling.
I would do one side of the car at a time:-
1. Jack car up high enough to do welded repairs.
2.support at several points on rear floor parallell to the wood as near to the side of the car as you can.
3. remove wood (looking at yours, it may pull away by hand!
4. Welded repairs you cannot get to with the wood on. (traveller wheel arch flange, if its rusted, and this piece :- hidden behind the ali panel the boxing panel extension

this is hidden behind the ali panels and tends to rot at the bottom, can't see it till the wood is off.
You may also find the ali panels are shot. You could make up new ones from 1mm ali sheet, or panels are available- paint before fitting to the car- acid etc primer first, run down, then top coat. I did mine at home using celly spray cans and they look allright!
Posted: Mon Jun 19, 2006 4:18 pm
by michel
Posted: Mon Jun 19, 2006 7:00 pm
by Onne
thats just stunning! True dutch workmanship this!
Posted: Mon Jun 19, 2006 7:34 pm
by michel
Thanks Onne
Posted: Mon Jun 19, 2006 7:39 pm
by Kevin
OHH to have that much space and room available

Posted: Mon Jun 19, 2006 8:04 pm
by michel
Yep, that was one of the reasons I bought the house. A big garage with a pit and two additional spaces for the rest of the equipment.

(sorry, a bit of topic)