Page 5 of 6
Re: 1966 2 door saloon Milly restoration project
Posted: Tue Jun 03, 2025 9:07 am
by David JM
Cheers John, I'll check that out.
Re: 1966 2 door saloon Milly restoration project
Posted: Tue Jun 03, 2025 11:49 am
by svenedin
My car has had an electric washer pump since before I owned it but I recently replaced the Trico pump as it wore out. The replacement Lucas pump is polarity sensitive. My car is positive earth. The + terminal of the pump is connected to earth e.g. to one of the pump mounting screws with a ring terminal. The negative terminal of the pump goes to the switch and the wire can be routed via the same hole as the water tubing (through a grommet of course). The other terminal of the switch is connected to any convenient fused ignition switched live, which for neatness sake, in my case, is taken from behind the dashboard. Note also the correct in/out ports for the water tubing. The tube that goes into the washer bottle should be fitted with a non-return foot valve that incorporates a mesh filter. This prevents the pump from operating dry (which will quickly destroy it).
Stephen
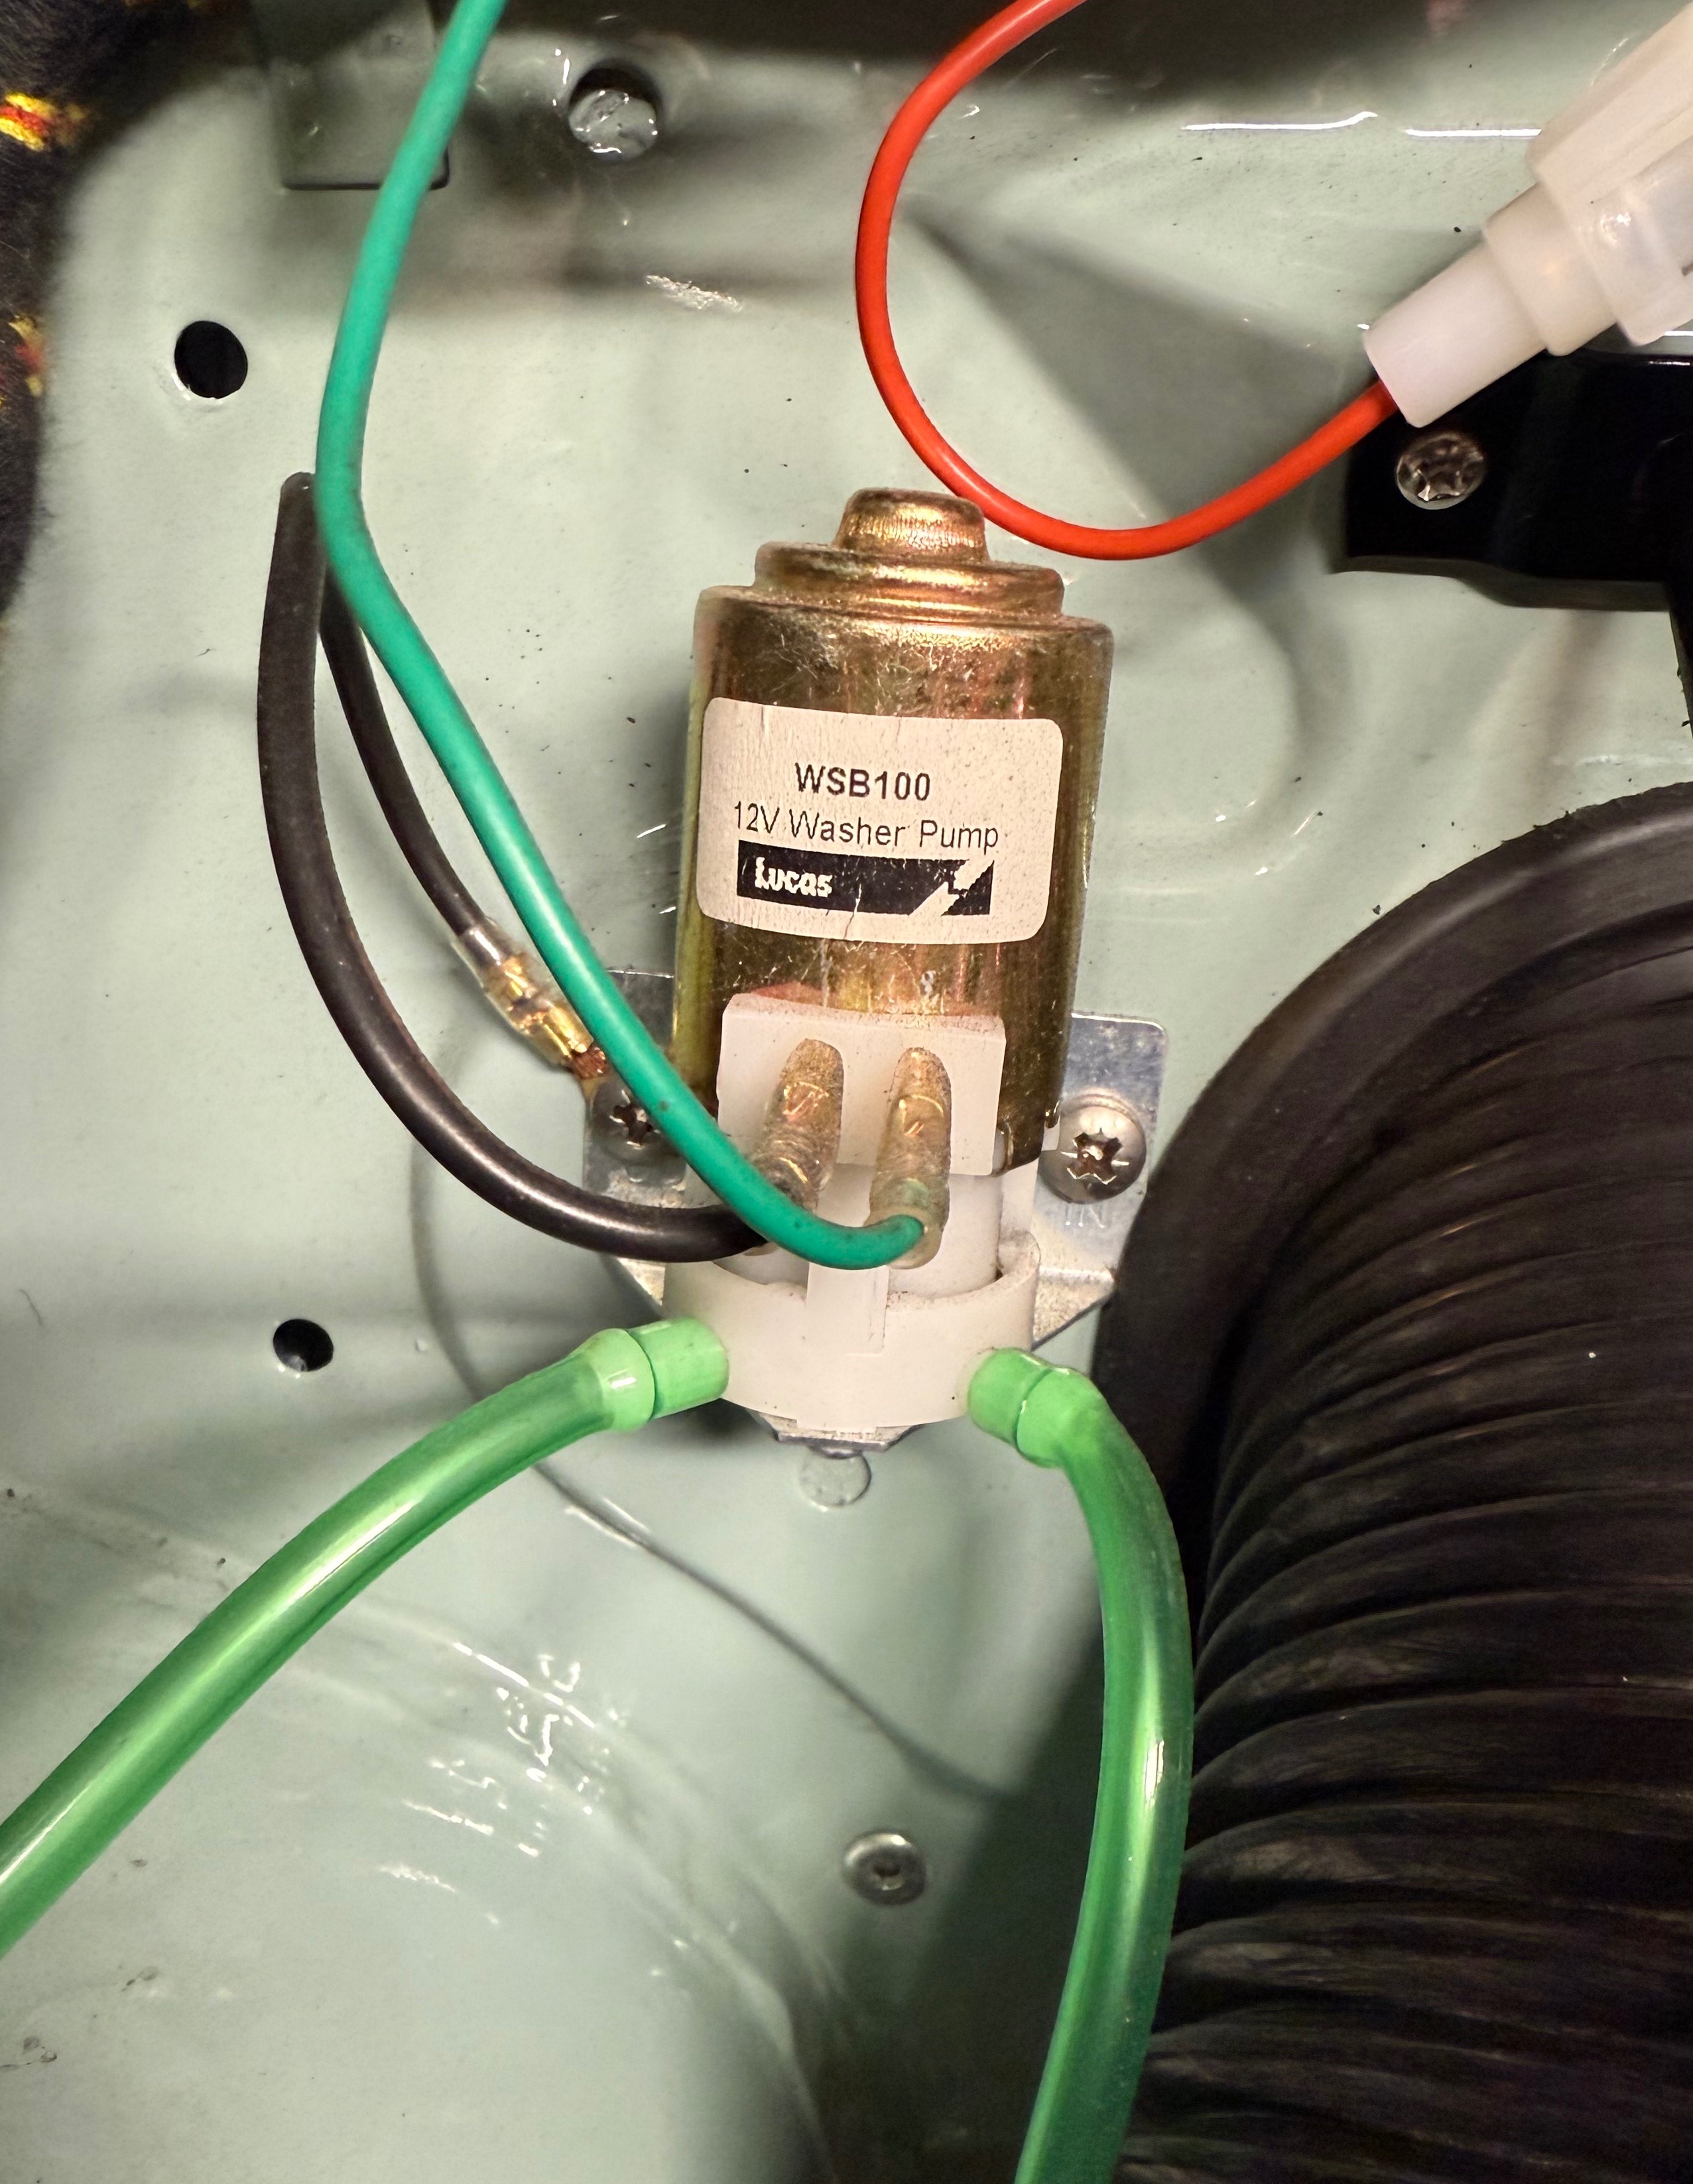
- IMG_2184.jpeg (1.74 MiB) Viewed 1555 times
Re: 1966 2 door saloon Milly restoration project
Posted: Tue Jun 03, 2025 12:05 pm
by svenedin
David JM wrote: ↑Sat May 24, 2025 10:59 am
looking through my HAYNES manual, thew sparkplug gap should be .025 of an inch.so where do we say the .025 is on this scale 1.2.or 3, anyone help me out here?

Definitely 3. If you fit a high-output coil you can open the gap further to 30 or even 35 thou.
Stephen
Re: 1966 2 door saloon Milly restoration project
Posted: Wed Jun 04, 2025 11:58 am
by David JM
Thank you Stephen, great reply, much appreciated.
Dave
Re: 1966 2 door saloon Milly restoration project
Posted: Sun Jun 08, 2025 6:04 pm
by David JM
Today was a day of easy simple wins, my new Mig welder is very impressive, it's not even half the size of my old one and a fraction of the weight, yet does a better more accurate job.

first win was the broken off seat bolt, cut the retaining nut with a 1mm nut splitting disc and simply welded in a new one.

that was the last snag to moving on and getting the interior in, here, Harry and his Mum use vinyl cleaner before the seats go in.

Re: 1966 2 door saloon Milly restoration project
Posted: Mon Jun 09, 2025 9:40 pm
by David JM
What a great day, all the welding done, fuel in line filter leak sorted, the fuel gauge is functioning, the wash pump was working but has now given up the ghost. So new one on order. Great test drive along some country roads, she drives so smoothly now, with that clutch linkage swap out. a real pleasure. Here's Harry, the new proud owner in the driving seat.

Re: 1966 2 door saloon Milly restoration project
Posted: Mon Jun 09, 2025 9:45 pm
by David JM
later on a nice easy win for Harry, he made a bracket to stop the crank handle stop rattling around in the boot using a pre existing bolt hole in the floor to tie it up nice and tight.

quite a nice fabrication job.

Re: 1966 2 door saloon Milly restoration project
Posted: Tue Jun 10, 2025 6:26 am
by firedrake1942
The original black plastic tool bag used to do that quite well- I always wrapped the tools in old cloth off-cuts though. I still keep one under my driver's seat out of long habit as I frequently had to use it in the late 1970s / early 1980s.
Re: 1966 2 door saloon Milly restoration project
Posted: Wed Jun 11, 2025 10:18 pm
by David JM
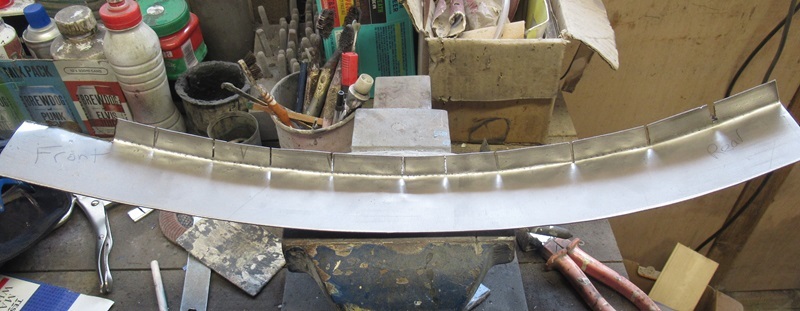
Next part to be fabricated is the cross brace spanning the bonnet that attaches to the bonnet hold up linkage.

cutting out a cardboard model and holding it up the the original on my Pickup, compared for size.

using the cardboard model as a template to mark out metal blanks.

Re: 1966 2 door saloon Milly restoration project
Posted: Wed Jun 11, 2025 10:22 pm
by David JM
welded onto the cross brace and a pin placed through to the bonnet hold up linkage. Works fine, the cross piece was welded together from two bent and shaped pieces, it's only tac welded in so far, finish it off tomorrow. I can put the shotgun cleaning rod away that i used to hold up the bonnet.

Re: 1966 2 door saloon Milly restoration project
Posted: Fri Jun 13, 2025 5:29 pm
by David JM
Not sure how we missed this switch, it operates the horn. So all systems are now up and running. Harry does intend to replace the steering wheel by one from ESM, stylish wood one, so he won't have to worry about wiring in the horn push for a while.

Re: 1966 2 door saloon Milly restoration project
Posted: Sat Jun 14, 2025 1:28 pm
by David JM
Having way too much fun for a bloke who is 62 Tomorrow, selfie taken old school of course, not with a smart phone oh no, with Cannon Digital Camera.

Re: 1966 2 door saloon Milly restoration project
Posted: Tue Jun 17, 2025 12:33 pm
by mikec4193
So do you find these old Moggies for people and then fix them up for them??
Just wondering out loud that is all...
MikeC
Re: 1966 2 door saloon Milly restoration project
Posted: Thu Jun 19, 2025 5:46 pm
by David JM
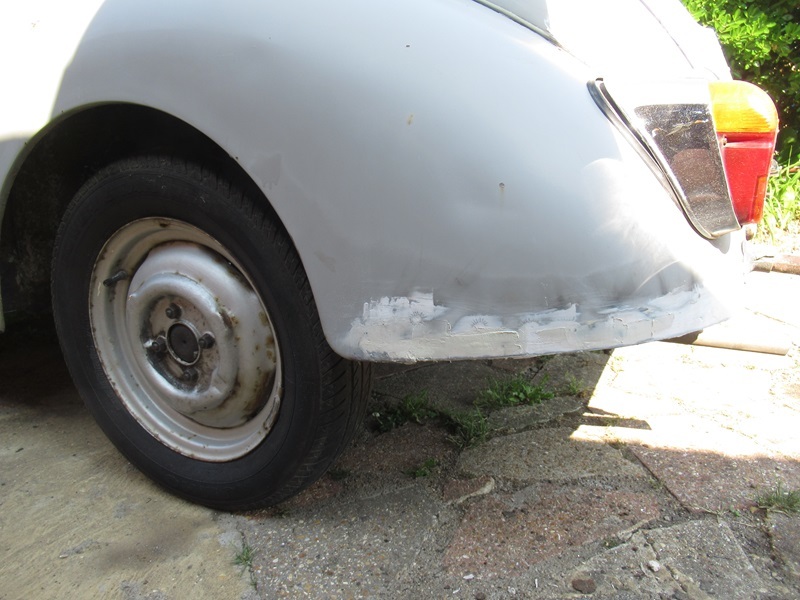
Hi Mike, no, for myself mainly, this one is going to be my son's first car, He takes his test in a couple of months, so I'm keeping my fingers crossed for him.
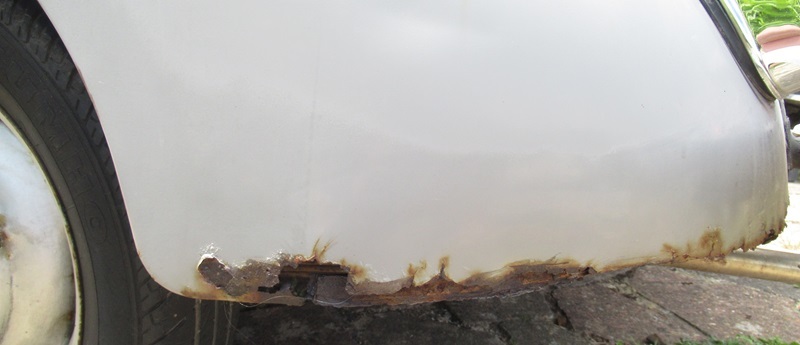
anyway, the repair piece for the lower rear left wing, it's a bit crusty down there.
that will have to be cut back to solid metal, loosing that crusty edge.
Re: 1966 2 door saloon Milly restoration project
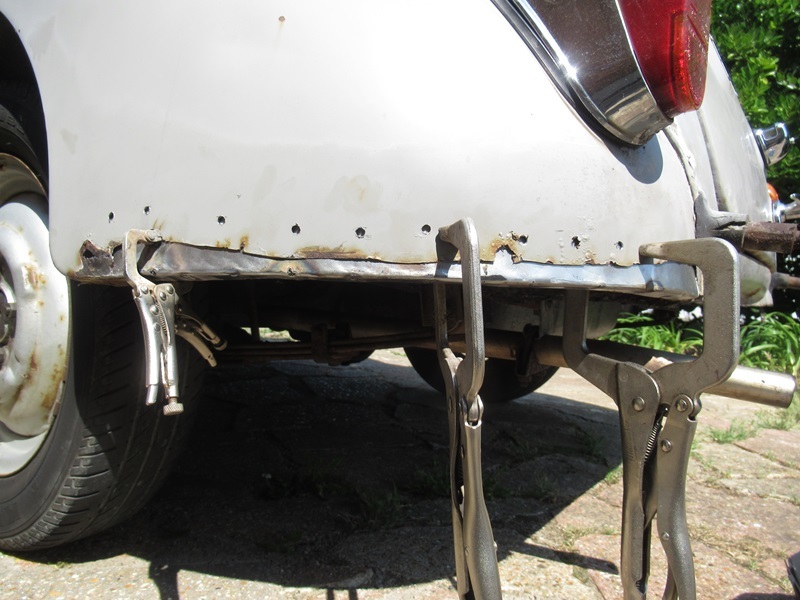
Posted: Thu Jun 19, 2025 5:56 pm
by David JM
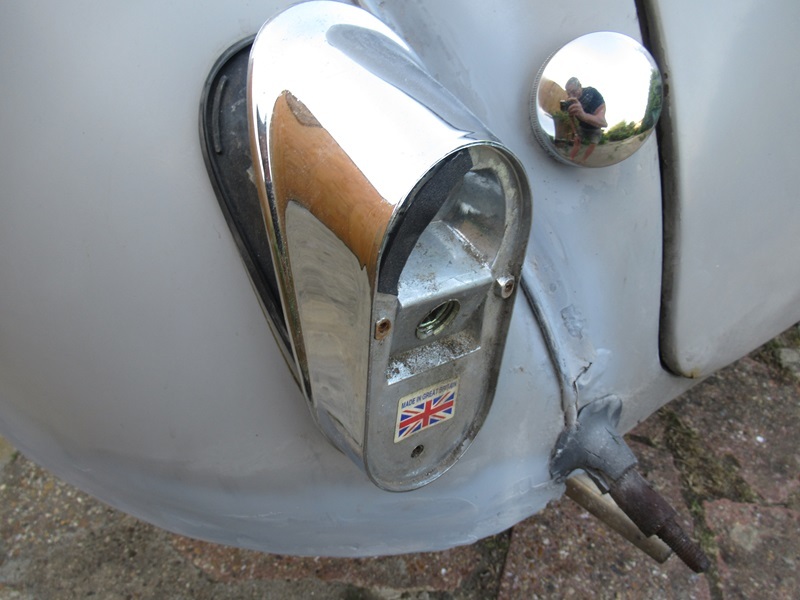
Unbolted the Bumper and slid it off to the garage out of the way, the repair part had it's darts welded up, here it is clamped in position, given a nudge here and there to line it all up.
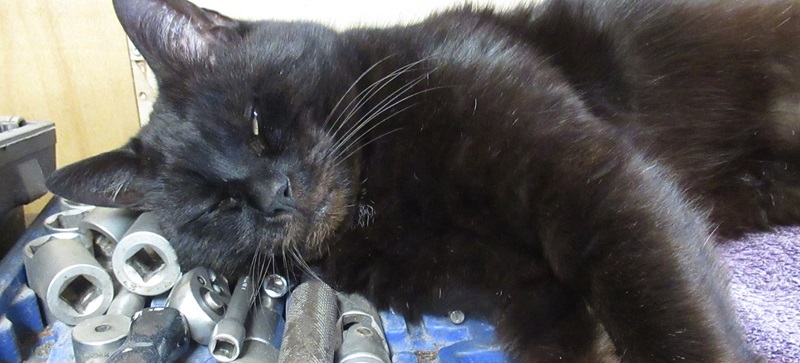
Lucky for me I don't need any of these cold sockets, or I'd have to wake up George, and he's grumpy when he can't sleep on sockets.
I've had to use half the hardener I usually use, it's such a hot day, the filler goes stodgy very fast, have to act quickley. Let that cure before I get some wet and dry on it.
Re: 1966 2 door saloon Milly restoration project
Posted: Thu Jun 19, 2025 8:18 pm
by David JM
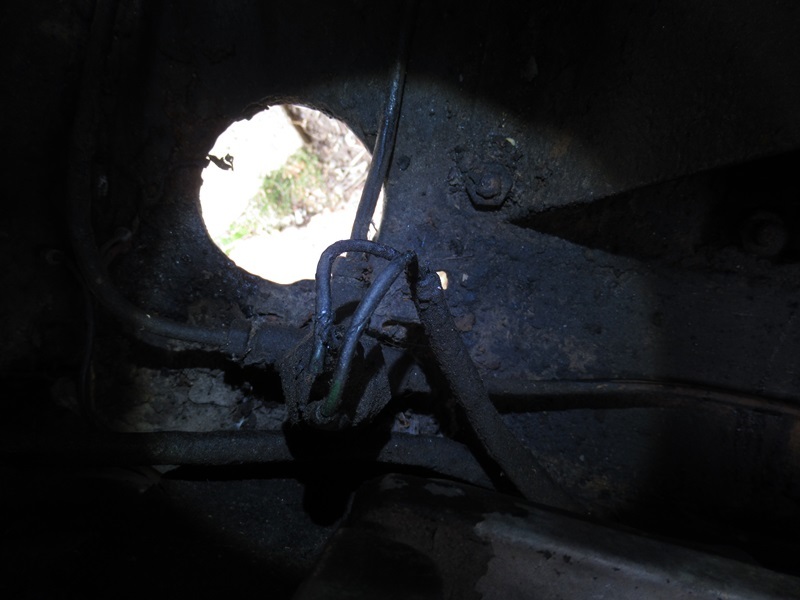
To get at the wing join to body I need to remove the rear light cluster this side, undoing the bolt from inside was a big mistake, it crumbled the captive nut plastic surround.
I collected the pieces and I'm trying to bond them back together again. but I need to take the light base unit off the wing to fix it,
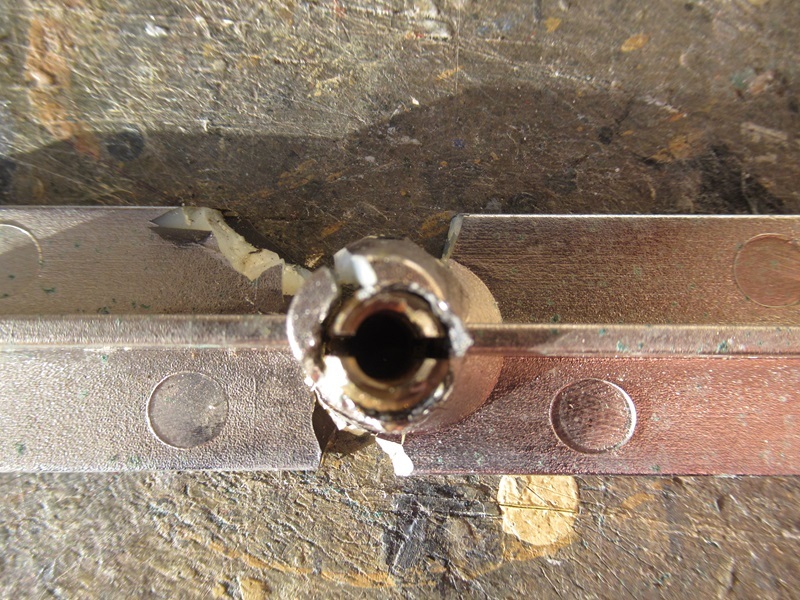
So I need to disconnect the wires that are the only thing stopping the base from coming off, anyone know if these just pull out? unplug? I'd rather not break it up further, as a new one will set me back 125 quid.
Re: 1966 2 door saloon Milly restoration project
Posted: Sun Jun 22, 2025 9:11 am
by ManyMinors
Plastic

It's just another cheap reproduction part. Not really designed to last or be repaired. You might be able to patch it back together but would probably be better off to buy a sound secondhand unit. I wouldn't consider buying a new one for my own car. There are plenty of used ones around if you don't mind a few pimples in the chrome

Re: 1966 2 door saloon Milly restoration project
Posted: Sun Jun 22, 2025 9:26 am
by Bill_qaz
The bulb holder,round silver bit should just pull out of base, it a circle of spring legs. Try prying gently against flat plate.
- Screenshot_20250622-092700_Samsung Internet.jpg (121.94 KiB) Viewed 1007 times
Re: 1966 2 door saloon Milly restoration project
Posted: Tue Jun 24, 2025 2:15 pm
by David JM
Thank you many minors and Bill, very helpful comments.
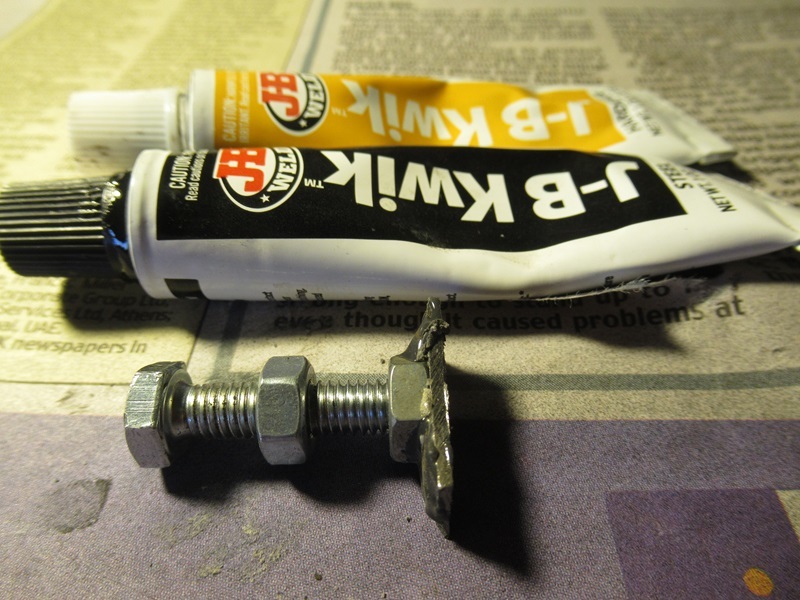
I have been using JB WELD to glue on retaining nuts inside the light housing, only a temporary measure till I can find an NOS replacement, the made in UK sticker may date this as later than the car 1966, as that drive was late sixties, so it may be a replacement light base anyway. So it's back on for now so I can concentrate on more worrying issues.

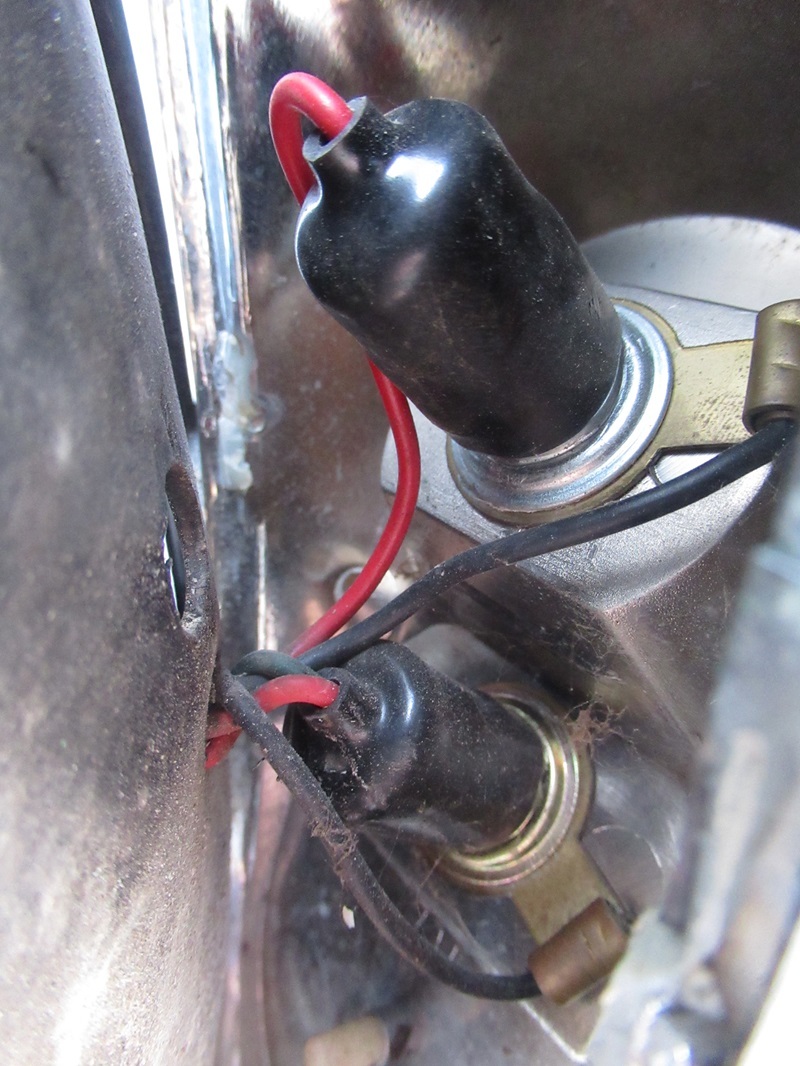
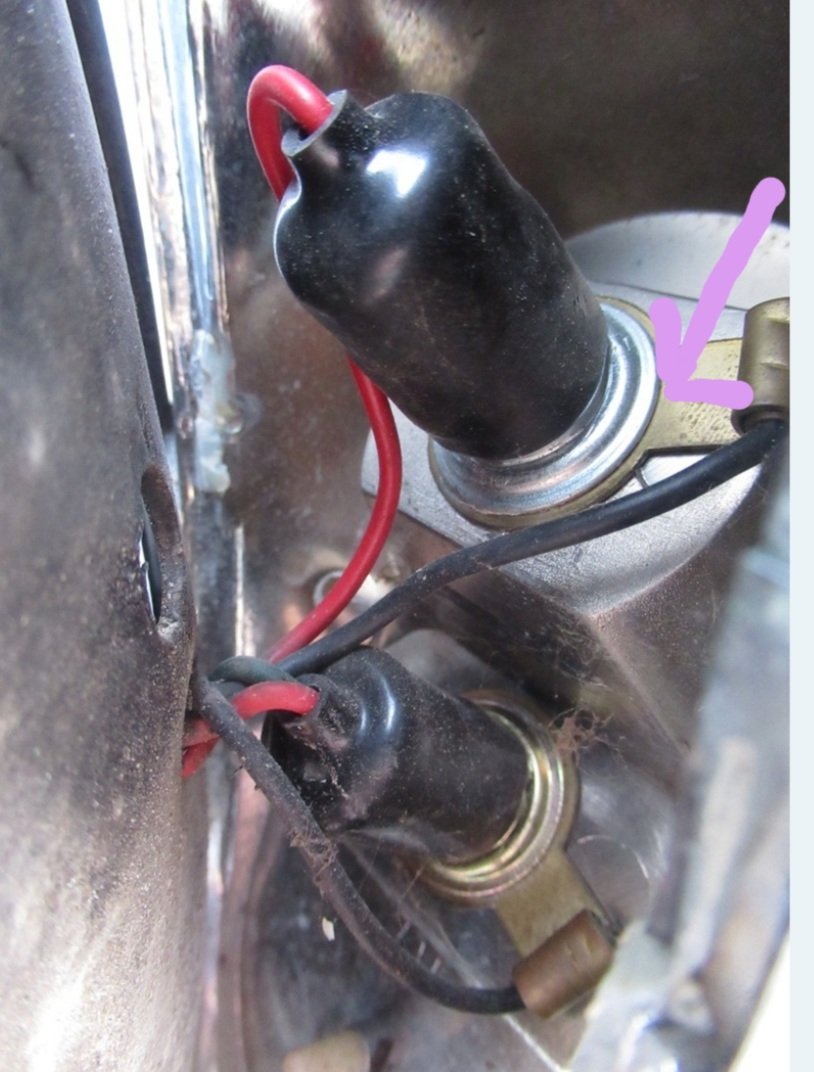
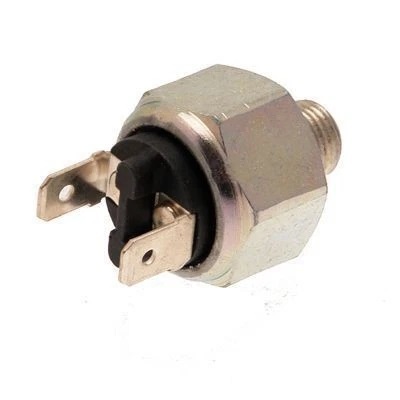
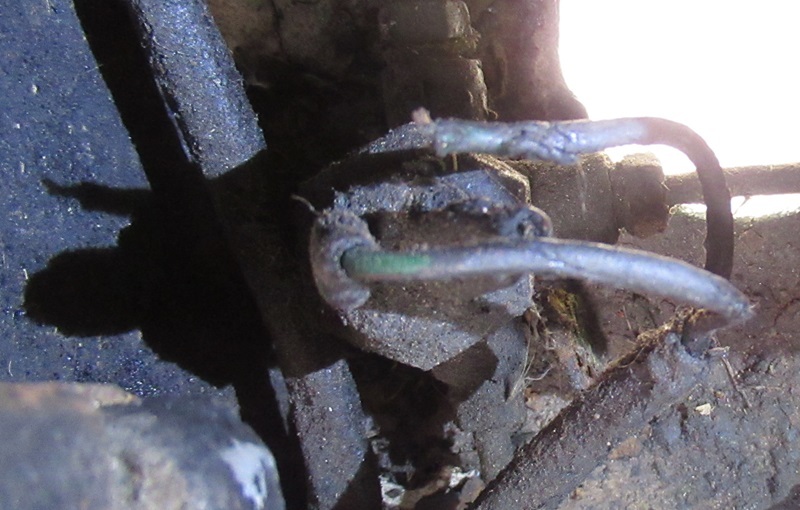
doing a light check the brake lights failed to show, no wonder. looking at the state of the brake light switch.
confusing image, but here you can see the shadow of a loose connection.
[
https://images2.imgbox.com/7f/56/KYfJ4PjN_o.jpg][/img]
so a new one on order
Re: 1966 2 door saloon Milly restoration project
Posted: Tue Jun 24, 2025 7:23 pm
by Bill_qaz
Has the terminal broken off the switch or just the wire.
There are lots of posts about the new switches being poor quality and people searching for nos. If the switch is undamaged and working then simply clean the terminals and if needed crimp new terminals on the wires. The original maybe be more reliable than the replacement.