Page 30 of 36
Posted: Thu May 28, 2009 8:13 pm
by davidmiles
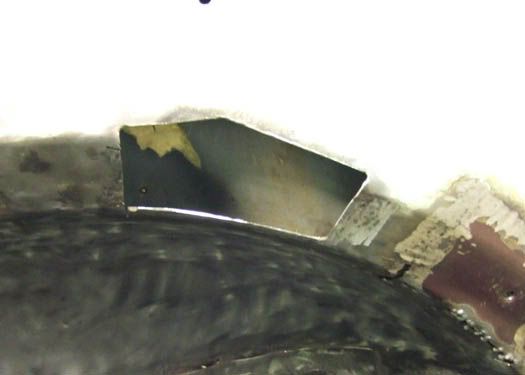
The next area for a patch is this forward area of the f/o/s inner wing, I tried to unbolt that outer wing securing bolt, but as is so often the case with this resoration project, it sheared off. so its nice and flat now ready to take the patch, once i've been over it again with the wire wheel.<br>

<br>
Posted: Thu May 28, 2009 8:18 pm
by aupickup
there will be a captive nut there as well of course, i think they are 5/16 bsf
Posted: Thu May 28, 2009 8:32 pm
by davidmiles
Ive found that using a jigsaw fitted with a blade for steel is a quick accurate way of cutting out shapes from a cardboard template. this patch covers the wing bolt hole, that will have to be re-drilled through the new metal.
<br>

<br>
Posted: Thu May 28, 2009 8:35 pm
by davidmiles
Cheers aupickup, yes, that bolt will have to be welded back on as it sheared off earlier, any tips for welding on captive nuts without damaging the thread?
Posted: Thu May 28, 2009 9:12 pm
by pfgiz
When I did it on my Saloon I drilled a hole, put the nut on the correct side and bolted it in tight. Welded the nut in place and removed the bolt. As the bolt was in place while the welding was done there was no damage to the thread.
Posted: Thu May 28, 2009 9:41 pm
by jaekl
The leading wing bolt is just that a bolt, no captive nut. Original captive nuts are square nuts held under folded sheet metal that is spot welded on. A simple die will form the sheet metal. Then you can reproduce the originals. If you can deal with the lack of float a tapped plate works well too.
Posted: Thu May 28, 2009 9:44 pm
by davidmiles
thanks, I'll give that a go.
Posted: Thu May 28, 2009 10:10 pm
by les
Most of these captive nuts are retained in a type of cage rather than welded directly, not always needed but used mainly to allow the nut to have some movement for alignment.
Posted: Thu May 28, 2009 10:15 pm
by les
Sorry didn't read the post by jaekl, I've just repeated his thoughts!
Posted: Fri May 29, 2009 11:33 am
by rich-legg
davidmiles wrote:here's a couple of shots of the wing welding results, the top picture is the seam welded inner wing, while the lower picture is of the plug welded outer, as Dean suggested.
Great progress on the welding!!
I'd suggest cutting the rust out completely before welding a patch on. The rust needs to be cut out or neutralised, otherwise it will grow back. I'd also say seem weld the other side of the patch as well, or use seam-sealer on it, otherwise moisture will get in the gaps & rot it again, and before the patch goes on paint the panel with weld through zink primer.
You don't want to be having to do this all again in a few years time!
Why not try butt-welding, or using a joggler, rather than patching it? It might be a little harder to get the hang of, but the results will be much more pleasing to the eye.
Here is an example for you...
This was a new dash butt-welded in.

And repairs to wing fixings, which aren't that great.
Posted: Fri May 29, 2009 12:37 pm
by davidmiles
Thanks Rich, that sounds like great advice, I wish I'd read that before going onto this one, still at least I wire wheeled away any rust, and I've seam welded the other side, but this next one...<br>

<br>
Posted: Fri May 29, 2009 12:40 pm
by davidmiles
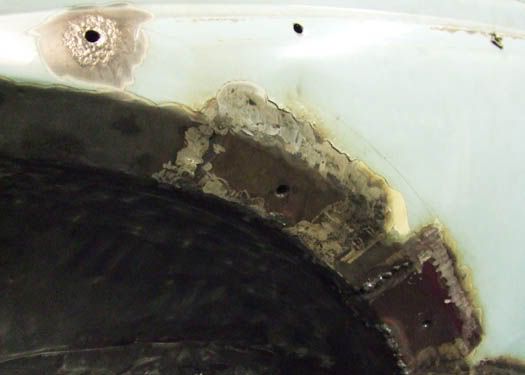
It's the f/o/s inner wing top curve under the re-inforcing plate, that plate makes this the most complex area Ive dealt with up to now, I'll try out your suggestions on this one.<br>

<br>
Posted: Fri May 29, 2009 12:59 pm
by davidmiles
I take the point about pleasing to the eye,the other two previous patches are hidden under the flange, but this area is apparent the moment you lift the bonnet to show off your immaculately restored engine (yeah, dream on Dave) so butt welding is the next step.<br>

<br>
Posted: Fri May 29, 2009 1:00 pm
by alex_holden
davidmiles wrote:It's the f/o/s inner wing top curve under the re-inforcing plate, that plate makes this the most complex area Ive dealt with up to now, I'll try out your suggestions on this one.<br>
<br>
I don't want to put you off, but that is possibly the most difficult area I've had to repair on my cars. It's a complex compound curved shape where three panels meet, it needs to be the right profile for the bump stop to sit in the right place and at the right angle, and it needs to be structurally strong because the bump stop can get bashed pretty hard. If I were you I'd be tempted to practise on some of the easier bits first.

Posted: Fri May 29, 2009 1:08 pm
by davidmiles
So how do I start with this one? that reinforcing plate with the hole stamped in it will have to come away first, it needs a bottom repair patch itself. There are rusted bolts in there that attach the front rubber bump stop. they'll have to come off first I guess.
<br>

<br>
Posted: Fri May 29, 2009 1:18 pm
by davidmiles
Yes Alex you're quite right this does look difficult, compound curve an all, wouldn't it be ironic if that pickup pfqiz found on his latest thread was going for free and its got a better cab than this. It's not far from me and I'm going to check it out soon, I'll post some pics here maybe, see what you all think.
Posted: Fri May 29, 2009 2:02 pm
by davidmiles
just before I start my late shift this afternoon, Ive got to show you all... best weld so far, ok its only 3/4 inch long, but as Dridon said in Lawence of Arabia, "big things have small beginings", ok he was talking about the Arab revolt, but it works with welding too.<br>

<br>
Posted: Fri May 29, 2009 3:44 pm
by rayofleamington
It's the f/o/s inner wing top curve under the re-inforcing plate, that plate makes this the most complex area Ive dealt with up to now, I'll try out your suggestions on this one.
I tried and failed to make a good repair piece for that area on my pickup last year. The other side was a mess so I replaced the complete section - which took less time and effort!
Lesson learned the hard way again...
For those with panel beating expertise, a 3D curve is probably OK. For those like me who don't and think that cutting a few darts in sheet steel and using a big hammer with a round end will help make a 3D complex curve - It usually doesn't.
Posted: Fri May 29, 2009 5:37 pm
by d_harris
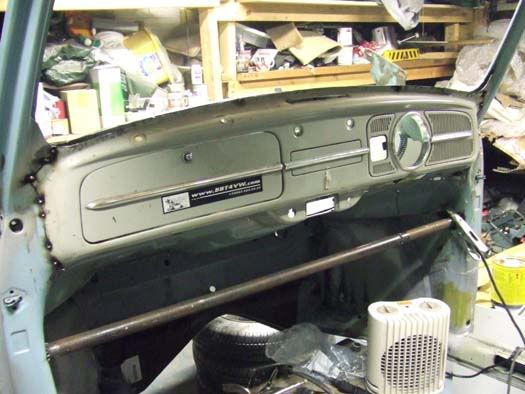
rich-legg wrote:
This was a new dash butt-welded in.
I looked at that, and wondered for a moment why you had put a beetle dash in a morris!

Posted: Fri May 29, 2009 10:56 pm
by les
and wondered for a moment
I'm still wondering!!
