Page 2 of 14
Posted: Mon May 11, 2009 9:40 pm
by Dean
This is great stuff, very informative. Thank you for sharing, the car is looking great.

Posted: Mon May 11, 2009 9:46 pm
by d_harris
Very good work. How do you find the welder btw? my SIP is a pain in the bum
Posted: Mon May 11, 2009 9:55 pm
by taupe
Dan
My SIP is also a pain in the bum - when its working ok it does lovely welds and its nearly always ok for a small amount of tacking and for plug welding. I use the oxy acetylene set or spot welder when I can though but I have a rule with spot welding to only use when joining two new bits of steel. I also do a test spot weld first and check by pulling the test apart. If its a good weld there is a plug ripped out of one piece leaving a hole!!
Regards
Taupe
Posted: Mon May 11, 2009 10:38 pm
by bmcecosse
Better to get some steel sheet correct thickness - and just fab up your own panel if you really feel the ready-made panel is too thin.
Posted: Mon May 11, 2009 11:07 pm
by taupe
Yes BMCecosse
I have considered fabricating my own front floors. The pressings are a bit tricky though and without that they will surely drum.
The floor Im cutting out that has been part replaced has an 18 SWG (1.2mm) floor - Shame I havent yet found a replacement this thick

BTW has anyone noticed that the shape of the floor pressings are different in the Quarter and half floors? Which is the closest to original.
Posted: Tue May 12, 2009 12:34 am
by bmcecosse
That floor sounds thicker than standard! Is it original ??
Posted: Tue May 12, 2009 12:52 am
by taupe
The original floor measures at approx 1mm ie 20SWG
The replacement section previously fitted was thicker 18 SWG.
Id be quite happy with 1mm for the replacement but wouldnt mind if it was 1.2mm.
When carrying out repairs I always try to match the existing or go very slightly thicker as I take the view that even a correctly repaired area is generally going to be weaker than the original due to the fact that it has been disturbed.
Posted: Tue May 12, 2009 10:35 pm
by MGFmad
Dan_Harris wrote:Very good work. How do you find the welder btw? my SIP is a pain in the bum
That is the same as my welder (in the photo) and it gave up on the first day of welding my Traveller. Luckily I was able to borrow this beast which was incredible
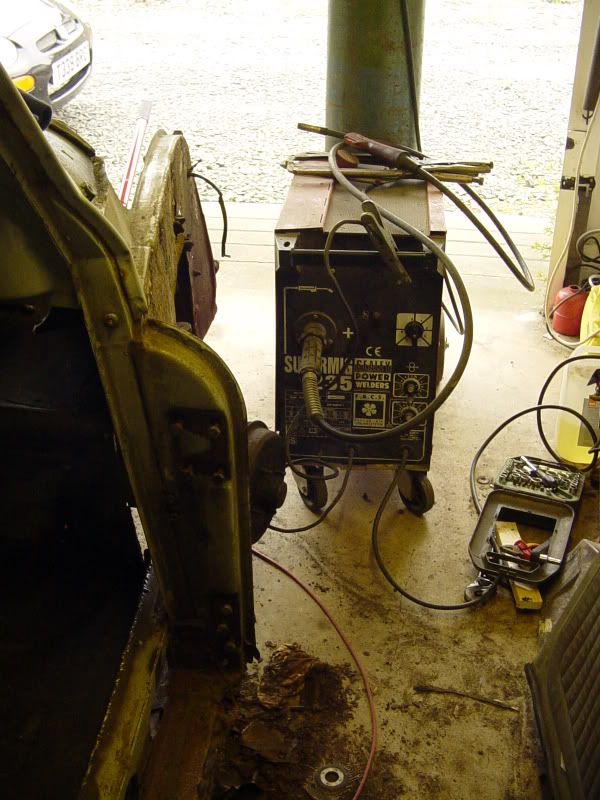
Strangley though my old SIP has now decided to start working again

Posted: Wed May 13, 2009 1:47 pm
by rich-legg
MGFmad wrote:Dan_Harris wrote:Very good work. How do you find the welder btw? my SIP is a pain in the bum
That is the same as my welder (in the photo) and it gave up on the first day of welding my Traveller. Luckily I was able to borrow this beast which was incredible
Strangley though my old SIP has now decided to start working again
That's the same as mine - it's a great welder

Posted: Sat May 16, 2009 6:04 pm
by taupe
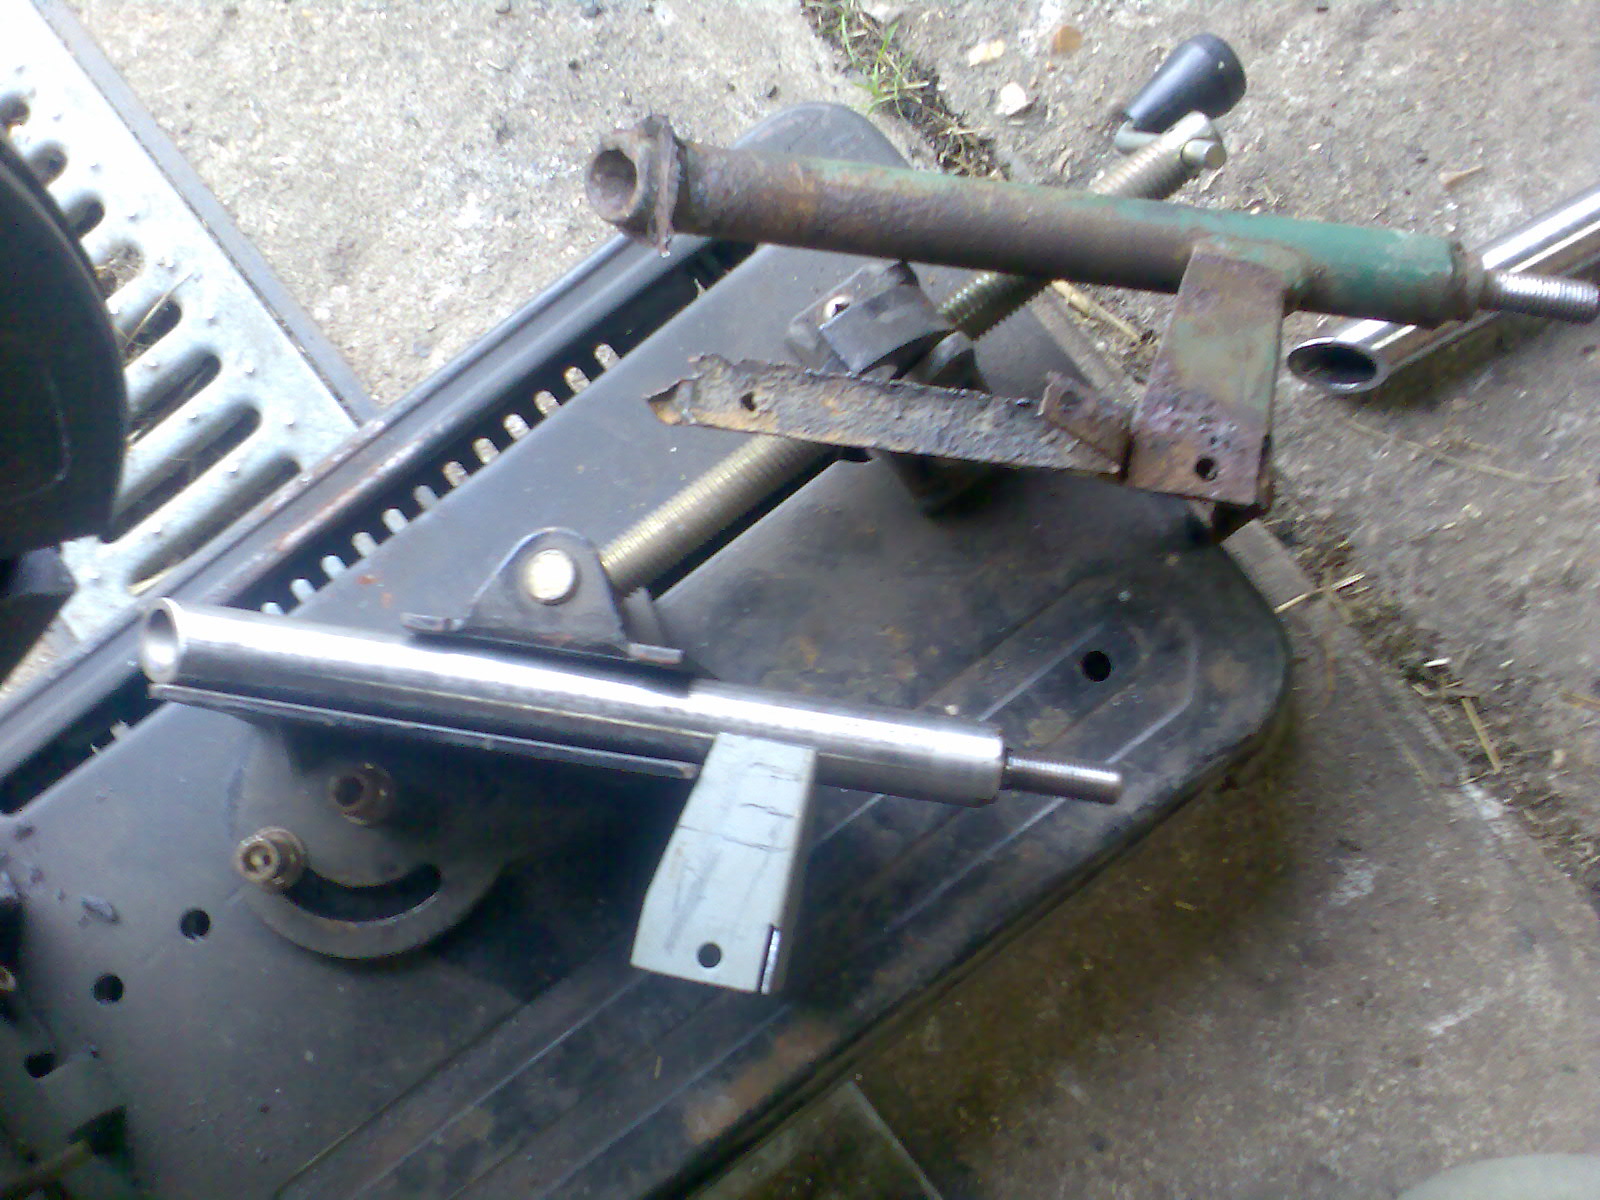
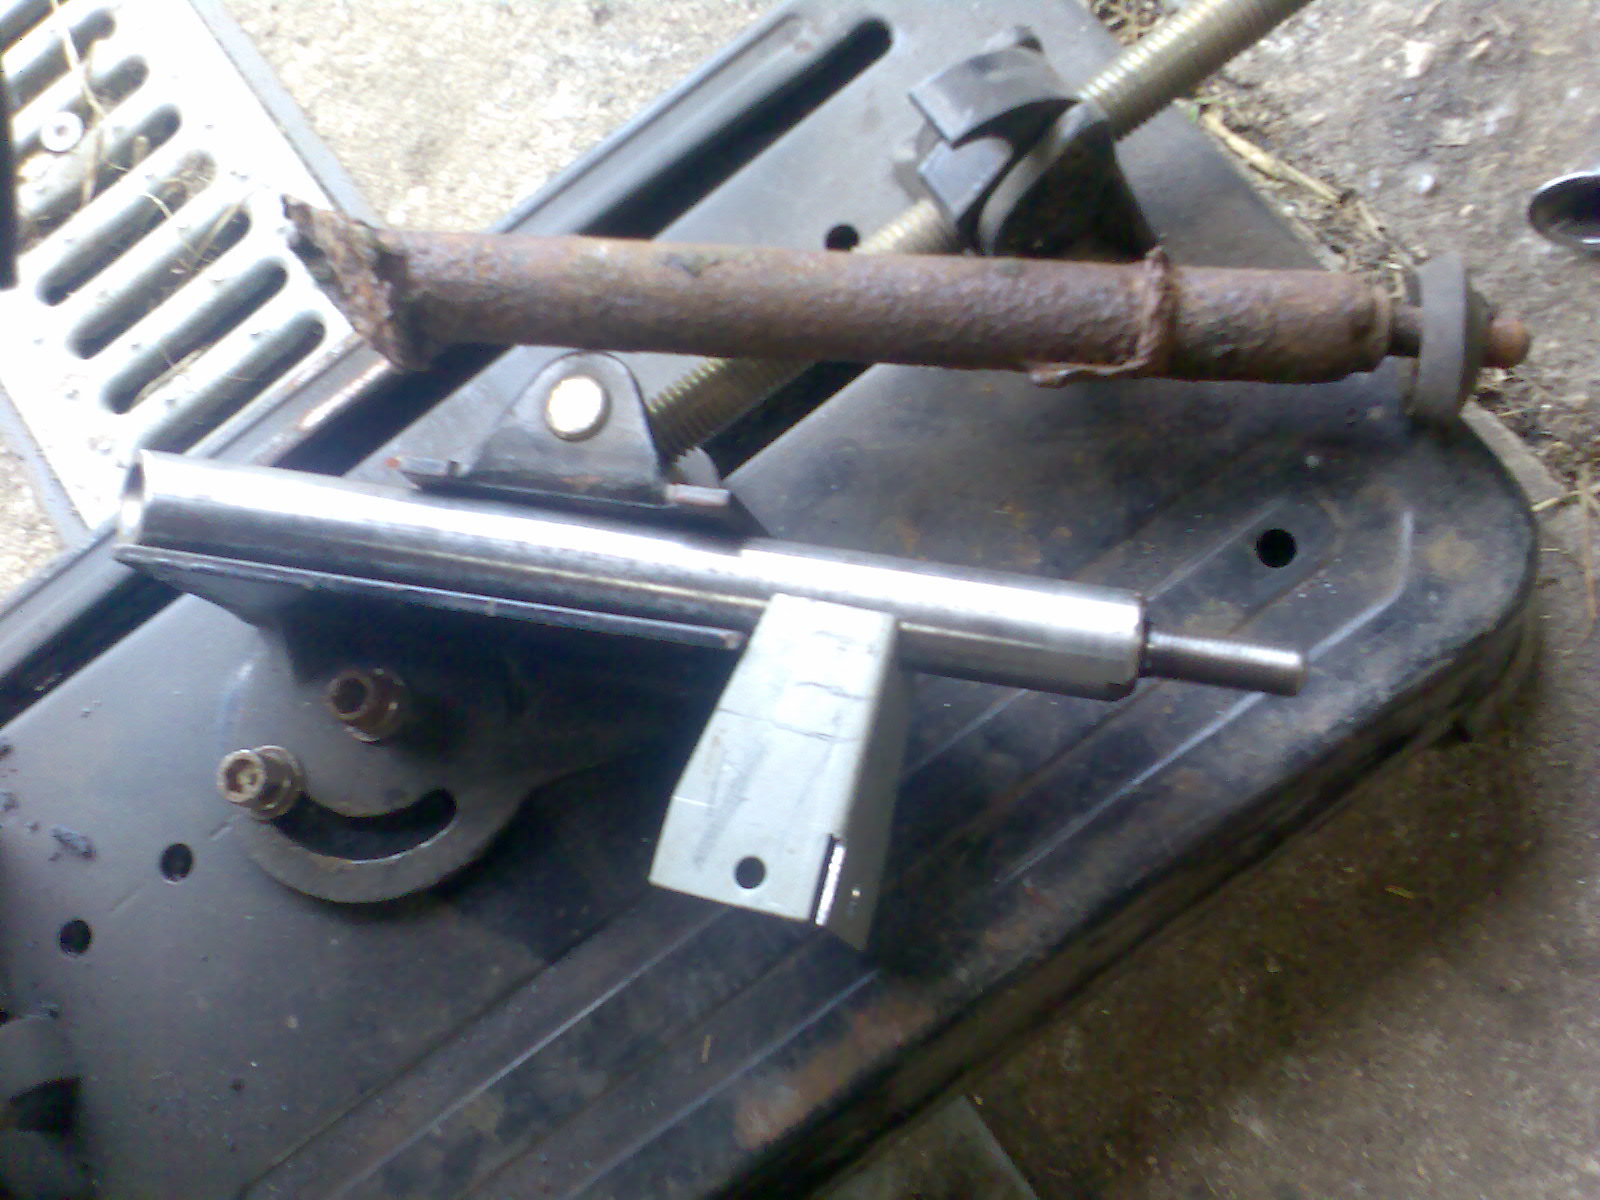
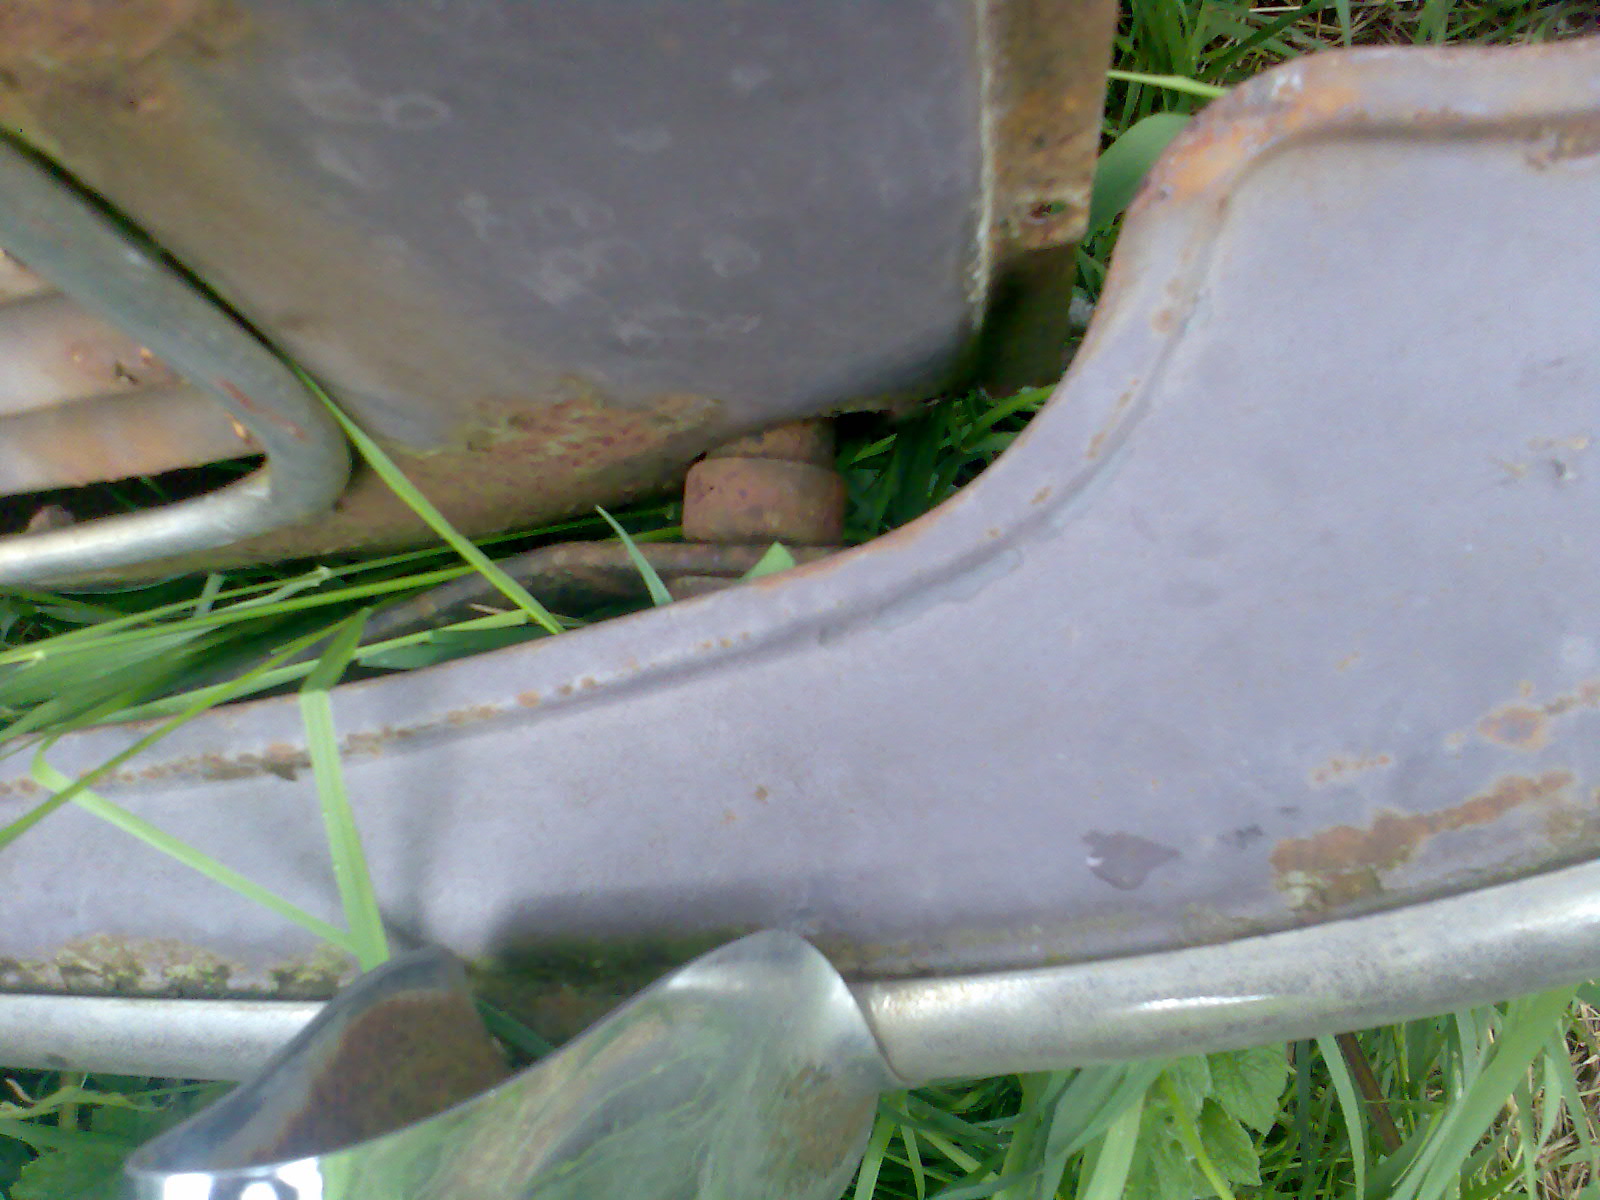
Hi
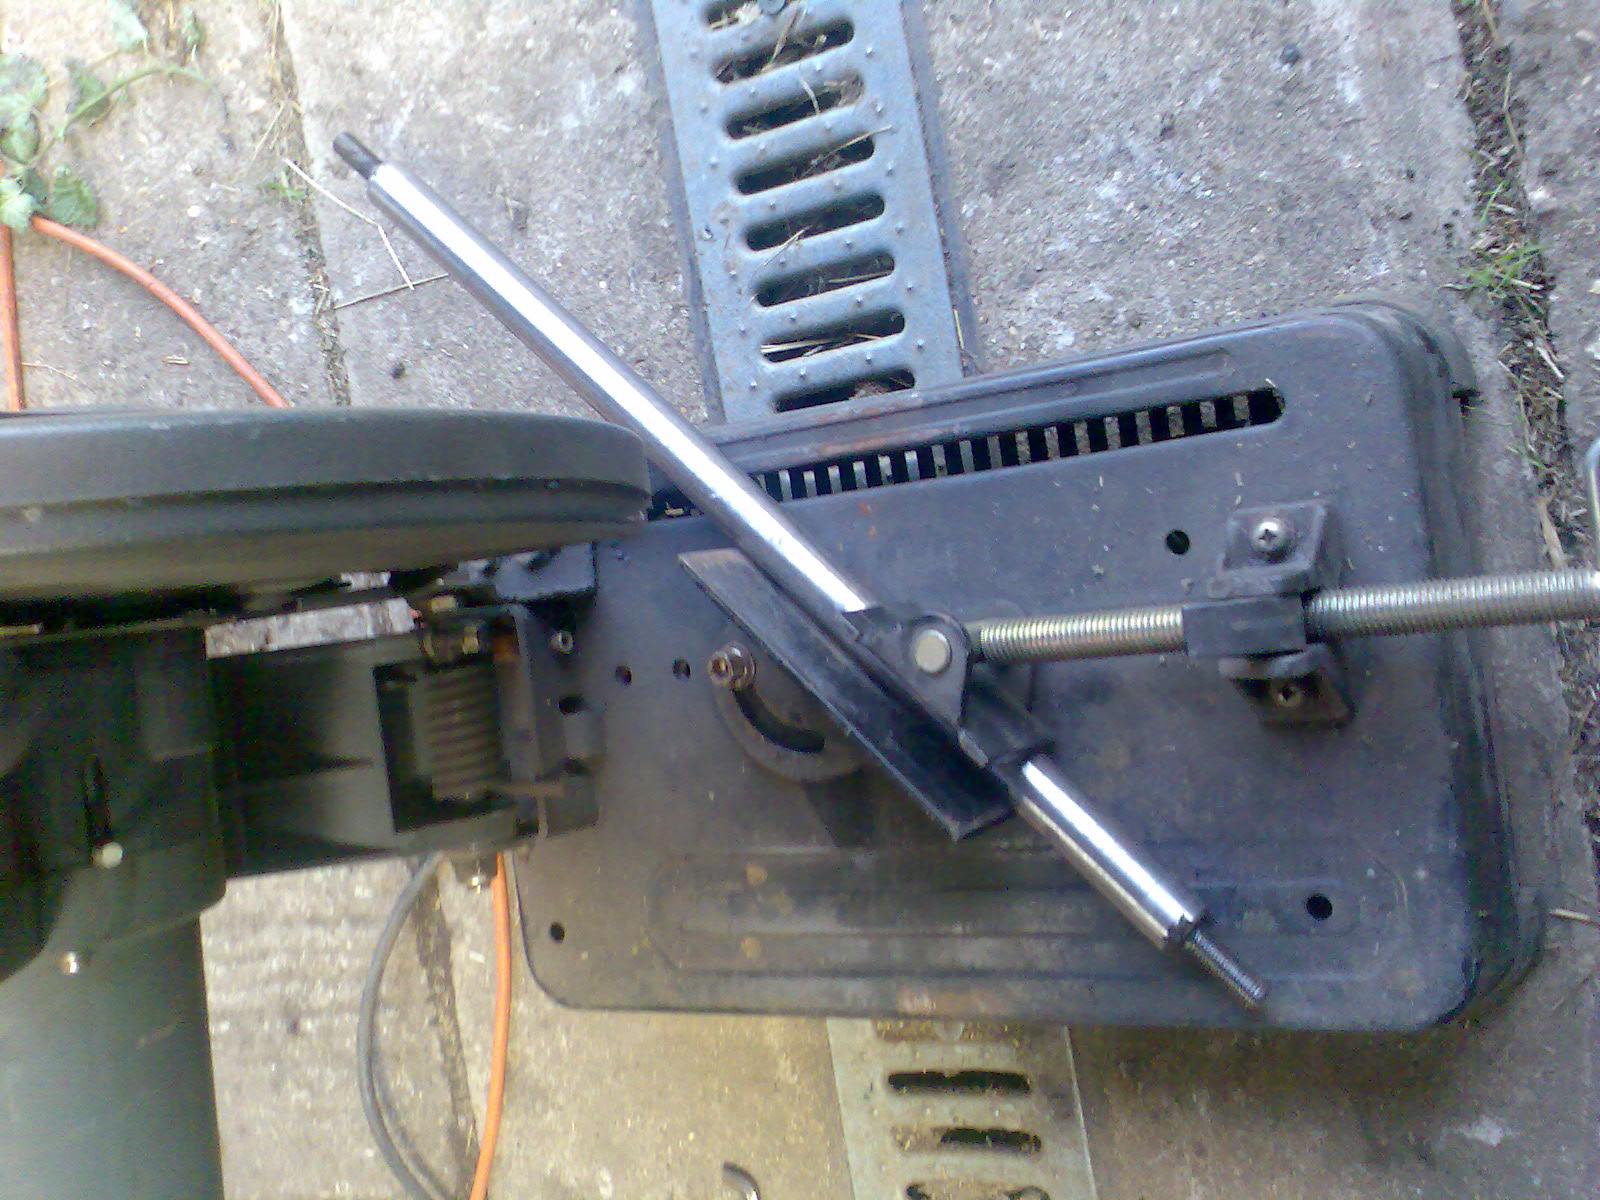
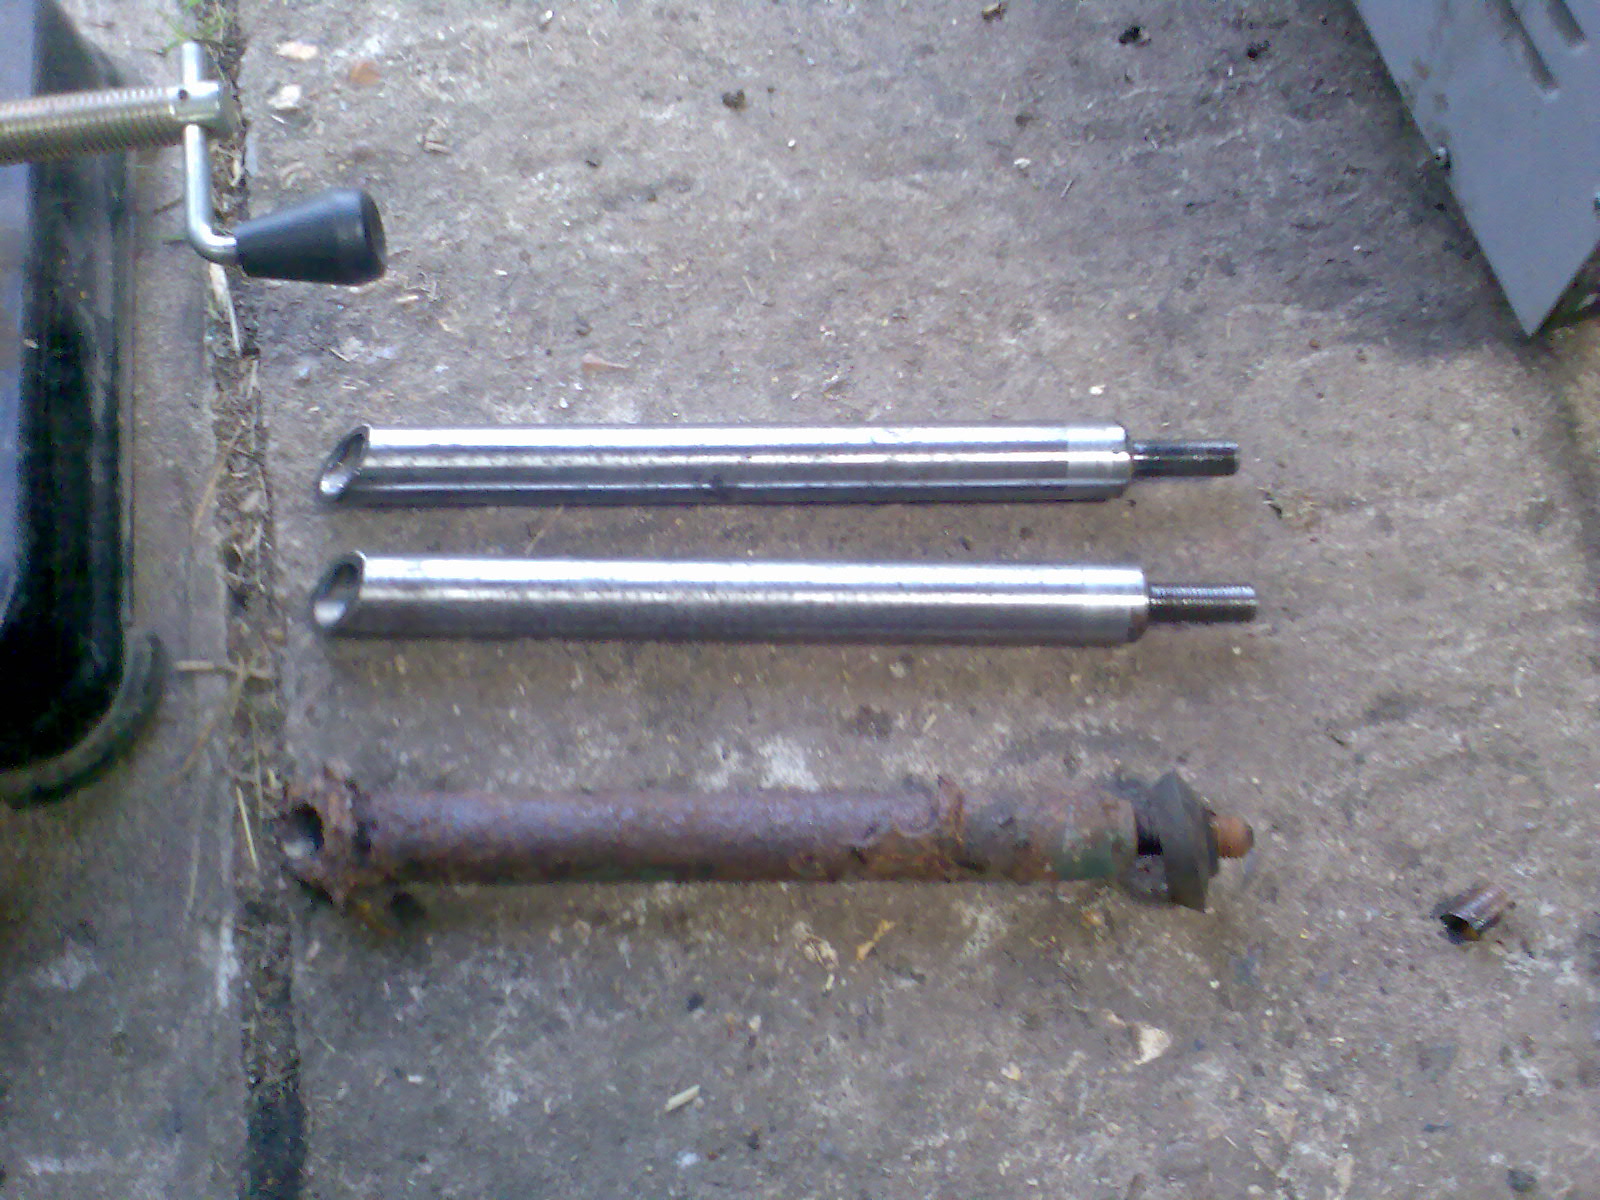
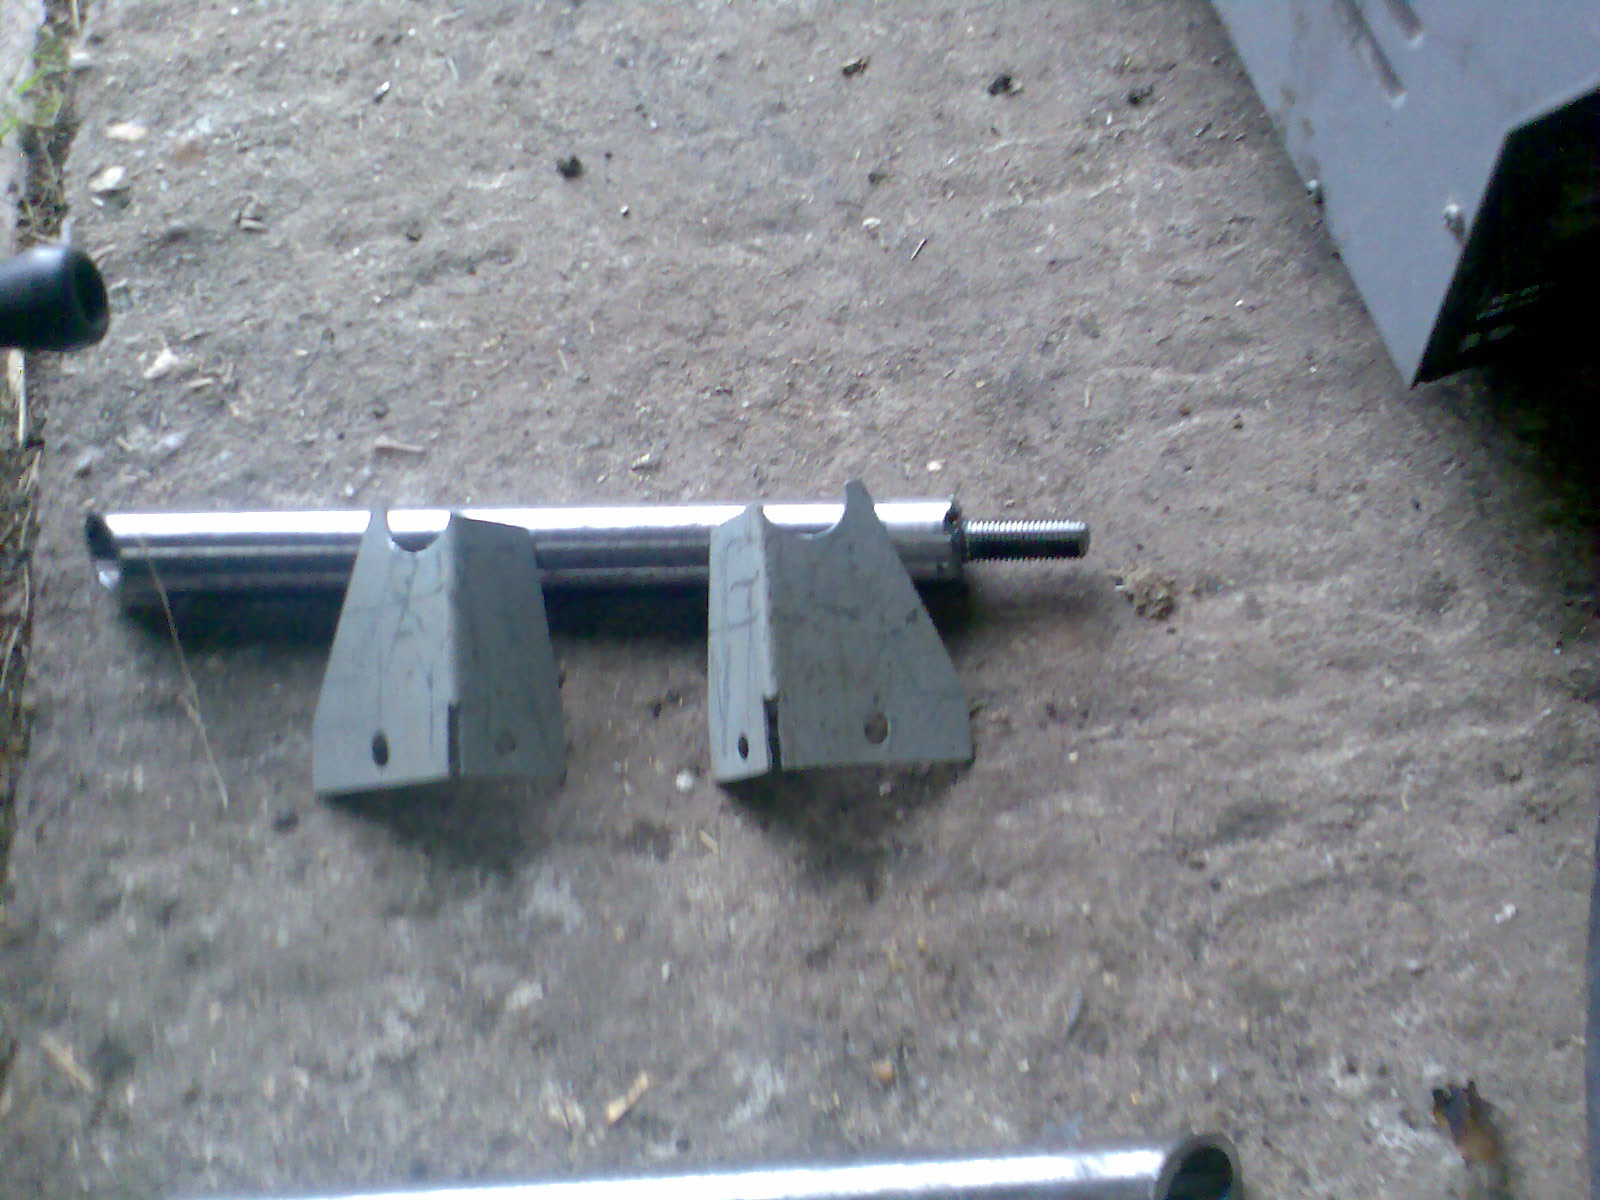
I have saved myself £50 today by making new front bumper support bars and brackets.

I used high tensile steel for the threaded rod inserts cut in the lathe and then slid into the tubes and welded.
Im going to be supporting the car on these at some stage as my car roller uses the bumper mounts - so they need to be strong!
I havent made replacement cover ferrules (the cap that goes over the outside of the bumper support bar see pic) as mine look ok I think... will have to see when I get these off ...if not I might turn a pair in stainless.
Here are some pics
- Image015.jpg (497.24 KiB) Viewed 4002 times
- Image016.jpg (438.73 KiB) Viewed 4002 times
- Image017.jpg (397.98 KiB) Viewed 4002 times
- Image018.jpg (395.8 KiB) Viewed 4002 times
- Image019.jpg (322.09 KiB) Viewed 4002 times
- Image020.jpg (323.82 KiB) Viewed 4002 times

- Image021.jpg (234.62 KiB) Viewed 4002 times
Posted: Sat May 16, 2009 6:04 pm
by taupe
I havent made replacement cover ferrules (the cap that goes over the outside of the bumper support bar see pic) as mine look ok I think... will have to see when I get these off ...if not I might turn a pair in stainless.
pics

- Image021.jpg (234.62 KiB) Viewed 4001 times
Posted: Sat May 16, 2009 8:26 pm
by bmcecosse
Handy if you have a lathe! Make em and sell em !
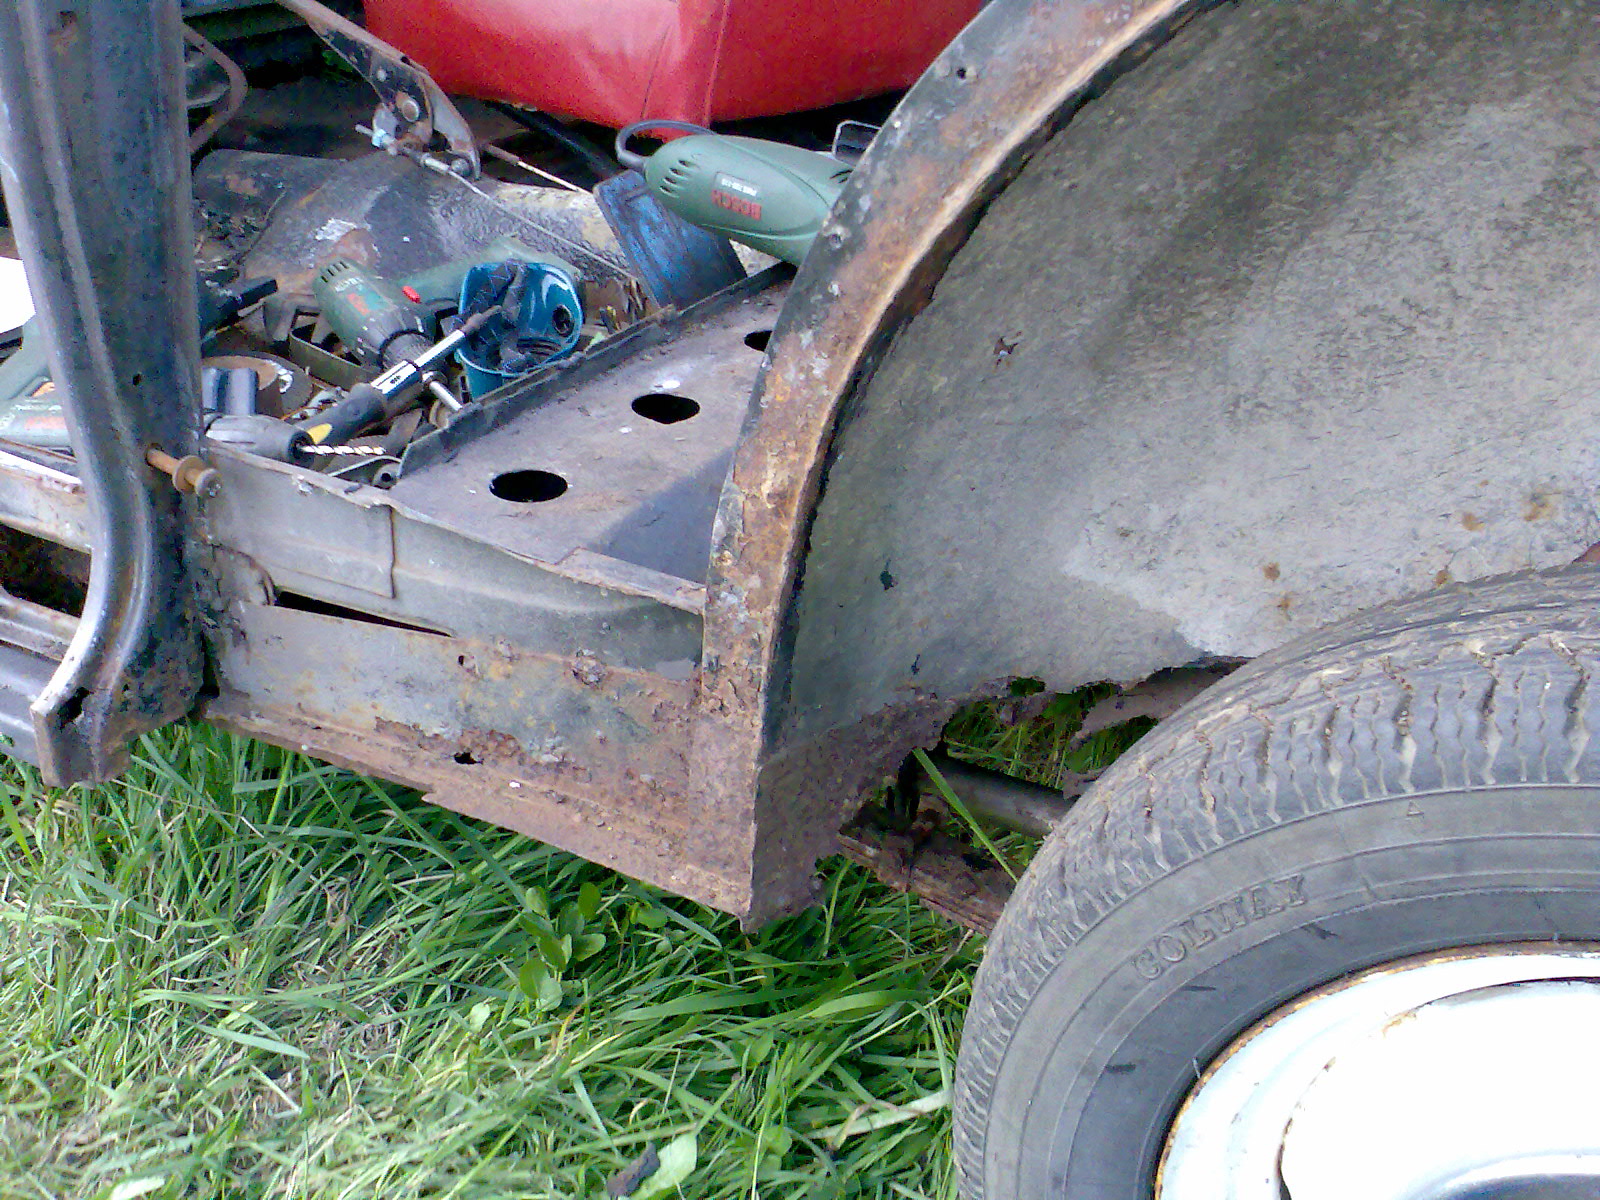
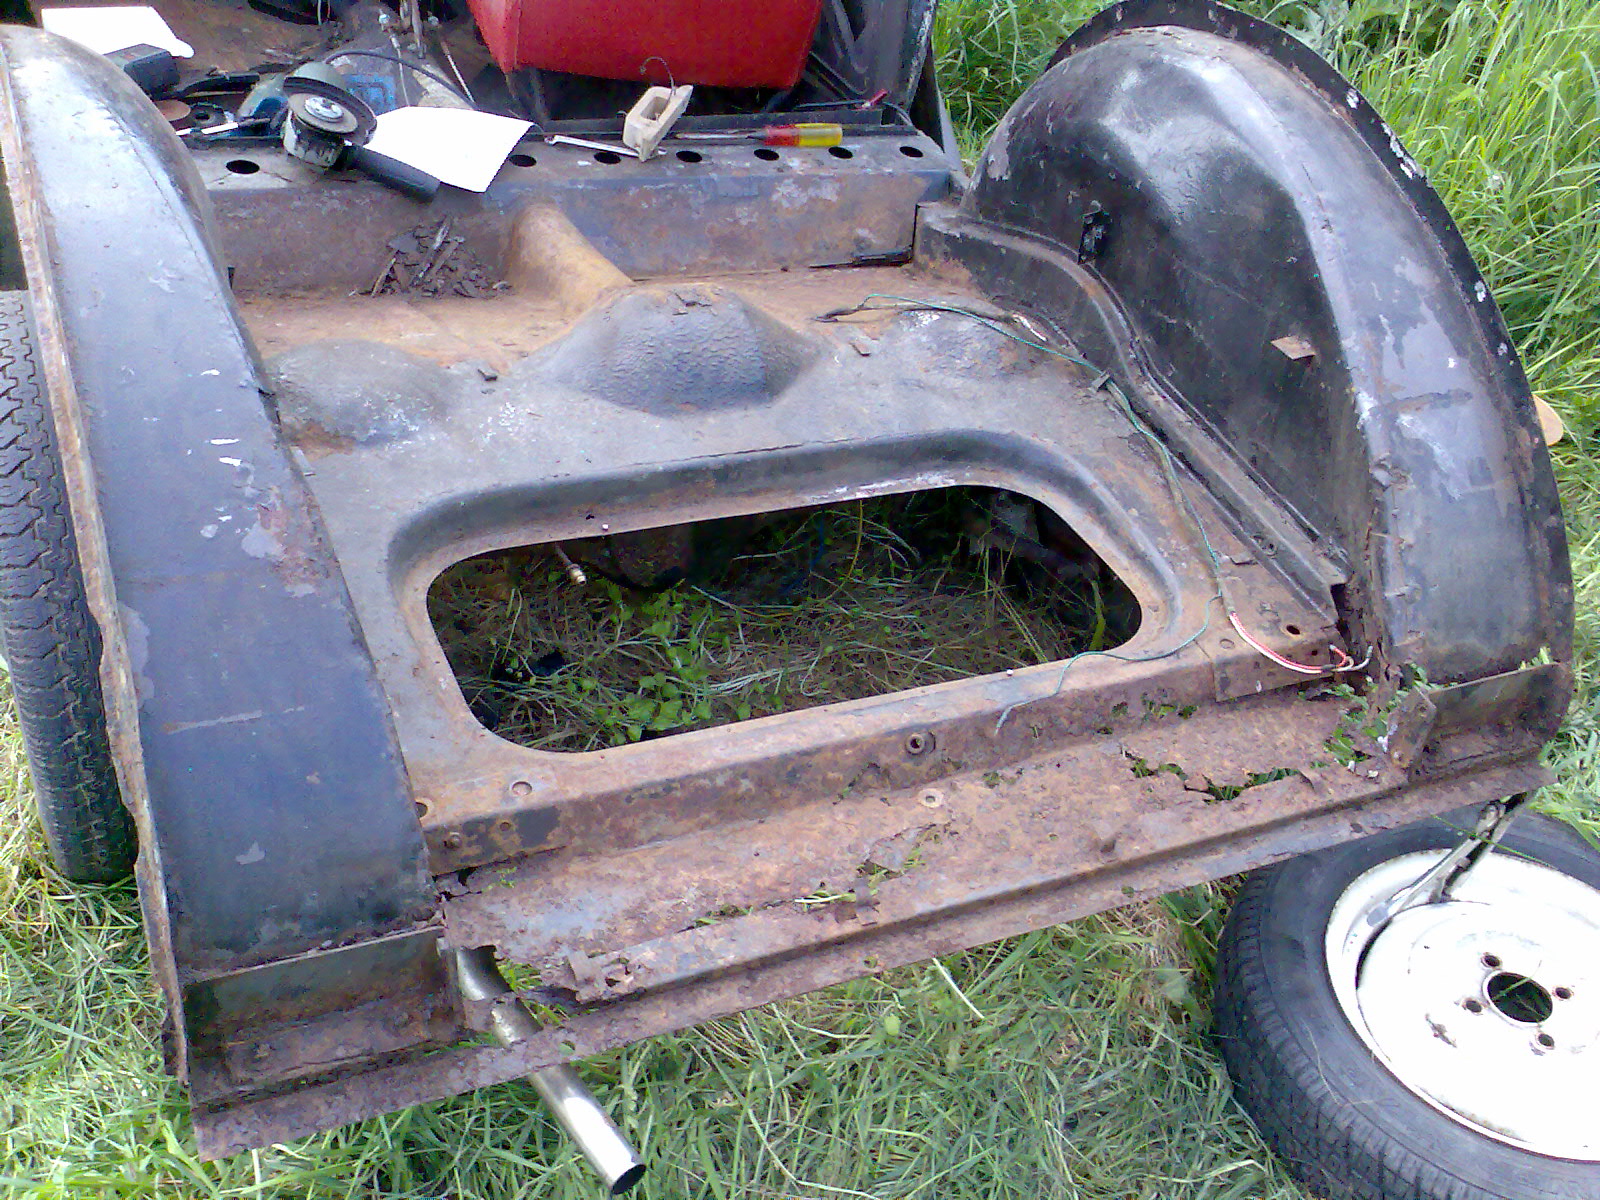
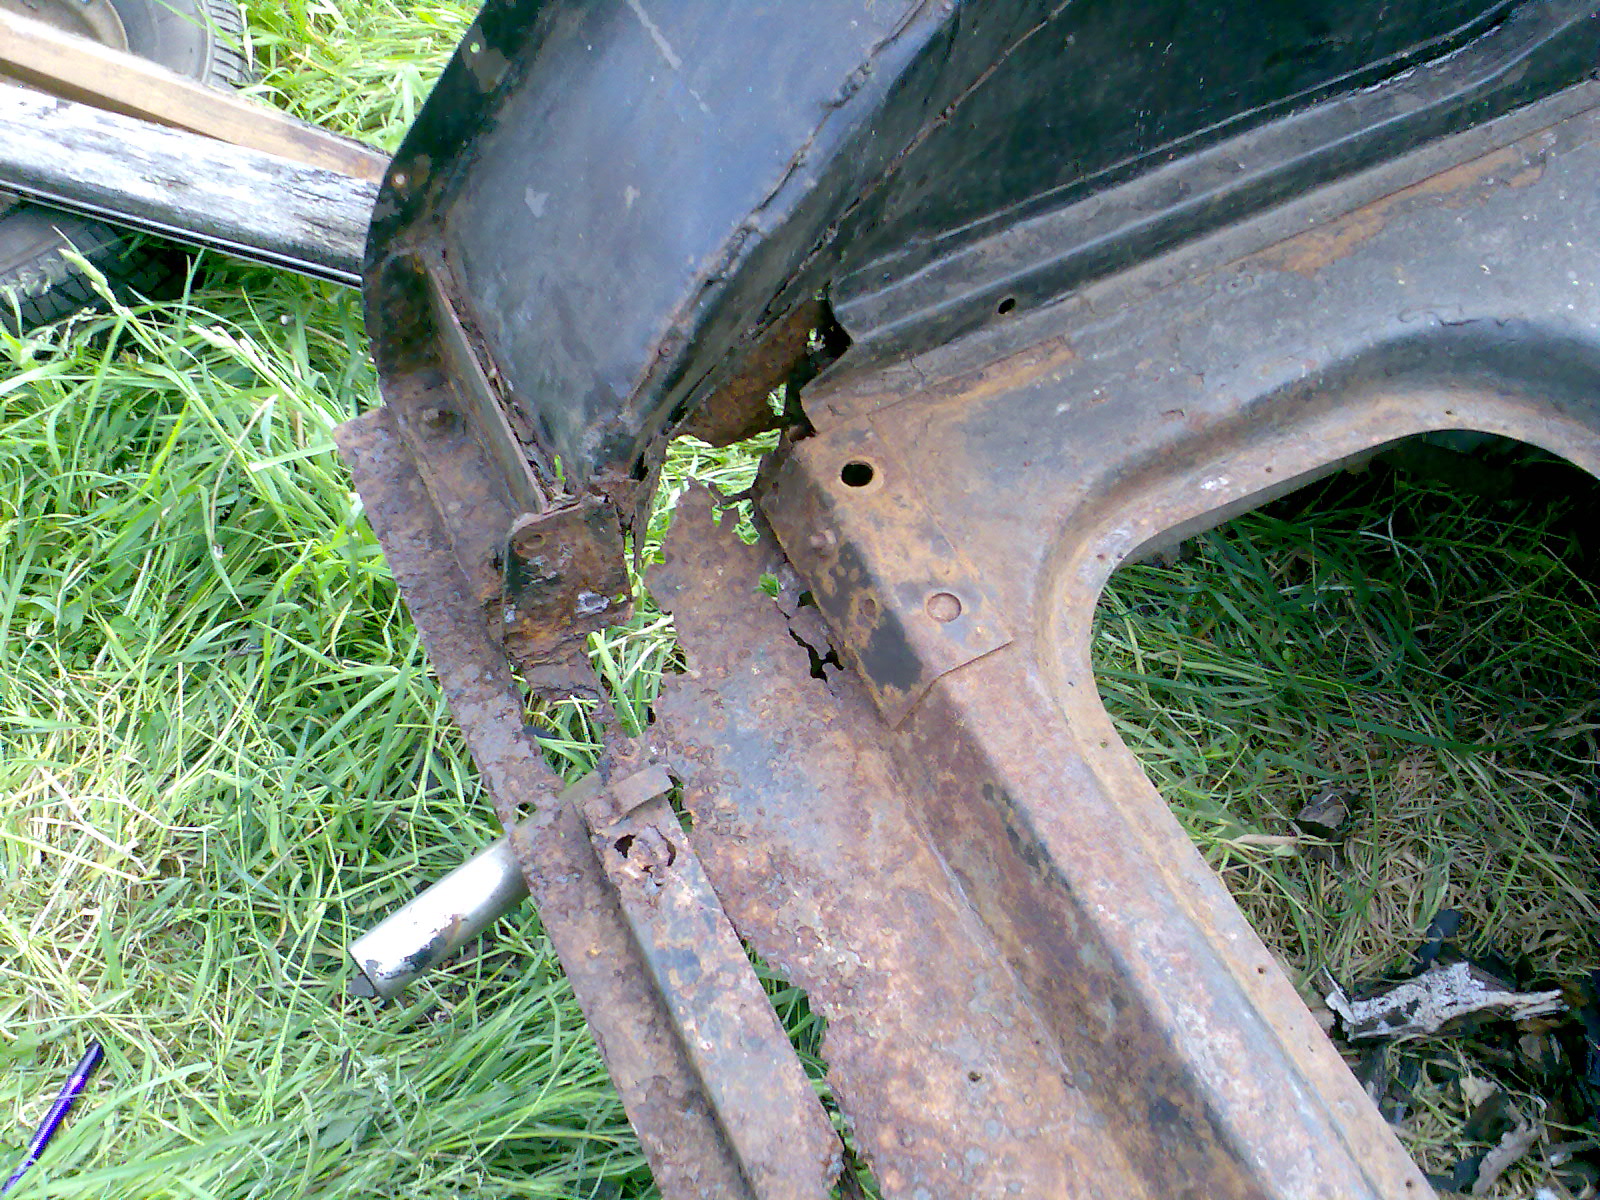
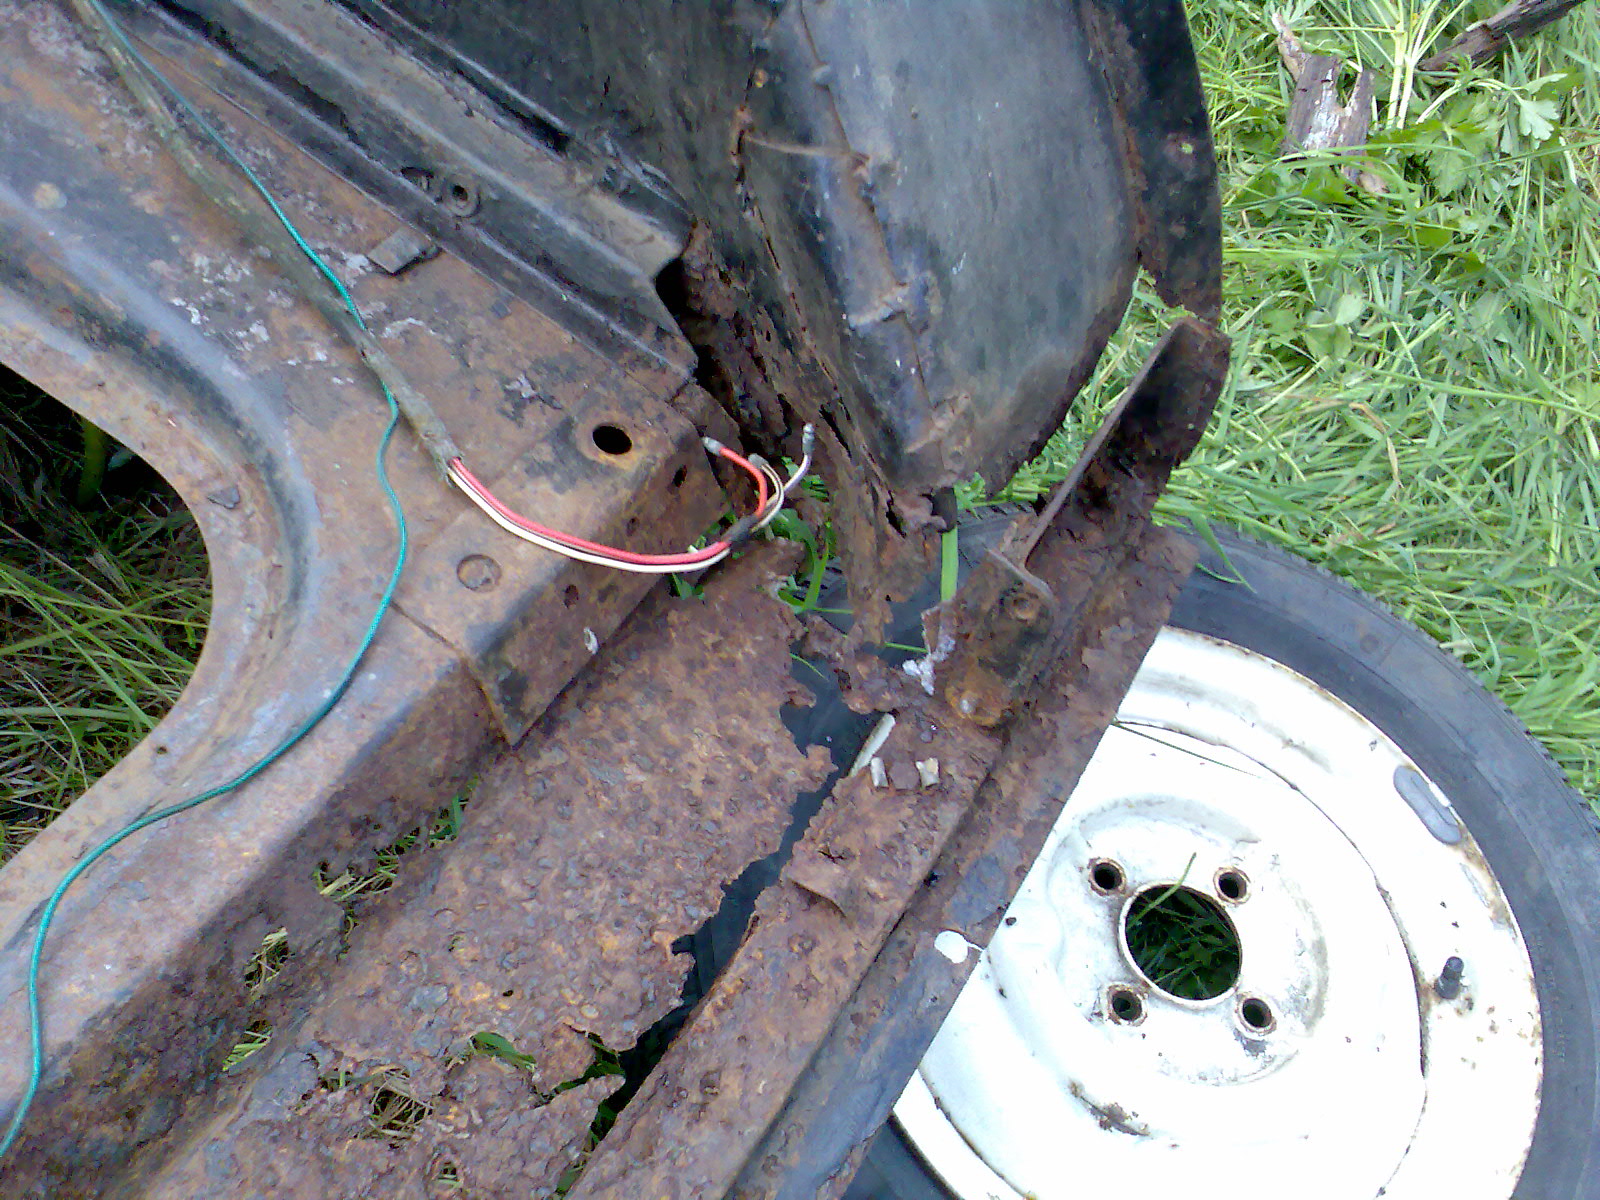
Posted: Sat May 23, 2009 8:09 pm
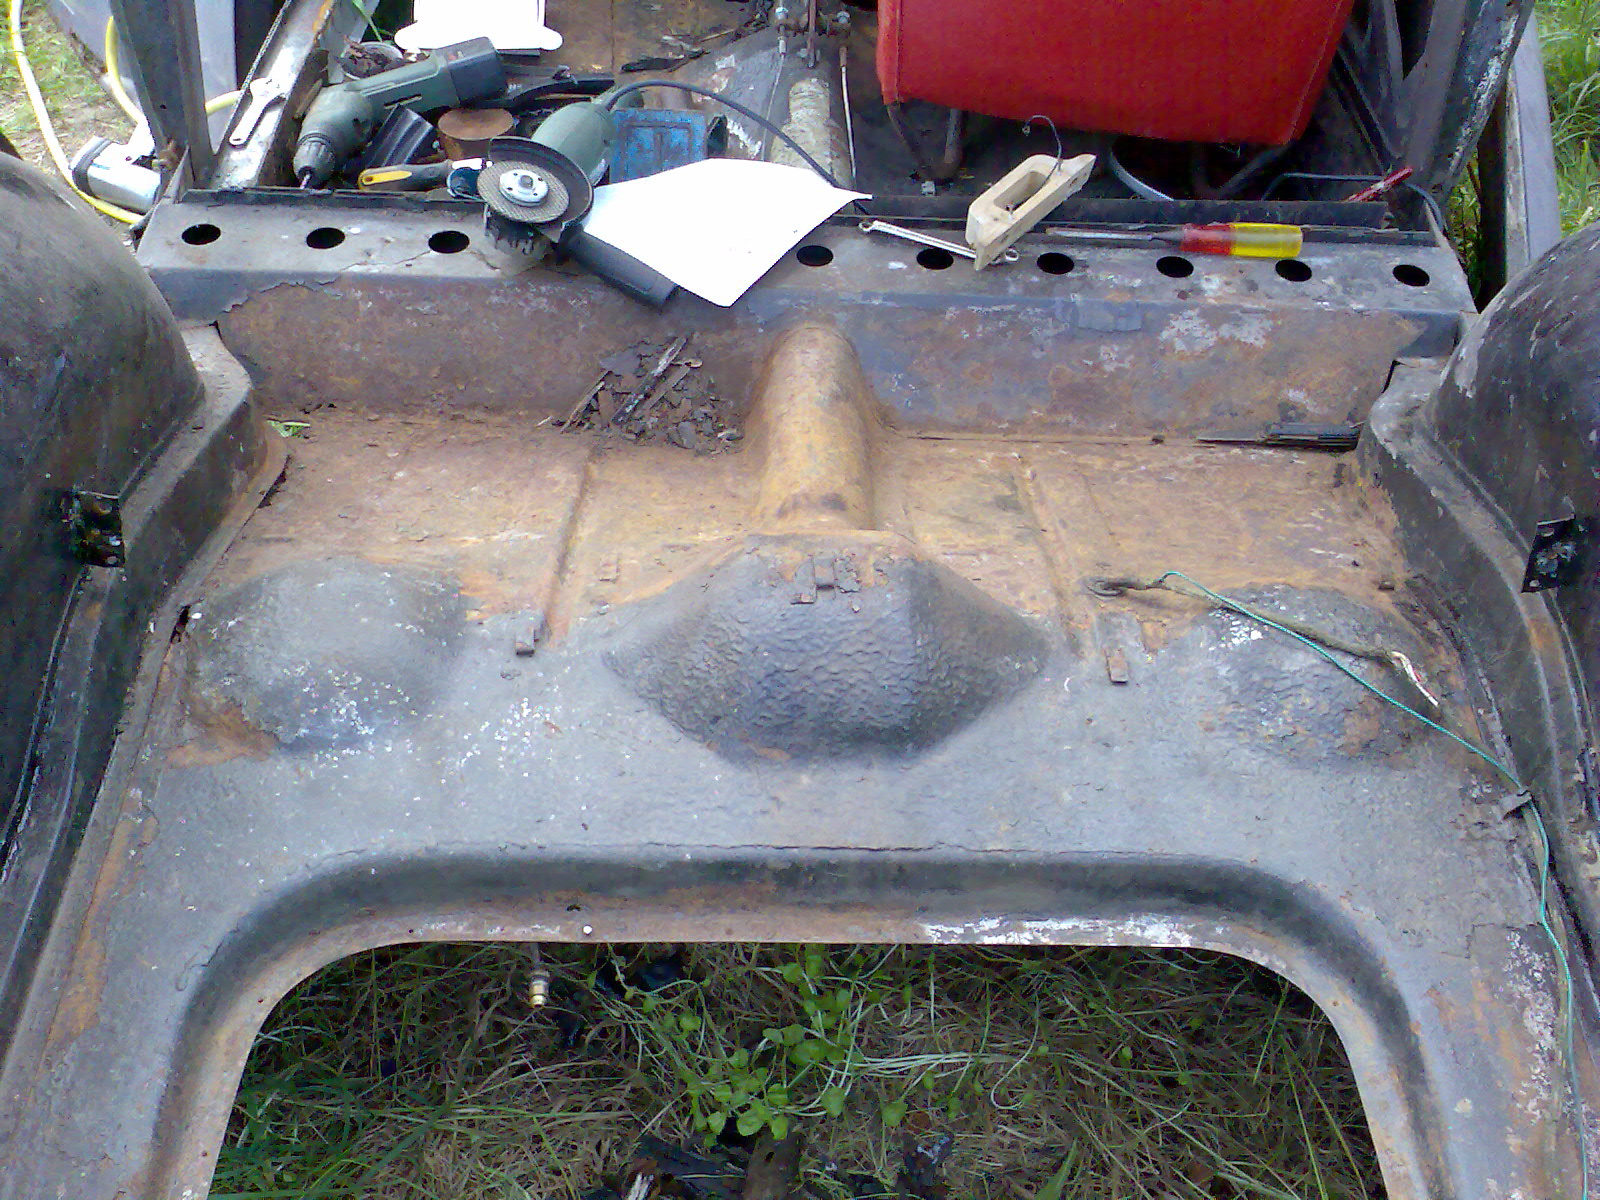
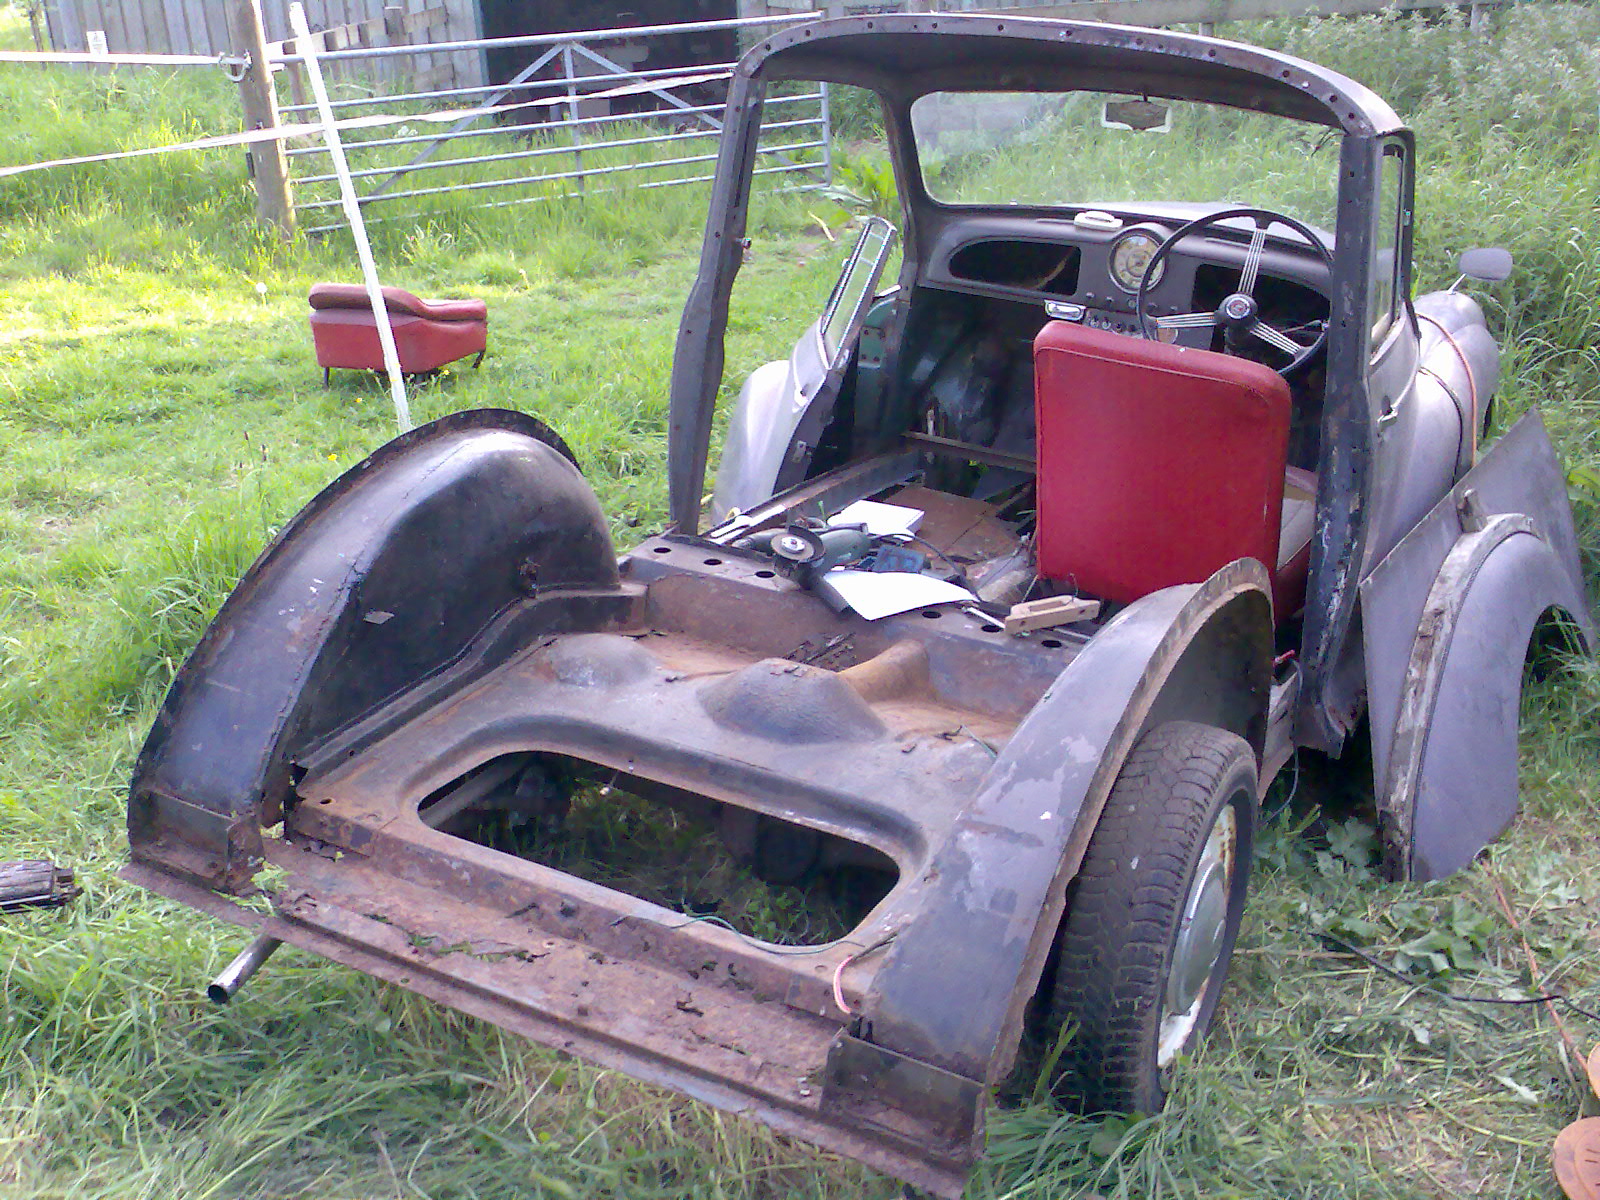
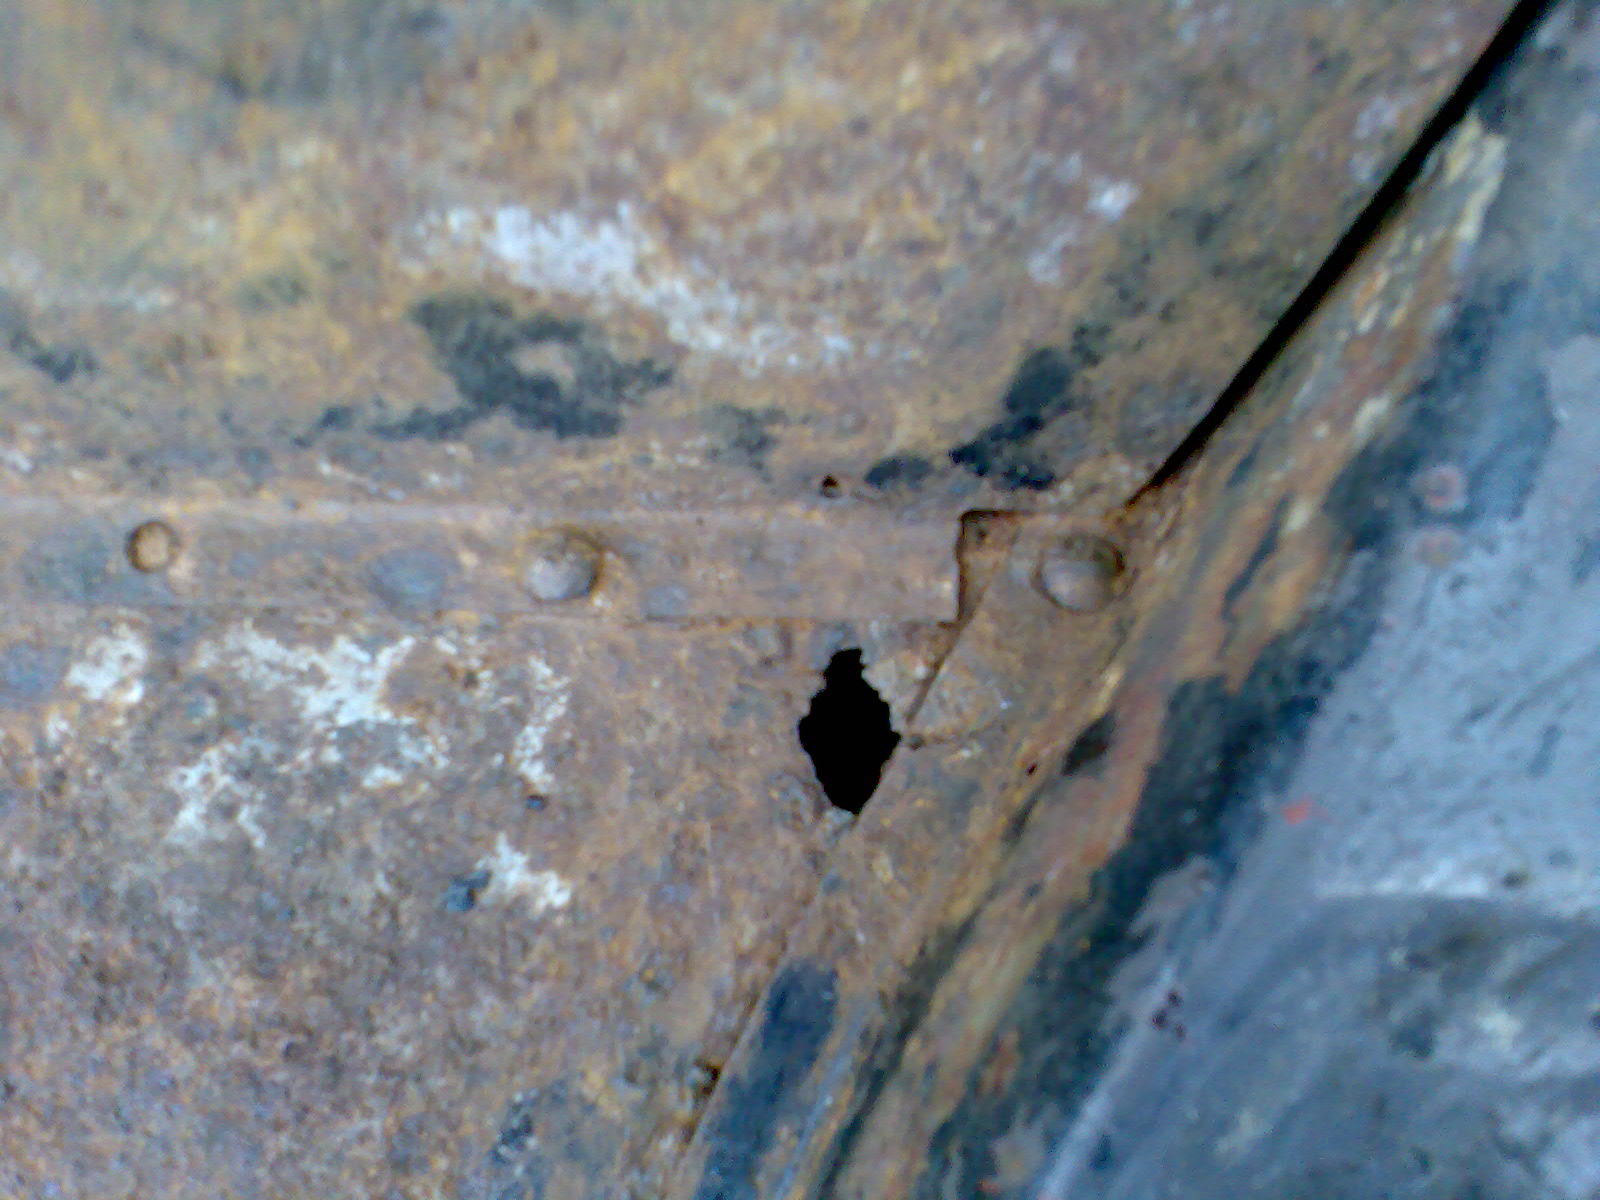
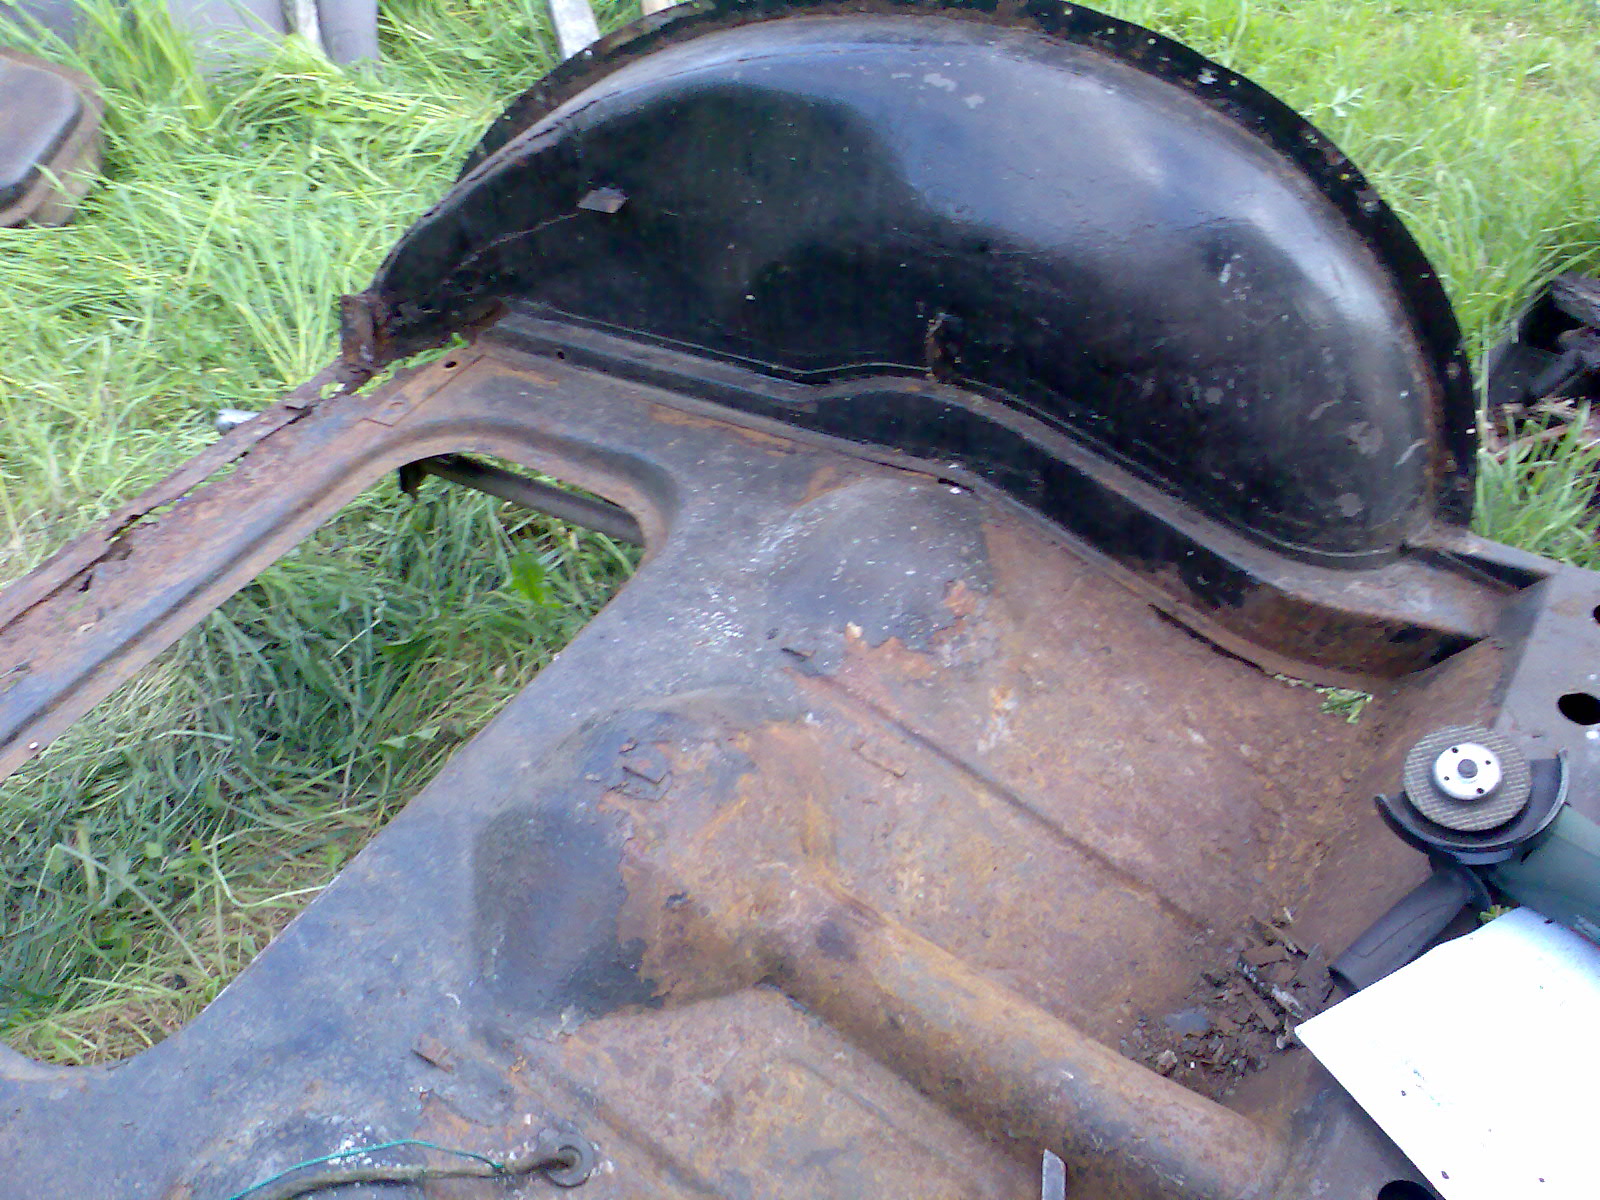
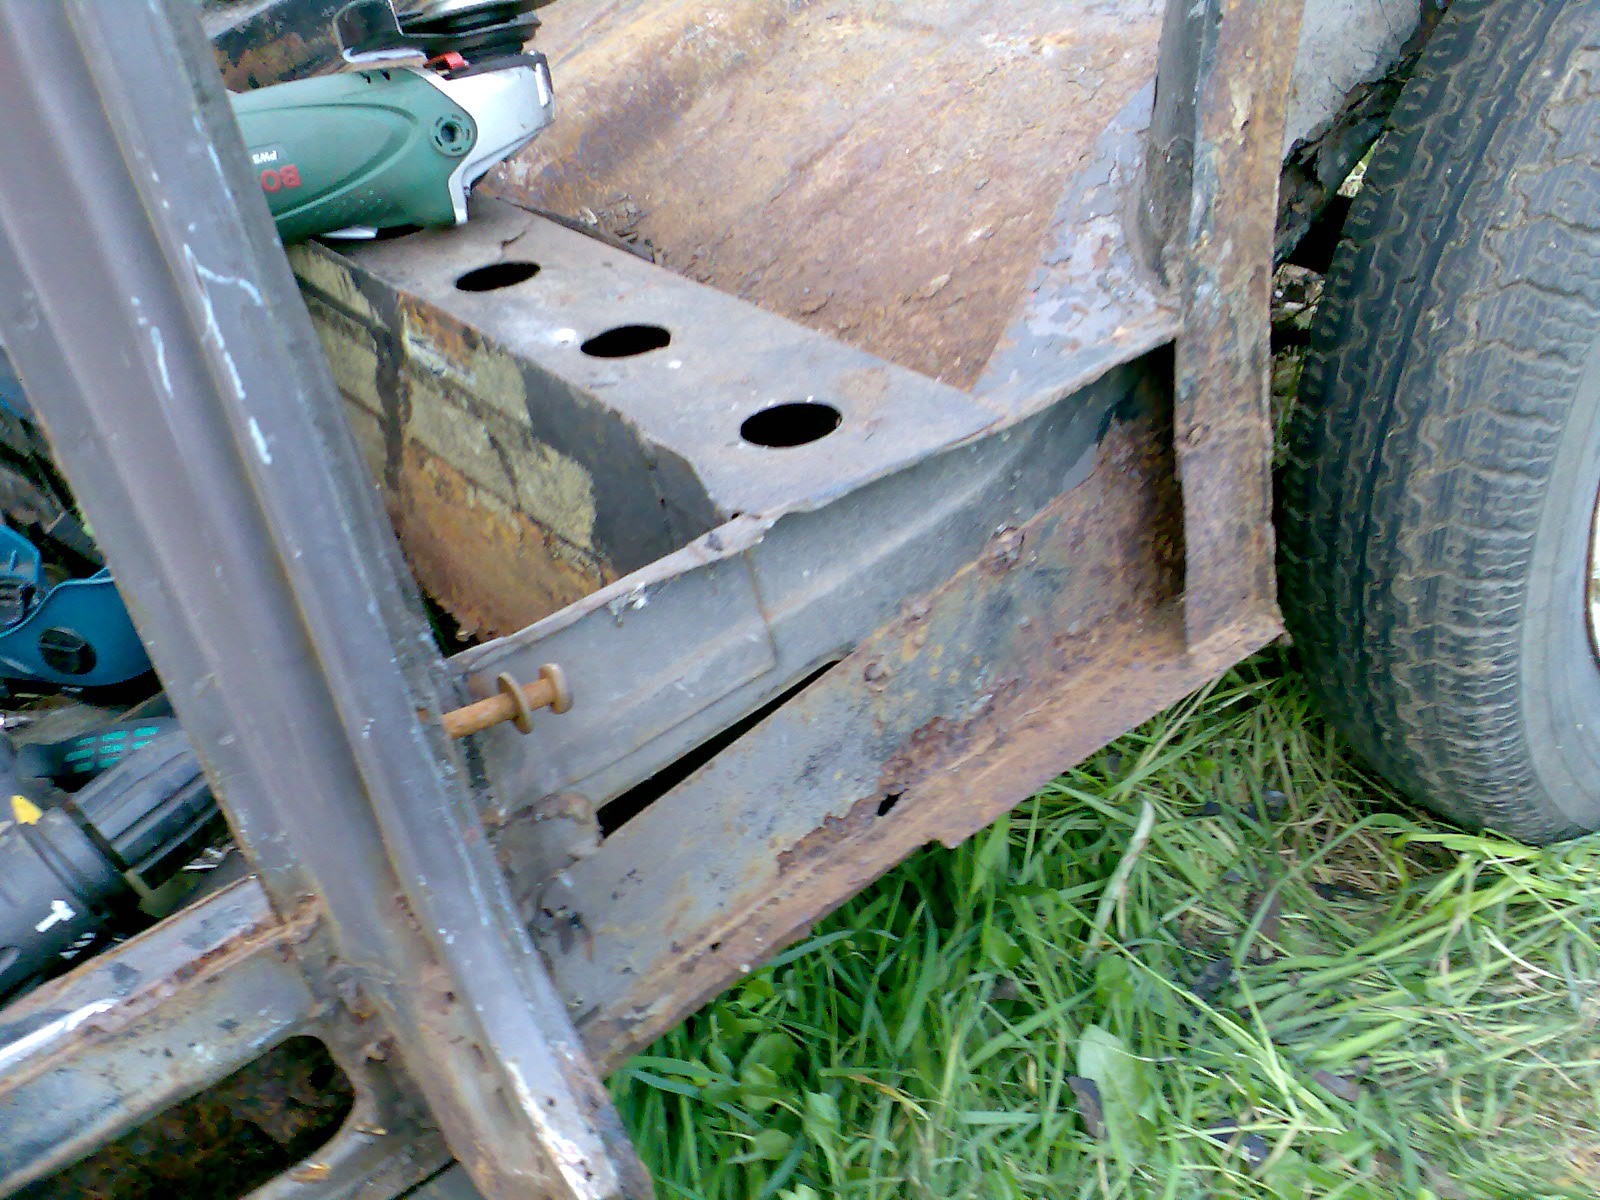
by taupe
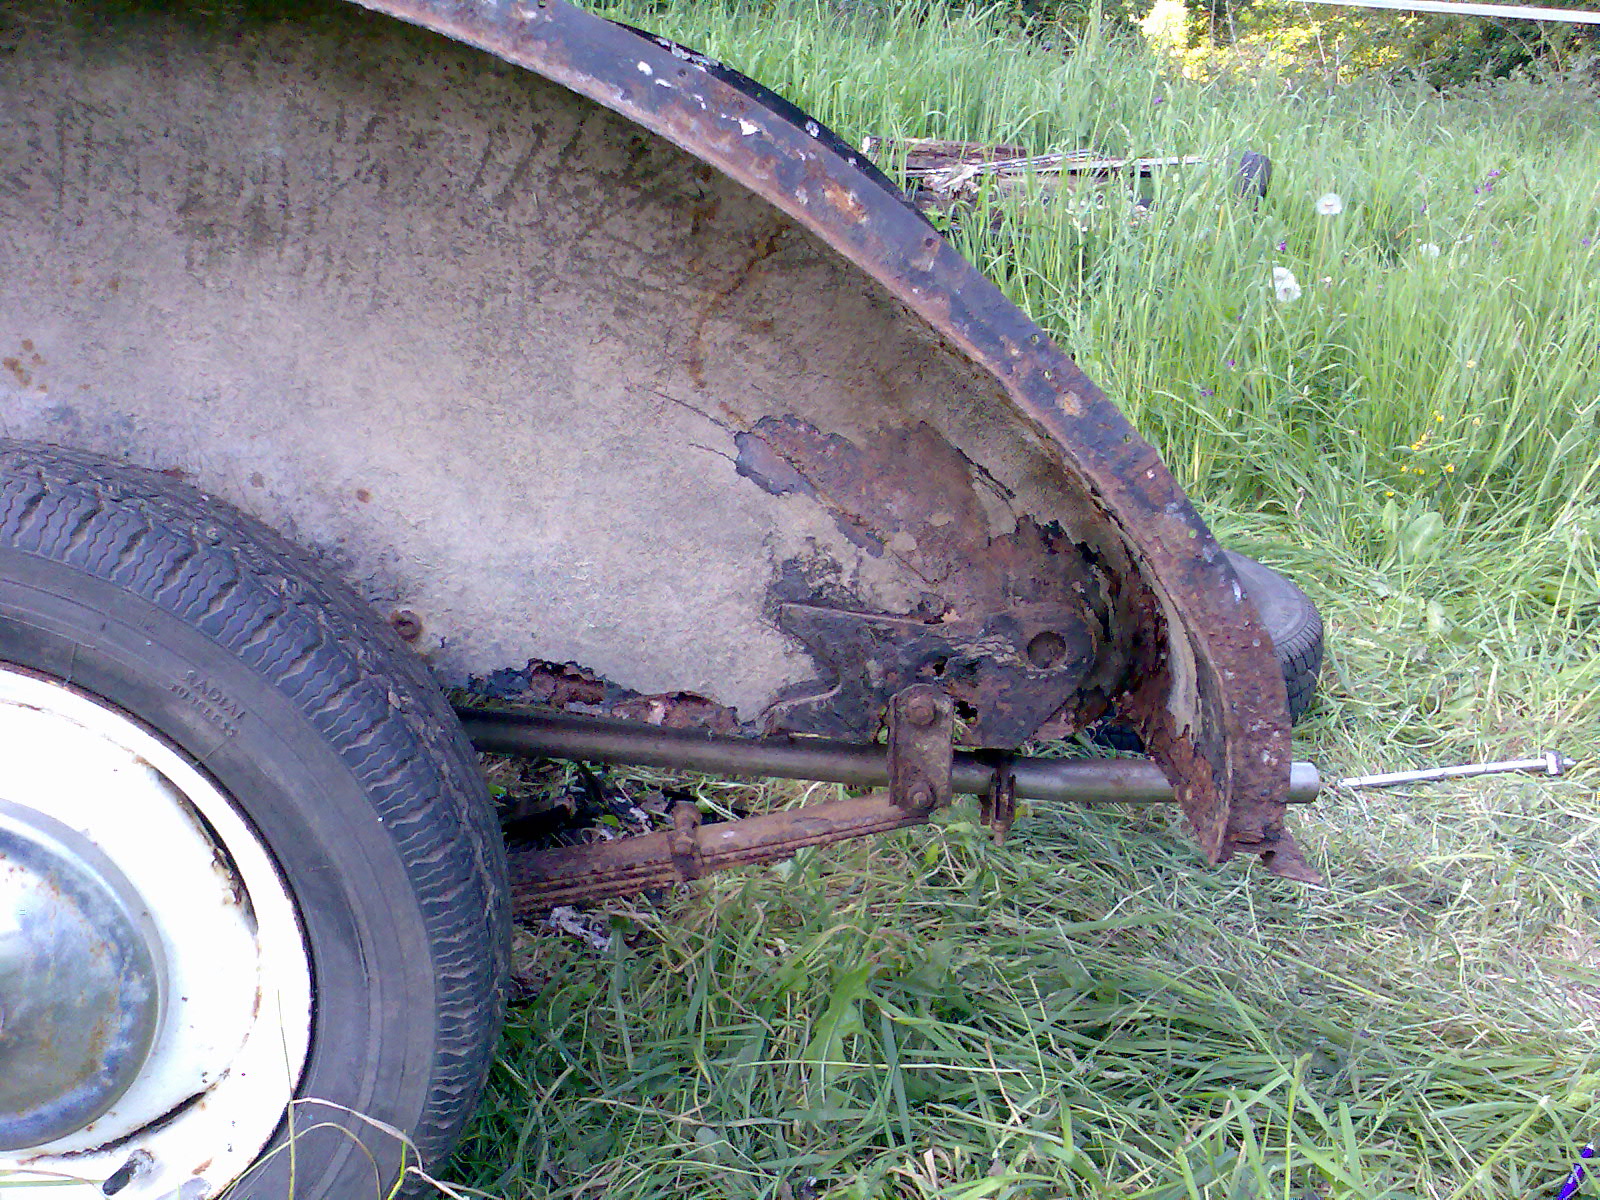
Hi
I bit the bullet today and removed the rear roof and timber.
I had checked out the sill extension areas and decided that the body was strong enough for removal.
There wasnt much strength left in the timbers anyway!! The roof came off nicely as the nails were all loose!!
All of the screws into the B post except one came undone. Ill have to cut this one out and replace it.
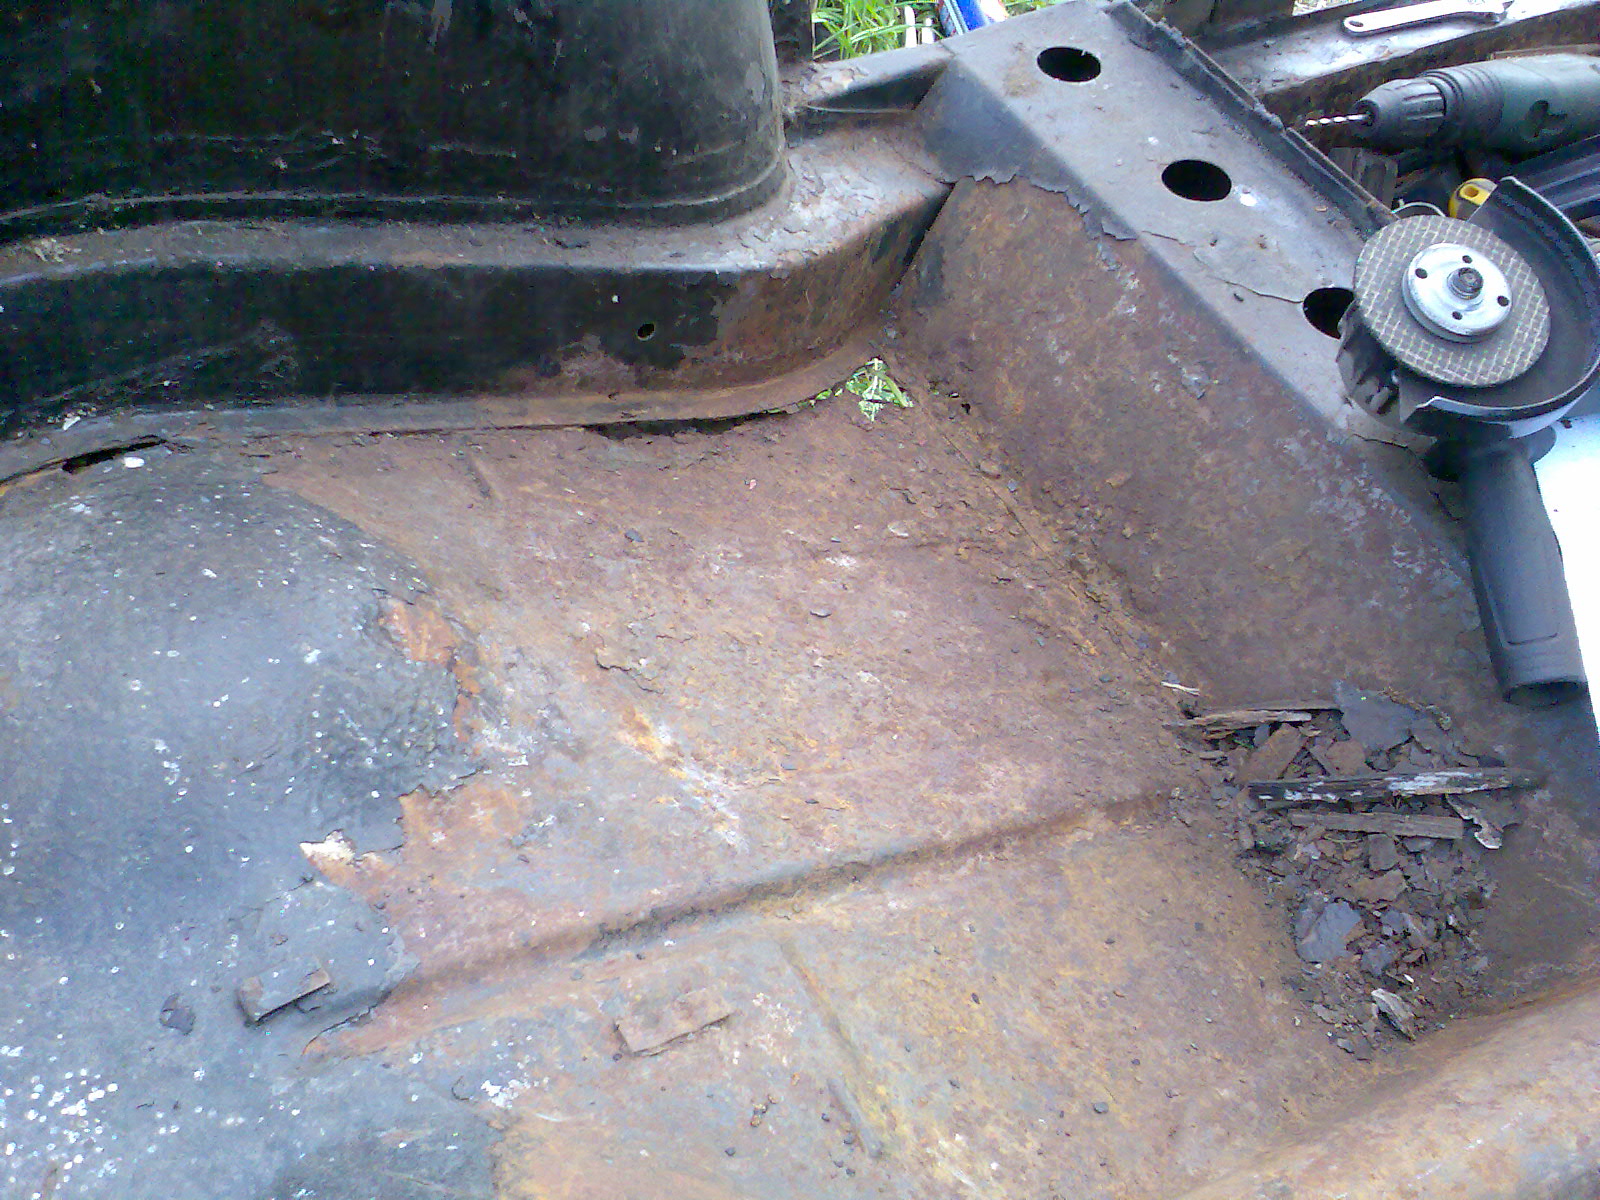
Im quite pleased with what I found once the body was off. I think I might well be able to salvage both rear wings and let in new steel where necessary.
Only a small spot of corrosion around the tank support and the floor under the rear seats looks mostly salvagable.
The rear spring hanger areas are shot on both sides but enough remains to ensure realignment. There is quite bad corrosion on the nearside to the front spring hanger and extending back along the chassis to the bump stop. A poor repair had been carried out here and I think the hanger was not placed correctly.
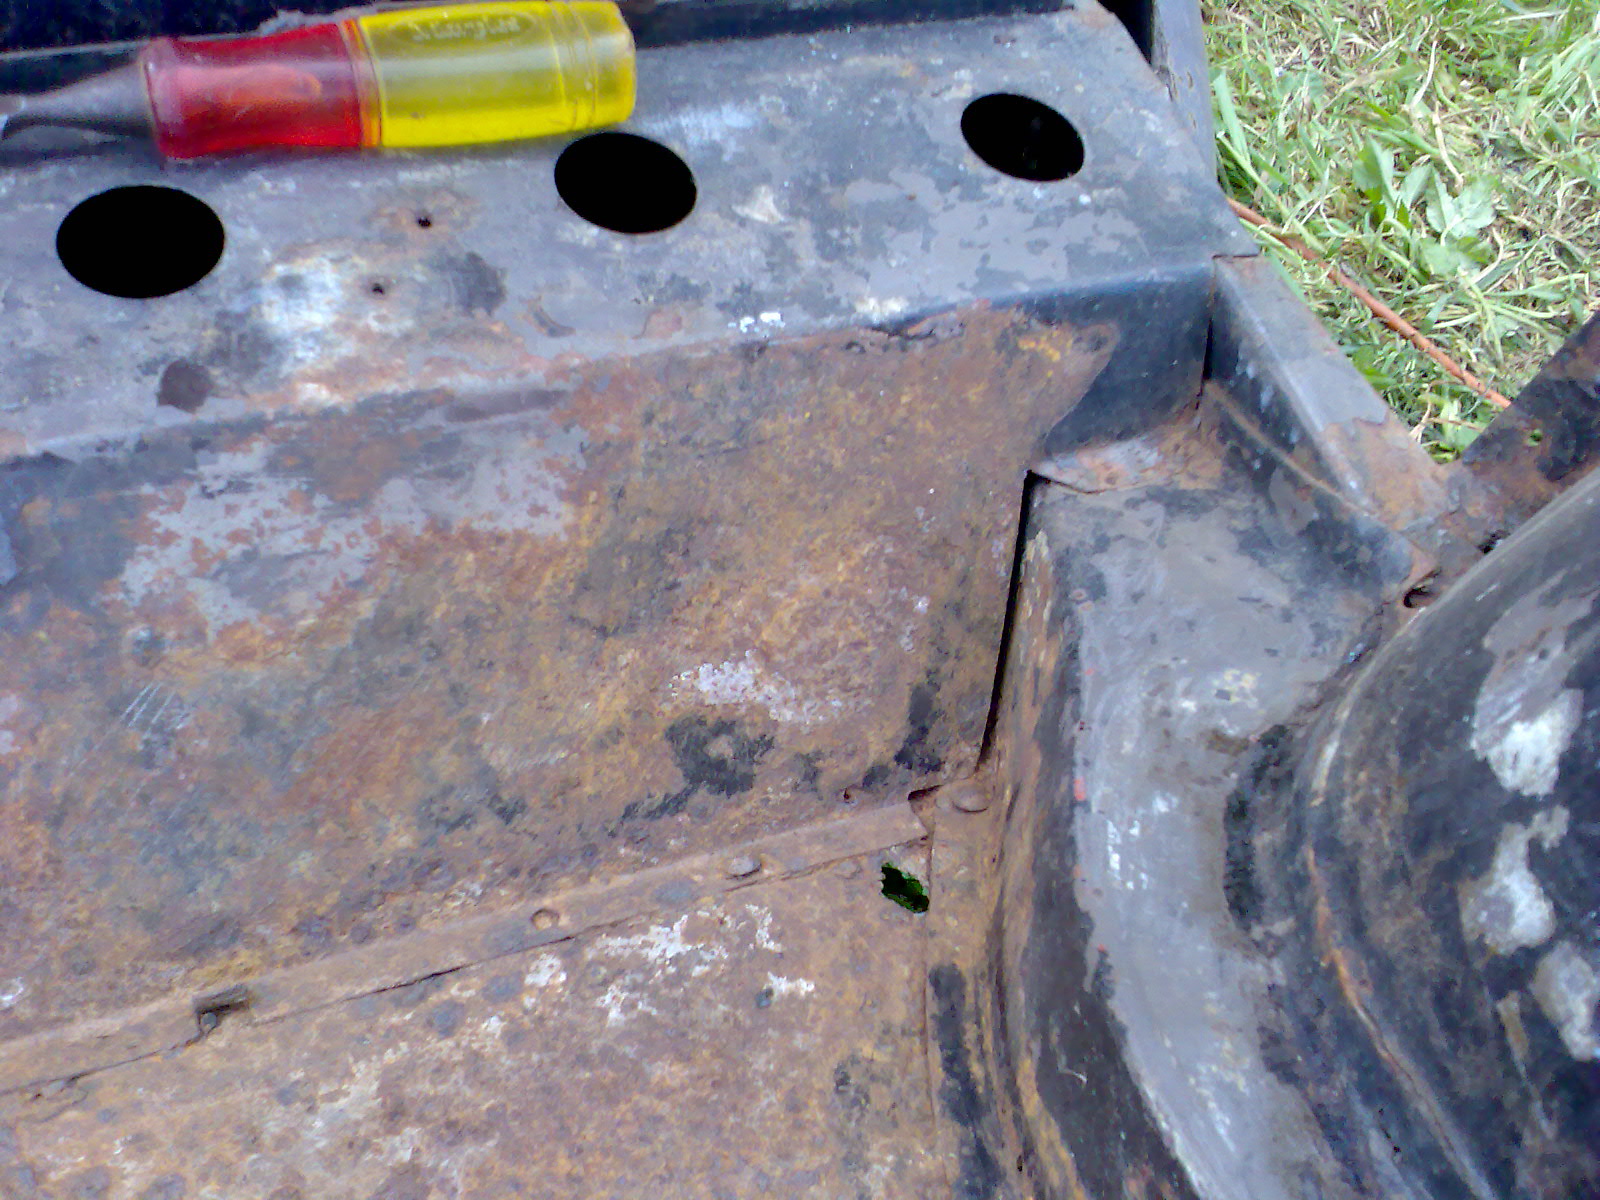
I dont think the rear earthing point was working very well!!
I also noticed two rivets on both sides under the rear seats which I think were to hold the rear of the front spring hangers. If thats the case then I will be able to replace these and ensure correct placement of the new hangers.
Can any one confirm that this was an original feature??
Here are some pics....
- Image019.jpg (827.49 KiB) Viewed 4001 times
- Image020.jpg (672.08 KiB) Viewed 4001 times
- Image021.jpg (714.7 KiB) Viewed 4001 times
- Image022.jpg (768.44 KiB) Viewed 4001 times
- Image023.jpg (604.78 KiB) Viewed 4001 times

- Image024.jpg (489.26 KiB) Viewed 4001 times
- Image025.jpg (632.83 KiB) Viewed 4001 times
- Image026.jpg (681.15 KiB) Viewed 4001 times
- Image027.jpg (569.51 KiB) Viewed 4001 times
- Image028.jpg (480.71 KiB) Viewed 4001 times
- Image029.jpg (368.19 KiB) Viewed 4001 times
- Image030.jpg (540.57 KiB) Viewed 4001 times
- Image031.jpg (546.67 KiB) Viewed 4001 times
Posted: Sat May 23, 2009 8:19 pm
by Dean
I'm sure I've seen two rivets holding each of my spring hangers at the front end and a seam weld towards the rear. So I will go with yes, it must be original.
Posted: Sat May 23, 2009 8:43 pm
by bmcecosse
Are they not screws? Is that not a trace of a slot in the top? Maybe there when the car had it's first resto - to locate the hangers as you suggest - before welding. The inner wings look too good (compared to the rest) - have they been replaced sometime in the past ?
Posted: Sat May 23, 2009 10:42 pm
by taupe
Well theyre not screws - no slots. I guess they may be coach bolt heads but they do look like rivet heads.
I notice that the spring hanger repair sections you can buy have two holes both front and back.
These are plug welded on the spring hanger repair panel assemblies and 'look' like a rivet head from under the car. I think I will reproduce this with hot rivets when I do the spring hangers whether original or not as it will help to ensure the hangers are tied right thro the structure.
BTW they are the original rear inner wings - have just been painted black polyurethane over the top but have obviously also had a fair amount of patching!!
Posted: Sun May 31, 2009 4:31 pm
by taupe
Posted: Sun May 31, 2009 7:09 pm
by Dean
You are a dark horse! Great engineering skills! I salute you sir. ;)
Posted: Sun May 31, 2009 7:47 pm
by aupickup
the rivets we are talking about are original
Posted: Sun May 31, 2009 8:41 pm
by taupe
Thanks AU
I had reached the same conclusion as when looking underneath ... amazingly I still have the remains of one original spring hanger and floor section on the drivers side.
The rivets are still in place.
Did all minors (except LCV etc) have them ?
Regards
Taupe