Page 2 of 3
Posted: Thu Nov 13, 2008 11:10 am
by Luxobarge
Thanks to croft for sending the scans of the article in PC - I may well try that another day, possibly for the net wheel!
However, for the second wheel I'm sticking with the Bilt-Hamber process - an update: it seems to be working!
The liquid has now gone very brown and scummy - as you can see - so I lifted the wheel temporarily out of the bath and took this picture:
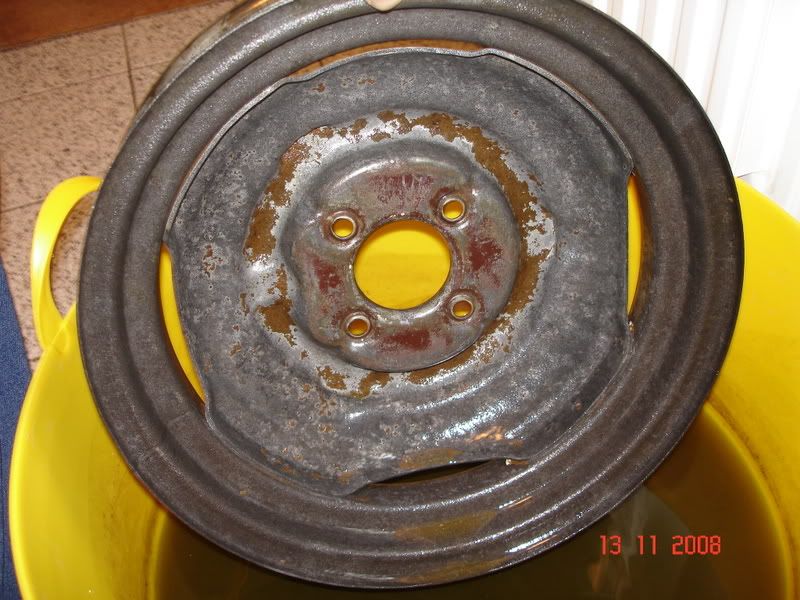
Now this was by far the worst "side" of the wheel, and you can see areas which are looking a lot better already, especially near the centre "dip". Still a long way to go, but getting there!
I
think it's due to being warmer now I've brought the bath into the kitchen and I
thank my wife for allowing me to do so! (mind you, it's her car..... )

Posted: Thu Nov 13, 2008 11:32 am
by ASL642
Just so long as it doesn't dissolve a hole in the bottom of the bucket - then you'll be for it

Posted: Sat Nov 15, 2008 2:38 pm
by Luxobarge
Back to wheel No 1 today - last left in primer, drying out. Time to paint it in top coat today, I'm using some easily-available aerosols of Rover "Arum White" - virtually the same colour as the official "Old English White", but cheaper and easily bought locally. Nevertheless, I don't want to paint the whole wheel in this paint because a) rattle cans are relatively expensive and b) on the inside of the wheel, where it gets a lot of stones, mud etc. I'd prefer to paint it in something tougher - I've bought some Grey POR15 for this purpose.
So, here is the wheel resplendant in grey primer:
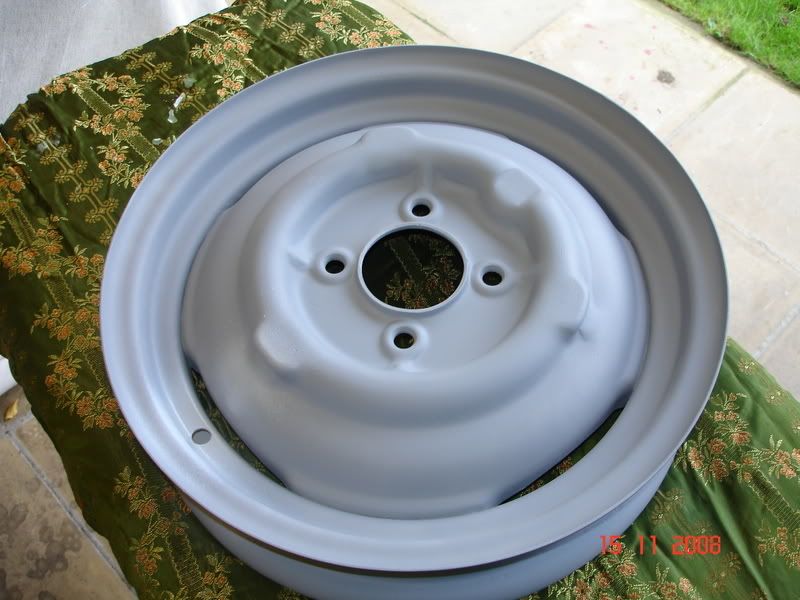
And about 20 minutes later, having carefully sprayed the outer side of the wheel (i.e. the visible bit) in Arum White:
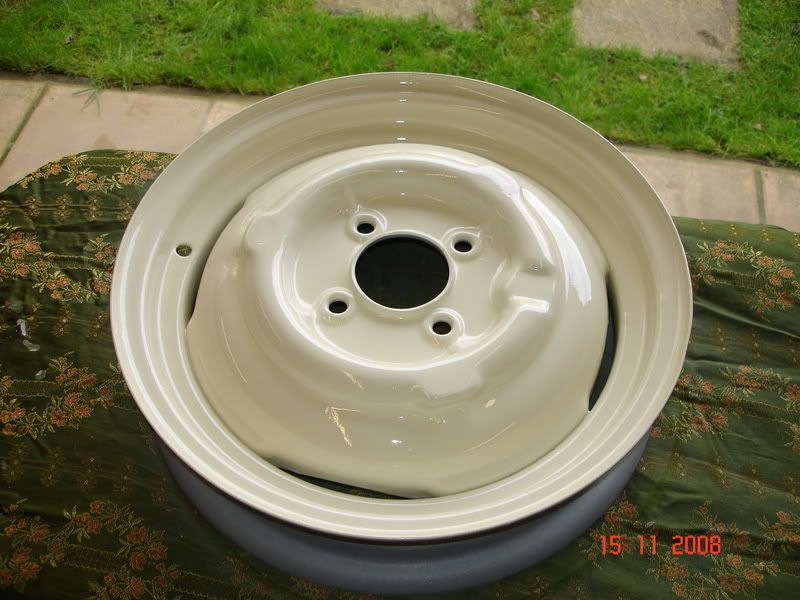
This will now dry and harden for a few days, then I will turn it upside down and brush paint on the grey POR15 - might do 2 coats of this, too.
More anon!
Posted: Sat Nov 15, 2008 6:19 pm
by alanworland
Anyone had any results from the soda crystals yet?
I have an exhaust manifold on the go at the moment.
Nice work with the wheels I have an old halfshaft which I mount verticaly and on the bearing end I have mounted a approx 8 inch diameter wheel. This is used for mounting items for spraying as it can be revolved without the need to walk round the item ideal for wheels.
Posted: Sat Nov 15, 2008 6:31 pm
by Luxobarge
alanworland wrote:Anyone had any results from the soda crystals yet?
I have an exhaust manifold on the go at the moment.
Nice work with the wheels I have an old halfshaft which I mount verticaly and on the bearing end I have mounted a approx 8 inch diameter wheel. This is used for mounting items for spraying as it can be revolved without the need to walk round the item ideal for wheels.
I'm having mixed results with the Deox-C crystals (I'll post more about this later) and so I plan to use Soda crystals and electrolysis (as per the recent feature in Practical Classics) for the 3rd and final wheel - watch this space!
Cheers
Posted: Sat Nov 15, 2008 11:16 pm
by MGFmad
Nice work Luxobarge. I gave my wheels a spruce up with the tyres still on but will probably have to do it again as time goes on - I will keep this page in mind.
Posted: Sun Nov 16, 2008 9:55 am
by MarkyB
Remember to be careful putting on the POR 15.
If any drips through from back to front it'll spoil the work you've done already.
Posted: Tue Nov 18, 2008 2:56 pm
by Ratbag
Luxobarge wrote:snip
This will now dry and harden for a few days, then I will turn it upside down and brush paint on the grey POR15 - might do 2 coats of this, too.
More anon!
Why did you decide to do the outside first? I can see a case for painting the inside, then spraying the outside....
Posted: Tue Nov 18, 2008 8:20 pm
by charlie_morris_minor
I tried the method from practical classics over the weekend and was very impressed. I manged to get the soda crystals from wilkinson at 55p a kilo it does seem to take a while to work, i am going to try a big anode next time to see if it is any quicker, but i would recomend giving it a try.
Posted: Tue Nov 18, 2008 9:49 pm
by Luxobarge
Ratbag wrote:Luxobarge wrote:snip
This will now dry and harden for a few days, then I will turn it upside down and brush paint on the grey POR15 - might do 2 coats of this, too.
More anon!
Why did you decide to do the outside first? I can see a case for painting the inside, then spraying the outside....
Because there's quite a bit of spray gone on the inside, and if you spray on top of POR15 it goes wrinkly - ask me how I know......

Sorry not much of an update on this - been busy, something called work???

Posted: Tue Nov 18, 2008 9:51 pm
by Luxobarge
charlie_morris_minor wrote:I tried the method from practical classics over the weekend and was very impressed. I manged to get the soda crystals from wilkinson at 55p a kilo it does seem to take a while to work, i am going to try a big anode next time to see if it is any quicker, but i would recomend giving it a try.
Hiya! Yeah, thanks for that, "impressive" is indeed the effect I'm looking for! I plan to give this a whirl on my 3rd and final wheel, I bought the soda crystals the other day in ASDA, and will be using the huge plastic bucket shown above and a battery charger - watch this space for a photographic record of how it goes!
Posted: Wed Nov 19, 2008 9:54 pm
by tickman
Luxobarge wrote:Sorry not much of an update on this - been busy, something called work???
Slacker
Amazing results as always, keep it up.
John.
Posted: Fri Nov 21, 2008 12:29 pm
by Luxobarge
OK, I'm really not that happy with the Bilt-Hamber Deox-C de-rusting system, as:
1) it hasn't completely de-rusted my second wheel,
2) I've already used over £23 worth of crystals, so it's proving to be rather expensive,
3) it's taken ages, although this isn't a huge problem, it's certainly not a plus point.
So, today I decided to make a start on setting up a system to de-rust these wheels using the electrolysis method recently explained in PC magazine.
I bought 1kg of washing soda crystals from Asda very cheaply, less than £1. You are supposed to use 10g of crystals for every litre of water, and as I had about 30 litres of water to adequately cover the wheel (the yellow tub has handy volume markings on the side) I used the kitchen scales to measure out 300g of crystals and poured them into the water, stirring to dissolve.
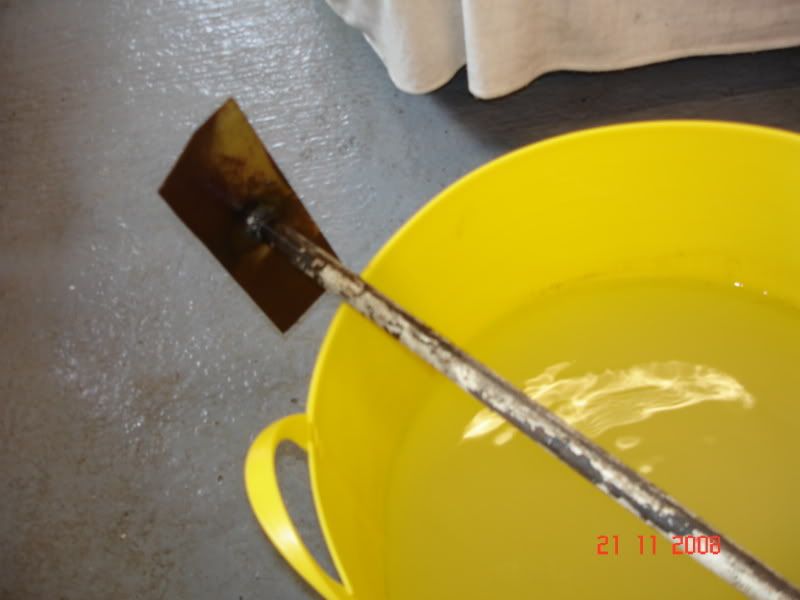
Then I needed to set up an anode - apparently this system works best in "line of sight" to the rust, so I needed a central anode that would "face" the majority of the rust I want to remove from the wheel. I used an old steel pole and welded a flat piece of scrap sheet to it, here you can see my anode and the tub ready to go:
Then it was simply a matter of connecting a piece of scrap wire to an old crocodile clip to clip to the wheel to use as a cathode. I tied the anode to a cross-beam of spare steel with cable ties to support it, put the wheel in the bath and connected it all up.
Here it is all working:
Immediately quite a lot of tiny bubbles started clouding up from all surfaces - yes, it's a good idea to keep the area well ventilated, as one element will be emitting hydrogen and the other oxygen, and they are explosive when mixed together! The system is drawing between 2-3 amps from the battery charger, which is fine as I don't want to overload it.
Very simple to do, I hope I get as good results as others have reported. I'm initially doing the wheel that has so far spent a week in the Deox-C, as it is not fully de-rusted. If this works, then I plan to do the 3rd and final wheel this way too.
I have a "before" shot of the wheel, when it's cooked for a while I'll show you the "after" shot and we can see how well this system has worked.
More anon!
Posted: Sat Nov 22, 2008 10:47 am
by tingo
This is a great thread Luxobarge! Keep up the good work, I hope you get the results you want.
Posted: Sun Nov 23, 2008 6:08 pm
by Luxobarge
Well, you saw the tub in the pictures above when I'd just started it, this is what it looked like just a couple of hours later:
I brushed the gunk off the anode every now and then, and left it for a day and a half - then took the wheel out, hosed it down and dried it.
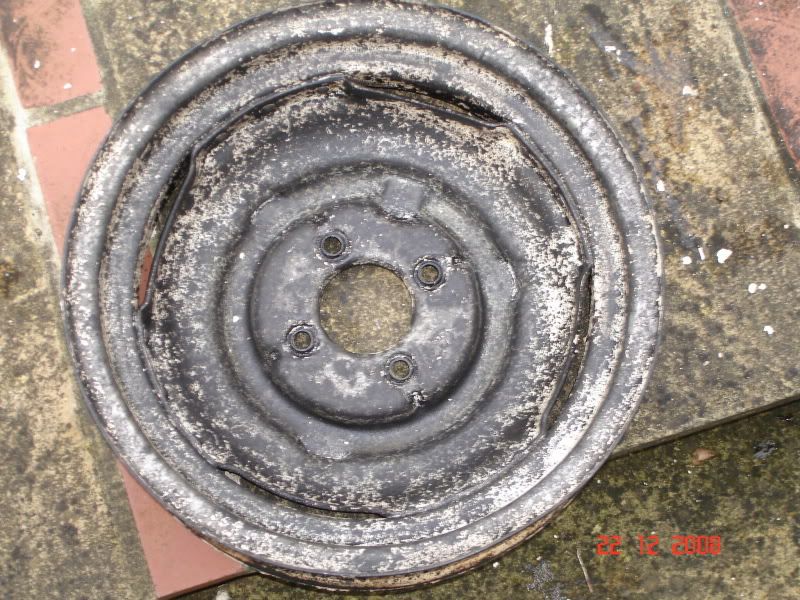
This is what it looks like now:

The slight red rust look just developed as it was drying - it's all gone a sort of dark gunmetal grey colour.
The dark rust marks on the inner deep ring on the back of the wheel in the 1st photo were still red rust when they came out of the Deox-C bath, but after electrolysis they are still there, but have now turned black.
I will clean this wheel up with wire brushes etc. as a next step, and see if I can get it a bit brighter, and remove those dark lumpy bits ready for painting - overall quite impressed with the electrolysis though!
Progress is slow at the moment as I'm really busy with other stuff, but will post updates as and when I get more done.
Cheers
Posted: Sun Nov 23, 2008 6:11 pm
by Luxobarge
Back to painting the first wheel for a moment now - here I used Rover Arum white on the outside, and grey POR15 on all the bit's you won't see from the road - used 2 coats of this, here's the result:

So, one wheel finished! I probably won't fit the tyres for ages yet, certainly not until all 3 wheels are done.
Cheers!
Posted: Sun Nov 23, 2008 9:50 pm
by tortron
RE: painting over POR-15
i haven't had any problems with this, a guy a club i am in recently undercoated his ke20 in por-15 and had no problems.
Were you leaving it to cure long enough?
Posted: Mon Nov 24, 2008 9:26 pm
by Luxobarge
tortron wrote:RE: painting over POR-15
i haven't had any problems with this, a guy a club i am in recently undercoated his ke20 in por-15 and had no problems.
Were you leaving it to cure long enough?
Well, it's not nearly as bad as Smoothrite for example, that wrinkles over really badly if you over-paint it, even with another coat of smoothrite, but I have had this effect from POR15 when painting celly over it fairly wet, so I didn't want to run the risk. Yes, you reduce the risk by waiting for it to cure fully, but that can take weeks, life is too short, I wanted to get on with the job! Even when I've had this problem, the item was left to dry at least 24 hours in a warm boiler room, so should have gone off OK.
Every man to his own though I suppose - I'd not be that bothered either way!
Cheers
Posted: Mon Dec 22, 2008 2:22 pm
by Luxobarge
Update on wheel No. 3:
I've not been really bothered with progressing this over the past 2 or 3 weeks, so this wheel has been in the electrolysis bath all that time - I did turn the wheel over in the bath a couple of times though.
It sat there quite happily, the sacrificial anode gets quite gunged up very quickly, so it draws only a fraction of an amp from the battery charger, which was running cold, so very little power consumption.
I took the wheel out today - this is all that's left of the anode!
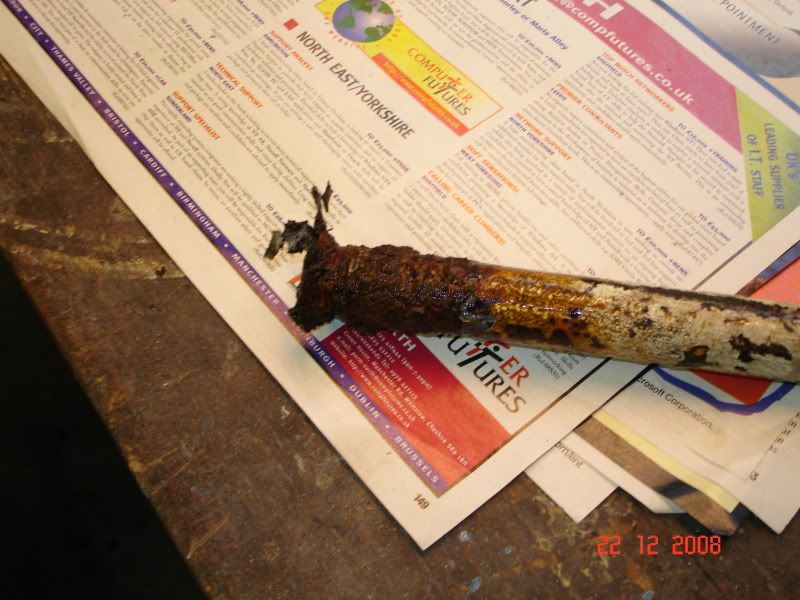
It's only made of scrap steel, so no problem, but I'll have to weld on another piece for the next time I use this system!
Boy, this system does seem to work well, and really cheap too!
After all that time, not only had it shifted
all the rust (it did that in a day or two) but it's also actually started to lift a lot of the paint too, which is handy - I wasn't expecting that! It hasn't removed
all the paint by any means, but it all seems to have gone loose and flaky, so will probably be much easier to fully strip now.
This is the wheel after I'd taken it out and washed it down with a hose, then dried it:
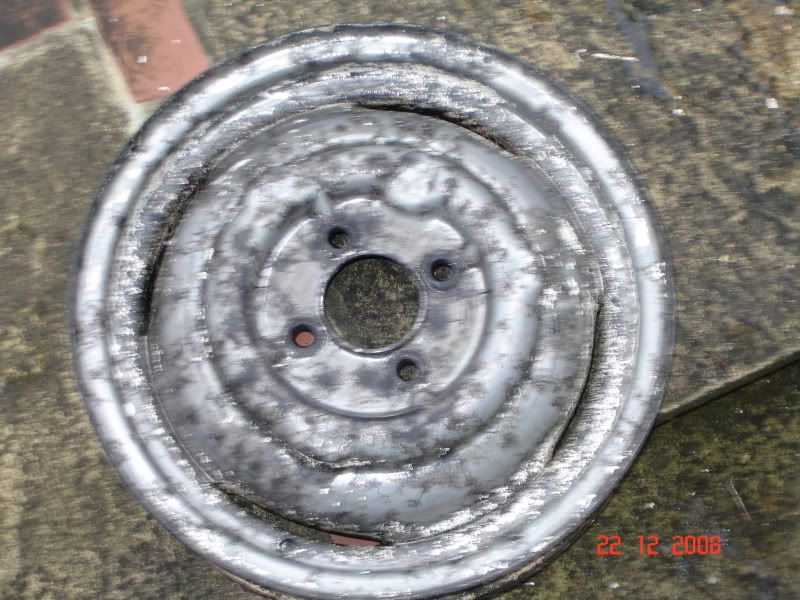
(Sorry about wobbly image - hand shake, I was hungry!)
Pretty good I think you'll agree. I really rate this system, it's childishly easy to set up and incredibly cheap to do, less than a quid for the crystals (I still have enough from one packet to do several more bath-loads, and even one bath can be re-used for ages) and overall I reckon it's more thorough than the Deox-C crystals method, although I'd still use Deox-C for small parts, as I did on some small mounting brackets on another car the other day.
The wheel still needs quite a bit of cleaning up, particularly the removal of the rest of the old paint, but I think this will be quite easy now (relatively speaking) and so I'll do this as soon as I have some time & inclination - watch this space!
Cheers all - have a happy Christmas!
Posted: Mon Dec 22, 2008 8:09 pm
by linearaudio
croft wrote:Hi luxobarge, out of interest how much did the bilt-hamber stuff cost? I'm busy de-rusting some stuff in the same size tub you have but following the recent article in Practical Classics! It cost me £2.00 for the soda crystals! Granted you need a few scrap bits of steel and a battery charger but I'm seeing the same sort of results you have in your photos. I took the easy way out and had my wheels sand-blasted and etch primed £10.00 from my local guy. Keep up the good work, enjoyng your Pictorials!! Cheers, Croft
I had a go with the battery charger method a month ago- after two minutes it started smoking badly-exit one selmar battery charger

What did I do wrong?