Page 10 of 14
Re: Rose Taupe Traveller Restoration- update 34
Posted: Sun Jun 12, 2011 8:55 am
by mmjosh
did the traveller used to be lhd as i can see 2 master cylinders
Re: Rose Taupe Traveller Restoration- update 34
Posted: Sun Jun 12, 2011 10:42 am
by chrisryder
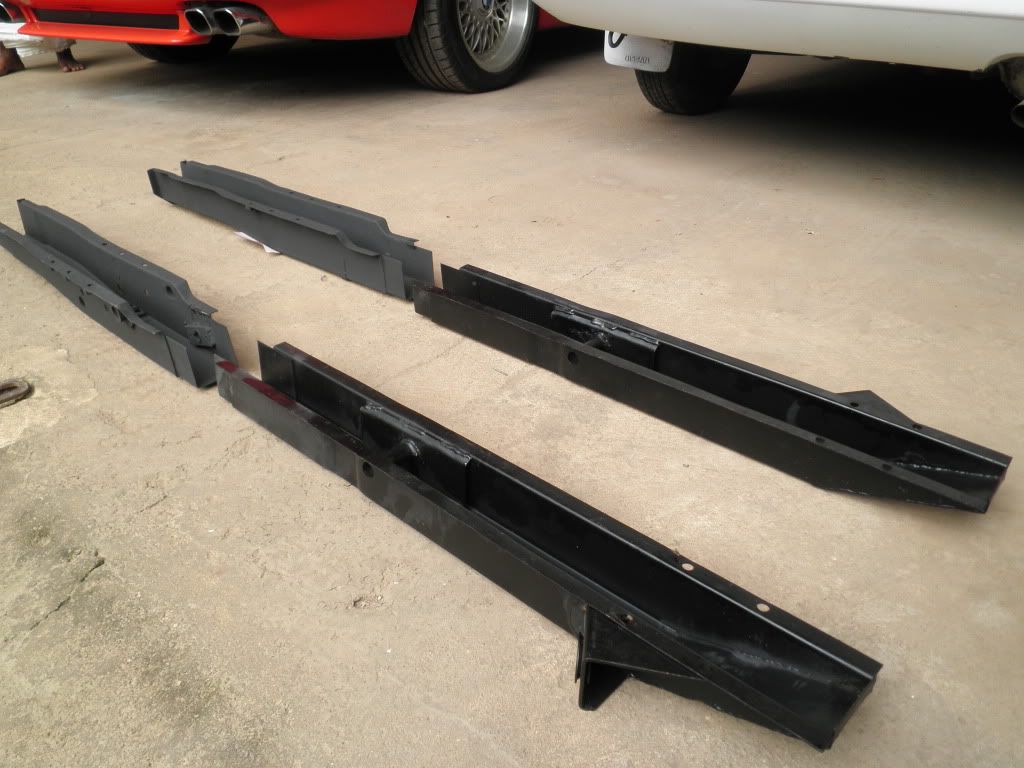
i believe Taupe was using master cylinders to reinforce the chassis legs and keep them the right width during welding. makes sense really as master cylinders are the perfect size for the job!
Re: Rose Taupe Traveller Restoration- update 34
Posted: Sun Jun 12, 2011 11:13 am
by klm
Taupe,
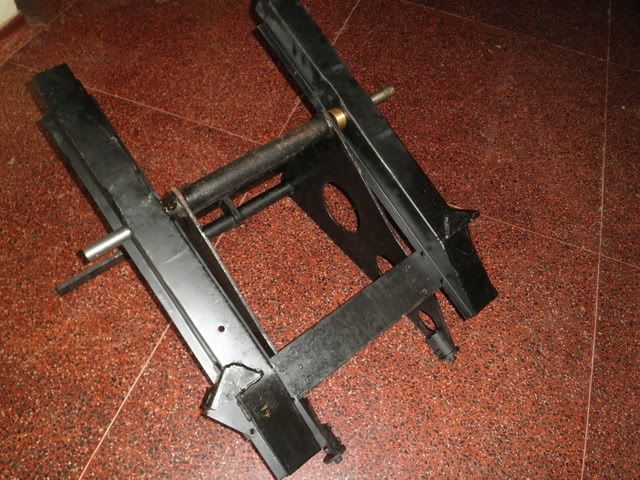
Did this inaccuracy occur due to the new chassis leg been too long? If the distance from the centre of eye bolt hole to the chassis rail eye is exactly 39" I cannot figure out why the splines did not enter fully into lower arm.
The spring mounting points are 43 3/32" horizontally and 4 7/8" vertically apart. This works out to 43.37" as the direct distance between the mounting points. It is not clear in your posting what the distrance 40 1/8" between the centres of the springs mean. Would it be possible to please clarify?
The dimensions in the manual are given on the assumption that pins are located centrally at the rear spring mounting points and the flat side of the front pins are flush with the inner surface of the front spring brackets. If you think this is incorrect please let us know. I have measured the original pins and they are 2 13/16" for both front and rear spring mountings.
klm
Re: Rose Taupe Traveller Restoration- update 34 pics updated
Posted: Sun Jun 12, 2011 12:24 pm
by taupe
Hi Klm
The 40 1/8" dimension is across the car to the notional centres of the leaf springs, this is the same as the centres between the holes in the spring plates in my axle casing.
Regarding the torsion bar its set exactly as the manuals dimensions (39") I know as I made a jig to get this exactly right and measured it again after all the welding !!!
So I dont know whats going on there? Though as I said in my post Im not worried about a bit of spline showing.
The only thing I can think of is perhaps the dimension in the manual is to the 'centre' or rear face of the crossmember centre web this would give 3-5mm less spline showing but thats certainly not how it looks on the drawing in the manual. Perhaps my torsion bar has shrunk!!

Ive also measured from the front face of the centre crossmember web to the join between the two lower suspension arms, this is also almost exactly 39" and this corresponds with the wheel centre line which is where the dimension is given in the manual.
If I placed the centre crossmember further forward to compensate for the splines then my spring hangers would have been even further out (11mm!)
Thanks for your interest
Taupe
Re: Rose Taupe Traveller Restoration- update 34 pics updated
Posted: Sun Jun 12, 2011 12:31 pm
by taupe
Chris
Thats right though I was going to tell Josh that it was for the passenger brake pedal

Taupe
Re: Rose Taupe Traveller Restoration- update 34 pics updated
Posted: Sun Jun 12, 2011 6:33 pm
by MarkyB
the splines did not enter fully into lower arm
I wouldn't worry about that, I don't think they are designed to, that how people mark the splines to get them back together the same.
Certainly the holes for the eye bolts need to be the same, but the splines don't help define the distance.
Re: Rose Taupe Traveller Restoration- update 34 pics updated
Posted: Sun Jun 12, 2011 10:35 pm
by mmjosh
taupe wrote:Chris
Thats right though I was going to tell Josh that it was for the passenger brake pedal
Taupe
like the driving instructors cars lol

Re: Rose Taupe Traveller Restoration- update 34 pics updated
Posted: Mon Jun 13, 2011 5:00 am
by klm
Thank you Taupe for clarifying the 40 1/8" dimension and for sharing other chassis information.
So far to me, the 39" dimension appears correct. Recently I took accurate measurments of an eyebolt, lower arms and a torsion bar and found that the distance from the end of the torsion bar to the centre of the eye bolt hole to be 1 13/32". Today I once again measured a torsion bar and found it to be 37 7/16". Allowing 1/8" for the horse shoe washer, the total comes to 38 31/32". The 1/32" gap could be taken up by the chassis leg eye. Would it be possible for you to please advise if the above dimensions are consistent with your jig?
Also would you be able to provide a sketch with main dimensions of your rear end jig for accurately positioning the spring hanger?
Thanks again
klm
Re: Rose Taupe Traveller Restoration- update 34 pics updated
Posted: Mon Jun 20, 2011 12:56 am
by taupe
Re: Rose Taupe Traveller Restoration- update 35
Posted: Sun Aug 28, 2011 9:49 am
by klm
Re: Rose Taupe Traveller Restoration- update 35
Posted: Thu Apr 12, 2012 12:09 am
by DAVIDMCCULLOUGH
Re: Rose Taupe Traveller Restoration- update 35
Posted: Thu Apr 12, 2012 9:04 am
by ignatzcatz
Mighty big cahoonas, nice work buddy, nice garage, oh and nice jack too.
Re: Rose Taupe Traveller Restoration- update 35
Posted: Fri May 11, 2012 2:27 pm
by davidpidge
Hows it coming along? This is one of the best restorations i've ever followed. There's a similar rebuild of a VW camper somewhere online. The guy basically built a brand new camper! I don't think there was a single scrap of original metal left.
Re: Rose Taupe Traveller Restoration- update 35
Posted: Sat May 12, 2012 12:10 am
by don58van
Hello Rose Taupe
Please tell us that you haven't lost interest in this project.
Your work so far has been incredibly informative, inspirational and encouraging (I am trying to restore a Traveller needing extensive rust repairs).
All the best
Don from Oz.
Re: Rose Taupe Traveller Restoration- update 35
Posted: Mon May 14, 2012 9:24 am
by RobThomas
Ditto. When you're shown what is possible for Taupe to do, it kinda inspires me to have a go at some of the jobs that you've been putting off due to lack of confidence in my own abilities.
C'mon, Taupe, oh Mighty Metal Guru, masterful wielder of the Mighty MIG welder. Give us a sign, a heavenly portent, another photo to inspire the huddled masses.
Re: Rose Taupe Traveller Restoration- update 35
Posted: Tue Nov 27, 2012 1:06 pm
by jagnut66
Hi,
Simply inspiring, I have to say, like the rest on here I'm looking forward to the latest update.
Hope things have progressed well without too much 'pain' since the last one.
Best wishes,
Mike.
Re: Rose Taupe Traveller Restoration- update 35
Posted: Sun Jan 06, 2013 2:48 pm
by taupe
Hi
I’ve started again in earnest with the Traveller after a short break and was researching replacement timber over Christmas when I spotted a shop-soiled bargain from Bull Motif.
I picked up the full timber kit on Friday and have been trial fitting it. I’m very pleased with the quality and fit, though its probably not as good as a Woodies one is was less than half the price
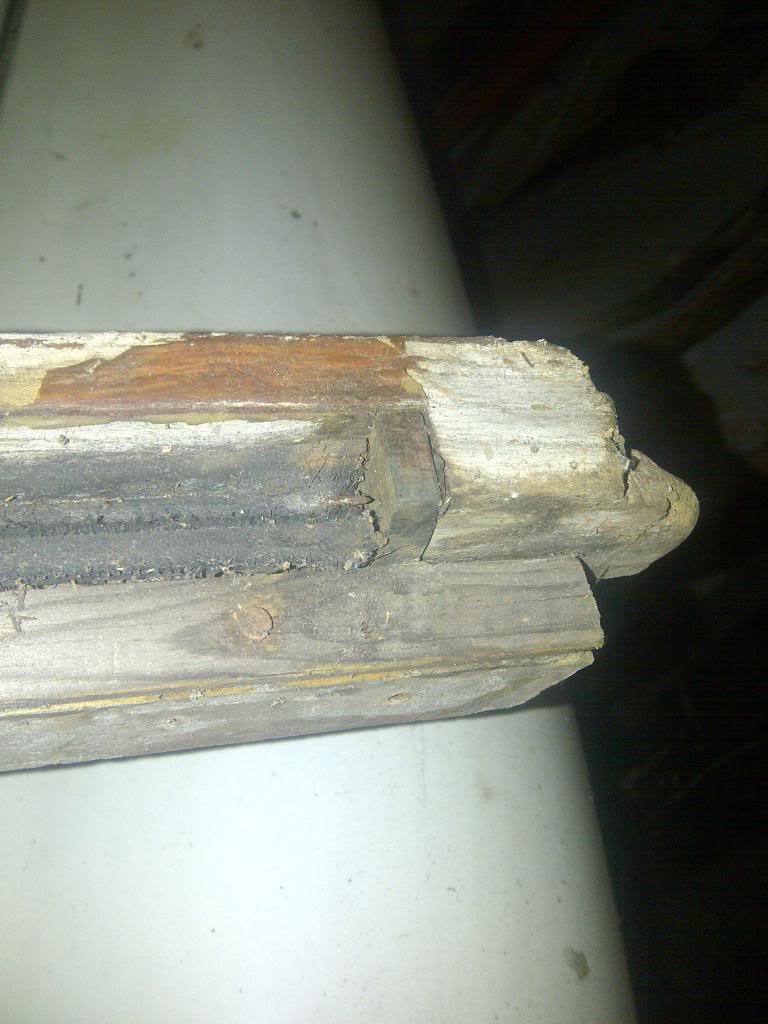
The reason for the super discount was this, which apparently occurred during transport from a customer.
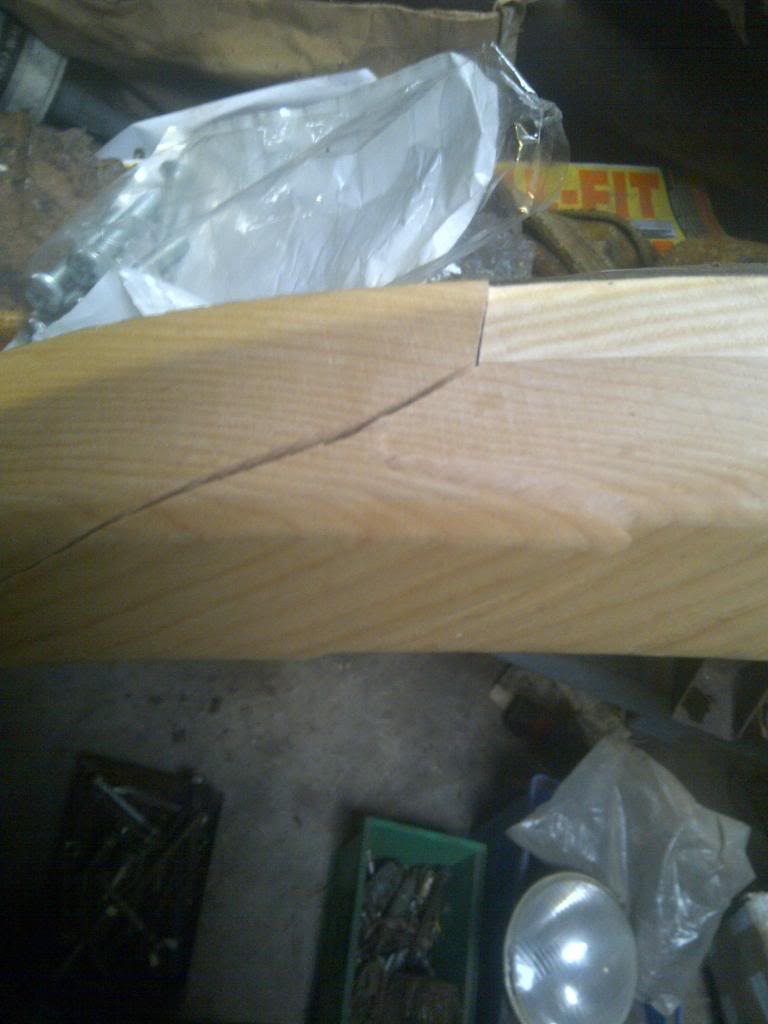
- TravellerpicsJan011_zps9454a52e.jpg (58.23 KiB) Viewed 8844 times
And this, which is just incomplete machining and needs about a further 10mm trimmed from the pillar so that the ladder frame can fit properly.
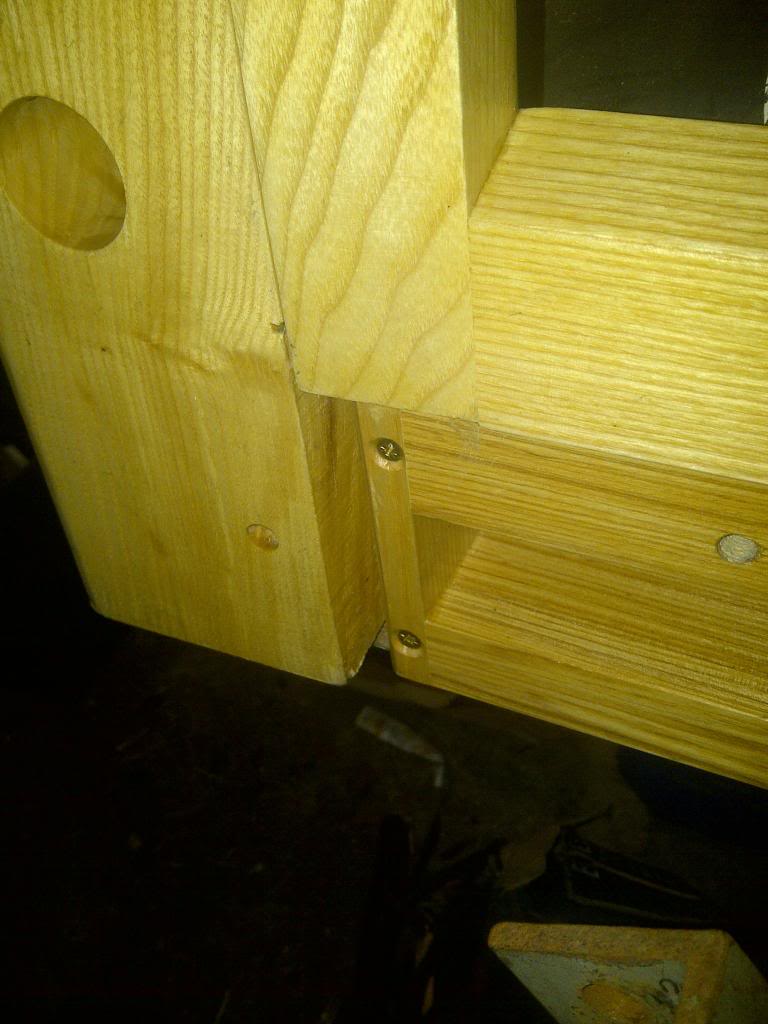
- TravellerpicsJan012_zps5a235369.jpg (76.71 KiB) Viewed 8844 times
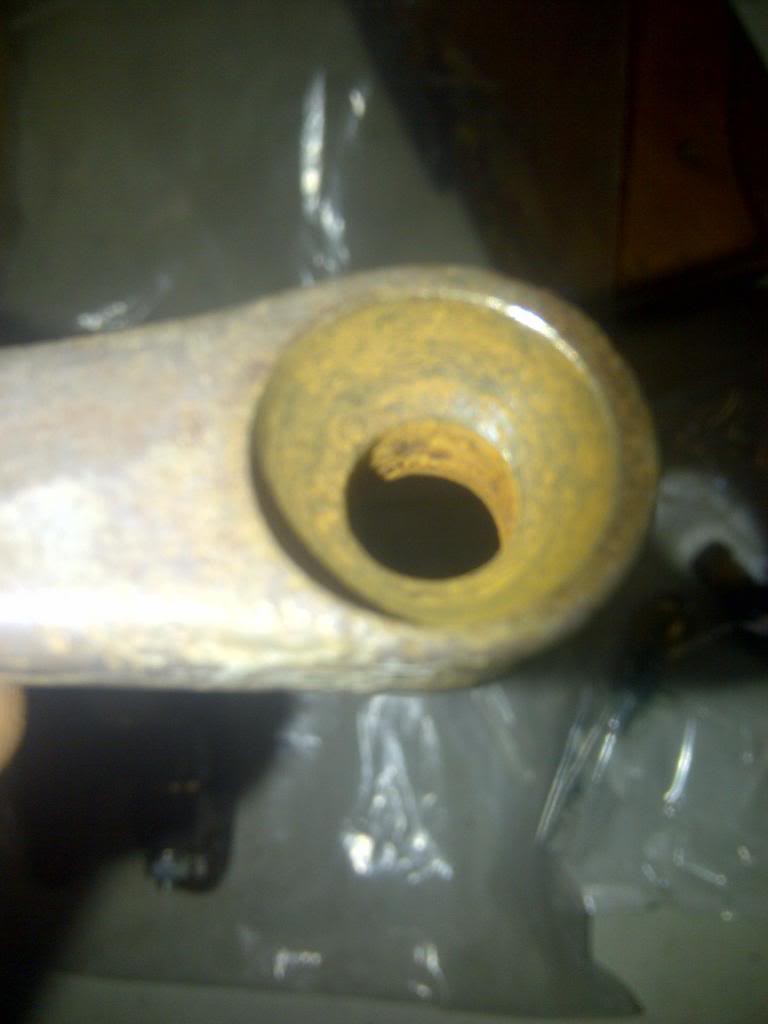
I kept all the rotted old timber and have been busy salvaging a few bits like these rubber buffers and measuring the old screws for replacements.
- TravellerpicsJan001_zps7cd79354.jpg (72.58 KiB) Viewed 8844 times
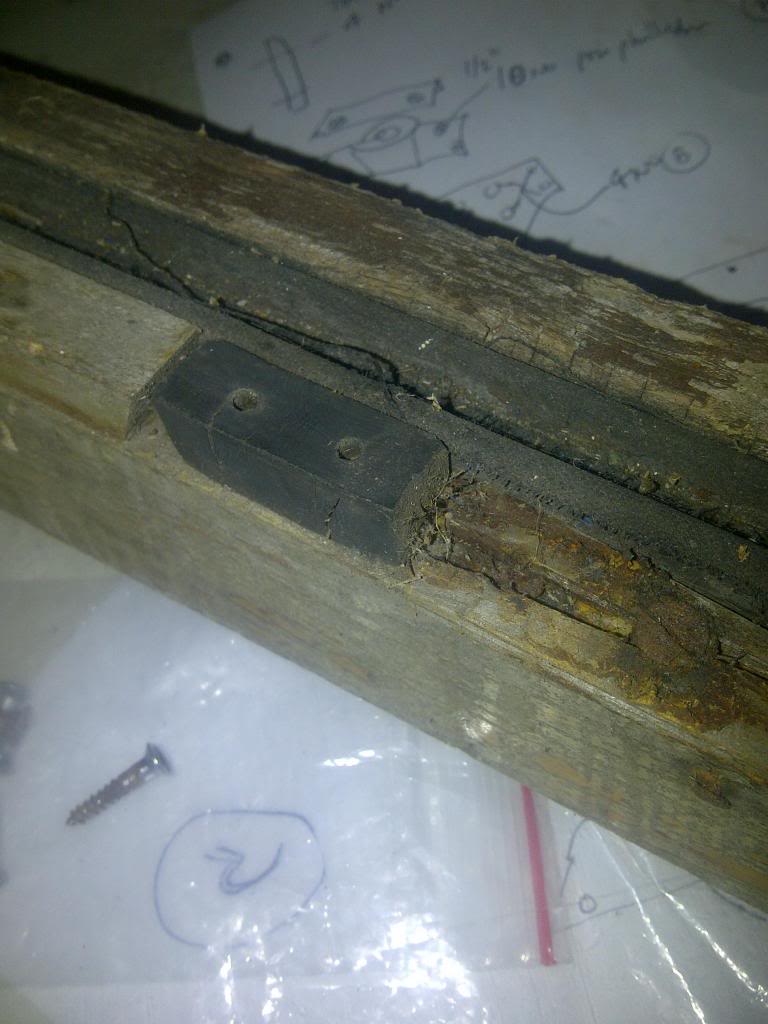
- TravellerpicsJan002_zps1d3bd785.jpg (75.94 KiB) Viewed 8844 times
I took the old hinges off to clean up and fit new hinge pins and brass balls and was a little confused to start with. My right hand door had bent pins top and bottom, this turned out to be that the hinges had been mixed up with the lower door arm fitted to the upper hinge and vice verse!
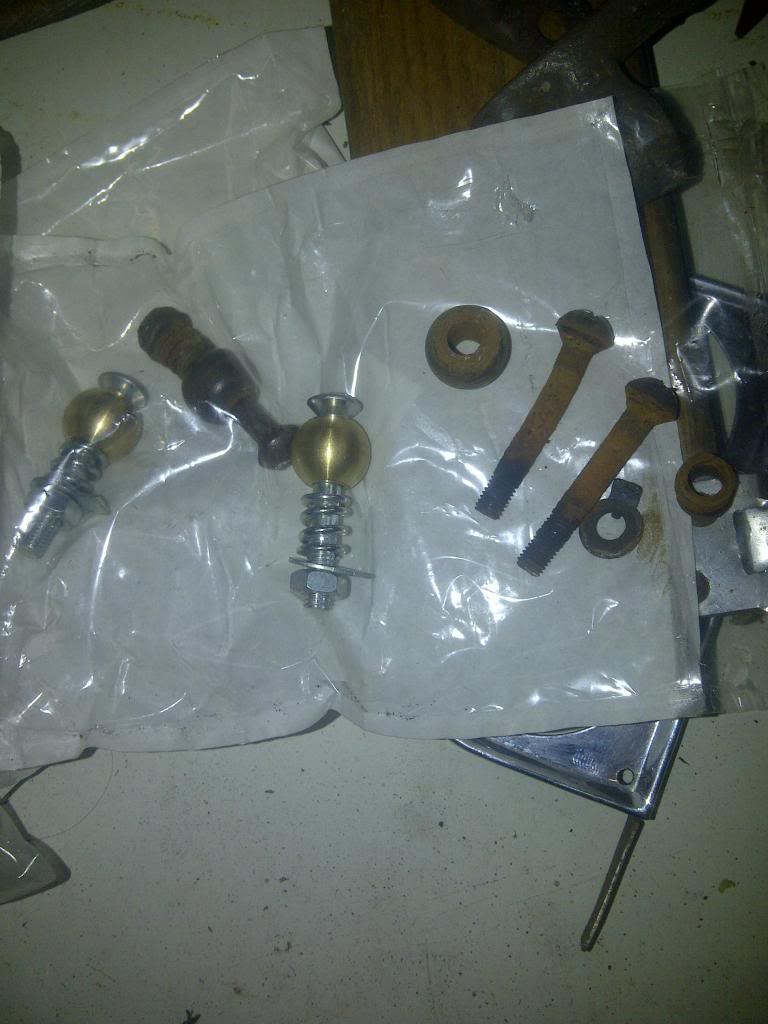
- TravellerpicsJan007_zps3ffd5ab6.jpg (73.18 KiB) Viewed 8844 times
- TravellerpicsJan006_zps8eb171f6.jpg (60.67 KiB) Viewed 8844 times
You can see the new pin sets and the bent hinge pin above
I gave the spherical sockets a quick clean and fitted the pins for now ready for a full clean and painting later on
- TravellerpicsJan008_zps41455889.jpg (38.12 KiB) Viewed 8844 times
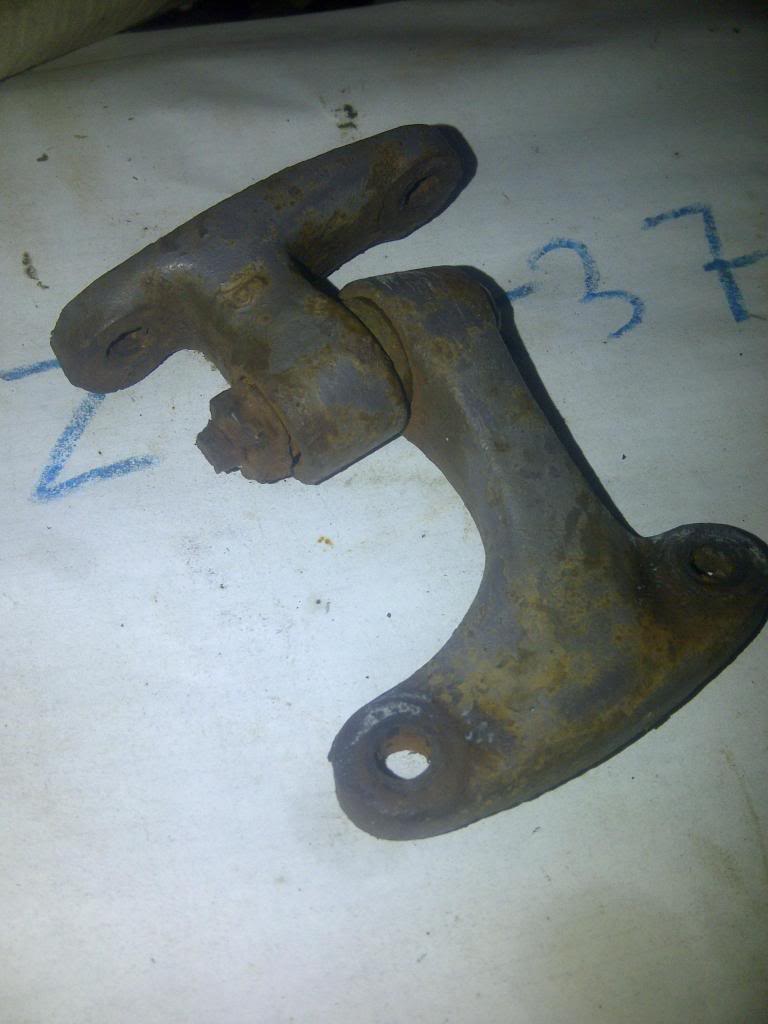
Here are the four hinges cleaned up.
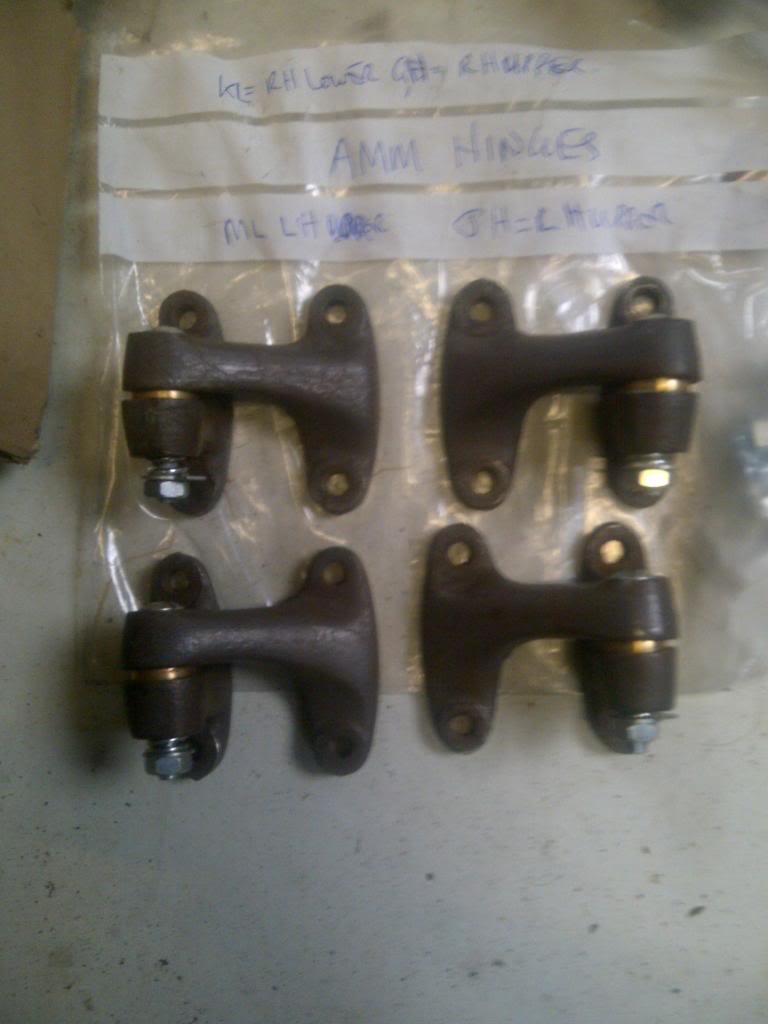
- TravellerpicsJan009_zps9b796ca5.jpg (53.8 KiB) Viewed 8844 times
The hinge castings on mine are marked as follows
K,L Right Hand lower
G,H Right Hand Upper
M,L Left Hand Lower
J,H Left Hand Upper
I think the L and H bits can be used on LH or RH sides?
Here is a quick pic of the frames and door rested in place
Taupe
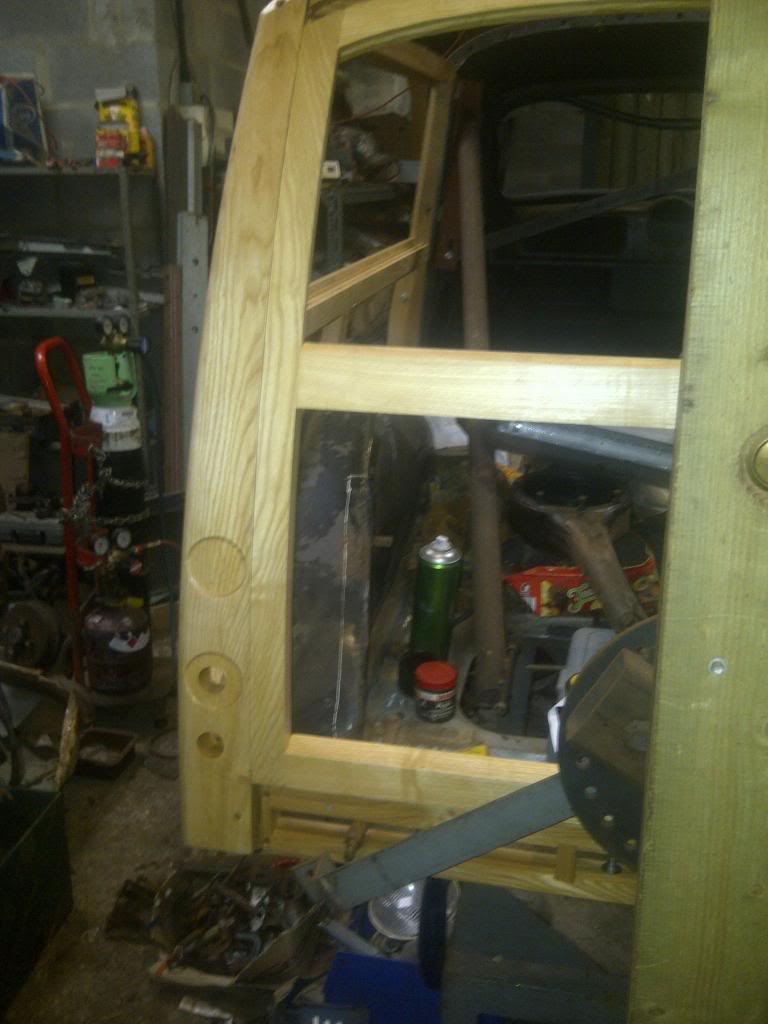
- TravellerpicsJan010_zps410fad96.jpg (68.75 KiB) Viewed 8844 times
The wheel arch fit is fine both sides but I’ve decided to replace these now as I have full new panels for the inner wings it seems daft to patch up the old ones. Now that I have the timber frame I can do the final alignment of the cars rear end and complete the welding this end.
That’s all for now.
Re: Rose Taupe Traveller Restoration- update 36 - Jan 2013
Posted: Sun Jan 06, 2013 4:40 pm
by davidpidge
Glad to see we're on roughly the same part of the restoration. Might let you stay a couple of steps ahead to see how to do it properly!
Re: Rose Taupe Traveller Restoration- update 36 - Jan 2013
Posted: Mon Jan 07, 2013 5:37 am
by don58van
Hi Taupe
Its great to see that you are back in action on the Traveller. I am one of many (I am sure) who draws lots of information and confidence from seeing your work.
Well done with the wood. The grain looks v nice.
I gather that you advocate building the timber and trial fitting it -- then modifying the metal-work to fit (if required) -- as opposed to making the wood fit the metal. I presume you would have checked the frame as you assembled it to make sure that it is true before trial fitting. Do you have any data for this (other than making sure that diagonal measurements match, etc)?
All the best for the NY from Oz!
Don
Re: Rose Taupe Traveller Restoration- update 36 - Jan 2013
Posted: Mon Jan 07, 2013 11:06 am
by ian.mcdougall
are those rubber buffers original and can they still be obtained