Page 8 of 14
Re: Rose Taupe Traveller Restoration- update 23
Posted: Fri May 06, 2011 11:00 am
by ian.mcdougall
now let us into the secret on how you got a nice turned edge to the round hole
Ian
Re: Rose Taupe Traveller Restoration- update 23
Posted: Fri May 06, 2011 12:17 pm
by chickenjohn
ian.mcdougall wrote:now let us into the secret on how you got a nice turned edge to the round hole
Ian
- Image125.jpg (211.29 KiB) Viewed 2356 times
I'd say lots of patience. If Taupe does not have the tool that makes a turned edge in a circle then, mark two circles, cut the inner, start the lip with pliers (patience required!) and finally careful dressing with hammer and dolly and hard flat surface.
Good guess??
Re: Rose Taupe Traveller Restoration- update 23
Posted: Fri May 06, 2011 3:17 pm
by taupe
Hi
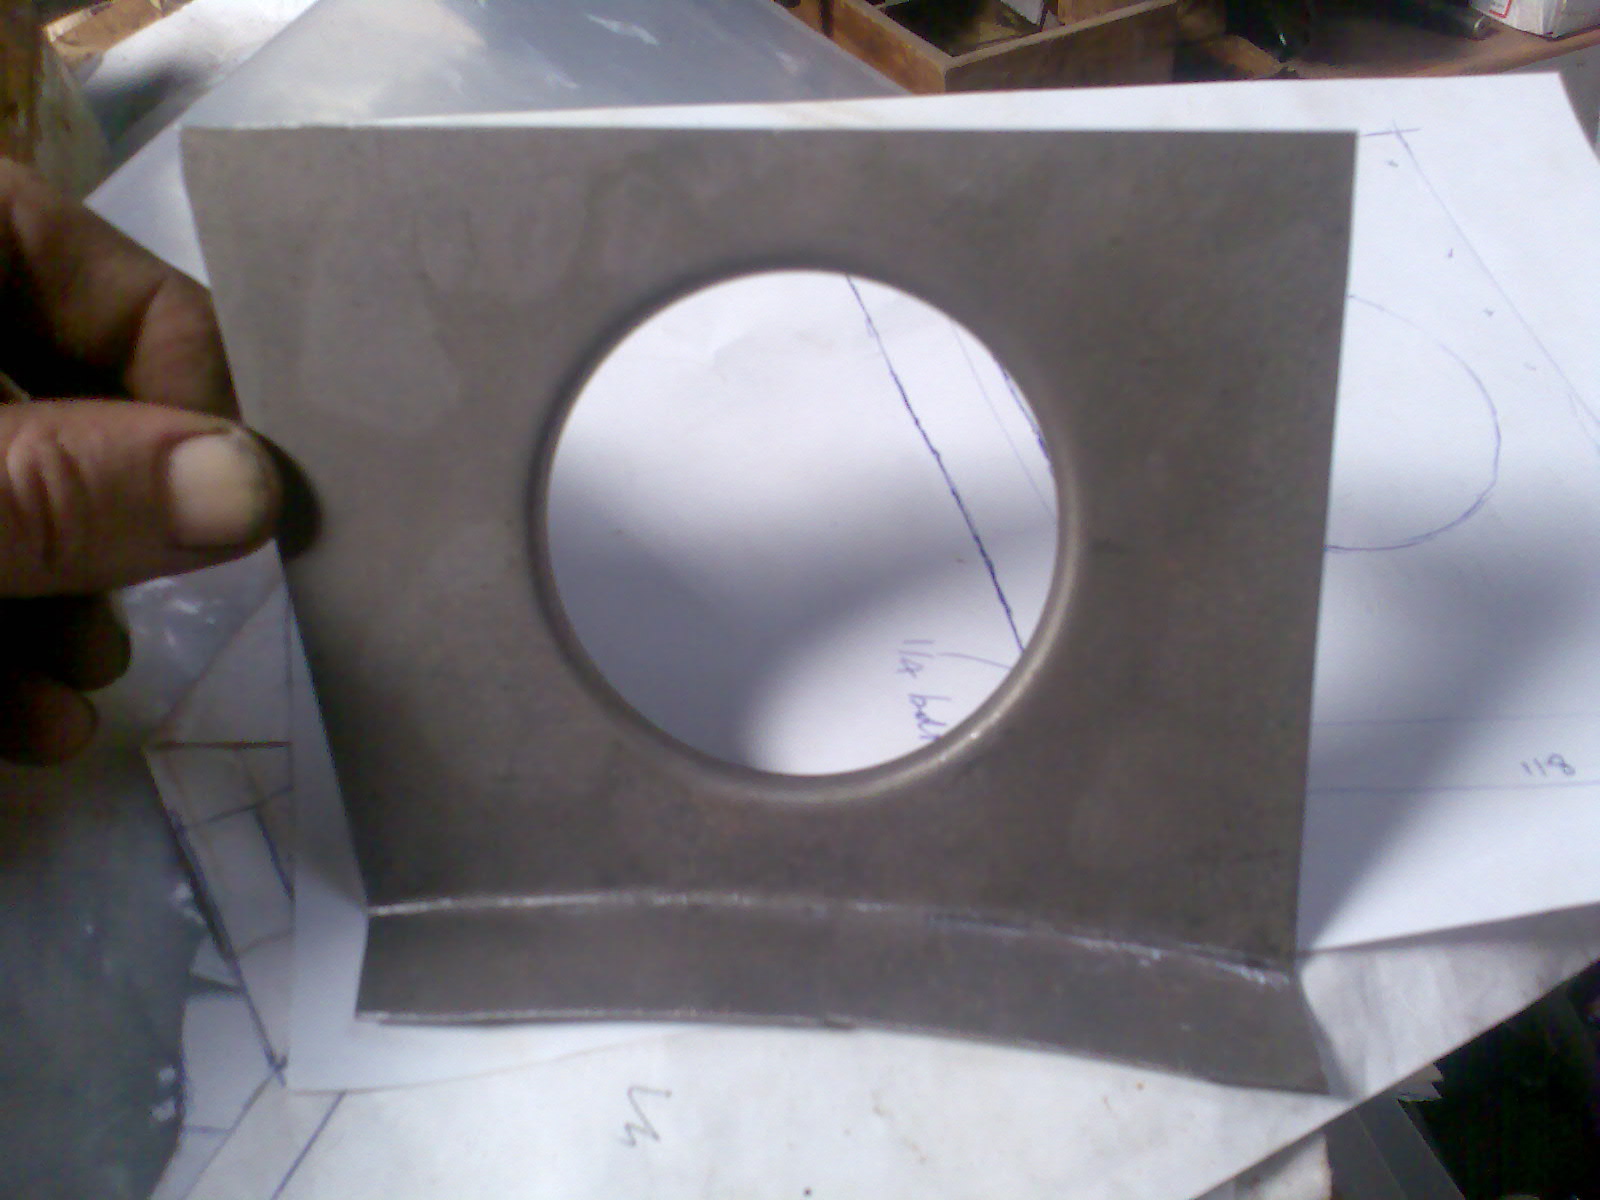
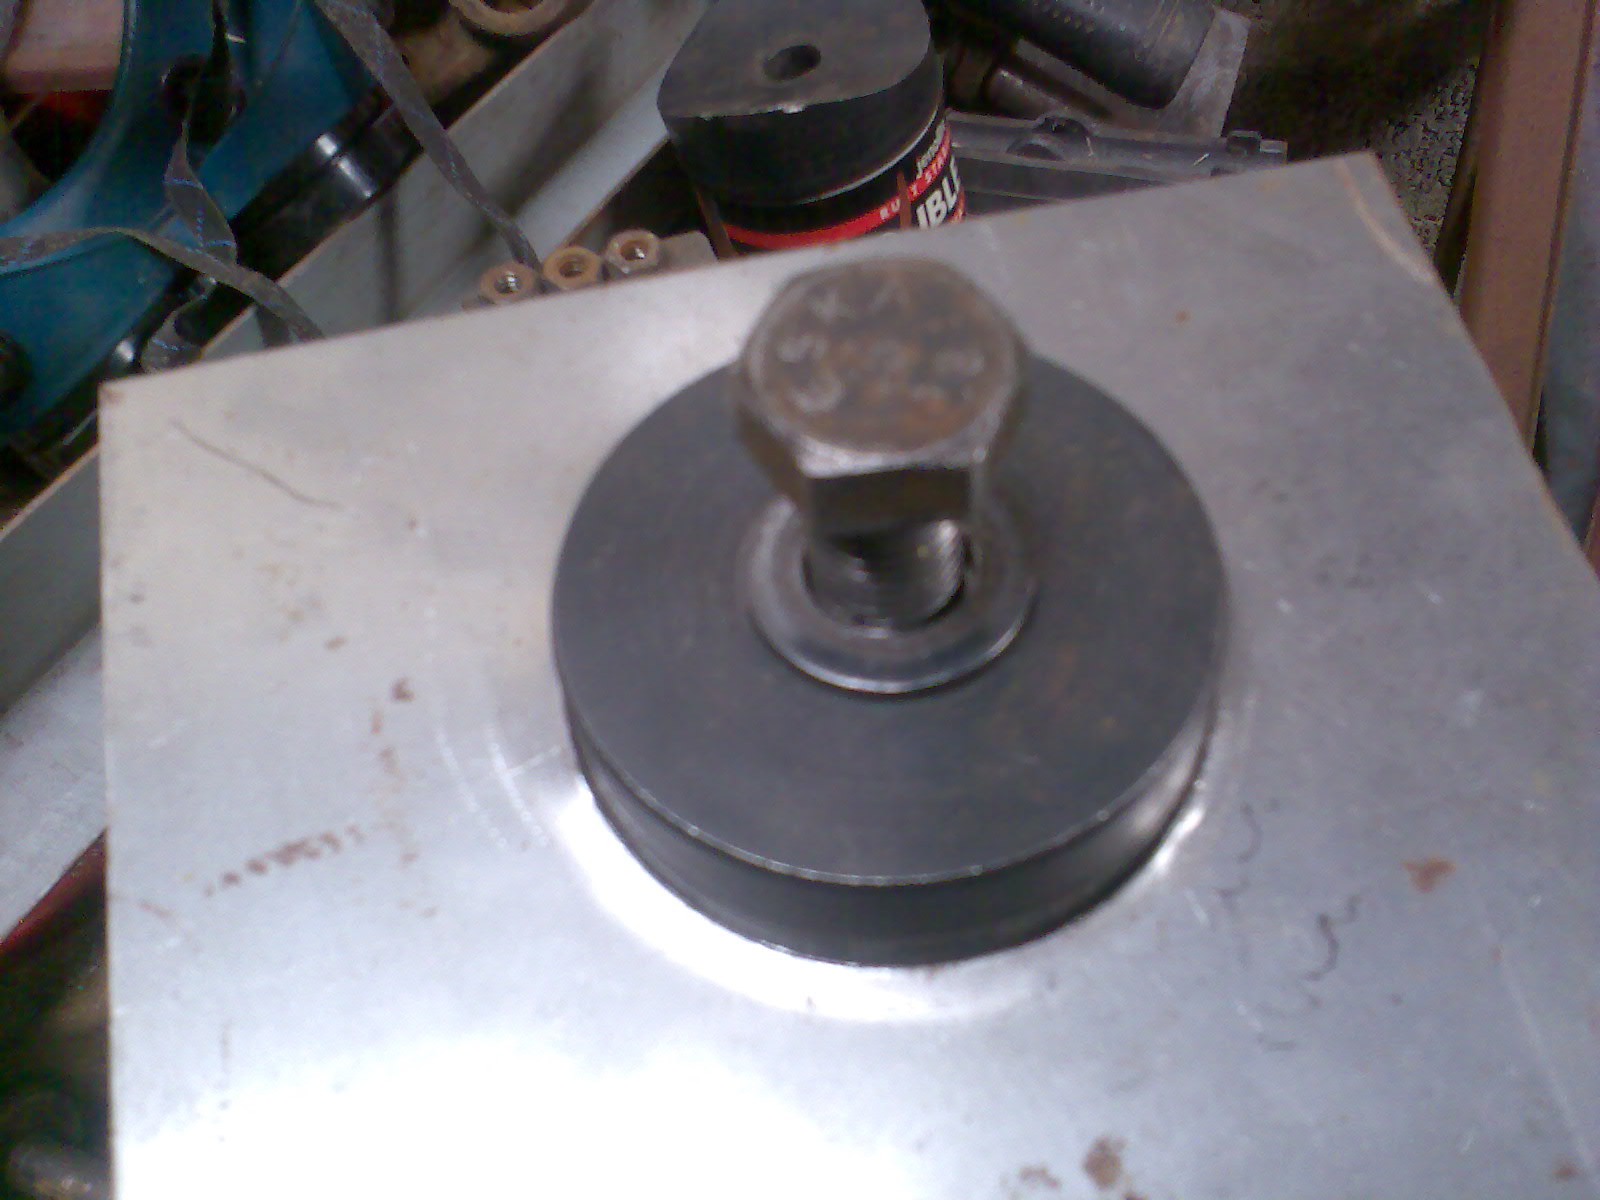
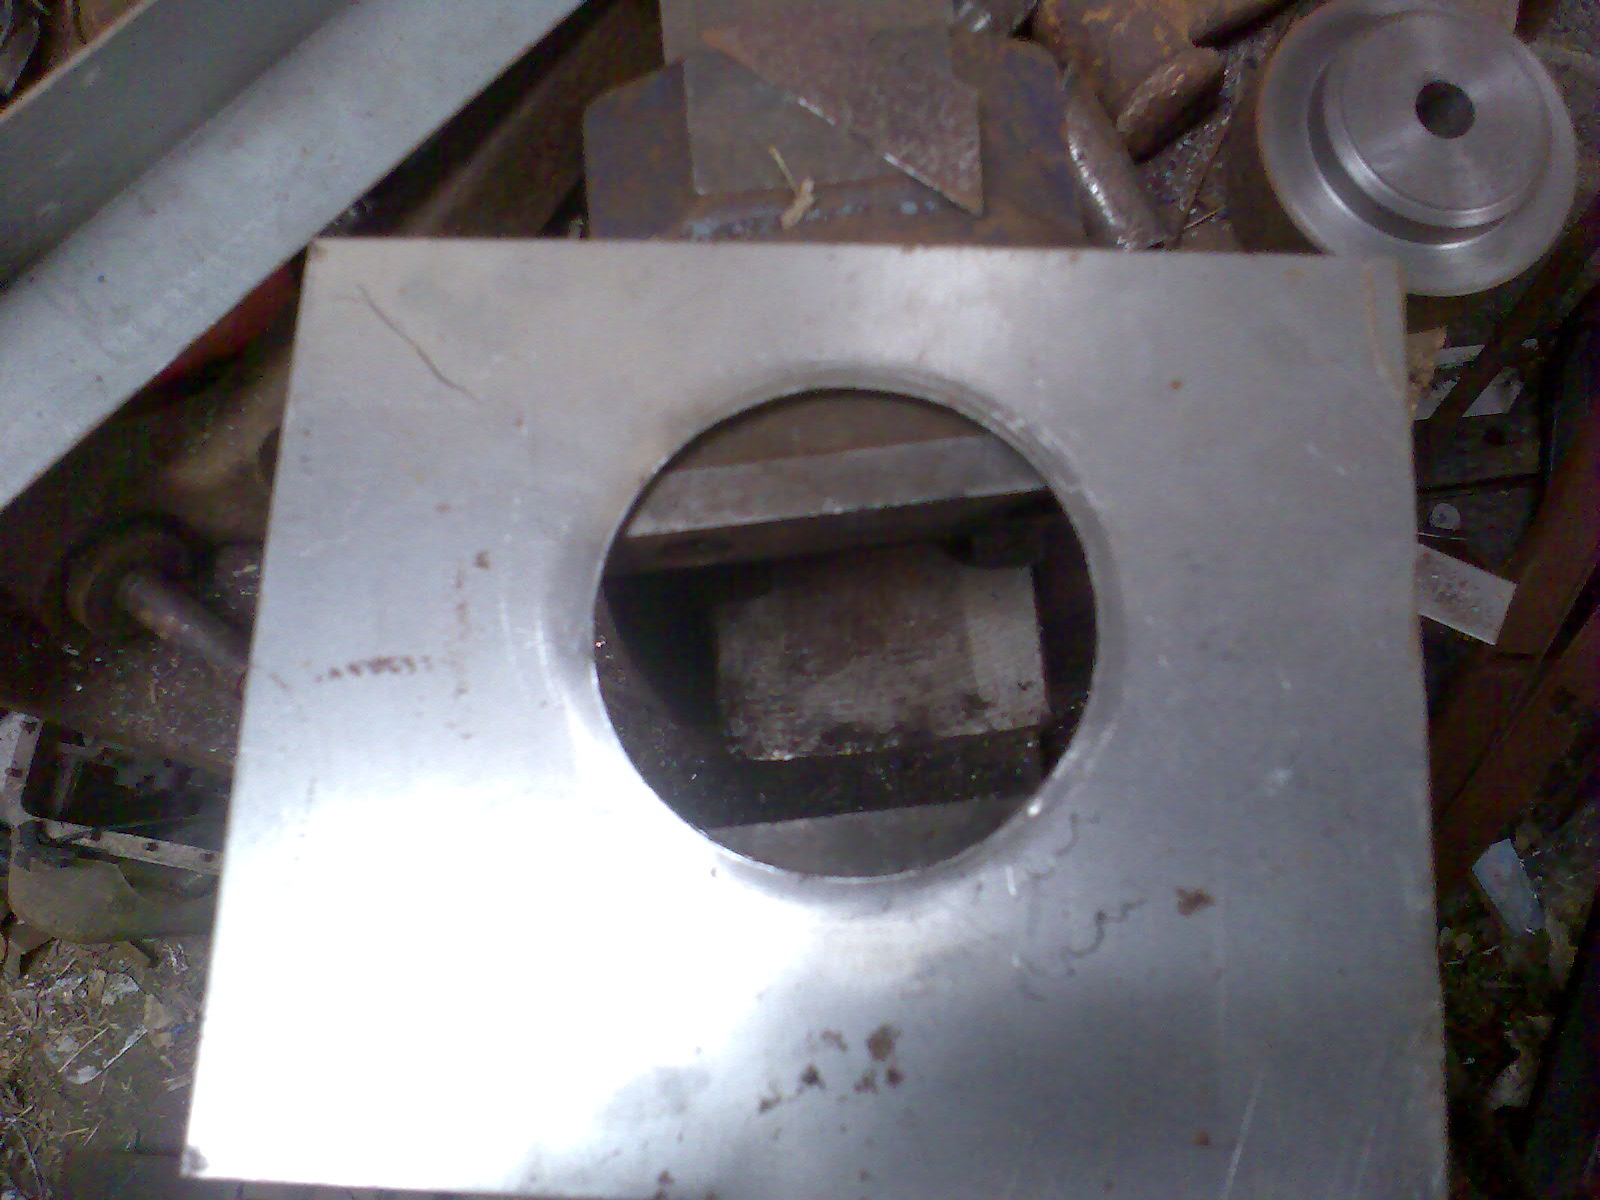
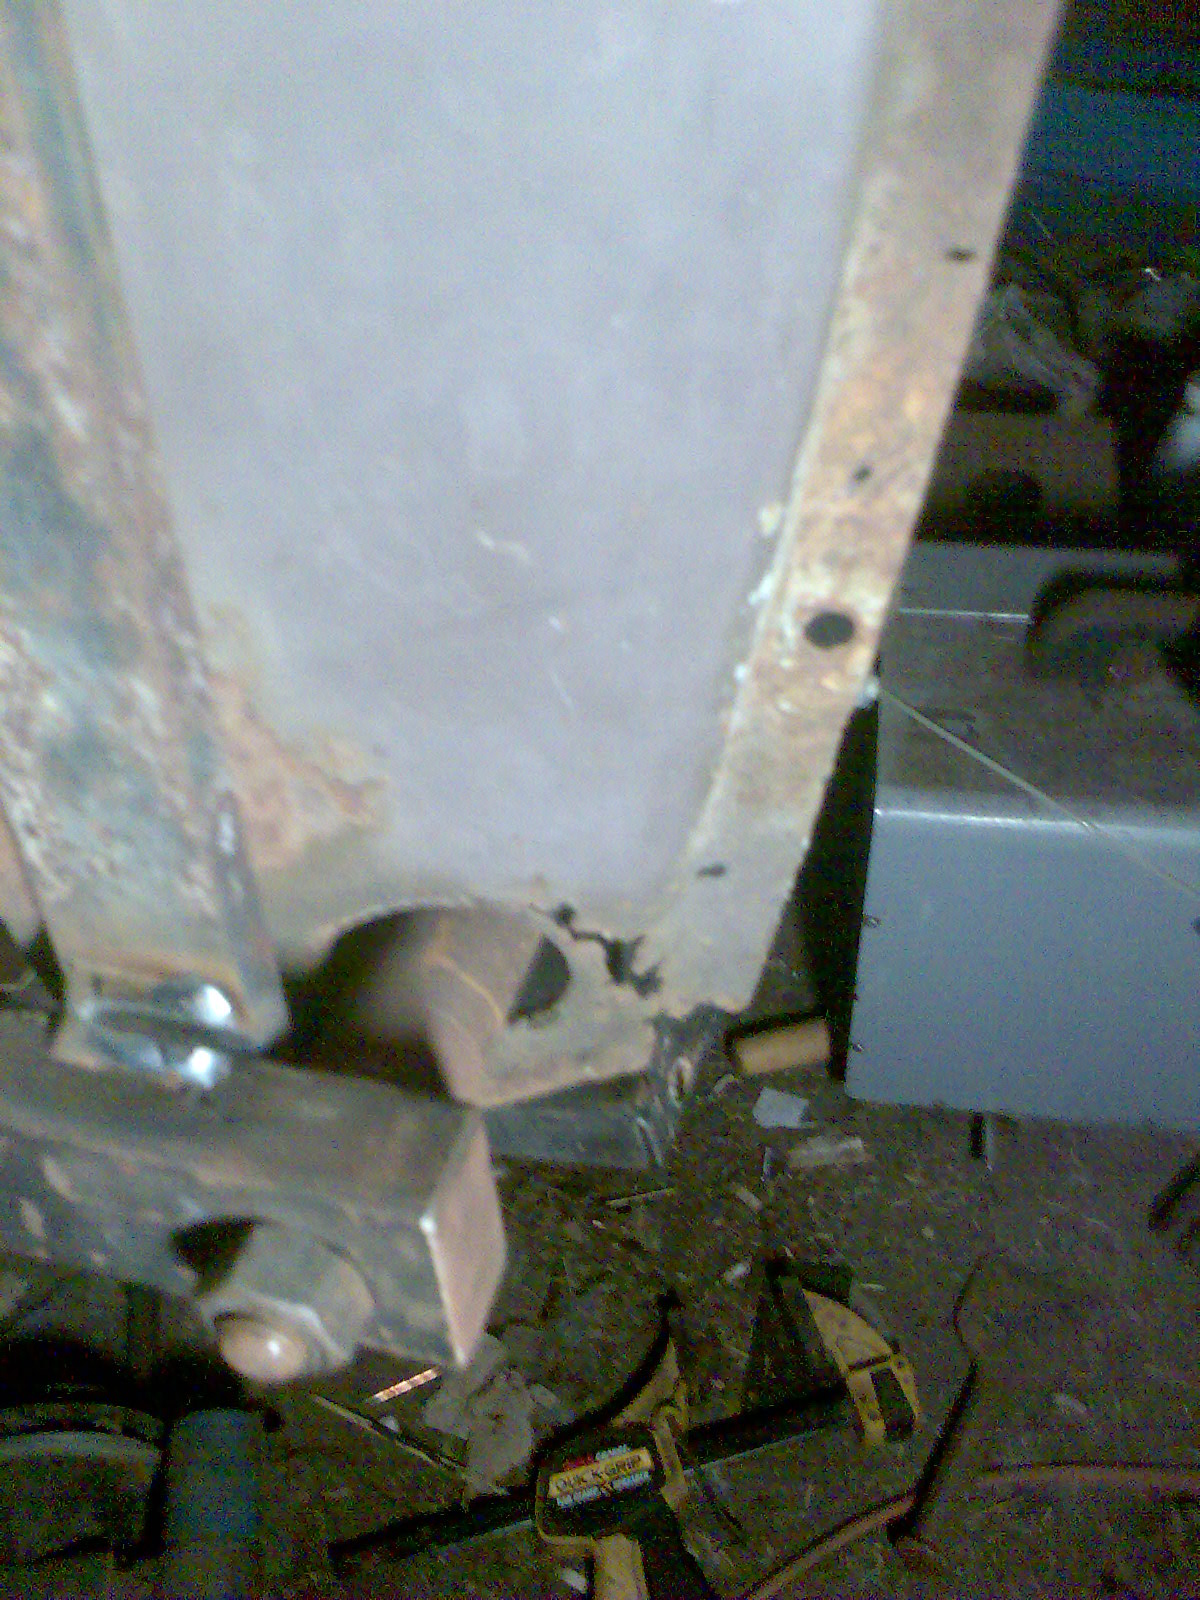
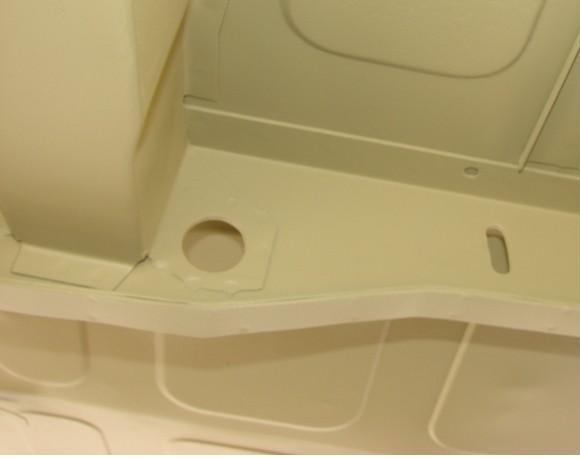
Well I cheated... and used a qmax cutter to cut the hole 70mm and larger qmax cutter 76.5mm dia to press in the lip through an 80mm hole

As Chickenjohn says this can be done by cutting and filing the hole and then using a ball peen hammer or similar to form the lip over an edge.
Here are some pics
- Image052.jpg (236.9 KiB) Viewed 2355 times
- Image050.jpg (295.03 KiB) Viewed 2355 times

- Image051.jpg (261.84 KiB) Viewed 2355 times
Re: Rose Taupe Traveller Restoration- update 23
Posted: Fri May 06, 2011 3:38 pm
by taupe
Re: Rose Taupe Traveller Restoration- update 24
Posted: Fri May 06, 2011 6:49 pm
by pskipper
As always stunned at the attention to detail in your work and learning more every time you post!
Thanks for keeping such a great build diary!
Philip
Re: Rose Taupe Traveller Restoration- update 24
Posted: Fri May 06, 2011 6:56 pm
by chrisryder
pleased to see you've got a brace accross the front edge where the front panel bolts on to keep it square. have you tried shutting the bonnet (i see it's still attached, so shouldn't be too difficult) to make sure everything still lines up? I'd hate to see you find it doesnt after all of your hard work!
Re: Rose Taupe Traveller Restoration- update 24
Posted: Fri May 06, 2011 7:10 pm
by ian.mcdougall
I have some of them cutters but only big enough for wing mirrors and aerials from the days long gone when we used to replace wings and Herald and Spitfire bonnets and Imp Bonnets??
Re: Rose Taupe Traveller Restoration- update 24
Posted: Fri May 06, 2011 7:17 pm
by chickenjohn
chrisryder wrote:pleased to see you've got a brace accross the front edge where the front panel bolts on to keep it square. have you tried shutting the bonnet (i see it's still attached, so shouldn't be too difficult) to make sure everything still lines up? I'd hate to see you find it doesnt after all of your hard work!
I don't think that looks like just any old brace, it actually looks like the very best brace available- the radiator mounting/ cowel panel! The bonnet will close with the proper panel holding the inner wings in place.
Re: Rose Taupe Traveller Restoration- update 24
Posted: Fri May 06, 2011 8:06 pm
by chrisryder
so it is!
even so, i've heard that the shape of the top edge of the inner wing leaves a little to be desired, and doesn't always follow the arc of the bonnet...
Re: Rose Taupe Traveller Restoration- update 24
Posted: Sun May 08, 2011 4:12 pm
by taupe
Chris Ive tried the bonnet alignment and it seems fine
I think the Hadrian flitch panels are pretty accurately made.
I left the bonnet undisturbed in its original position on purpose to help check alignment and will only remove it once the drivers side flitch is completed.
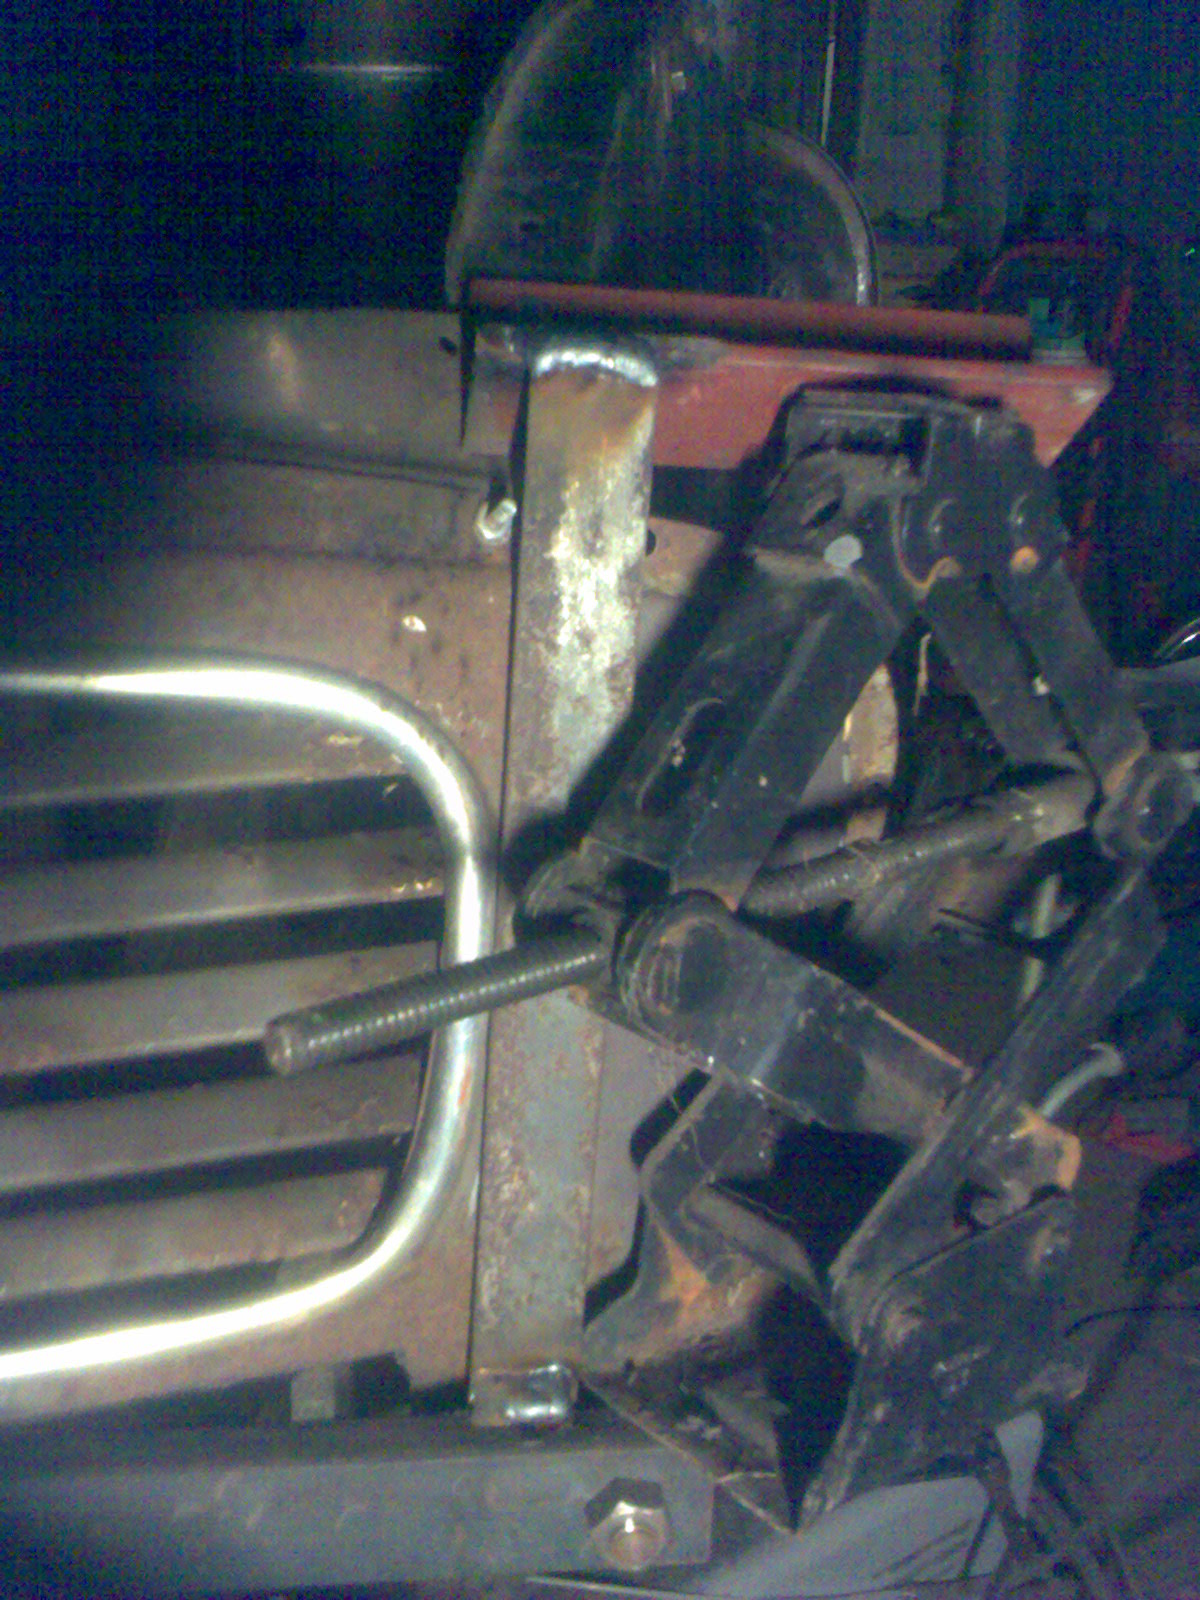
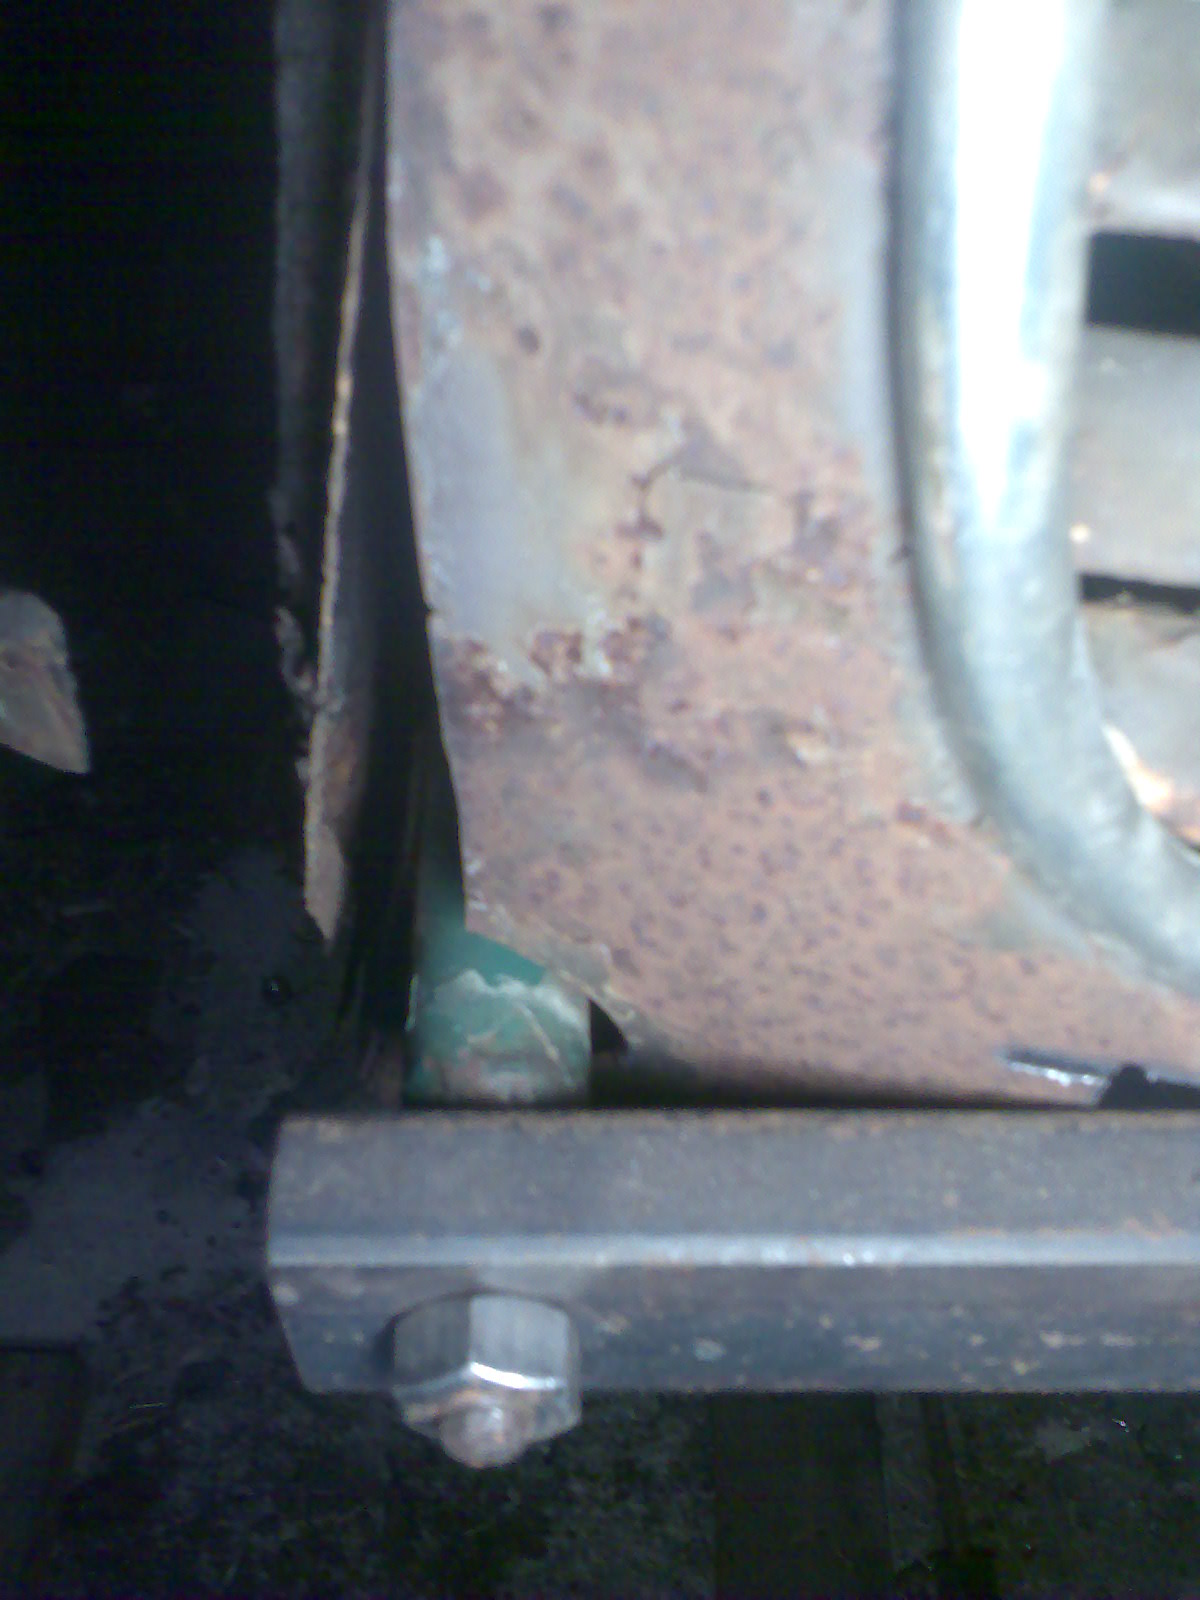
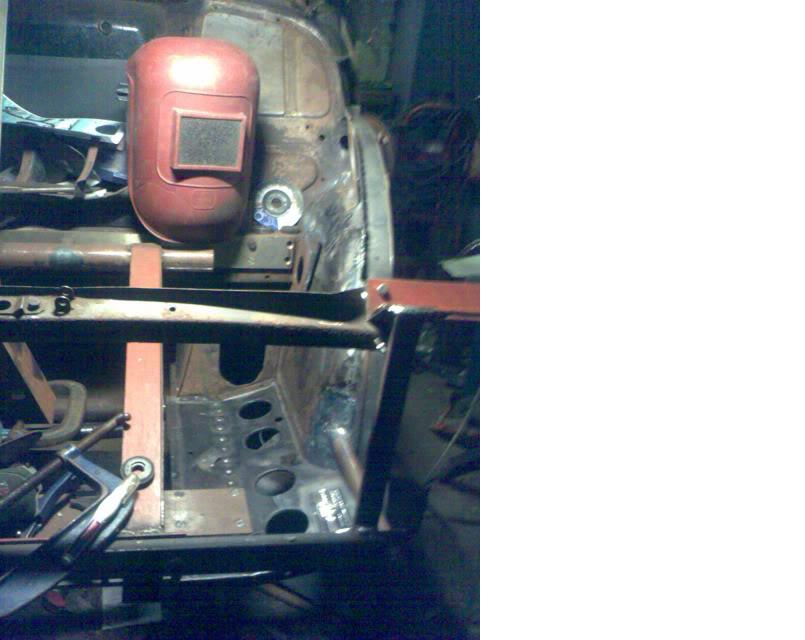
I trial fitted the old front grille panel (Mine is beyond repair but I have a good second hand one to fit later) to see how the bumper mount bars lined up and found that it was spot on side to side but sitting slightly too low on the ns.
I had left the last welds off to the wheelarch panel to allow for adjustment and so I bolted an angle to the end of the flitch panel where it joins the top of the rad panel and jacked it up! It needed to go up about 3/16" and the alignment of the bumper bar holes was then ok. A stout steel brace was welded in whilst the flitch, engine tie panel, bumper bar and flitch extension were welded in. This will also keep the alignment when I do the drivers side.
Here are some pics
- Image000.jpg (504.86 KiB) Viewed 2353 times
- Image001.jpg (542.49 KiB) Viewed 2353 times
- Image002.jpg (240.08 KiB) Viewed 2353 times
- front.JPG (49.73 KiB) Viewed 2353 times
Re: Rose Taupe Traveller Restoration- update 24
Posted: Sun May 08, 2011 4:30 pm
by taupe
Re: Rose Taupe Traveller Restoration- update 25
Posted: Mon May 09, 2011 8:55 pm
by taupe
Re: Rose Taupe Traveller Restoration- update 25
Posted: Tue May 10, 2011 1:48 pm
by chickenjohn
WOW! I am impressed and glad that it is someone with your skill level, Taupe, that are restoring this car. None of those bulkhead panels are available so you will have to painstakingly pick them apart with the spot weld drill/chisel and fabricate new panels, then weld them all back together, somehow keeping the car in shape!!
Even my rusty 4-door saloon is rock solid in those areas in comparison. That Traveller must have sat on wet grass for a long time to get that bad!
I'm going to enjoy watching you repair the bulkhead on this thread!!
Good fortune indeed!
Re: Rose Taupe Traveller Restoration- update 25
Posted: Tue May 10, 2011 4:49 pm
by taupe
Re: Rose Taupe Traveller Restoration- update 26
Posted: Tue May 10, 2011 5:50 pm
by ASL642
The attention to detail is inspiring. Can't wait for the next installment.
Re: Rose Taupe Traveller Restoration- update 26
Posted: Tue May 10, 2011 11:12 pm
by taupe
Re: Rose Taupe Traveller Restoration- update 27
Posted: Fri May 13, 2011 11:34 am
by klm
Taupe,
You are an inspiration to all of us who are restoring old cars. The attention to detail and the level of accuracy you maintain in your restoration is truly amazing. I have learnt a lot from your thread and hope to use some of the techniques you have used in restoring my car. As an example, the use of spare set of torsion bars with angles welded at the end to use as a jig to accurately position the centre cross member with respect to the eye bolt holes is really brilliant. I measured an eye bolt, lower arm and a torsion bar and worked out that the distance between the end of torsion bar to the centre of eye bolt hole is 1 13/32" or 35.72mm. Is this correct? Would you be able to provide the dimensions of the angle piece for the benefit of all of us?
Thanks
klm
Re: Rose Taupe Traveller Restoration- update 27
Posted: Fri May 13, 2011 1:25 pm
by taupe
Hi klm
You will need a piece of 5mm thick angle approx 3x2" and 1 1/2" long or you can weld up some plate.
Ideally you would place the angle so that the dimension of the torsion bar away from the side of the chassis leg is the same as it is with the eyebolt fitted. You can measure an eyebolt for this.
Here is a sketch which may be of use.
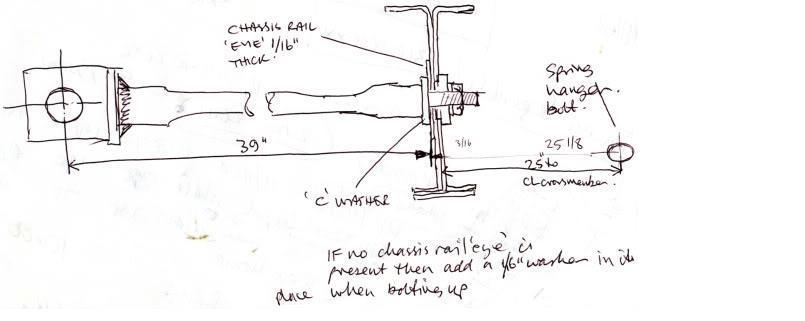
- chassis dims.JPG (26.03 KiB) Viewed 2367 times
The angle is welded on first then the 39" is carefully measured from the back of the C washer to get the hole position on the angle.
The hole should be either a tight fit on the eyebolt pin if youre using that... or a tight fit on your fixture pin.
By tight I mean with no play.
Interestingly it works out that the rear spring front mounting bolt is placed exactly 25" from the 'centre' of the main crossmember.
I dont think a variation of up to around 1/8" would be a problem tolerance wise but the dimensions each side should be the same.
Whilst on the subject of chassis dimensions Ive now got both chassis legs fitted and the eyebolt holes are touching the fixture which suggests that with my car at least the distance apart for the chassis legs is 15 7/8"... So I think the dimension should definately be between that and 16" max
Taupe
Re: Rose Taupe Traveller Restoration- update 27
Posted: Sat May 14, 2011 9:21 am
by klm
Hi Taupe,
Thank you for sharing the information. Today I measured a torsion bar and found it to be 37.4". When the worked out distance from the end of torsion bar to centre of eye bolt hole of 1.4" is added, the total comes to 38.8". With the thickness of the horse shoe washer ~ 0.12", comes very close to your measurement of 39".
The alignment diagram from the workshop manual shows the distance from the front face of centre crossmember to centre of the front wheel as 39". Does this mean that the centre of the eye bolt hole and the centre of the wheel lie on the same verticle line?
The records I have shows a distance of 16 1/8" between the inner faces of the chassis legs. If the two legs touched the fixture at the eye bolt holes (as I would expect) then your measurement of 15 7/8" is correct. When I next have access to the fixture, I hope to assemble a new set of chassis legs to check how it all fits, and I will confirm.
Thanks again,
klm
Re: Rose Taupe Traveller Restoration- update 27
Posted: Wed May 18, 2011 8:15 pm
by RobThomas
Charles. Don't know if this helps but here is a shot of the crossmember where there appear to b 7 spotwelds on that little plate bit.
Rob
- robs spot weld pic.JPG (13.17 KiB) Viewed 2367 times