Page 6 of 7
Re: 1970 Trav "IGOR" (modified) PIC HEAVY! Ancilleries going on!
Posted: Fri Apr 29, 2011 8:53 am
by morrisfixer
Have a look at Retro Rides homemade water rail. That'll give you an idea on how to make your own water rail.

stevie
Re: 1970 Trav "IGOR" (modified) PIC HEAVY! Ancilleries going on!
Posted: Fri Apr 29, 2011 4:24 pm
by polo2k
[Morrisfixer] Thanks for the heads up on the article. What month was it in?
[Alex'N'Ann] No worries on the explanation

. Im mounting the lift pump externally becasue im aiming to keep the standard tank
I have ordered some pipe for the water take off. Im having to totally rebuild the take off because, it usually houses the thermostat, joins 4 pipes and acts as a retaining piece for the water pump feed. There are no fixing brackets around the W/pump pipe, it simple "jams" between the back of the pump and the housing im replacing. Ive already cut a plate that covers the take off, and ordered the pipe. The pipe is a 180 degree bend of 38mm of steel tube, ill do a bit of guessing, and a bit of cutting to get the pipe on there.
Hopefully I will get the pipe from the sorting office tomorow so I should be able to explain it better. For longevity I will get the new pipe powdercoated eventually.
I have the 'normal' tele kit on mona (except with old knackered konis on there). Once Ive got some decent dampers on mona, im confident that she will feel a lot better, however the stresses and strains of 180/300hp will be much greater so I wanted to beef things up a fair bit.
Re: 1970 Trav "IGOR" (modified) PIC HEAVY! Ancilleries going on!
Posted: Fri Apr 29, 2011 6:08 pm
by morrisfixer
Hi Ash,
It's a car forum. Google Retro Rides homemade water rail then scroll down and you'll find some pictures of a home made water rail
stevie
Re: 1970 Trav "IGOR" (modified) PIC HEAVY! Ancilleries going on!
Posted: Sat Apr 30, 2011 6:22 pm
by polo2k
Ah, my bad. I thought you said "retro cars", ive had a look for that post, but not found it. I will have to do some more investigating before I do any more fab (my tube hasnt arrived yet either

)
Today I have been playing witht he fuel system.
Previously I had converted an in tank pump to an external one.I fitted an inline filter (of a corsa iirc) and made a bracket for it all.
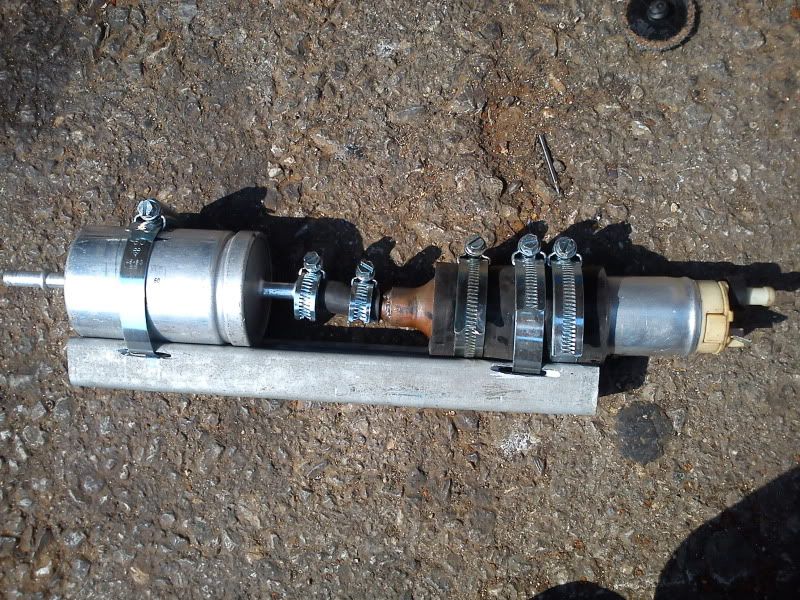
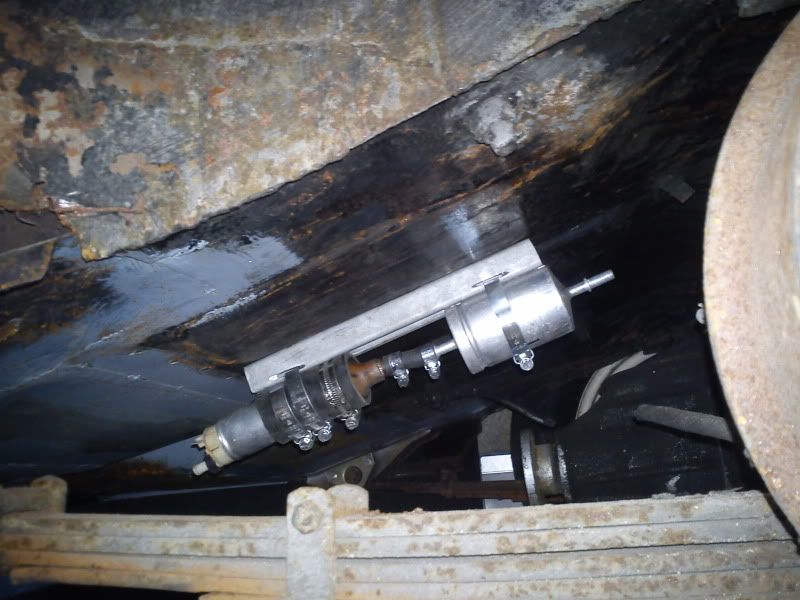
Then mounted this under the floor (under the rear seat)
Added some pipe from the tank to the pump...
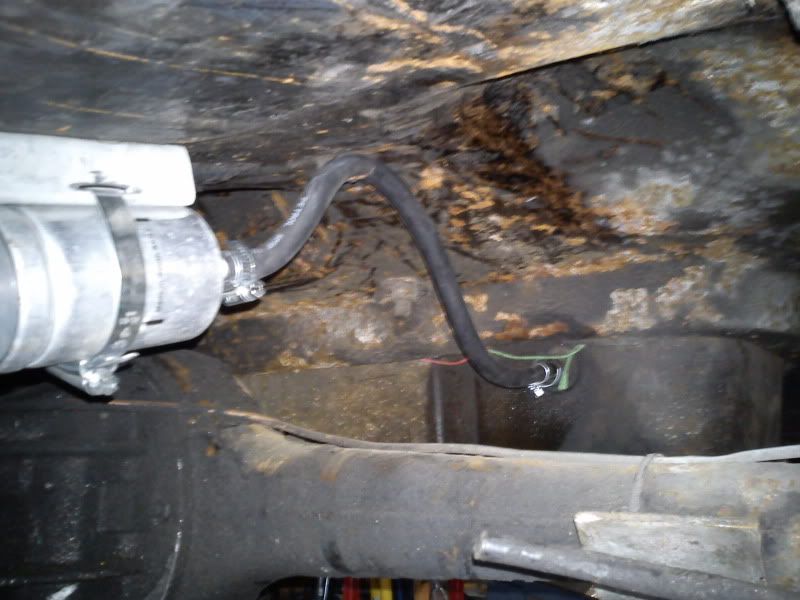
And some from the pump, to the swirl pot...
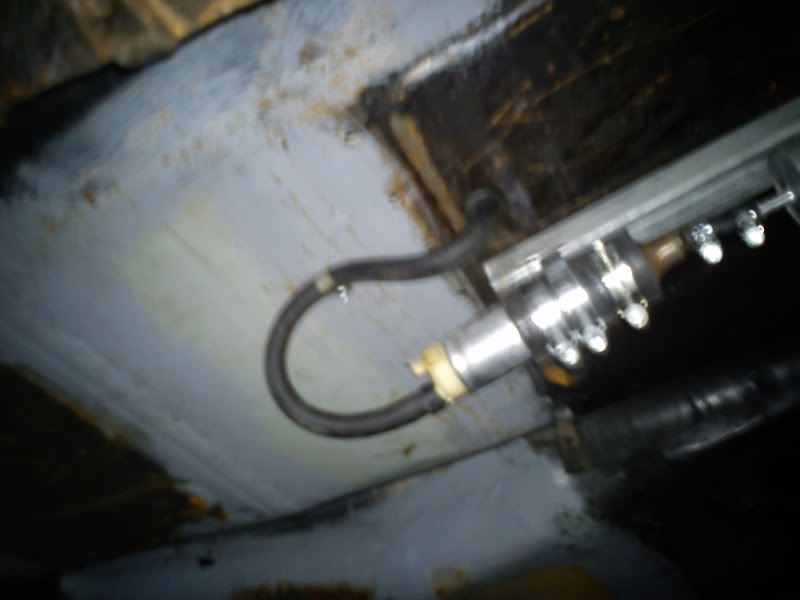

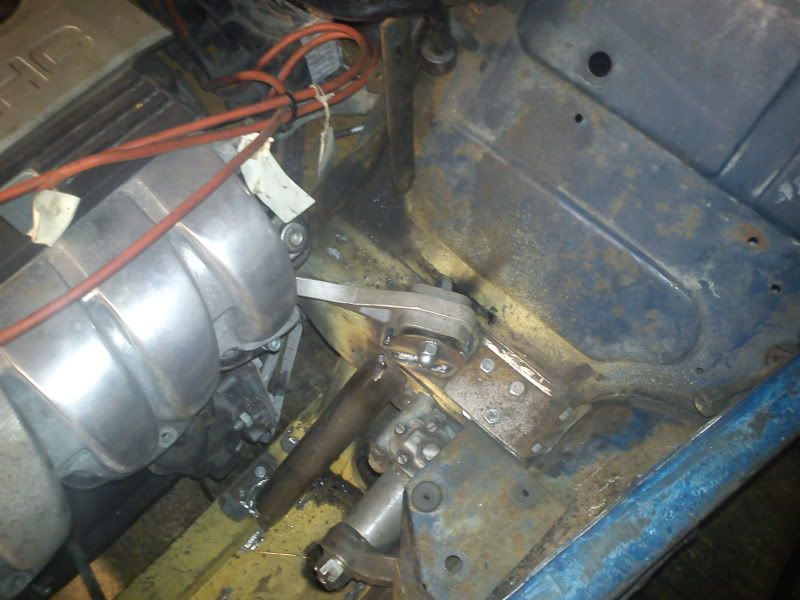
So thats the tank to the swirl pot sorted, now for the feed from the swirl pot to the high pressure pump...
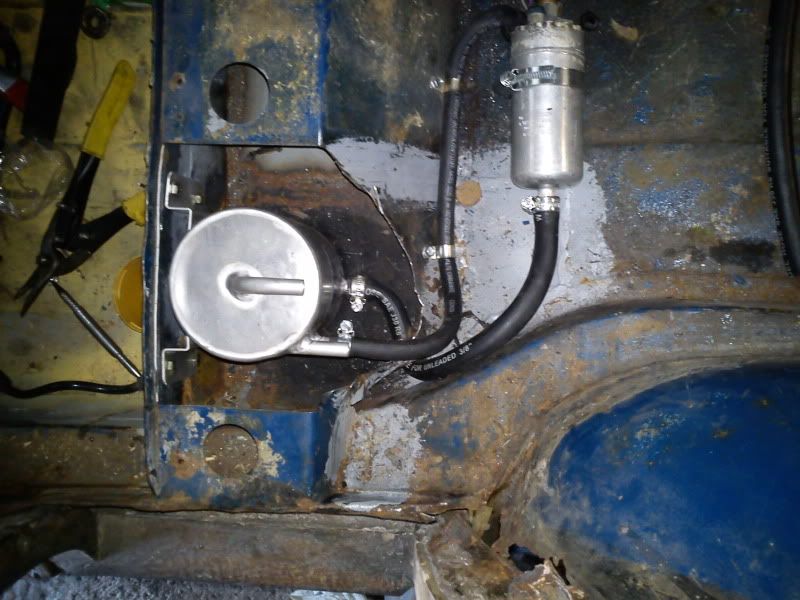
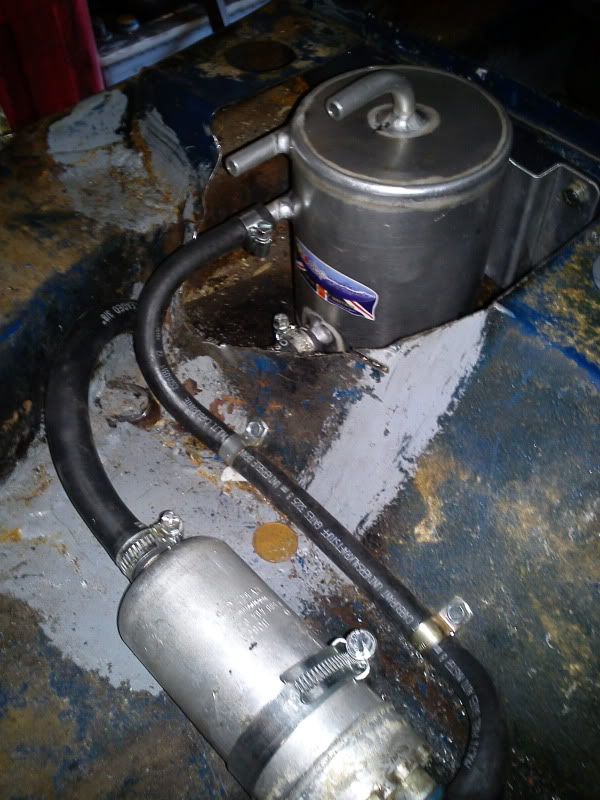
The high pressure pump is mounted on a metal saddle with a hose clamp through the saddle.
On other news... I have mode a slight boo boo with the oil filter relocation, I forgot to take the torsion bar into account, so I need to do a bit of a redesign on that

Re: 1970 Trav "IGOR" (modified) PIC HEAVY! Ancilleries going on!
Posted: Sat Apr 30, 2011 7:40 pm
by MarkyB
I'd strongly suggest you undo the right hand bit in the picture then put some packing under it so that bit of tube isn't going to flex so much.
To be honest it looks like a lash up, but that should make it a longer lasting lash up
.
Re: 1970 Trav "IGOR" (modified) PIC HEAVY! Ancilleries going on!
Posted: Sat Apr 30, 2011 11:28 pm
by polo2k
I did think about spacing the pump off a little.
This is mainly to get the engine running and to check all the principals are right. Mk2 will probably be a fair bit "posher"
Re: 1970 Trav "IGOR" (modified) PIC HEAVY! Ancilleries going on!
Posted: Mon May 09, 2011 9:01 pm
by polo2k
Bit of a boring update,
Got the Acc belt on now.
Started figureing out the coolant pipes and thermostat
Started figureing out the ECU and wireing (head starting to hurt... lots)
I will eventually end up designing and making something along these lines:
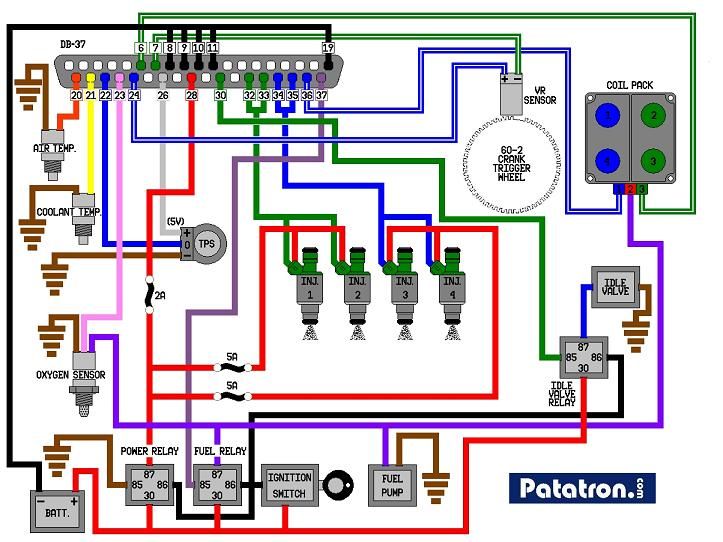
Getting to play with stuff like this:


Unfortunatly I have just donated my "MegaSquirt fund" to the Uniroyals' tyre fund, in the interests on Legality on my Golf

I have also started on my lower front damper mounts, they are rough at the moment, but thats why its called mock up. I think I will manage to transfer all the damper loads into the bulkhead and then through that to the brace bars at the back of the engine bay and into the bars along the engine bay floor. This should help in transfering loads from the heavy engine into the suspension. For example, when the car goes over a bump and the weight comes back down, there is a direct path of re-enforcement through which the main mass can transfer its kinetic energy.
Re: 1970 Trav "IGOR" (modified) PIC HEAVY! Ancilleries going on!
Posted: Mon May 09, 2011 11:59 pm
by Alex'n'Ane
Sounds like your getting on well though, am very very impressed with that wiring and full diagram! The software does look fun, i absolutely hate electronics and computers, but theres something fascinating about sitting in a car on a laptop changing the engine settings and advance etc.
Re: 1970 Trav "IGOR" (modified) PIC HEAVY! Ancilleries going on!
Posted: Tue May 10, 2011 12:42 pm
by MColes
I started drooling when I saw this... I probably need help, but hardware is my 'thing'!

Re: 1970 Trav "IGOR" (modified) PIC HEAVY! Ancilleries going on!
Posted: Wed May 11, 2011 12:02 am
by polo2k
Alex'n'Ane wrote:Sounds like your getting on well though, am very very impressed with that wiring and full diagram! The software does look fun, i absolutely hate electronics and computers, but theres something fascinating about sitting in a car on a laptop changing the engine settings and advance etc.
Oh, thats not my diagram
Not enough cylinders

I plan to also have some extras wired in, possibly knock detection integrated into the ignition, rev limit, arter run pump control,maybe launch control

At the moment I have an excel spreadsheet with a list of sensors, I plan to make a full diagram of the engine and management systems, then a seperate diagram for all the cabin and body electrics etc
Im also slowly compiling a list of all the parts I have used so I dont have to worry about forgetting something
[MCOLES]
in the UK, you can only buy the ECU ready built* but if you buy from the states, you can get the whole she-bang in kit form!for only $266 (about £160!) for fully mappable stand alone!!!
a lot of it is open source and free to download! (tuner studio is about £25 and gives you the fancy dashboard screen and more auto mapping options).
*Im will be buying my megasqurt from ExtraEFi.co.uk and as part of the package they supply a fully built ECU, with a map installed for a basic VR6. 1.5 bar map sensor (manifold/boost pressure). Much as I would like to build the ECU from scratch, its probaby worth having at least one part that I know will work from the get go.
Re: 1970 Trav "IGOR" (modified) PIC HEAVY! Ancilleries going on!
Posted: Sat May 21, 2011 4:00 pm
by pskipper
Any more progress to report?
Re: 1970 Trav "IGOR" (modified) PIC HEAVY! Ancilleries going on!
Posted: Wed Jun 01, 2011 12:26 am
by polo2k
right then... ive been a bit quiet recently. Time for an update.
Ive been doing a fair bit of tinkering and lots more theory on some stuff to make sure that I've got all mt ducks in a row (so to speak)
I have spent a fair amount of time on the coolant system recently.
Still to do (on the coolant system)
- source/modify/fit heater matrix
- modify/fit header tank
- figure out the after run pump connection locations
all the pipework is totally custom, the stat ius off a K series (elise i think)
I am going to graft in sensors off a saxo (only chosen because they are a simple M14 thread into the pipe)
I have also relocated the oil filter housing and feed/return pipes. before I can turn the engine over I need to get some sensors in the holes but I think its should work there.
Re: 1970 Trav "IGOR" (modified) PIC HEAVY! Ancilleries going on!
Posted: Wed Jun 01, 2011 6:18 pm
by morrisfixer
Lookin good Ash,
With the oil filter under the floor is there enough room when turning the wheels! What about exhaust pipes, lol just thinking out loud.
stevie
Re: 1970 Trav "IGOR" (modified) PIC HEAVY! Ancilleries going on!
Posted: Wed Jun 01, 2011 7:09 pm
by polo2k
cheers for the input Steve,
Im hoping that the oil filter will clear but I dont have any wheels to mock up yet so im a bit nervous!
The exhaust has plenty of room, its all on the drivers side
Re: 1970 Trav "IGOR" (modified) PIC HEAVY! Ancilleries going on!
Posted: Sun Jun 12, 2011 7:09 pm
by polo2k
... Speaking of the exhaust....
Ive been out there again
I found this on Ebay and spent the princely sum of 99p! (and a tenner postage
)
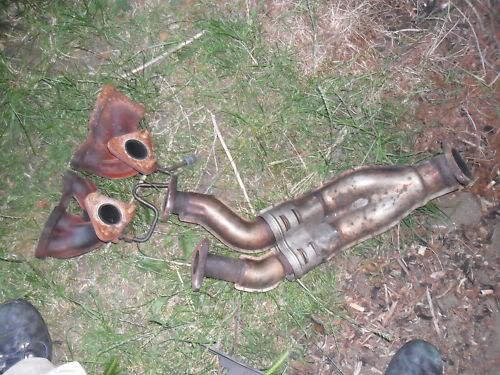
the cast manifolds are surplus so I will probably try to sell them at some point to recoup some cash.
Then I set onto the downpipe with my mini arsenal of tools.
I cut off the tin plate heat shields (and removed the padding inside) then spent a fair bit of time pondering. I forgot to take pics, but I did my best to estimate the angles involved and started chopping.
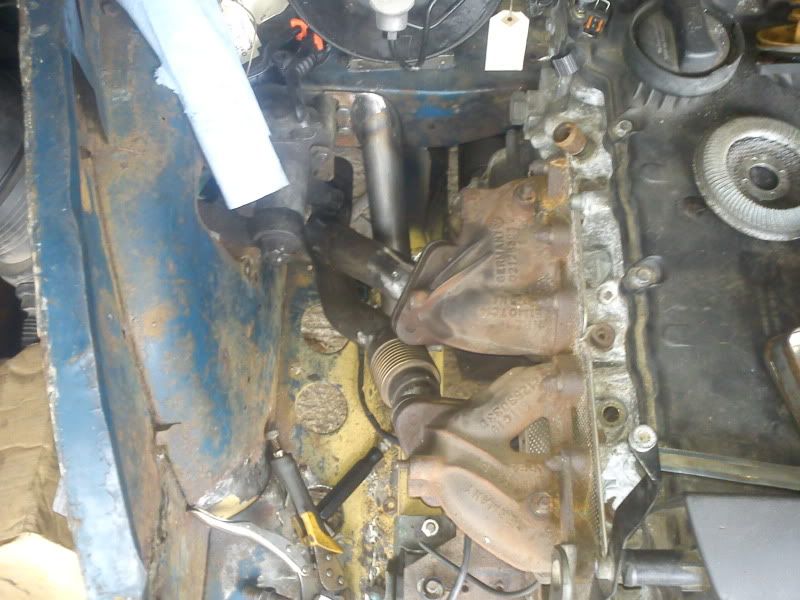
Firstly I cut off the manifold flanges, and bolted them to the manifolds on the engine.
Then I decided it would make sense to use the collector portion of the downpipe to save fabbing one.
So I had an idea of where the collector needed to sit, and I had the flanges bolted up to the engine, and just kind of 'joined the dots!'
I ended up with this:
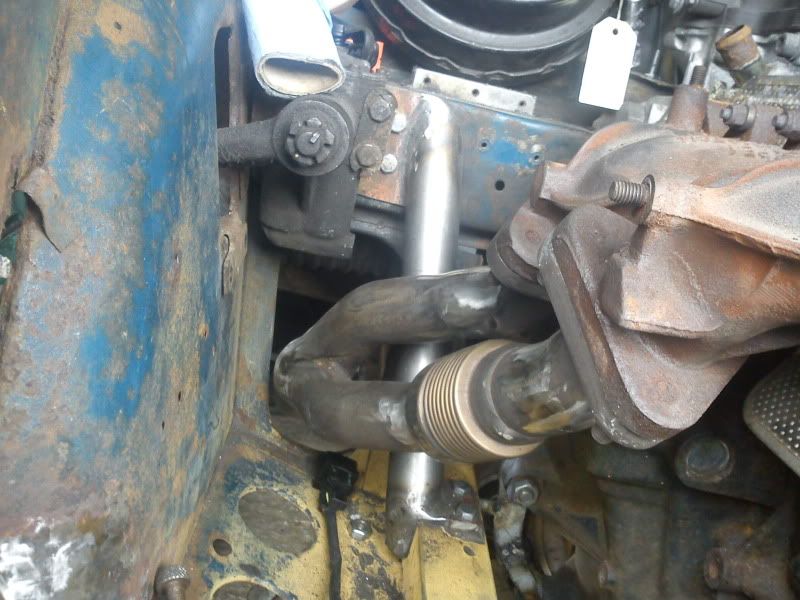
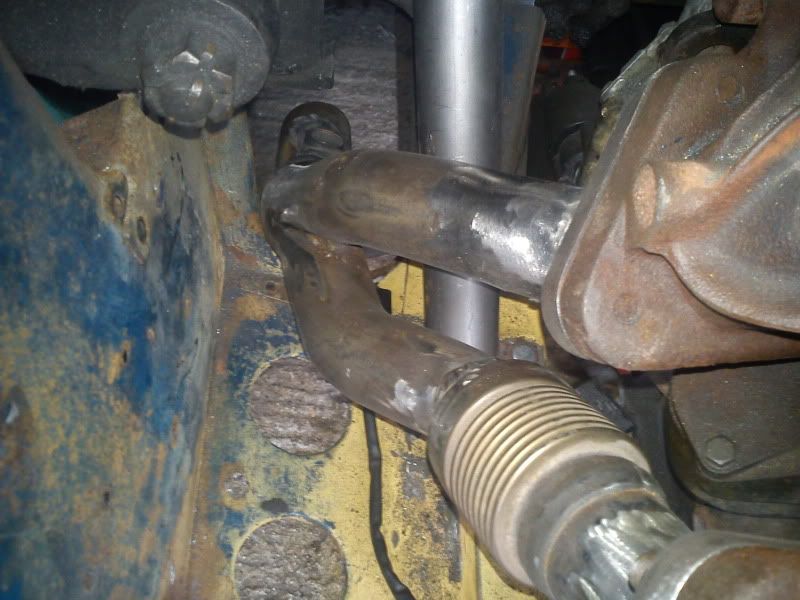
These pics are after the first grinding, Ive got a few bits to fill with weld where I have been over enthusisastic with the grinder
This is what it looks like off the engine:
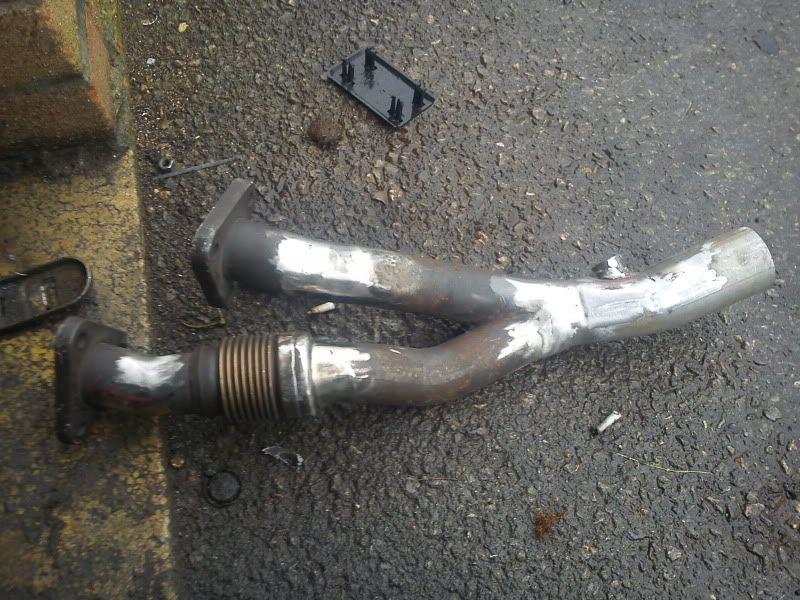
The flexi section it to relieve the cooling stresses rather than cracking the collector. There was originally one on each branch, under the heat shield.
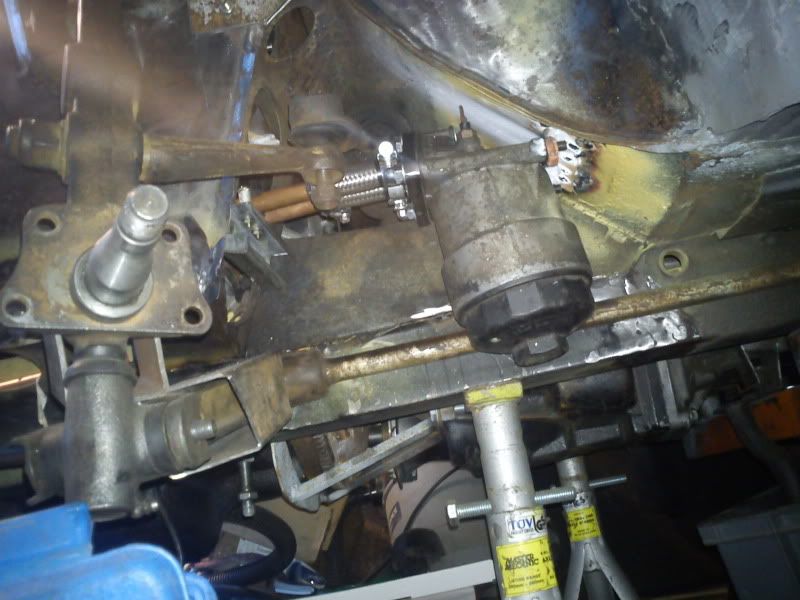
I have also welded on the boss for the lambda sensor, it exits the pipe vertically under the steering rack so its out of the way, but close enough to get up to temperature quickly.
I have only got the exhaust to the back of the engine bay, but thats the complicated bit as far as im concerned! Once the rest of the exhaust is mocked up, and I have added a couple of additional coolant spurs then ill be ready for the ECU! I nearly forgot that I need to add the rigid fuel lines too but they haven't arrived yet
Re: 1970 Trav "IGOR" (modified) PIC HEAVY! Ancilleries going on!
Posted: Mon Jun 13, 2011 12:19 am
by Sam_1688
Hi I have just read your whole tread and really like your plans
I only have one question are you planning on using that Cora fuel filter once all put together??
Just that I put a Audi 2.8 v6 30v into an anglia with my friend but he used a fiesta fuel filter but it was restricting the fuel flow and it was down on power just thought I would point as my engine was only running 230bhp but if your planning on 300+ it may be a problem
Re: 1970 Trav "IGOR" (modified) PIC HEAVY! Ancilleries going on!
Posted: Mon Jun 13, 2011 8:18 pm
by polo2k
Sam_1688 wrote:Hi I have just read your whole tread and really like your plans
I only have one question are you planning on using that Cora fuel filter once all put together??
Just that I put a Audi 2.8 v6 30v into an anglia with my friend but he used a fiesta fuel filter but it was restricting the fuel flow and it was down on power just thought I would point as my engine was only running 230bhp but if your planning on 300+ it may be a problem
Hi there, thanks for taking the time to read it all, I will have to go back and condense the ramblings lol.
I hadnt really considered the flow rate on the filter to be honest, hopefully the filter will be able to keep up. The swirl pot is 0.5L and I cant see many all out power runs for longer than about 30 seconds, saying that though it would be daft to risk the engine running lean and it wouldnt be a massive job to uprate it. Ill add it to the list
Im quite a fan of the bigger audi lumps, they're heavy but they sound so nice! I friend of mine had an ABY engined S2 running around 350 ponies and a tailgate full of torque and boost! Kinda tormenting people when he put a 1.6 badge on it
Might get the welding fill in on the downpipe this evening.
Re: 1970 Trav "IGOR" (modified) PIC HEAVY! Ancilleries going on!
Posted: Wed Jul 06, 2011 8:20 pm
by polo2k
Hi all, Its been a bit of a while since I last posted but the world has been on its head, so to speak. Any who... Im back!
I haven't been out to the garage much lately, but I have finally gotten a little bit of time in there.
On Saturday I got motivated at the national (not enough modified minors on the sat
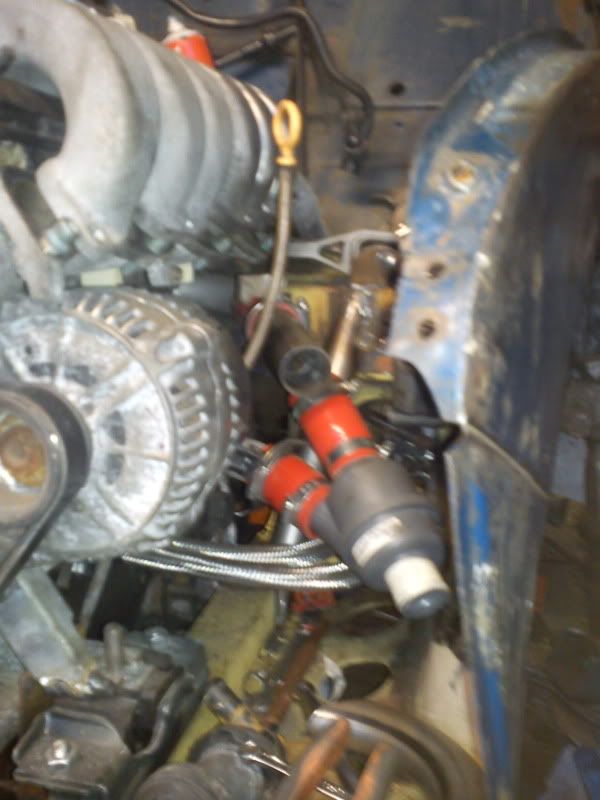
)and decided to start getting some of the engine prep done now that the engine is in place. The inlet manifold is on, the injector wiring is labeled and the fuel lines are up to the bulkhead. I forgot to take any pics on sat but heres the top of the engine:
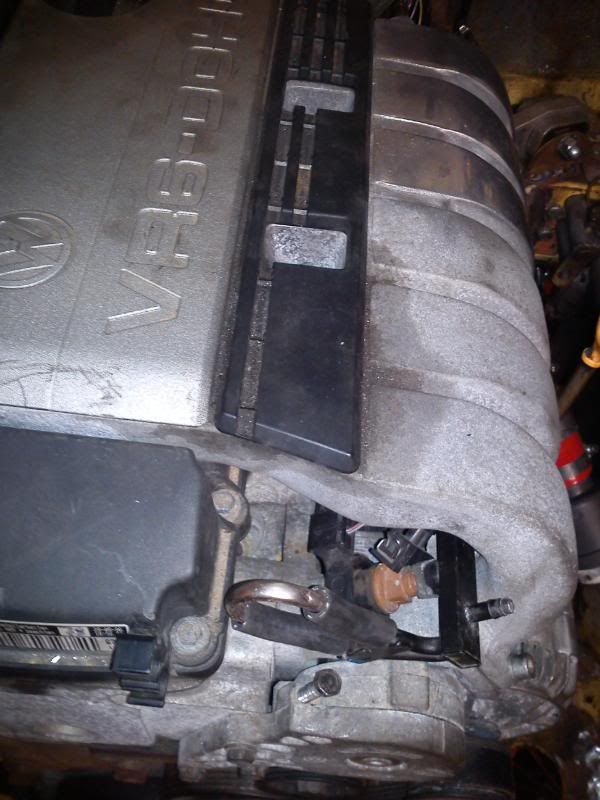
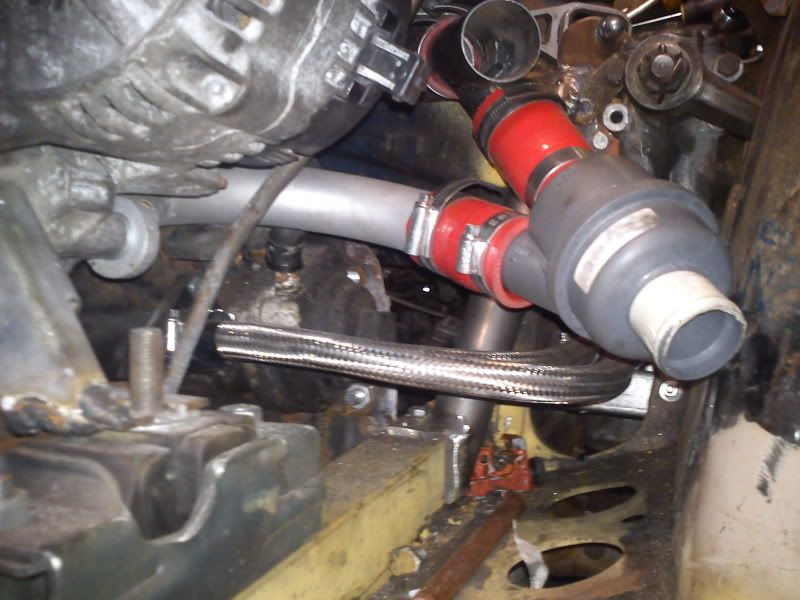
This is from the front

This is from the top shooting down the back of the engine.
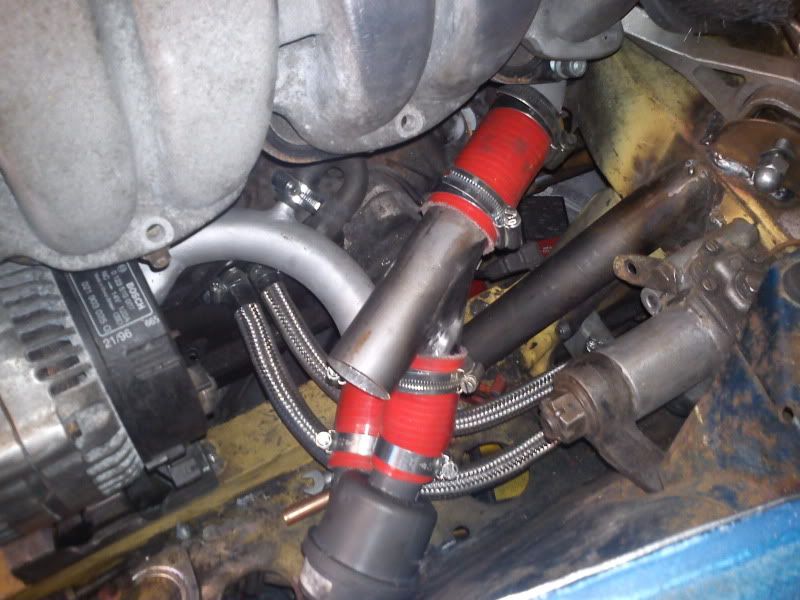
Originally, on a golf VR6, the fuel arrives down the drivers side chassis rail, directly into the fuel rail. then excess fuel pressure is bled by the fuel pressure regulator. From there it flows town a steel tube on the side of the injector rail, to exit next to the fuel inlet.
This is all well and good in a golf, but for Igor it means that the fuel comes from the front of the engine. I cut the steel pipe coming from the fuel pressure regulator and bent the 2 cut ends outwards (so they point downwards rater than forming a u shaped loop). I then looped the original inlet into the original outlet, using fuel line (see first pic). This has resulted in a completely hidden fuel line. I will probably either spring wrap, or braid the hoses, I will also have to find a banjo for the high pressure pump and join that to the engine, and join the return line to the swirl pot. Then Just need to test it!
I have also bolted the inlet manifold on.
I still need to hook up the idle control valve and will probably use a smaller filter on that.
Oh, and the exhaust as it stops at the back of the engine bay at the moment.
Then its on to the electrics. Im looking for somewhere that can do decent quantities of automotive cable, in various gauges with different colours. I remember seeing stands with about 20 rolls of cable on them for sale but I cant remember where!
If anyone can help, please PM me.
Re: 1970 Trav "IGOR" (modified) PIC HEAVY! Ancilleries going on!
Posted: Wed Jul 06, 2011 8:50 pm
by polo2k
There are going to be a fair few pics in this post, I thought it might be kinder to split them into a seperate post. Here goes:
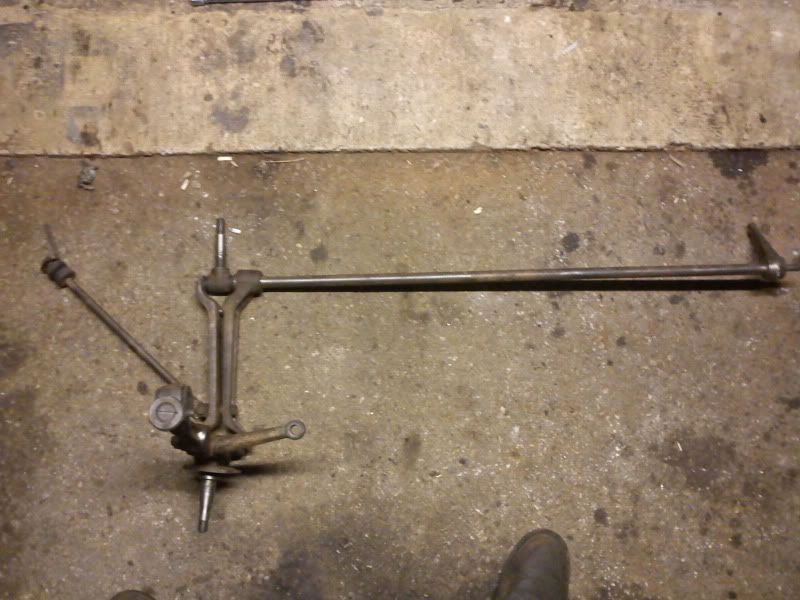
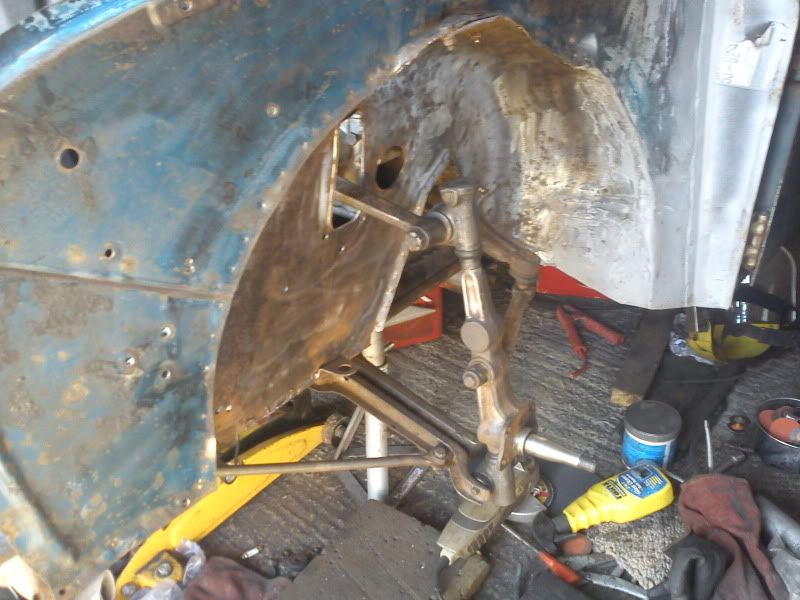
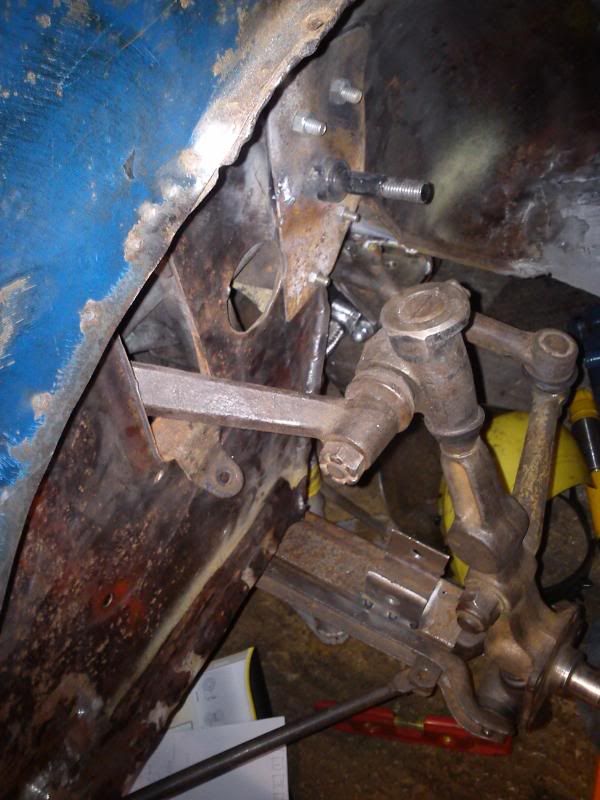
So. Front dampers...
Last time I mentioned them we were looking at this:
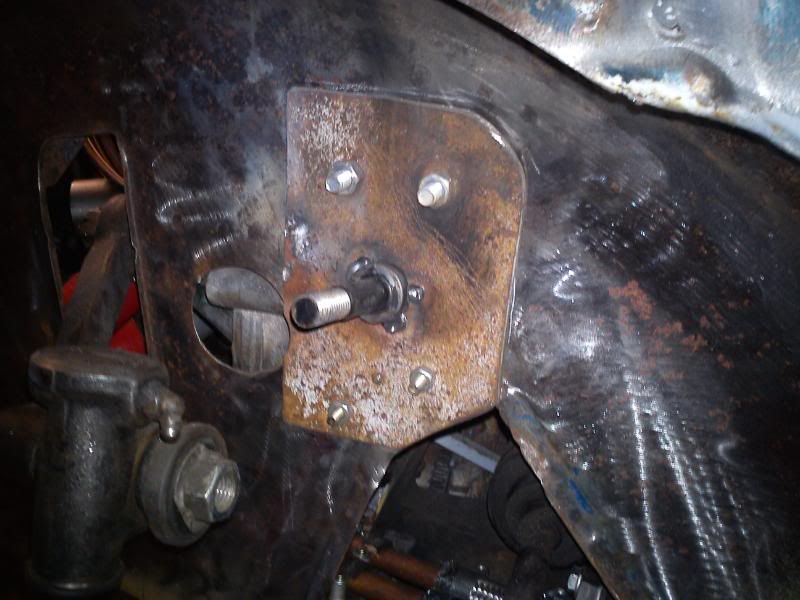
Then I added some nice heavy plate

The inner wing is sandwiched
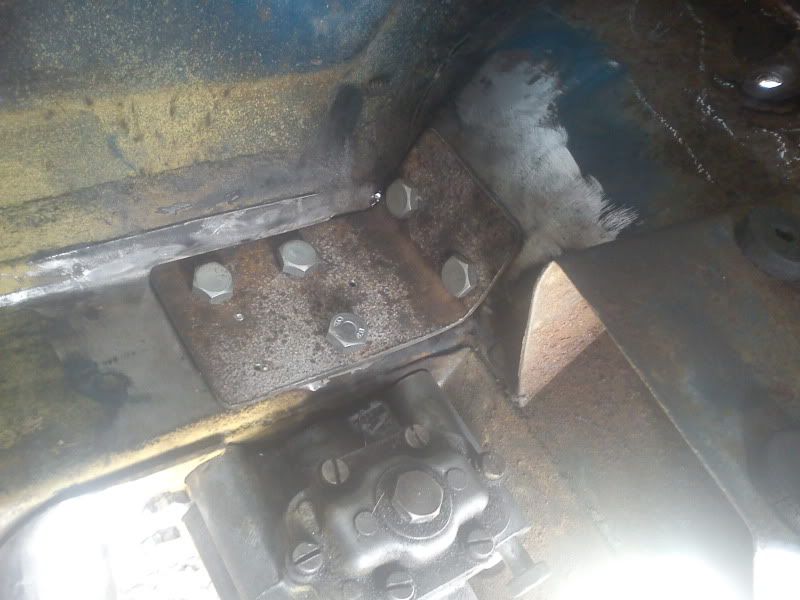
From the top:
So where am I with it all now?
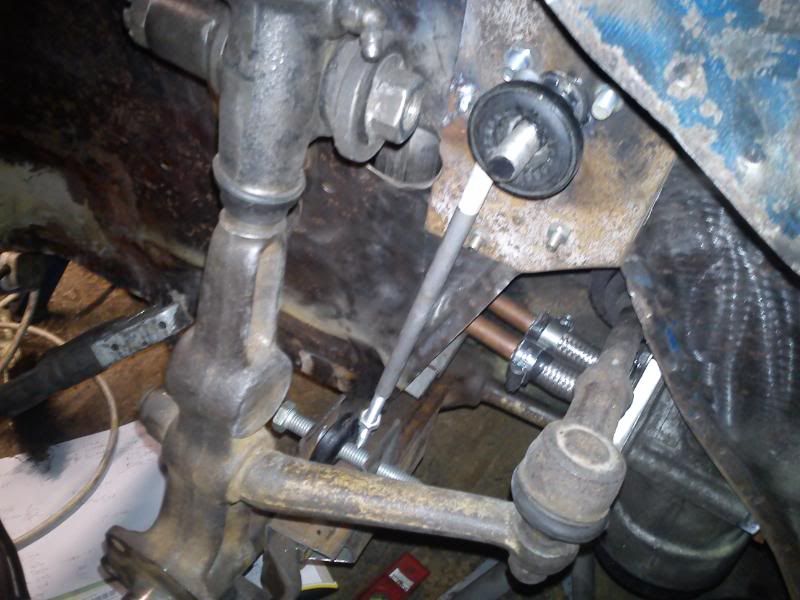
I made a sleeve for the bottom rear arm and after much deliberation I welded on a U shaped bracket
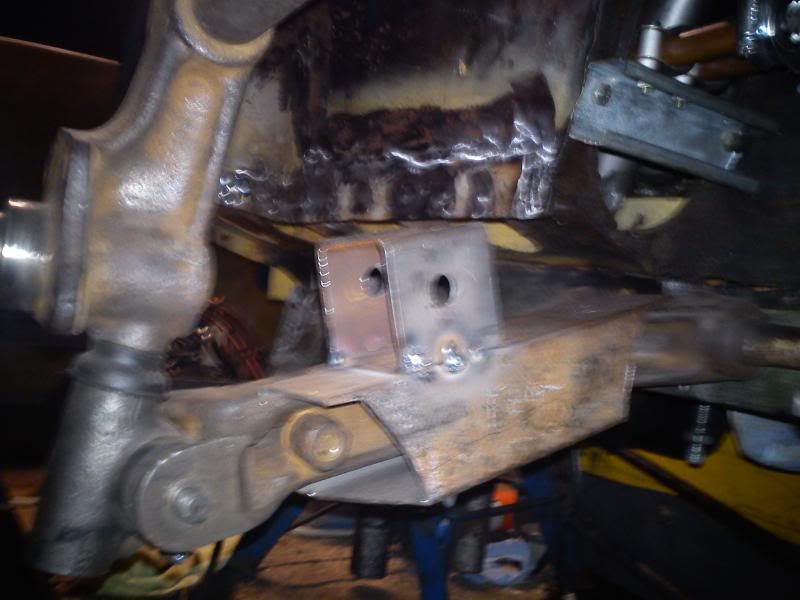
I also added a top mount (I didnt get this right at first)
To give:
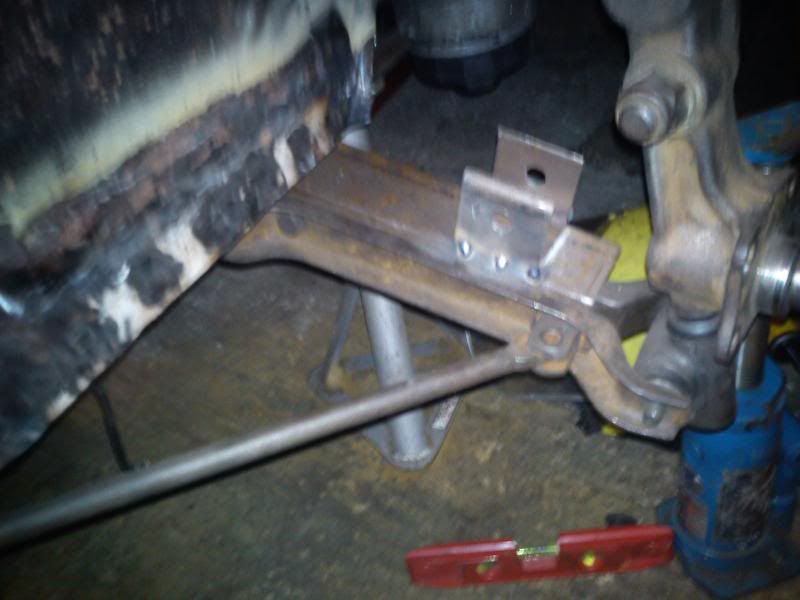
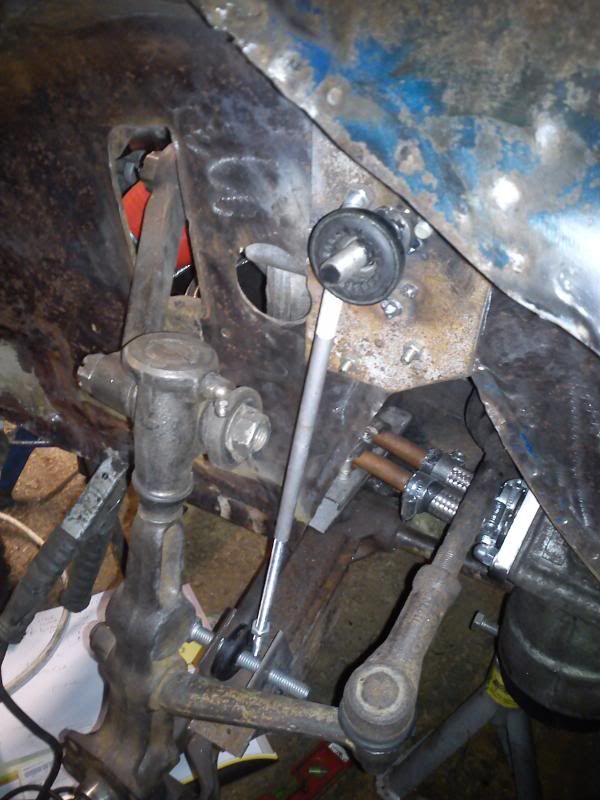
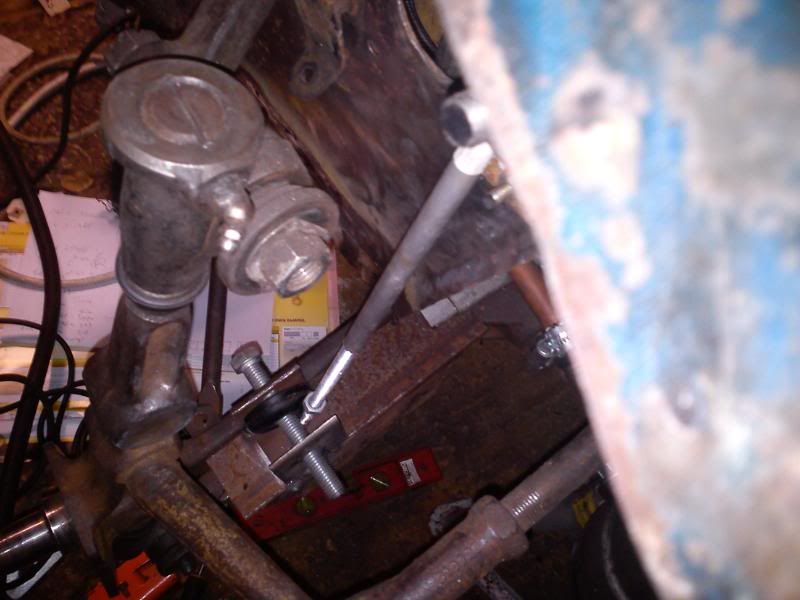
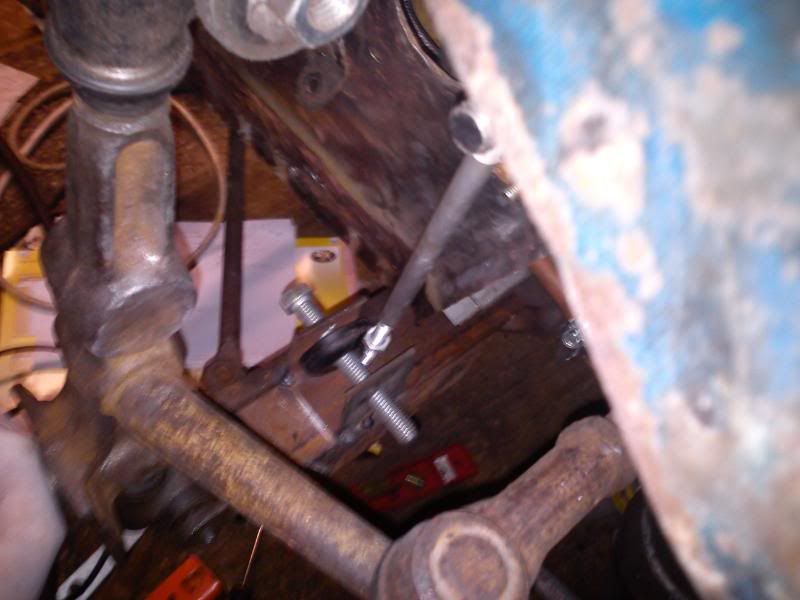
Then I spent ages deliberating and measuring, and scratting my head while looking through the SPAX catalogue. There is a section towards the rear where you can design your own damper. I deliberated over my options and the clearances involved till I was happy.
Then to quadruple check my maths I made a mock up with some old strut bearings, some ally tube and a bit of M8 threaded bar. I chose the strut bearings because they were the only thing I had to hand with a 1/2" hole through it. the M8 bar allows me to wind a nut on the the effective minimum length so I can check the closed length, and the yellow bit indicated over extension
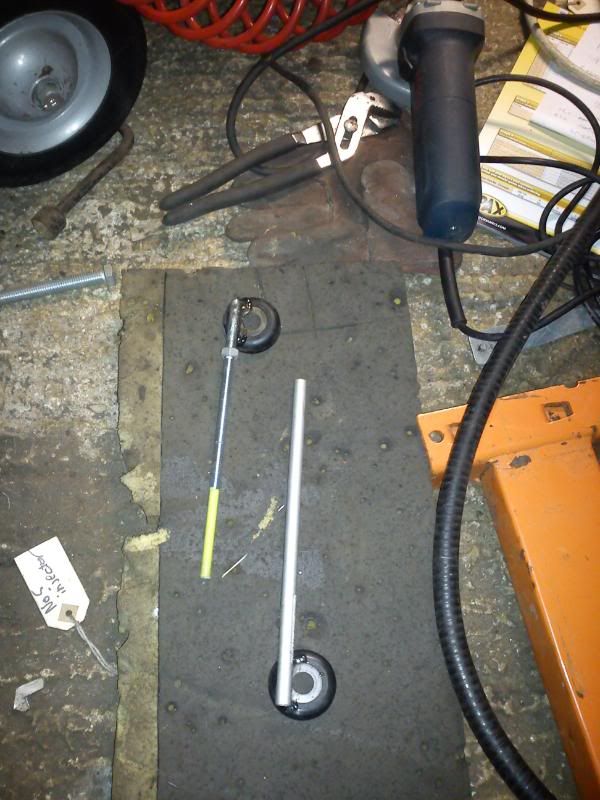
This means that I can test it all out and check it.
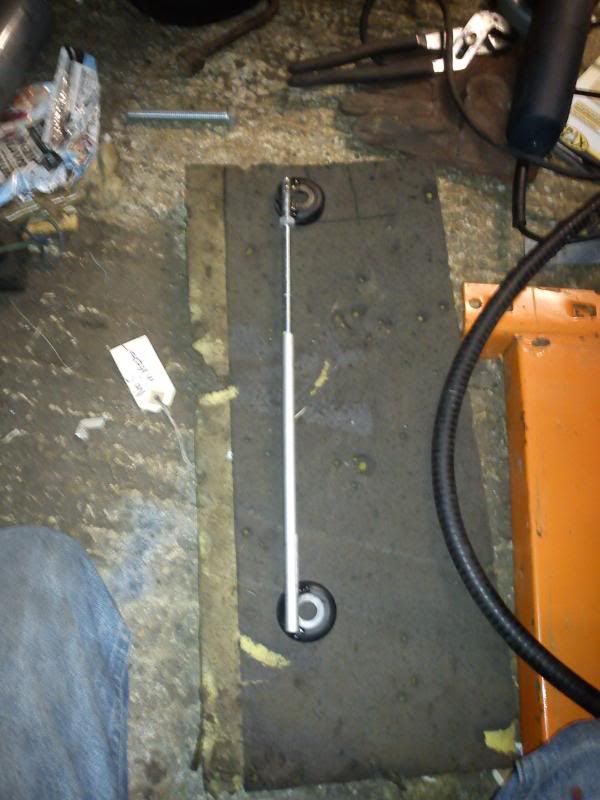
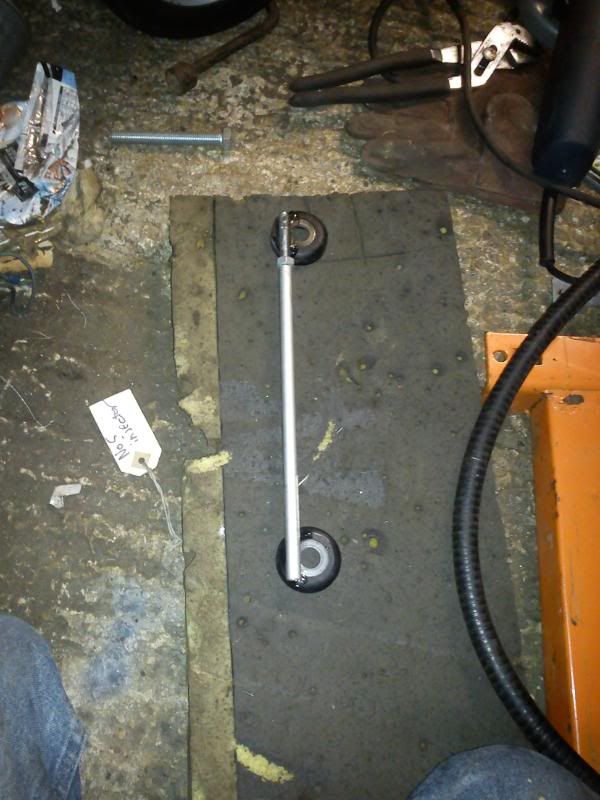
Full droop:
Full compression:
Full droop:
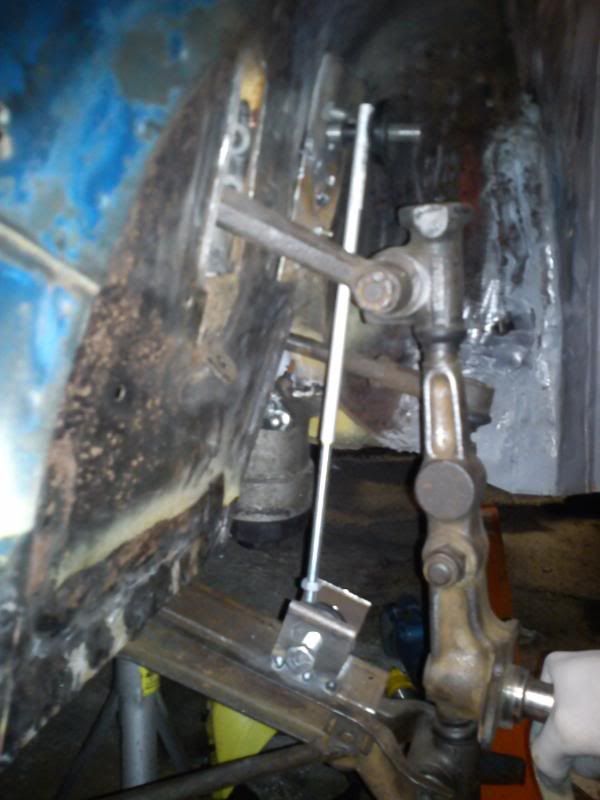
Full compression:
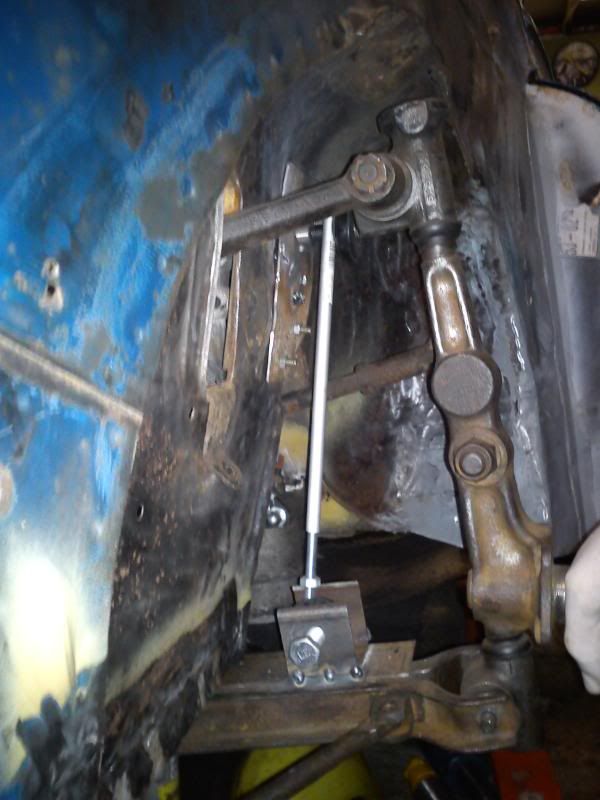
Full droop:
Full compression:
Just got to add my dampers to the list. £140 each (plus springs) so its not too bad.
The damper adjuster will be at the top facing the rear of the arch, with the flip front they will be soooo easy to adjust!
Re: 1970 Trav "IGOR" (modified) PIC HEAVY! Ancilleries going on!
Posted: Wed Jul 06, 2011 11:14 pm
by chrisryder
it's a bit weird having the pivots in 2 different axis isn't it?
why not have the top pivot 90 degrees out, so that it's in line with the bottom pivot, and the whole suspension axis?
will there be enough give in the bushes to allow for the damper movement?