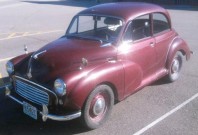
As my electrics are a complete mess..(bodged?).. I'm fitting a new loom, purchased from Charles Ware. Any tips or suggestions on installation?
Thanks as always-
Bloodyank
Fitting A New Harness, er, Loom..
Forum rules
By using this site, you agree to our rules. Please see: Terms of Use
By using this site, you agree to our rules. Please see: Terms of Use
-
bloodyank
- Minor Fan
- Posts: 133
- Joined: Thu Dec 27, 2007 5:58 pm
- Location: Steamboat Springs, Colorado, USA
- MMOC Member: No
Fitting A New Harness, er, Loom..
http://www.davidwinterswoodworker.com/
-
Fingolfin
- Minor Legend
- Posts: 1312
- Joined: Thu Jan 28, 2010 4:14 am
- Location: Fulton, Missouri, United States
- MMOC Member: No
Re: Fitting A New Harness, er, Loom..
Let's see...
 It's easy, but tedious and time-consuming.
- Give yourself plenty of room to lay the harness out next to the car, or inside of it if it's a bare shell and you have maneuvering room inside.
- I started making connections at the control box on the firewall, then did the turn signals, then the lights, then the engine, and so forth, but you could start anywhere. Stick to figuring out one circuit at a time.
- String or wire help with getting the wire for the dome light up the A-pillar.
- Zip-tie or clip the harness to the body where possible, to prevent it hanging loose.
- Use thick rubber grommets where it passes through the body.
- Heat-shrink connectors where possible, particularly in the engine bay and trunk/boot.
- Use dielectric grease on connectors that will need to be removed again periodically, and on other electrical items (bulbs, plug wires, etc.). Or use it on every connector, that works too. Keeps moisture out.
The way to a man's heart may be making food, but the way to my heart is buying me car parts!
Come read about my Minor at An American Moggie.

Come read about my Minor at An American Moggie.
-
IslipMinor
- Minor Legend
- Posts: 2147
- Joined: Mon May 10, 2004 9:10 pm
- Location: Oxford, UK
- MMOC Member: Yes
Re: Fitting A New Harness, er, Loom..
As suggested, lay the new harness out so that you can identify the various circuits and then feed the 'internal' part through the bulkhead grommet, the front part through and down to the lights, horn and brake light switch, and then finally the long length down underneath to the hole in the boot floor and on to the rear lights.
I always use a battery charger with a circuit breaker when doing work on the harness - that way any problems trip the breaker and not the fuse or worse. Connect one circuit at a time and test it. I find that sometimes the flashers do not work properly on the charger, and obviously the headlights will not be at full strength, unless you have a really big charger.
Once everything is working, then carefully connect the battery, but do not tighten the connections yet as you might need to disconnect it quickly!
Once all checked thoroughly and working, tighten the battery connections.
Richard

Re: Fitting A New Harness, er, Loom..
Some people cut the old wiring loose , leaving a short length of wire attached to the lamp / gauge, etc so that it helps identify
the correct wire colour to connect.
Cable ties are great but leave them in a loop initially. This gives you room to push and pull the loom until it is in the right position ( and is not straining any part of it ). When you're happy it's all correct and works you can tidy up by tightening all the loops.
Cover any metal " tags " securing the loom to the body with a short length of heat shrink tubing to stop abrasion.
With a lot of electrical faults , a bad earth is often discovered as the cause of the problem. So make sure all the earth connections are attached to clean , grease free metal and protect the connector with either electrical grease or copper ease.
As others have said work methodically and carefully , an enlarged size wiring diagram by side at all times.
Good luck with it.
Bob