no problem Bob you've been a source of help and inspiration, nothing to forgive.
The pinch bolt in position,not overtightened, just reasonably so, the exhaust is strong and firm now.
I've overfilled the gearbox and it's spilling onto the garage floor evertime I wheel the Truck in and out of the garage. I'll drain it right out and refill to the correct level when it's ready to roll for the MOT.
rame][/frame]
Last edited by davidmiles on Fri Aug 19, 2011 2:41 pm, edited 1 time in total.
smile, you never know, you might be winning.[IMG]http://i67.tinypic.com/2ro3j37.jpg[/IMG]
David , thanks for the comments.
As for the gearbox oil, don't drain all the oil out.Let a little drain out into a nice clean jam jar.
Plug back in, undo the filler plug on side,insert clean finger ( or a twist of kitchen paper, if you have large fingers ) through the hole horizontally, to see if oil wets the finger tip.
Wet = OK, dry means you let too much out ! Fill up a little, using the nice clean oil from the jam jar and a plastic funnel, until it "just " dribbles over the threaded hole edge.Put filler plug back in.
I remembered to check the photo this time.
Bob
unless you're filling it from the wrong place, or have the back end jacked up by about 10 feet.
you fill up through the filler hole until it pours out all over the floor (well that's what happens to me anyway!)
is it possible you have a leaky gearbox? or did you fill the gearbox through the gearstick hole? in which case, you definately could have overfilled it.
if you did that, just open the fill plug and let the oil drain out until it stops draining, and then it's level with the filler hole, which is where it wants to be!
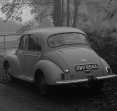
That's what is worrying me, I did fill it by the screw off filler plug, not through the gear stick, every time I move the vehicle there's a fresh pool of fresh thin oil on the ground under the gear box, The speedo cable screw in is wet to the touch, Ive just taken this picture and Ive just noticed a droplet on the speedo screw in cap, Maybe it needs the gearbox draining and the speedo taken out and re seated back in.
.[frame][/frame]
smile, you never know, you might be winning.[IMG]http://i67.tinypic.com/2ro3j37.jpg[/IMG]
one good thing did happen, the slide switch that lights the speedo clock wired and fitted in perfectly. Thanks for that Driad. Now I need to tend to this oil leak.[frame][/frame]
smile, you never know, you might be winning.[IMG]http://i67.tinypic.com/2ro3j37.jpg[/IMG]
I'd try reseating the speedo drive, I'd thought it was higher than the the oil level and on the body of the gearbox, must be thinking of some other car I guess.
"Once you break something you will see how it was put together"
Inside that plastic thing is a rubber O-ring if that fails you not only have leaking oil but the oil is"pumped" into the speedo and after a wile the speedo goes crazy even resulting in speeds over 140 km in my case and the car didn't even have to be on the move.The needle sticked...
I had to degrease the speedo and after that every thing was alright.I changed the plastic thing for another one and I hope everything is alright now.
Regards Jan
That earth strap looks rather tight (it could just be an illusion). I normally attach mine to one of the unused threaded holes that you can see in the picture, that would have the clutch relay shaft mica bush cover plate screwed to, if it were left hand drive.
This is the seal that fits inside the plastic fitting. http://morrisminorspares.co.uk/shop/pro ... 37edb38eba
I had to replace mine, the old one had gone brittle with age, and the car was leaving little reminders of where it was parked. Also, check the shaft that goes inside this seal. Mine was corroded which didn't help with the seal and also caused the cable to slip inside the squared bit.Remember to drain the gearbox first.
I know what you're thinking, shoulda put that on before the exhaust, but at least I have a reference location, and there's plenty of clearance. but does the heat shield go above the silencer, is that the hotest exhaust component?[frame][/frame]
smile, you never know, you might be winning.[IMG]http://i67.tinypic.com/2ro3j37.jpg[/IMG]
Hi David
I've checked that they are all your photos.In order ..Exhaust bracket looking good.Shield above the silencer Yes.
Bump stop ..looking good, but..is there a split pin on the nut, attaching the lever arm (shock absorber ) ? Can't quite see.
MOT failure if not.( I missed one on my restoration ...sorry Mr Tester, well spotted !! ).Exhaust clamp...were you planning to put a spring washer between the nut and the flat washer, to stop it working loose ? You 're giving my little grey cells a work out.Good progress, it's all coming together now.
Bob
new parts arrival, probably the last box of bits I'll need. Seat belts,front indicators, rear bumper blocks, oil seal and horn, all I need now is the 12v battery
[frame][/frame]
smile, you never know, you might be winning.[IMG]http://i67.tinypic.com/2ro3j37.jpg[/IMG]