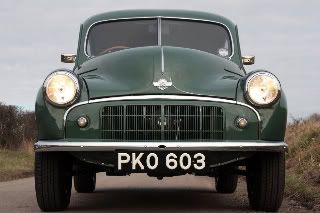
my 51 minor

Discuss anything Morris Minor related.
Forum rules
By using this site, you agree to our rules. Please see: Terms of Use
tortron
Minor Fan
Posts: 396
Joined: Thu Feb 21, 2008 8:48 pm
MMOC Member: No

Post by tortron »

manifolds are now made. Just wanting a final clean up, finishing of the flange faces and a coat of something petrol proof

spent a bit of time today modifying the backing plates of the filters (off an old jag, so didnt exactly bolt right up to 1 1/8th carbs). So thats done and while i was at it i made up all new gaskets for the carbs.

so here is what i am left with today (mounted on a manifold i wont be using)
Image

looking pretty good if you ask me (minus the greasy fingerprints that is)
tortron
Minor Fan
Posts: 396
Joined: Thu Feb 21, 2008 8:48 pm
MMOC Member: No

Post by tortron »

Image
tortron
Minor Fan
Posts: 396
Joined: Thu Feb 21, 2008 8:48 pm
MMOC Member: No

Post by tortron »

so.
A couple of pages ago i posted this mockup
Image

well today i got stuck in and ended up with this

Image
(looks abit wonky but i assure you its no worse than original)

still needs finishing - but i think it should look great (and fairly original)
tortron
Minor Fan
Posts: 396
Joined: Thu Feb 21, 2008 8:48 pm
MMOC Member: No

Post by tortron »

so interior wise
current is brown doors with chrome strip and brown headliner
kick panels, b pillars, rear parcel tray and under rear seat are also trimmed in the original brown, carpets and wheel well covers are long gone, but were brown and creme respectively.

steering column, handbrake and parcel tray under the dash are a sort of matt brown (should be nickle, but my car is poverty spec due to shortages at the time) which i do like due to the vintage feel the finish gives. The tray itself is a thick card with a gold painted finish on one side - i have some nice textured material in the same colour i was planning on covering the upperside with, although i think a padded tuckandroll matching the seats could work nicely if i paint or cover the otherside.

The instrument panel and glovebox were originally painted gold - not sure if i want to repspray them gold, black, or even a dark red
The sill covers were originally silver i was planning on repraying these silver again - along with the bracing in the boot. Not sure about the sill finishers (the bit you see from outside) - they would have been body colour, but you can get stainless ones so perhaps paint them too.
(the fuel tank is painted silver and i plan on doing the torsion bars the same)

Carpet
I am torn between black carpet or a dark red carpet (i will be trimming the boot as well)
It would be a dark red but im thinking that if i have the doors, seats and headlining red as well it could be like sitting inside a mouth :?, this also leads onto windlace/door seals - these come with a fabric cover (originally grey with green flecks) black or red. Will having them red be too much or will it make a nice contrast to a black painted interior
Image

Im pretty set on having the beading between the front + rear wings and body a dark red
possibly this
Image
unless i can recolour some

hints, tips, comments?
tortron
Minor Fan
Posts: 396
Joined: Thu Feb 21, 2008 8:48 pm
MMOC Member: No

Post by tortron »

^ instrument panel is now smoothed out and in primer
have just been going through the box of parts and sorting them into things to be painted (and what colour) and things to polish

thinking of polishing up the alloy rear light bodies (originally body colour) as i like shiny thing and it should look good against the black body.
cleaned up the glass brake lights too - they were quite dirty inside, so this should make them a hell of alot more visible
Image
mmjosh
Minor Legend
Posts: 1066
Joined: Tue Apr 14, 2009 8:51 am
Location: Atherstone,Warwickshire
MMOC Member: No

Post by mmjosh »

have you got any pictures of your instrument panel

tortron
Minor Fan
Posts: 396
Joined: Thu Feb 21, 2008 8:48 pm
MMOC Member: No

Post by tortron »

just that rough tacked one a couple of posts back
i will dig it out of the shed next im in there
mmjosh
Minor Legend
Posts: 1066
Joined: Tue Apr 14, 2009 8:51 am
Location: Atherstone,Warwickshire
MMOC Member: No

Post by mmjosh »

are you putting that one on

tortron
Minor Fan
Posts: 396
Joined: Thu Feb 21, 2008 8:48 pm
MMOC Member: No

Post by tortron »

Image
this is the original panel as fitted to series mm and II

Image
this is the modified panel to fit the extra water temp and amps gauges shown

The gauge mounting/backing panel is also modified to fit the extra gauges. I will also be swapping out the speedo for one with a trip meter
tortron
Minor Fan
Posts: 396
Joined: Thu Feb 21, 2008 8:48 pm
MMOC Member: No

Post by tortron »

Ultimately its the small details that take alot of time
Image

been flat out working most of the time so have taken to trying to get just a few pieces done every night - slow progress but progress none the less. Now have everything that was to be polished polished. have just been going through the box of parts and sorting them into things to be painted (and what colour) and things to polish

thinking of polishing up the alloy rear light bodies (originally body colour) as i like shiny thing and it should look good against the black body.
cleaned up the glass brake lights too - they were quite dirty inside, so this should make them a hell of alot more visible
Image


Just a couple of small parts wanting painting left now
alanworland
Minor Legend
Posts: 1453
Joined: Tue Jan 30, 2007 10:09 pm
Location: Essex
MMOC Member: No

Post by alanworland »

I have my rear light bases polished and I think they look good, I keep them wax polished to keep the elements out.
Image
RobThomas
Minor Legend
Posts: 2647
Joined: Thu May 11, 2006 10:34 am
Location: Cardiff
MMOC Member: Yes

Post by RobThomas »

Might be worth investing in a short length of SOLAS tape to make the lights more reflective. I did this on my Midget tail-lights. Works well.

Like this stuff..
http://www.safety-marine.co.uk/Life-Jac ... -Strip.htm
Cardiff, UK
tortron
Minor Fan
Posts: 396
Joined: Thu Feb 21, 2008 8:48 pm
MMOC Member: No

Post by tortron »

that would be placed inside the light on the base?

if so - way ahead of you, have a roll sitting here right now :P
alanworland
Minor Legend
Posts: 1453
Joined: Tue Jan 30, 2007 10:09 pm
Location: Essex
MMOC Member: No

Post by alanworland »

I think the Morris lights seem quite 'reserved' in their light output compared to many vehicles!
I have installed within the rear lights one of those 10 watt halogen type bulbs (on a ceramic socket) which operates with the original 5 watt sidelight and gives a far more visible light.
My brake light still seems visible above this new light level but is supplemented with an LED cluster inside the rear window - secured to the parcel shelf with two of those telescopic magnets!
I feel much happier knowing my rear end is better illuminated!
Image
tortron
Minor Fan
Posts: 396
Joined: Thu Feb 21, 2008 8:48 pm
MMOC Member: No

Post by tortron »

again, not alot of progress,
flat out working, but hope for a day or two in the next few days to get a few bits done.

Have since picked up a water pump for the sidevalve engine (for a steal too i might add) and a few rubber bits, so its all coming together
tortron
Minor Fan
Posts: 396
Joined: Thu Feb 21, 2008 8:48 pm
MMOC Member: No

Post by tortron »

bah scratch that
on inspection the pump looks to be a cast unit for an a series
having being sold to me as definitely for a sidevalve im not that chuffed
alanworland
Minor Legend
Posts: 1453
Joined: Tue Jan 30, 2007 10:09 pm
Location: Essex
MMOC Member: No

Post by alanworland »

I think the sidevalve pump is quite short in supply - Club Spares?
Image
tortron
Minor Fan
Posts: 396
Joined: Thu Feb 21, 2008 8:48 pm
MMOC Member: No

Post by tortron »

alanworland wrote:I think the sidevalve pump is quite short in supply - Club Spares?
which is why i was quite excited to have found one.

Nevermind tho, plenty of other work to do
tortron
Minor Fan
Posts: 396
Joined: Thu Feb 21, 2008 8:48 pm
MMOC Member: No

Re: my 51 minor

Post by tortron »

Ok, i now have a correct water pump :D

spent roughly 8 hours today doing this
Image

most of that time was spent figuring out the correct plan of attack and teaching anyone within earshot a few choice words :lol:
But once i got it all figured out i managed to get it all in by myself (tho another 2 or 3 people would make things a bit smoother)
Just letting the rubber settle now for a day or two and then il sort out the chrome work.

Also the radiator panel, grill, bonnet and fuel tank are all in - with new seals, rubbers, bolts and washers were required.
Will be without the chrome hockey sticks and moustache strip until i put all new studs in them - am moving in a few weeks so just need it drivable for now.

Will head back out soon and sort out the headlights, indicators and assorted wires
tortron
Minor Fan
Posts: 396
Joined: Thu Feb 21, 2008 8:48 pm
MMOC Member: No

Re: my 51 minor

Post by tortron »

well the screen is well and truly in there now
have just installed the centre pillar, i found that the lower edges of the glass had crept in just slightly making the gap too small - so i dug out a near 100 year old sidevalve valve spring tool and was able to separate them (it spreads rather than closes, to push against the block i guess). The next problem was how to get the inner screen screws (they have an internal thread and the chrome pillar has studs) through the rubber as its a very tight fit. The easiest way i found was to assemble the inner parts (rubber gasket, inner metal pillar and the 4 screws) then poke 4 bolts through the centre rubber through to the inside. Thread the screws on and pull the lot through the rubber.
Post Reply