Brendas Restoration

Discuss Bodywork problems here.
Forum rules
By using this site, you agree to our rules. Please see: Terms of Use
nslocomotive2
Minor Fan
Posts: 155
Joined: Tue May 27, 2008 1:56 pm
Location: Norwich
MMOC Member: No

Brendas Restoration

Post by nslocomotive2 »

Well I thought Id start a thread to show some of the work I am doing on Brenda, this will hopefully help inspire me to finish her this year.

After having had my garage broken into and my welder and tools stolen I final bought myself a new toy last week, a nice new mig :-)

First job a hole in the drivers floor pan where the back leg of the seat sat.
Image
showing the patch in place ready to grind.
Image
after grinding I notice a hole in the weld and I went to fill it with a bit of weld, unfortunately i lent on the switch on the welder and it was set to MAX without noticing I then atempted to weld ooops :o :(
Image
So I tackled it again with the amps turned down and ground it down to look pretty, now its as good as new:-)

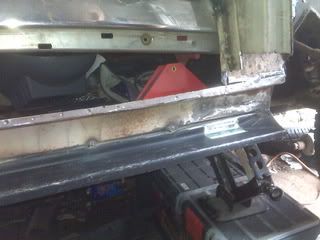
Next job the sill's check out how they look right now.
Image
Image
Image
parts on order so we will see how things turn out
:-?
Last edited by nslocomotive2 on Sun Dec 21, 2008 8:47 am, edited 2 times in total.
regards

Nigel

Meet Nobby Minor my daily driver, needing a little TLC now and then.
[img]http://i152.photobucket.com/albums/s192/nslocomotives/nobby/IMG00319-1.jpg[/img]
http://s152.photobucket.com/albums/s192/nslocomotives/
If at first you don't succeed, destroy all evidence of trying :-)
bmcecosse
Minor Maniac
Posts: 46561
Joined: Wed Feb 16, 2005 11:24 pm
Location: ML9
MMOC Member: No

Post by bmcecosse »

Good luck with it - looks like a lengthy trail ahead!
ImageImage
Image
nslocomotive2
Minor Fan
Posts: 155
Joined: Tue May 27, 2008 1:56 pm
Location: Norwich
MMOC Member: No

Post by nslocomotive2 »

Well its a start, we will see I want to try and get the drivers side done by christmas at least... :roll:
regards

Nigel

Meet Nobby Minor my daily driver, needing a little TLC now and then.
[img]http://i152.photobucket.com/albums/s192/nslocomotives/nobby/IMG00319-1.jpg[/img]
http://s152.photobucket.com/albums/s192/nslocomotives/
If at first you don't succeed, destroy all evidence of trying :-)
bmcecosse
Minor Maniac
Posts: 46561
Joined: Wed Feb 16, 2005 11:24 pm
Location: ML9
MMOC Member: No

Post by bmcecosse »

You will manage that ok - 'youngun' on here has done all this work (and more) recently and has a good set of pictures showing how.
ImageImage
Image
nslocomotive2
Minor Fan
Posts: 155
Joined: Tue May 27, 2008 1:56 pm
Location: Norwich
MMOC Member: No

Post by nslocomotive2 »

yea he has inspired me to get back in the chair again, I was a bit reluctant after the break in, to get started again, but actually I managed to get a better welder this time round, and I'm really glad I did, my shots on photo bucket show what I managed b4 with the old machine, I have done the boot floor and the lower rear panel, I have some work to do in the rear inner wheel arches to get those up to scratch, then the back is done..

I did get started after seeing Flyings thread, so lets see what transpires, I hope that this will keep me motivated by updating this thread with what Ive done...
regards

Nigel

Meet Nobby Minor my daily driver, needing a little TLC now and then.
[img]http://i152.photobucket.com/albums/s192/nslocomotives/nobby/IMG00319-1.jpg[/img]
http://s152.photobucket.com/albums/s192/nslocomotives/
If at first you don't succeed, destroy all evidence of trying :-)
MGFmad
Minor Fan
Posts: 394
Joined: Mon May 05, 2008 10:49 pm
Location: Fife Scotland
MMOC Member: No

Post by MGFmad »

Your sills look like mine did a few weeks back, but I am getting through the welding and can see light at the end of the tunnel. I have a deadline of November to get 'our' Traveller finished as its for my wifes 40th birthday - always easier to do if you have a deadline I think!

Keep posting updates.

Is that a Clarke welder you have bought? Considering one myself to replace my failing SIP, difficult to go back to now though as I have been lucky to have the use of a friends professional MIG.
[sig]8143[/sig]
nslocomotive2
Minor Fan
Posts: 155
Joined: Tue May 27, 2008 1:56 pm
Location: Norwich
MMOC Member: No

Post by nslocomotive2 »

MGFmad wrote:Is that a Clarke welder you have bought? Considering one myself to replace my failing SIP, difficult to go back to now though as I have been lucky to have the use of a friends professional MIG.
Well the clake is very user friendly, I find it very easy to use, just getting used to the machine right now, but this time I went for mid range model.

I have the 110 EN Turbo, it is reasonably priced for what you get, this is the third welder Ive had and it is the best. I currently use it as gassless but it can be set up with gas if you prefer. Last time I went for the 90EN which is the cheapest in the range, although a good unit it could only hold the smaller 1KG spools which becomes expensive, and its run time was considerably less, I found myself going to make a cuppa once it had cut out far too often. :-) Still a good unit never the less.

If you have the cash my advice is do it, go splash out a few hundred quid...
regards

Nigel

Meet Nobby Minor my daily driver, needing a little TLC now and then.
[img]http://i152.photobucket.com/albums/s192/nslocomotives/nobby/IMG00319-1.jpg[/img]
http://s152.photobucket.com/albums/s192/nslocomotives/
If at first you don't succeed, destroy all evidence of trying :-)
MGFmad
Minor Fan
Posts: 394
Joined: Mon May 05, 2008 10:49 pm
Location: Fife Scotland
MMOC Member: No

Post by MGFmad »

Good to know that you like the Clarke range. My SIP is a 105 Turbo so will probably go a bit higher is amps - will possibly wait for te next VAT free day at Machine Mart.

I have always used the gas bottles with mine, how do you fine the gassless set up?
[sig]8143[/sig]
nslocomotive2
Minor Fan
Posts: 155
Joined: Tue May 27, 2008 1:56 pm
Location: Norwich
MMOC Member: No

Post by nslocomotive2 »

Not having used a gas Mig I would find it hard to give you an Idea, the reason I use the gassles set up is I have an en-block garage, which means it gets very windy at times, and its easier to start with. I have read that its harder to see the weld pool, but you get used to it..
regards

Nigel

Meet Nobby Minor my daily driver, needing a little TLC now and then.
[img]http://i152.photobucket.com/albums/s192/nslocomotives/nobby/IMG00319-1.jpg[/img]
http://s152.photobucket.com/albums/s192/nslocomotives/
If at first you don't succeed, destroy all evidence of trying :-)
nslocomotive2
Minor Fan
Posts: 155
Joined: Tue May 27, 2008 1:56 pm
Location: Norwich
MMOC Member: No

Post by nslocomotive2 »

Ok guys I give up... How does one get the piece of box section out from behind the B pillar on a 4 door?

I spent the whole day drilling out spot welds and removing what was left of the original box panel. But I'm stumped with how to get it out from behind the b pillar without damaging the pillar.

BTW patch, apon patch, rust rust and more rust.... :-)
regards

Nigel

Meet Nobby Minor my daily driver, needing a little TLC now and then.
[img]http://i152.photobucket.com/albums/s192/nslocomotives/nobby/IMG00319-1.jpg[/img]
http://s152.photobucket.com/albums/s192/nslocomotives/
If at first you don't succeed, destroy all evidence of trying :-)
nslocomotive2
Minor Fan
Posts: 155
Joined: Tue May 27, 2008 1:56 pm
Location: Norwich
MMOC Member: No

Post by nslocomotive2 »

ok done it, Managed to find the troublesome spot weld right behind the pillar and drilled through from the inside, now the box section is off photos are threatened... next job to tidy up the rear floor pan grind down whats left of the spot welds and clamp up the new panels and workout how I'm gonna start welding it all back together...
regards

Nigel

Meet Nobby Minor my daily driver, needing a little TLC now and then.
[img]http://i152.photobucket.com/albums/s192/nslocomotives/nobby/IMG00319-1.jpg[/img]
http://s152.photobucket.com/albums/s192/nslocomotives/
If at first you don't succeed, destroy all evidence of trying :-)
nslocomotive2
Minor Fan
Posts: 155
Joined: Tue May 27, 2008 1:56 pm
Location: Norwich
MMOC Member: No

Post by nslocomotive2 »

Image
1) inside the drivers side front sill
Image
2) Patch apon patch apon patch this is a patchwork minor
Image
3) Underside of drivers floor pan ready to accept the new panel
Image
4) showing ront on hing pillar (A)
Image
5) bottom of B pillar
Image
6) drivers side sill behind the hinge pillar
Image
7) front of drivers sill showing the rot on the inner wing area
Image
8) view down the drivers side
Image
9) rear wheel arch bodge to replace
Last edited by nslocomotive2 on Sun Dec 21, 2008 8:49 am, edited 1 time in total.
regards

Nigel

Meet Nobby Minor my daily driver, needing a little TLC now and then.
[img]http://i152.photobucket.com/albums/s192/nslocomotives/nobby/IMG00319-1.jpg[/img]
http://s152.photobucket.com/albums/s192/nslocomotives/
If at first you don't succeed, destroy all evidence of trying :-)
youngun
Minor Addict
Posts: 859
Joined: Sat Aug 19, 2006 9:30 pm
Location: North Devon
MMOC Member: No

Post by youngun »

Looking good nsloco, best way to start is just to cut all the crap out, then set about ordering panels. The worst thing to do is to order panels and then find that after cutting out a nice panel shaped hole you have to cut out more!
The Inner sill step on your car looks like it could do with some work. Either buy the floorpan sections which have the steps on them, or make up sections to fit from sheet. Then just work outwards from there! The sections are all self explanatory, i think ive got a good few pics detailing how i did it, if its not clear though just ask!
Keep up the progress and good work, oh and avoid buying C pillar repair sections unless you want to spend many many hours making them fit properly!

YG
Ultimate rust cure for your moggy....paint it brown, at least that way you dont notice the rust as much!!
nslocomotive2
Minor Fan
Posts: 155
Joined: Tue May 27, 2008 1:56 pm
Location: Norwich
MMOC Member: No

Post by nslocomotive2 »

Hey people todays update photos to follow,

I have cut out the rot on the inner sill step on the drivers side and made up a new piece from sheet, this is my first homemade repair panel so please don't expect anything too smart, beaten out using nothing more than a lump hammer and a vice.

I found paper and a dirty finger very useful for making templates :-)

This is now tacked into position, its not as good as I would like but it is a first attempt at making repairs from scratch so I'm not too fussed and as long as the structure is sound when all said and done I'm not to bothered about how it looks as it will be covered by the finishers anyway.

When I finish this eve I will post a few images...

regards

Nigel.
regards

Nigel

Meet Nobby Minor my daily driver, needing a little TLC now and then.
[img]http://i152.photobucket.com/albums/s192/nslocomotives/nobby/IMG00319-1.jpg[/img]
http://s152.photobucket.com/albums/s192/nslocomotives/
If at first you don't succeed, destroy all evidence of trying :-)
Dean
Minor Legend
Posts: 2182
Joined: Fri May 30, 2008 9:41 pm
Location: Sutton Coldfield
MMOC Member: No

Post by Dean »

Well done, it looks a tough nut to crack. :)
My Minor:
A Clarendon Grey 1953 4 Door Series II.
MMOC - 66535


nslocomotive2
Minor Fan
Posts: 155
Joined: Tue May 27, 2008 1:56 pm
Location: Norwich
MMOC Member: No

Post by nslocomotive2 »

Image
as promised :-)
Last edited by nslocomotive2 on Sun Dec 21, 2008 8:50 am, edited 1 time in total.
regards

Nigel

Meet Nobby Minor my daily driver, needing a little TLC now and then.
[img]http://i152.photobucket.com/albums/s192/nslocomotives/nobby/IMG00319-1.jpg[/img]
http://s152.photobucket.com/albums/s192/nslocomotives/
If at first you don't succeed, destroy all evidence of trying :-)
chickenjohn
Minor Legend
Posts: 4064
Joined: Tue Dec 07, 2004 8:50 am
Location: Margate, East Kent
MMOC Member: No

Post by chickenjohn »

Hi Nigel,
thats good work! Keep it up and keep posting the pics. I've not done a 4-door and I can see there are a lot of sections that will be new to me, useful stuff!

keep it up.
Cheers John - all comments IMHO
- Come to this years Kent branches Hop rally! http://www.kenthop.co.uk
(check out the East Kent branch website http://www.ekmm.co.uk )
ImageImage
nslocomotive2
Minor Fan
Posts: 155
Joined: Tue May 27, 2008 1:56 pm
Location: Norwich
MMOC Member: No

Post by nslocomotive2 »

I have a question does anyone know what hould happen with the back part of the boxing pannel its looking as if its the wrong shape, what should I do do I have to make a piece? what di you do Young Gun?
regards

Nigel

Meet Nobby Minor my daily driver, needing a little TLC now and then.
[img]http://i152.photobucket.com/albums/s192/nslocomotives/nobby/IMG00319-1.jpg[/img]
http://s152.photobucket.com/albums/s192/nslocomotives/
If at first you don't succeed, destroy all evidence of trying :-)
nslocomotive2
Minor Fan
Posts: 155
Joined: Tue May 27, 2008 1:56 pm
Location: Norwich
MMOC Member: No

Post by nslocomotive2 »

Image
Drivers side inner sill in position I first lined it up with the boxing panel clamped in place then tacked it in a few places, removed the boxing panel and then clamped it up and put in some more tacks to prevent distortion.
Image
Now its ready for welding up to do a proper job.
next task is to cut out the rear floor rot in order to make ready for the new rear inner-sill.
Last edited by nslocomotive2 on Sun Dec 21, 2008 8:50 am, edited 1 time in total.
regards

Nigel

Meet Nobby Minor my daily driver, needing a little TLC now and then.
[img]http://i152.photobucket.com/albums/s192/nslocomotives/nobby/IMG00319-1.jpg[/img]
http://s152.photobucket.com/albums/s192/nslocomotives/
If at first you don't succeed, destroy all evidence of trying :-)
User avatar
Dryad
Minor Addict
Posts: 681
Joined: Tue Jan 11, 2005 7:37 pm
Location: South Norfolk
MMOC Member: Yes

Post by Dryad »

Hello nslocomotive2. Just read your posts regarding the work you've done on Brenda. Mine's a 4-door saloon too, but I've only just started on what looks to be a major rebuild; new sills, boxing plates, rear inner wings, rear back spring hangers, boot floor, rear wing flanges, front inner wings, flitch plates, front crossmember and central crossmember ends. Then there's the brakes and diff... At least the engine and gearbox are good!
Image
Post Reply