Hey guys!
Just a few pics that I will be updating when I can of my latest project!
Initialy I was going to simply replace the wing beading on the rear wings but you know how one job leads to another and then when your doing that job you might aswell do this.. and so on!
Well what should of been a simple 1hour job has turned into a complete restoration and re-spray!
Take a look at the pics and see what you think! Any comments are welcomed.
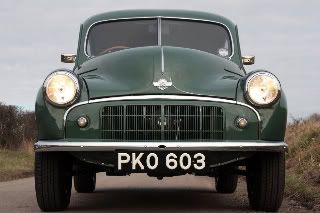
Picture 1: The original car
http://www.flickr.com/photos/22759412@N07/2210681922/
This is the progress so far: (scroll through album)
http://www.flickr.com/photos/22759412@N07/2210681866/
It started as replacing the wing beading.....
Forum rules
By using this site, you agree to our rules. Please see: Terms of Use
By using this site, you agree to our rules. Please see: Terms of Use
-
AndrewSkinner
- Minor Fan
- Posts: 349
- Joined: Sun Nov 12, 2006 4:47 pm
- Location: Ross On Wye
- MMOC Member: No
It started as replacing the wing beading.....
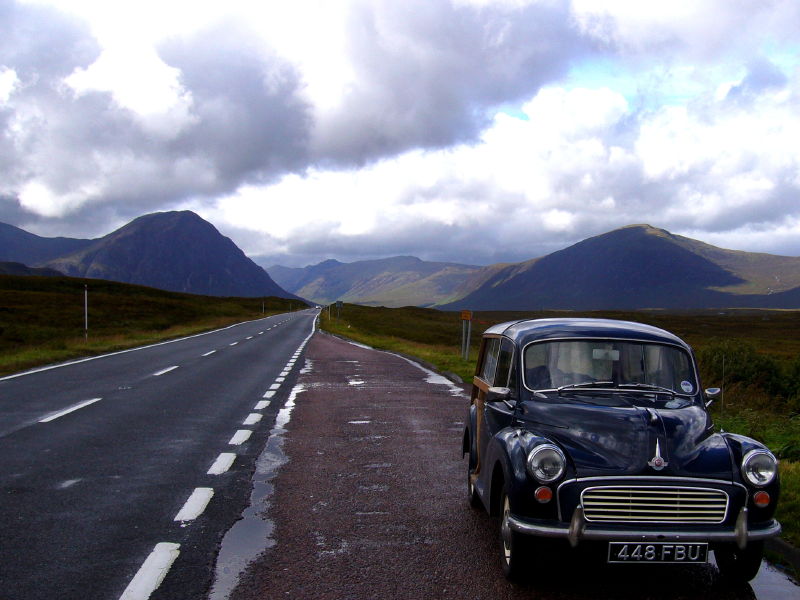
An age when roads were empty, machines were simple and every journey was an adventure!!
-
alanworland
- Minor Legend
- Posts: 1453
- Joined: Tue Jan 30, 2007 10:09 pm
- Location: Essex
- MMOC Member: No
-
Kevin
- Moderator

- Posts: 7592
- Joined: Thu Feb 14, 2002 12:00 am
- Location: Watford, Hertfordshire.
- MMOC Member: No
Well Andrew I think you must be a perfectionist as the original photo looked really good and even the stripdown doesn't look bad or are the photo's misleading and you are just enjoying yourself . 
Cheers
Kevin
Lovejoy 1968 Smoke Grey Traveller (gone to a new home after13 years)
Herts Branch Member
Moderator MMOC 44706
Kevin
Lovejoy 1968 Smoke Grey Traveller (gone to a new home after13 years)
Herts Branch Member
Moderator MMOC 44706
-
AndrewSkinner
- Minor Fan
- Posts: 349
- Joined: Sun Nov 12, 2006 4:47 pm
- Location: Ross On Wye
- MMOC Member: No
i think its more of me being a perfectionist. I think if it as being in an 'annoying state!' its no way near bad enough for a complete re-build but there are a few niggly bits that I know of that I want put straight.
It simply started off with me starting to replace some wing beading on the rear rings as it had split at the bottom but then i thought, "as i have the wing off I might aswell give it a good paint under the wings." so i started stripping back the old horrible underseal. While doing so i thought well if im doing the back i might aswell do the front! so off came the front wings.
As you can see in the pics the front wings have scraped off most of the rubbish off the wing but to get to ultra clean I went out and bought myslef a nice beefy compressor and a grit blaster!! Then realised that to stop any rubbish getting in the steering and suspension all that would have to come off and to make sure it doesnt get in the engine that might aswell come out aswell!!!!! lol! you can see where this is going!!
with the wings off, engine out and car on castors i was readt to start work!! but hang on!! the paintwork behind the door was looking a bit tired so that might aswell be done aswell! haha! so off come the doors!
now the car is stripped down to almost a shell ready to be rolled over, have the underside grit blasted and sealed up again. the paint on the roof had gone matt and if you looked closely you could tell it was going thin so to ensure a 100% colour match its booked in for a full respray
Now while the engine and running gear is all out I might aswell rebuild all of it aswell and clean it up!!!
Most parts e.g. steering parts and interior parts have all been grit blasted back to a very clean metal and ready to be painted!
As for the rest of the car, who knows when it will be ready but im going to do all I can to make it the best thing ive ever restored!!
Fitting all this in with my 1st year at uni is tough though!
An age when roads were empty, machines were simple and every journey was an adventure!!
-
chickenjohn
- Minor Legend
- Posts: 4064
- Joined: Tue Dec 07, 2004 8:50 am
- Location: Margate, East Kent
- MMOC Member: No
If I was at uni, I would just use the car then do all that work over the summer holidays. The car looks good as it is!
What are you going to use to seal the underside, please don;t say underseal!!!
What are you going to use to seal the underside, please don;t say underseal!!!
Cheers John - all comments IMHO
- Come to this years Kent branches Hop rally! http://www.kenthop.co.uk
(check out the East Kent branch website http://www.ekmm.co.uk )


- Come to this years Kent branches Hop rally! http://www.kenthop.co.uk
(check out the East Kent branch website http://www.ekmm.co.uk )
-
alex_holden
- Minor Legend
- Posts: 3798
- Joined: Tue Jul 25, 2006 9:46 am
- Location: Burnley
- MMOC Member: No
Oh dear oh dear... This story sounds awfully familiar.AndrewSkinner wrote:the engine that might aswell come out aswell!!!!! lol! you can see where this is going!!

Alex Holden - http://www.alexholden.net/
If it doesn't work, you're not hitting it with a big enough hammer.

-
AndrewSkinner
- Minor Fan
- Posts: 349
- Joined: Sun Nov 12, 2006 4:47 pm
- Location: Ross On Wye
- MMOC Member: No
Dunketh I feel sorry for you! I know what its like to unearth a load of rust!! maybe not that bad, but ive done it before to!
Im doing this as an easy project to get used to all of the workings of the car, then there is a pick-up I have my eye on!!!
That looks like more of a challenge! Its in cheltenham and under a blue sheet (near GCHQ) on someones front lawn!!! Im going to approach the owner and see if he wants to sell it!
An age when roads were empty, machines were simple and every journey was an adventure!!
-
AndrewSkinner
- Minor Fan
- Posts: 349
- Joined: Sun Nov 12, 2006 4:47 pm
- Location: Ross On Wye
- MMOC Member: No
Hey guys! just a little update.
Am home for easter now so getting on with morris again! Below are some more pics of the work carried out.
Tomorrow (weather depending) the car is being rolled over again and the complete underside stripped to bare metal and red oxide primed. I want to get this all in one day just to make sure no surface rust can come back.
Once this is done the parts that make the car roll need to be put back on and away to the sprayers!!
An age when roads were empty, machines were simple and every journey was an adventure!!

I sort of know the feeling, mine started out as a small pre MOT fettle, now it's a floorpan welding, wing replacing mini resto.
I have to use my daughter's mini while I do it, and Lucas the prince of darkness struck last night on the way home (between Glos and Malvern, you may know, the back road). Let's say being plunged into darkness at 50 while cornering wasn't a pleasant experience!
BTW, the sunbeam alpine looks fab, but aren't they twin Strombergs on rather than webbers? Or have you changed them?
(I'll get me coat....)
Wing beading, do you fit then paint the panel? If so, what's the point of buying it in the correct colour.
Andrew
-
AndrewSkinner
- Minor Fan
- Posts: 349
- Joined: Sun Nov 12, 2006 4:47 pm
- Location: Ross On Wye
- MMOC Member: No
Hey Andrew
Yes sorry! thanks for that they are strombergs and not webbers! School boy error
If you look through my flickr album you will notice a blue mini in there. Thats my mates mini but recently had a little accident
 went for its MOT yesterday and now needs more welding AND a new steering rack! expensive hobbie.
I have to say I am starting to get very intrested in the minis aswel. they are such fun to drive.
No you paint the wings and car speperate and then fit the wing beading.
Yes sorry! thanks for that they are strombergs and not webbers! School boy error
If you look through my flickr album you will notice a blue mini in there. Thats my mates mini but recently had a little accident
I have to say I am starting to get very intrested in the minis aswel. they are such fun to drive.
No you paint the wings and car speperate and then fit the wing beading.
An age when roads were empty, machines were simple and every journey was an adventure!!
-
alex_holden
- Minor Legend
- Posts: 3798
- Joined: Tue Jul 25, 2006 9:46 am
- Location: Burnley
- MMOC Member: No
Ideally, you'd paint the wings separately to the shell to make sure there is paint on the bits that will be hidden once it's bolted back together.eastona wrote:Wing beading, do you fit then paint the panel? If so, what's the point of buying it in the correct colour.
Alex Holden - http://www.alexholden.net/
If it doesn't work, you're not hitting it with a big enough hammer.
-
alex_holden
- Minor Legend
- Posts: 3798
- Joined: Tue Jul 25, 2006 9:46 am
- Location: Burnley
- MMOC Member: No
That looks in so much better nick than Lintilla underneath...
How did you roll it and what did you do to ensure you didn't damage the body and it couldn't fall over while you were working on it?
How did you roll it and what did you do to ensure you didn't damage the body and it couldn't fall over while you were working on it?
Alex Holden - http://www.alexholden.net/
If it doesn't work, you're not hitting it with a big enough hammer.
-
AndrewSkinner
- Minor Fan
- Posts: 349
- Joined: Sun Nov 12, 2006 4:47 pm
- Location: Ross On Wye
- MMOC Member: No
alex_holden wrote:That looks in so much better nick than Lintilla underneath...
How did you roll it and what did you do to ensure you didn't damage the body and it couldn't fall over while you were working on it?
Thanks! it was allot easier than I though it would be. The car is an empty shell appart from wiring everything on the dash, Steering wheel, steering rack, fuel tank and head lining
I simply took out the castors that were under the car making it movable so the car was now sitting on the floor along its chassis rails and cross member, Then I laid out lots and lots cussions from seats and covered it then in 'Roll Mats' (for sleeping on) It was then a simple fact of me going to one side of the car, lifting it up and over!
It didnt need anything to keep it upright as i had to use all my weight to pull it back over and I was doing any serious work on it at the time.
An age when roads were empty, machines were simple and every journey was an adventure!!
-
alex_holden
- Minor Legend
- Posts: 3798
- Joined: Tue Jul 25, 2006 9:46 am
- Location: Burnley
- MMOC Member: No
I didn't realise the shell was light enough to do that! You're not related to Geoff Capes are you? ;)
Alex Holden - http://www.alexholden.net/
If it doesn't work, you're not hitting it with a big enough hammer.
-
AndrewSkinner
- Minor Fan
- Posts: 349
- Joined: Sun Nov 12, 2006 4:47 pm
- Location: Ross On Wye
- MMOC Member: No
Ok guys! another little update! I have been very busy over the Easter holidays and also received my 20% bonus from working at Waitrose! All of this meant that the car has come a long way.
Since taking the rear axle off it has become apparent that the rust around the mounting points (On the axle) was very dangerous and therefore a replacement was needed. The 2nd hand axle I got was stripped, cleaned, repainted, then had new brakes and good 2nd hand drums fitted. Then I splashed out on some new shocks (all round) new poly bushes (all round) new leaf springs, new bump stops, and all new bolts and pipes etc.
Before fitting all the new shiny things the underside of the car was stripped down, cleaned, painted in red-oxide and then two coats of Hammerite. Then the front suspension was also striped down, cleaned, repainted and new poly bushes and new shocks fitted. It was then re-fitted to the car.
Below are some pics of the progress so far. Enjoy!

Rust found on original axle.

Car tucked away in the warm garage ready to work on.

Bits of the back end stripped and painted with red-oxide.

Scraping off years of old underseal and waxoil was not a fun task but very rewarding when it is all done.

At last! the whole car done in red-oxide.

Front box section all painted.

The Morris sees light again! carried out and first coat of hammerite applied.

The car is now ready to have its rear axle re-assembled and installed before rolling back over.

Axle ready to be fitted.

Almost everything is new or re-conditioned.

Now ready to be rolled.


Front wheel arches can now be stripped, painted in red-oxide and hammertited.

front suspension painted inc. new poly bushes, new dampers, new pipes, new cylinders, new shoes, new track rod ends and new fulcrum pins.

At last back on its own wheels and the correct way up! Since this I have purchased lots more new parts for it but still need to re-paint the rear wheel arches.
The next big question is should I paint it myself?? I have the compressor and spray gun. What do you guys think?? What can the quality be of a home spray job with no oven??
Since taking the rear axle off it has become apparent that the rust around the mounting points (On the axle) was very dangerous and therefore a replacement was needed. The 2nd hand axle I got was stripped, cleaned, repainted, then had new brakes and good 2nd hand drums fitted. Then I splashed out on some new shocks (all round) new poly bushes (all round) new leaf springs, new bump stops, and all new bolts and pipes etc.
Before fitting all the new shiny things the underside of the car was stripped down, cleaned, painted in red-oxide and then two coats of Hammerite. Then the front suspension was also striped down, cleaned, repainted and new poly bushes and new shocks fitted. It was then re-fitted to the car.
Below are some pics of the progress so far. Enjoy!
Rust found on original axle.
Car tucked away in the warm garage ready to work on.
Bits of the back end stripped and painted with red-oxide.
Scraping off years of old underseal and waxoil was not a fun task but very rewarding when it is all done.
At last! the whole car done in red-oxide.
Front box section all painted.
The Morris sees light again! carried out and first coat of hammerite applied.
The car is now ready to have its rear axle re-assembled and installed before rolling back over.
Axle ready to be fitted.
Almost everything is new or re-conditioned.
Now ready to be rolled.
Front wheel arches can now be stripped, painted in red-oxide and hammertited.
front suspension painted inc. new poly bushes, new dampers, new pipes, new cylinders, new shoes, new track rod ends and new fulcrum pins.
At last back on its own wheels and the correct way up! Since this I have purchased lots more new parts for it but still need to re-paint the rear wheel arches.
The next big question is should I paint it myself?? I have the compressor and spray gun. What do you guys think?? What can the quality be of a home spray job with no oven??
An age when roads were empty, machines were simple and every journey was an adventure!!
-
MoggyTech
- Minor Legend
- Posts: 1466
- Joined: Sat Aug 11, 2007 12:06 pm
- Location: Livingston Scotland
- MMOC Member: No
You have been busy. I used to use Hammerite but not any more, it seems to flake off if you look at it the wrong way these days. Rustoleum Chassis Black or POR15 would have been my choice, still it's done and has to be better than the old underseal that was on there.
WRT a DIY paint job. Oven not required for Celly paint, so if you have minimal spraying skills, it's mostly prep work that makes the big difference. It's a light colour which are the easiest to do, so I would go for it. I've seen so called pro paint jobs costing £3000 that are worse than most decent DIY jobs done with an HVLP gun.
Just make sure you use finishing thinners for the final coats, it lets the paint flow out and that means less colour sanding/compounding and polishing.
If you can heat the garage to 20c and keep dust down (wet the floor) you can spray a car in a day, although the prep work will probably take a week.
[img]http://i49.photobucket.com/albums/f264/Ghostrider117/sig.jpg[/img]
http://www.freewebs.com/moggytech
http://www.freewebs.com/moggytech