The urge to tinker is very strong in me too. I have to consciously stop myself sometimes.
Stephen
1966 2 door saloon Milly restoration project
Forum rules
By using this site, you agree to our rules. Please see: Terms of Use
By using this site, you agree to our rules. Please see: Terms of Use
-
svenedin

- Minor Legend
- Posts: 4984
- Joined: Fri Aug 29, 2014 9:27 am
- Location: Surrey
- MMOC Member: Yes
Re: 1966 2 door saloon Milly restoration project
1969 1098cc Convertible “Xavier” which I have owned since 1989.
Stephen
Stephen
Re: 1966 2 door saloon Milly restoration project
I guess it's forgivable if you are actually improving the car, and these cars are getting on a bit and need some TLC, So I forgive your tinkering nature Stephen.
Last edited by David JM on Sat Oct 25, 2025 3:41 pm, edited 2 times in total.
Re: 1966 2 door saloon Milly restoration project
This was a rather easy Tinker as it goes, I remembered to lubricate the new speedo cable before I fitted it, bit of a fiddle to grope behind the clock, just glad I didn't have to disturb it, did have to remove the glove box, that's getting fragile now. Treated cardboard from 1966.

Re: 1966 2 door saloon Milly restoration project
next big job is painting the wheels, I pressure washed them last week and they are dry now, despite the cold. I painted them on the inside surface with chassis black. great protection paint.

cut cardboard reusable masks that go over the masking tape hugging the outer rim. Never did like the silver paint on the rims that Longbridge did.

I think this little facehugger from Aliens sniffed some panel wipe, poor little chap, his fly catching days are over, onto the compost heap with him.

I'm happy with the first one, after a coating of white primer, then gloss white from a Halfords air can. three more to go.

cut cardboard reusable masks that go over the masking tape hugging the outer rim. Never did like the silver paint on the rims that Longbridge did.
I think this little facehugger from Aliens sniffed some panel wipe, poor little chap, his fly catching days are over, onto the compost heap with him.
I'm happy with the first one, after a coating of white primer, then gloss white from a Halfords air can. three more to go.
-
svenedin
- Minor Legend
- Posts: 4984
- Joined: Fri Aug 29, 2014 9:27 am
- Location: Surrey
- MMOC Member: Yes
Re: 1966 2 door saloon Milly restoration project
The usual way to do this is to loosen but not remove the 2x crosshead screws (1 on either side) via the hole in each glovebox on the speedo side. Then the whole speedo can be carefully pulled forwards and out of the dashboard where it will hang on its cables. It's strongly recommended to disconnect the battery before going near the electrics behind the dashboard as some are permanently live.David JM wrote: ↑Sat Oct 25, 2025 3:41 pm This was a rather easy Tinker as it goes, I remembered to lubricate the new speedo cable before I fitted it, bit of a fiddle to grope behind the clock, just glad I didn't have to disturb it, did have to remove the glove box, that's getting fragile now. Treated cardboard from 1966.
Stephen
1969 1098cc Convertible “Xavier” which I have owned since 1989.
Stephen
Stephen
-
myoldjalopy
- Minor Legend
- Posts: 3563
- Joined: Tue Jan 29, 2013 10:32 pm
- Location: Kernow
- MMOC Member: Yes
Re: 1966 2 door saloon Milly restoration project
The speedo is often hard to pull out from the front and, rather than risk damaging the dash paintwork, it may require removing the passenger side glove box to push it out from behind. That in itself can be a bit of a fiddle and, if the liner has gone flimsy with age, it can get damaged if you are not careful. Good to know that it is possible - even if it is 'a bit of a fiddle' - to replace the cable without removing the speedo. Whichever way you do it, it helps to be a bit of a contortionist as space is limited and the steering wheel and gear lever get in the way. Certainly its best to disconnect the battery before messing around behind the speedo tho' due to danger of shorting out one of the live wires Stephen mentions..
Re: 1966 2 door saloon Milly restoration project
Thanks for tbe comment MOJ, Speedo cable fitted, but I won't find out if it's an improvement till I have wheels back on, two tires were worn, two tires were new ish, to I took the two tired one's to my local tire specialist, but they don't have 145-80-R14 tires in their supplier catalogue, so two new ones from ESM, arrived the next day in a box £250.

nice tires, nice new smell, Pirelli, I had one of their cheeky calendars back in the 80's.

they charged me £50 cash to fit these including new weights and valves, so £300 for two front tires.

nice tires, nice new smell, Pirelli, I had one of their cheeky calendars back in the 80's.
they charged me £50 cash to fit these including new weights and valves, so £300 for two front tires.
Re: 1966 2 door saloon Milly restoration project
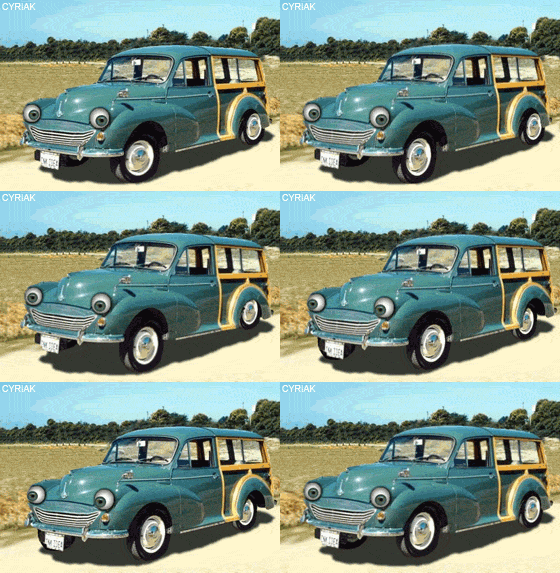
New white painted wheels back on, test run out in the West Sussex Countryside on a very grey day.


-
svenedin
- Minor Legend
- Posts: 4984
- Joined: Fri Aug 29, 2014 9:27 am
- Location: Surrey
- MMOC Member: Yes
Re: 1966 2 door saloon Milly restoration project
Hope you enjoyed your drive. I was out in the Morris too. It was rather wet!
Stephen
Stephen
1969 1098cc Convertible “Xavier” which I have owned since 1989.
Stephen
Stephen
Re: 1966 2 door saloon Milly restoration project
shame there is no edit function at the start of my restoration project, I lost quite a few images when my image host went south, see if I can restore some images here of the initial viewing and drive home.


Re: 1966 2 door saloon Milly restoration project
I've ordered Rear hub oil seal and bearings sets x2 from ESM, Their usual high end service wasn't even slowed down by Christmas, amazing those guys. But it's so bitterly cold in the workshop at the moments, I may wait for a warm front before getting stuck in.


Re: 1966 2 door saloon Milly restoration project
out came the halfshaft, amazed how it just drifted out with no effort.

the splines look excellent, they'll be going back in, no problems.

the splines look excellent, they'll be going back in, no problems.
Re: 1966 2 door saloon Milly restoration project
that gasket paste above has had it, dried out and useless, add it to the shopping list, along with a socket big enough for this hub nut, looks good, the previous owner hadn't hacked it off and reused it, that or it's from 1966 and longbridge fit, doubt that though.

I'll add a socket for that on my shopping list, 50mm? (check the manual)
I'll add a socket for that on my shopping list, 50mm? (check the manual)
Re: 1966 2 door saloon Milly restoration project
the gasket came off almost in one piece, this makes the cleanup a lot easier.

Not all Moggy work was straight forward today, this Character was told No, but he sleaked into the model room and slept on a tube of Revell liquid glue. all over his fur, Mrs Sprocket and I spent the morning cleaning him up with wet towels, He screamed, Growled, Grumbled and cried, exhausted himself in indignation, but after that he found a comfortable spot in the workshop with me and Gonked out.

Not all Moggy work was straight forward today, this Character was told No, but he sleaked into the model room and slept on a tube of Revell liquid glue. all over his fur, Mrs Sprocket and I spent the morning cleaning him up with wet towels, He screamed, Growled, Grumbled and cried, exhausted himself in indignation, but after that he found a comfortable spot in the workshop with me and Gonked out.
-
svenedin
- Minor Legend
- Posts: 4984
- Joined: Fri Aug 29, 2014 9:27 am
- Location: Surrey
- MMOC Member: Yes
Re: 1966 2 door saloon Milly restoration project
You don't need to order gaskets. There's a gasket in the rear bearing kit along with a new o-ring and lip oil seal.
Stephen
Stephen
1969 1098cc Convertible “Xavier” which I have owned since 1989.
Stephen
Stephen
Re: 1966 2 door saloon Milly restoration project
yes, you are right there, the set from ESM contains the rear hub oil seal, o ring and gasket as well as the new bearings.
My Daughter found this giant spanner while we were out magnet fishing last summer, it took some cleaning up to get it operational again.

But never look a gift Horse in the mouth, whatever that really means, the giant adjustable was just the ticket to loosen the Hub Nut.

My Daughter found this giant spanner while we were out magnet fishing last summer, it took some cleaning up to get it operational again.
But never look a gift Horse in the mouth, whatever that really means, the giant adjustable was just the ticket to loosen the Hub Nut.
Re: 1966 2 door saloon Milly restoration project
I used two claw hammers as levers to get the hub off in the past, not this time, it's not budging, so I bit the bullet and purchased these three for £16 on e bay, hate buying specialist tools I hardly ever need, but they can hang up on my workshop wall until they are needed again.

get that pesky hub to move.

get that pesky hub to move.
-
svenedin
- Minor Legend
- Posts: 4984
- Joined: Fri Aug 29, 2014 9:27 am
- Location: Surrey
- MMOC Member: Yes
Re: 1966 2 door saloon Milly restoration project
Those might be useful for other jobs but the axle is a hollow tube and there is nothing for those 3-leg pullers to push on in the centre.David JM wrote: ↑Fri Jan 23, 2026 5:54 pm I used two claw hammers as levers to get the hub off in the past, not this time, it's not budging, so I bit the bullet and purchased these three for £16 on e bay, hate buying specialist tools I hardly ever need, but they can hang up on my workshop wall until they are needed again.
get that pesky hub to move.
The correct tool is a slide hammer type tool that has a bracket that fits over 2 of the studs. In the absence of such a tool you can try these methods: put the wheel back on and see if the hub will budge with a bit of argy bargy or (if you have room) reverse the half shaft and put the wheel nuts back on conical section outwards and evenly tighten the nuts. Hub will pop off.
Stephen
1969 1098cc Convertible “Xavier” which I have owned since 1989.
Stephen
Stephen
Re: 1966 2 door saloon Milly restoration project
I plan to place a block of wood over the central hub so the extraction tool has something to bear against, lets see if it works when they arrive.