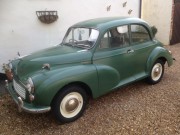
I've taken the bezels off to adjust the headlights. I have new bowls, gaskets and adjustment screws.
The headlamps are loose where the inner bezels meet the adjustment screws - the screws have a slotted end and fixed nut about 2-3mm apart and the bezels connect between them. I thought I might wrap some welding wire or something to make up the gap but wondered if anyone else has had the same issue and has found a better fix?
Thanks
Headlamp adjustment screws
Forum rules
By using this site, you agree to our rules. Please see: Terms of Use
By using this site, you agree to our rules. Please see: Terms of Use
Re: Headlamp adjustment screws
There are variations on the Headlamp set up , although common on a lot of classic cars of the era.
On http://www.moss-europe.co.uk , if you search for headlamp adjustment on the Morris make you will see the different
options.
It's easy to get caught out , trying to match up the various parts of the headlamp. If you bought all the parts from one supplier
in theory you should be OK but it's not heard of for the wrong parts to get muddled up in the part bins on the shelf ( when they look at a quick glance to be the same ).
Check with the supplier before you try adapting, otherwise they won't replace I quess.
Bob
-
stag36587
- Minor Legend
- Posts: 1395
- Joined: Sat Jan 06, 2007 3:55 pm
- Location: Raunds, Northamptonshire
- MMOC Member: No
Re: Headlamp adjustment screws
Thanks Bob
Headlamps are sealed beam 2-adjuster type. I've just adapted some nylon p-clips into washers to slip over the adjuster screwheads and problem is now solved
Next job is to adjust alignment.
Headlamps are sealed beam 2-adjuster type. I've just adapted some nylon p-clips into washers to slip over the adjuster screwheads and problem is now solved
Next job is to adjust alignment.
]
Re: Headlamp adjustment screws
So you now need the flat approach to a garage door or brick wall and a bit of chalk for some temporary focussed ( sorry for the pun ) graffiti.
Measure height to centre of headlamp and width between the lights, mark these positions on wall / garage door. Drive car back 30 feet / 10 metres. Dipped beam , brightest part of the beam , should be 4 inches ( 100 mm ) min / max 10 inches ( 400mm ) max below the cross , aiming to the left ( nearside of the road ).
Bob