Hi
I have in my possession the front end checking fixture originally supplied by BMC Cowley to the agent for Morris cars in Sri Lanka, British Cars Ltd. in the 1950's. I acquired the fixture in 1988 but to date have not used on my car as I am concerned if the fixture is accurate due to many years of usage by the Morris dealer. I would like to verify that the fixture has not suffered any distortion and as such would like to obtain a copy of the document issued by Cowley which provides the critical dimensions. If a copy of the document cannot be obtained, I would appreciate if someone could supply me the dimensions to check the fixture. Thanks
Rose Taupe Traveller Restoration
Forum rules
By using this site, you agree to our rules. Please see: Terms of Use
By using this site, you agree to our rules. Please see: Terms of Use
Re: Rose Taupe Traveller Restoration- update 21
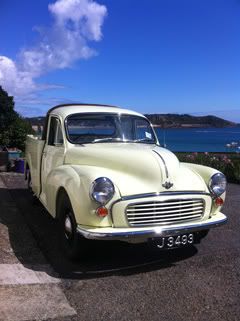
1960 Morris Minor 1000 Convertible
1984 Ford Laser KB Ghia
1997 BMW Z3 1.9
1999 Holden Astra 1.8 CD
1984 Ford Laser KB Ghia
1997 BMW Z3 1.9
1999 Holden Astra 1.8 CD
Re: Rose Taupe Traveller Restoration- update 21
Hi
If its this arrangement below I cant see how it could be out very much unless its been seriously abused.
Best to check diagonal measurements are equal to ensure its not been twisted.
Can you post a picture?
If its this arrangement below I cant see how it could be out very much unless its been seriously abused.
Best to check diagonal measurements are equal to ensure its not been twisted.
Can you post a picture?
- jig.JPG (56.73 KiB) Viewed 1609 times
Last edited by taupe on Wed Aug 30, 2017 10:32 am, edited 1 time in total.
-
Ian46
- Minor Fan
- Posts: 399
- Joined: Wed Apr 15, 2009 11:51 pm
- Location: Usually on the naughty step
- MMOC Member: Yes
Re: Rose Taupe Traveller Restoration- update 21
What happened to the rebuild? Is it still ongoing?
Regards Ian
Regards Ian
Busy collecting parts for my '52 MM Convertible and 1949 Saloon restorations. :o
Re: Rose Taupe Traveller Restoration- update 21
Hi Ian
Im still on bathroom and kitchen restoration duties!!
I have done very little more on the bodywork but I have found time to do the odd bit of mechanical restoration.
Ive stripped the rear axle, replaced the rear wheel bearings, seals and the pinion oil seal.
The axle case is now waiting for some paint.
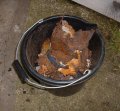
I was very lucky to be able to skim the original 1963 rear brake drums (they have 19/02/63 on the casting)- They were quite scored but fortunately not very deeply so they went in the lathe for a 10-15 thou cut and have cleaned up very nicely with plenty of wear diameter still spare.
The diff and half shafts dont show any appreciable wear so again lucky with this
Heres a pic of the diff and new pinion seal, though Ive already posted these pics under mechanical.
I cant wait to get back to body repairs, maybe in a month or so.
Taupe
Im still on bathroom and kitchen restoration duties!!
I have done very little more on the bodywork but I have found time to do the odd bit of mechanical restoration.
Ive stripped the rear axle, replaced the rear wheel bearings, seals and the pinion oil seal.
The axle case is now waiting for some paint.
I was very lucky to be able to skim the original 1963 rear brake drums (they have 19/02/63 on the casting)- They were quite scored but fortunately not very deeply so they went in the lathe for a 10-15 thou cut and have cleaned up very nicely with plenty of wear diameter still spare.
The diff and half shafts dont show any appreciable wear so again lucky with this
Heres a pic of the diff and new pinion seal, though Ive already posted these pics under mechanical.
- Image030.jpg (493.99 KiB) Viewed 1609 times
- Image031.jpg (506.68 KiB) Viewed 1609 times
- axle perch rep 011.jpg (87.72 KiB) Viewed 1609 times
Taupe
Last edited by taupe on Wed Aug 30, 2017 10:32 am, edited 1 time in total.
-
chickenjohn
- Minor Legend
- Posts: 4064
- Joined: Tue Dec 07, 2004 8:50 am
- Location: Margate, East Kent
- MMOC Member: No
Re: Rose Taupe Traveller Restoration- update 21
Looking forward to it!taupe wrote:-snip-
I cant wait to get back to body repairs, maybe in a month or so.
Taupe
Cheers John - all comments IMHO
- Come to this years Kent branches Hop rally! http://www.kenthop.co.uk
(check out the East Kent branch website http://www.ekmm.co.uk )


- Come to this years Kent branches Hop rally! http://www.kenthop.co.uk
(check out the East Kent branch website http://www.ekmm.co.uk )
Re: Rose Taupe Traveller Restoration- update 21
Hi
Ive been doing a mini project on the traveller.. My NMP plate with the body number on was missing/rotted out on the engine tie plate.
So - thanks to the generous loan from Rob Thomas of an excellent condition plate I set about making one for my trav.
Thanks Rob
The top strip in the pic is the body number plate from the main bulkhead above where the wiper motor is on my car. The middle one is the replacemant I have made by making up a press tool from Rob Thomas's original at the bottom using a soft mould and tooling resin.
This is incidentally the earlier type plate... its generally the same as later ones, but the writing is slightly smaller
Mine is very shiney as its new tinplated steel.. Robs has a coat of silver paint on.
Im really pleased with the results and now just need to stamp my body numbers on before fitting to the car.
I am making and stamping numbers on one for don58van and can do the same for others as long as the press tool holds up.
PM me if interested.
Taupe
- new nmp plates and strip.jpg (542.95 KiB) Viewed 1568 times
Last edited by taupe on Wed Aug 30, 2017 10:33 am, edited 1 time in total.
-
ptitterington

- Minor Fan
- Posts: 391
- Joined: Thu May 12, 2005 9:59 pm
- Location: Jersey Channel Islands
- MMOC Member: No
Re: Rose Taupe Traveller Restoration- update 21
The work you have done is truly awesome. The detail is fantastic.
- p tirring.JPG (23.17 KiB) Viewed 1567 times
Traveller rebuilt in 2007 by Charles Ware's Morris Minor Centre
Pickup Fully restored 2011 by Rich Legg

http://WWW.minor1000.com
http://www.morrisowners.co.uk/

Pickup Fully restored 2011 by Rich Legg
http://WWW.minor1000.com
http://www.morrisowners.co.uk/
-
Dryad
- Minor Addict
- Posts: 625
- Joined: Tue Jan 11, 2005 7:37 pm
- Location: South Norfolk
- MMOC Member: No
Re: Rose Taupe Traveller Restoration- update 21
Incredible - it looks like the real thing! I wish I had your skills. I can't wait to see the Traveller finished.
-
RobThomas
- Minor Legend
- Posts: 2646
- Joined: Thu May 11, 2006 10:34 am
- Location: Cardiff
- MMOC Member: Yes
Re: Rose Taupe Traveller Restoration- update 21
We bow down before thee, oh great lord of all things metallic!
Awwwwwwwwwwwwwwwwesome work!
I'm dying to know just HOW you did it, though.
Awwwwwwwwwwwwwwwwesome work!
I'm dying to know just HOW you did it, though.
Cardiff, UK
Re: Rose Taupe Traveller Restoration- update 21
Hi Rob
This is the press tool I have made.
Process was as follows: plastacene pressing from your original, polyester resin master cast into the plastacine then 'cleaned up' ,high strength resin cast from polyester master, original plate used to line up both halves and hs resin moulds bonded to plates to fit the hand press.
Here is a pic
Ps I have posted your original back today... Again many thanks for the loan.
Taupe
This is the press tool I have made.
Process was as follows: plastacene pressing from your original, polyester resin master cast into the plastacine then 'cleaned up' ,high strength resin cast from polyester master, original plate used to line up both halves and hs resin moulds bonded to plates to fit the hand press.
Here is a pic
- NMP tool.jpg (524.63 KiB) Viewed 1567 times
Taupe
Last edited by taupe on Wed Aug 30, 2017 10:33 am, edited 1 time in total.
-
alex_holden
- Minor Legend
- Posts: 3798
- Joined: Tue Jul 25, 2006 9:46 am
- Location: Burnley
- MMOC Member: No
Re: Rose Taupe Traveller Restoration- update 21
Impressive (no pun intended!). 
I wouldn't have expected resin to be hard enough to press fine details into steel like that. How much force do you need to apply?
I wouldn't have expected resin to be hard enough to press fine details into steel like that. How much force do you need to apply?


Alex Holden - http://www.alexholden.net/
If it doesn't work, you're not hitting it with a big enough hammer.
Re: Rose Taupe Traveller Restoration- update 21
Alex
Its tooling resin - steel and titanium filled!!! and a force of several tons is required with a number of hits
I also lubricate each one.
The strength of the resin and very accurate alignment is the key factor... Its still holding up but Im not expecting it to last for very long before some of the fine detail gets lost.
Taupe
-
RobThomas
- Minor Legend
- Posts: 2646
- Joined: Thu May 11, 2006 10:34 am
- Location: Cardiff
- MMOC Member: Yes
Re: Rose Taupe Traveller Restoration- update 21
Plates arrived home safely. Cheers, matey!
Cardiff, UK
-
davidpidge
- Minor Fan
- Posts: 473
- Joined: Wed Feb 04, 2009 6:49 pm
- Location: Frome
- MMOC Member: No
Re: Rose Taupe Traveller Restoration- update 21
I'm blown away by this thread. And I was so proud when I changed a window rubber and a clutch plate. My new traveller would be much better off in your hands. It's even the same year and rose taupe!
---------------------------------------------------------------------------------------------
1956 Traveller - work in progress

1956 Traveller - work in progress
Re: Rose Taupe Traveller Restoration- update 21
Hi
Ive had a few evenings to progress with the traveller.
I started with a repair to the n/s front bumpstop. A paper template was made from a nos panel I have for the o/s and reversed for this panel.
The repair was cut out and darts used to help create the curve.
Then it was gas welded in with the wiper motor bracket left in place to help with alignment. The flitch panel was also trial fitted to get the edge to the correct height.
I got a new toy to help with the restoration . It helps a lot when creating curved edges....
I made a repair section with it for the curved return of the inner front mudguard.. here are some pics
Ive also made some new engine towers as mine were all very bent and rusty
Im very pleased with these
Ive also started making a rear end jig as was not happy with the spring locations and will post some pics when this is finished.
Its great to have a little time for progress.
Taupe
Ive had a few evenings to progress with the traveller.
I started with a repair to the n/s front bumpstop. A paper template was made from a nos panel I have for the o/s and reversed for this panel.
The repair was cut out and darts used to help create the curve.
Then it was gas welded in with the wiper motor bracket left in place to help with alignment. The flitch panel was also trial fitted to get the edge to the correct height.
- Image082.jpg (276.91 KiB) Viewed 1566 times
- Image083.jpg (401.01 KiB) Viewed 1566 times
- Image084.jpg (374.2 KiB) Viewed 1566 times
- Image085.jpg (538.47 KiB) Viewed 1566 times
- Image086.jpg (499.99 KiB) Viewed 1566 times
- Image095.jpg (437.39 KiB) Viewed 1566 times
- stretcher 1.JPG (40.89 KiB) Viewed 1566 times
- Image096.jpg (294.56 KiB) Viewed 1566 times
- Image097.jpg (224.44 KiB) Viewed 1566 times
- Image093.jpg (506.07 KiB) Viewed 1566 times
- Image094.jpg (537.2 KiB) Viewed 1566 times
- wheel arch 23.JPG (42.45 KiB) Viewed 1563 times
- wheel arch 22.JPG (40.26 KiB) Viewed 1563 times
- Image100.jpg (259.52 KiB) Viewed 1563 times
- Image101.jpg (293.66 KiB) Viewed 1563 times
- Image102.jpg (203.33 KiB) Viewed 1563 times
- Image105.jpg (355.86 KiB) Viewed 1563 times
- Image103.jpg (408.59 KiB) Viewed 1563 times
- Image107.jpg (673.69 KiB) Viewed 1563 times
- Image109.jpg (690.95 KiB) Viewed 1563 times
- Image106.jpg (423.82 KiB) Viewed 1563 times
- Image108.jpg (778.78 KiB) Viewed 1563 times
Ive also started making a rear end jig as was not happy with the spring locations and will post some pics when this is finished.
Its great to have a little time for progress.
Taupe
Last edited by taupe on Wed Aug 30, 2017 10:34 am, edited 1 time in total.
-
chickenjohn
- Minor Legend
- Posts: 4064
- Joined: Tue Dec 07, 2004 8:50 am
- Location: Margate, East Kent
- MMOC Member: No
Re: Rose Taupe Traveller Restoration- update 22
Lovely Fabrication work, Taupe!
I bought myself s shrinker stretcher a few years ago too! Great tools aren't they!
Glad to see you back at work on the bodywork of your traveller.
I bought myself s shrinker stretcher a few years ago too! Great tools aren't they!
Glad to see you back at work on the bodywork of your traveller.
Cheers John - all comments IMHO
- Come to this years Kent branches Hop rally! http://www.kenthop.co.uk
(check out the East Kent branch website http://www.ekmm.co.uk )
- Come to this years Kent branches Hop rally! http://www.kenthop.co.uk
(check out the East Kent branch website http://www.ekmm.co.uk )
-
RobThomas
- Minor Legend
- Posts: 2646
- Joined: Thu May 11, 2006 10:34 am
- Location: Cardiff
- MMOC Member: Yes
Re: Rose Taupe Traveller Restoration- update 22
Just a thought, Charles. When finished, would you sell copies of your paper patterns?
Cardiff, UK
-
chrisd87
- Minor Addict
- Posts: 857
- Joined: Mon Nov 07, 2005 4:52 pm
- Location: Saffron Walden
- MMOC Member: No
Re: Rose Taupe Traveller Restoration- update 22
Have just read through this whole thread, and am amazed at the skill, care and attention to detail that's gone into this car. I'm sure the finished product will be superb. Would make a great 'from the ground up' story for a magazine.
[img]http://i31.photobucket.com/albums/c390/chrisd87/DSC00749.jpg[/img][img]http://i31.photobucket.com/albums/c390/chrisd87/med_gallery_128_45_1416415.jpg[/img]
Sarah - 1970 Minor 1000 2-dr
Maggie - 1969 Minor 1000 4-dr
Sarah - 1970 Minor 1000 2-dr
Maggie - 1969 Minor 1000 4-dr
-
ASL642
- Minor Maniac
- Posts: 5200
- Joined: Sat Oct 20, 2007 3:14 pm
- Location: Warwickshire
- MMOC Member: No
Re: Rose Taupe Traveller Restoration- update 22
Taupe - you should go into business - fabricating the repair panels - then they'd fit! Fascinating thread - learnt so much.
Lou Rocke
MMOC 43512
Re: Rose Taupe Traveller Restoration- update 22
Hi
Ive been completing the n/s bump stop area repairs and have made up a pair of bumpstop support repair panels.
You can see the state of the metal - this was covered with a very crude welded patch on the underside.
The aim now is to finally get the flitch panel welded in... its been a long time coming as I wanted to be sure of its correct placement and so many other panels join here.
After alignment it was spotwelded on and a couple of stitch welds were added to the back for good measure
Ive been completing the n/s bump stop area repairs and have made up a pair of bumpstop support repair panels.
You can see the state of the metal - this was covered with a very crude welded patch on the underside.
The aim now is to finally get the flitch panel welded in... its been a long time coming as I wanted to be sure of its correct placement and so many other panels join here.
- Image115.jpg (290.95 KiB) Viewed 1563 times
- Image116.jpg (269.07 KiB) Viewed 1563 times
- Image123.jpg (197.05 KiB) Viewed 1563 times
- Image124.jpg (209.65 KiB) Viewed 1563 times
- Image125.jpg (211.29 KiB) Viewed 1563 times
- Image129.jpg (387.09 KiB) Viewed 1563 times
- Image128.jpg (416.34 KiB) Viewed 1563 times
Last edited by taupe on Wed Aug 30, 2017 10:35 am, edited 1 time in total.