1971 Austin Van

Let us all know what you are up to with your current restoration project. Get that Minor on the road!
Forum rules
By using this site, you agree to our rules. Please see: Terms of Use
Post Reply
dean36014
Minor Friendly
Posts: 61
Joined: Mon Mar 05, 2007 3:11 pm
Location: Coventry
MMOC Member: No

1971 Austin Van

Post by dean36014 »

I bought this back in 2007 just before i went into hospital for back surgery. It was a don't look on the dark side, look on the bright side you'll be OK sort of thing. Something to look forward to after hopefully having a successful operation.
I bought it as a pick up, and assumed that was what it was. It looked like this when I bought it.
Image
Image
It was a 10yd car, when i first saw it i thought it looked great, the more you looked at it you realised it was terminally rotten. It needed serious amount of repairs to the cab and chassis, so I bought it for £150, always a sucker for a lost cause :roll: .
Had it transported home, and didn't really do that much until I'd recovered from the op.
First job was to get rid of the dexion and rotton wood pick up back. It practically fell off.
Then the cab was unbolted and lifted off revealing a rotten chassis.
Image
Image
Loads of welding needed.
Image
Eventually after a few false starts the chassis looked like this.
Image
While researching the chassis number i discovered that as it started AAVC, it should have been an Austin van, so the serch was on for a van body. in the meantime the repairs of the cab could take place.
Lots of this,
Image
Image
I managed to find a load of second panels that had been poorly fitted, but save me a fortune. These were cut away, repaired and fitted. In total it had complete new inner wings, complete sill structures, new floors, A posts, and bottom of b posts.
Eventually the rust was replaced and the cab was solid again.
Image
Image
A 1956 rear van was purchased needing repairs.
Image
A vast some of money was spent on these
Image
And the inside of the van looked like this.
Image
After fitting new floors wheel arches, and front and rear panels, it was time to tackle the roof.
Removing the roof skin revealed the roof support panels to be rotten.
Image
Repairs where needed on all 4 sides. then the roof gutters where plug welded on, and finally the roof skin replaced.
Image
It doesn't seem much for 2 and a half years work. There are definately things I would do differently, and could have now done alot better as my welding and fabrication skills have improved during the build. Progress is now slow again, due to having an accident at work and damaging my spine in the same place i was operated on :cry: . Can only really work on it on the good days now, and they don't come to often at the moment.
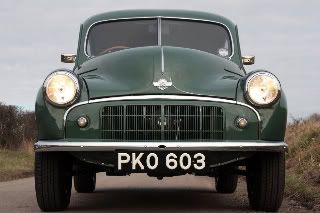
Last edited by dean36014 on Sat Nov 21, 2009 10:00 pm, edited 1 time in total.
maverick
Minor Friendly
Posts: 86
Joined: Sat Nov 15, 2008 9:57 pm
Location: Lancashire
MMOC Member: No

Post by maverick »

Looks great.
Hope you recover soon.
alanworland
Minor Legend
Posts: 1453
Joined: Tue Jan 30, 2007 10:09 pm
Location: Essex
MMOC Member: No

Post by alanworland »

Coming on fine by the look of it! My old Company (STC) had a fleet of Austin vans, one of which I used to travel through London at rush hour (mind you it's always rush hour in London!) It was desperatley low on petrol and the thought of running out wasn't good - I turned the engine off virtually everytime I stopped! eventually found a garage and all was well.
I seem to remember that it went very well.
Even slow progress is progress (as and when you can)
Get well soon.
Image
bmcecosse
Minor Maniac
Posts: 46561
Joined: Wed Feb 16, 2005 11:24 pm
Location: ML9
MMOC Member: No

Post by bmcecosse »

Fantastic work - I never cease to be amazed at the projects taken on and brought to completion. I am in total awe. SAnd having had my own share of back problems over the years, I have some idea of what it's like - get well soon!
ImageImage
Image
dean36014
Minor Friendly
Posts: 61
Joined: Mon Mar 05, 2007 3:11 pm
Location: Coventry
MMOC Member: No

Post by dean36014 »

Well I've no money as usual, it sucks being off work for twelve weeks on sick pay. So, no money means no shotblasting,however I did find a tin of paint stripper in the garage. I love bubbles ;D
Image
Stripped the roof and the rear doors. no real surprises in either thankfully, just a bit of light filler hiding a dent in one door.
Image
Image
Next job was to sort out the front wings. These are a bit short of metal where they attach to the front panel. Basically if you pull them in and bolt them up, the wings don't fit right to the front valance. So a little steel was added to the edge. Thanks to the MMOC for this tip, just annoying have to modify new panels.
Image
This now results in the edges following the body line on the front valance.
Image
Luckily in the darkest recesses of the garage I found two large tins of body filler, bought in more prosperous times, so let the filling commence. Rough shaping of the first layer.
Image
Image
Its going to take a long time to get it filled right. Matt black paint and whitewall tyres is looking more and more likely 8-)
Today I went and picked up some seats I bought of ebay for £13. A set of jaguar XJS leather seats in green. I'm not overly fond of the colour, but that can always be changed, but the style just looks so right for a '70's vehicle.
Image
The great thing abouts these are they have flat runners on the bottom making them easy to fit into any vehicle. I need to add about a 3 inch lift to the runners to get them to the right height, but in my opinion they just look so right trial fitted in the cab on some blocks of wood.
Image
I'm going to swap the seats over so you can reach the tilt mechanism easier as you can't reach them around the B post. Just need some suitable box section or U channel now to make the subframes
Dean
Minor Legend
Posts: 2180
Joined: Fri May 30, 2008 9:41 pm
Location: Sutton Coldfield
MMOC Member: No

Post by Dean »

Get well soon Dean!!!

The project looks amazing, keep it up and thanks for sharing.
My Minor:
A Clarendon Grey 1953 4 Door Series II.
MMOC - 66535


Jefftav
Minor Addict
Posts: 720
Joined: Fri Mar 28, 2003 9:28 am
Location: Inverness
MMOC Member: No

Post by Jefftav »

Try speaking nicely to a metal fabrication company they will probably have off cuts of box section or U channel that go in the skip but might be OK for your needs. They can only say No but will probably be quite happy to donate offcuts when you explain what you are doing.

Van looks fantastic, hope you get over your health issues soon.
Image
dean36014
Minor Friendly
Posts: 61
Joined: Mon Mar 05, 2007 3:11 pm
Location: Coventry
MMOC Member: No

Post by dean36014 »

positions. Bolted the steering column in and tried the seating position.....perfect 8-) I'm well chuffed with the way its going to look inside.
Image
Image
I'm using an older moggie steering wheel with the chrome spokes on.Now there's plenty of room for my knees, which there wasn't with the original moggie seats.
RussLCV
Minor Legend
Posts: 1036
Joined: Tue Mar 19, 2002 12:00 am
Location: Cardiff WALES
MMOC Member: No

Post by RussLCV »

Looking great now please keep us posted the Minor LCV Register
Russell Harvey
Minor LCV Register Historian
Freelance Motoring Journalist
http://www.Minorlcvreg.co.uk

Mike Shipman
Minor Fan
Posts: 475
Joined: Wed Feb 13, 2002 12:00 am
Location: New Forest, Hampshire.
MMOC Member: Yes

Post by Mike Shipman »

"Vantastic!" Dean... it looks really good, Im in awe of you guys who can do bodywork such as this.
Mike Shipman,
Seaton, Torpoint, Cornwall.
Post Reply